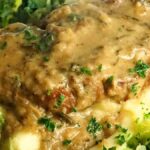
Pork Braised in Cider with Apples
Pork rib eye, (or pig cheeks) so tender you can eat with a spoon, in a rich cider sauce with sage, garlic, tangy apple, and a touch of cream.
Serve over mashed potatoes or rice with a side of greens for perfect cold weather comfort food.
Includes instructions for braising in the oven or cooking in an Instant Pot electric pressure cooker.
Note: if you only have dried sage, use 2 - 3 tsp and add it all at step 6.
Ingredients
- 2 tbsp oil or fat e.g. olive oil, lard
- 800 g pork rib eye steaks (approximately 4) or same weight of pig cheeks
- salt and black pepper
- 1 large onion skinned, halved, sliced (not too thinly)
- 1 head garlic skinned, cloves thinly sliced
- 2 stalks celery finely chopped or sliced
- 3 medium dessert apples
- 1 small bunch sage (leaves only) shredded or chopped
- 300 ml medium dry cider
- 1 tbsp cider vinegar
- 400 - 500 ml chicken stock
- 3 - 4 tbsp double cream
Instructions
-
If you are going to braise the pork in the oven rather than cook in an Instant Pot [IP] preheat the oven to 150° C / 130° Fan / Gas 2 / 300 F.
-
Put the oil or fat in a large casserole dish over high heat or in the IP inner and press Sauté.
While it heats, lightly season the pork with salt and pepper.
-
When the oil or fat is hot brown the pork on all sides: don't crowd the pot and do it in batches if necessary.
Transfer the meat to a plate when well browned.
-
Reduce the heat to medium (on the IP, you'll need to press Cancel to let the temperature drop, then press Sauté again) then add the prepared onion, garlic, and celery.
Season with a little salt and good grind of pepper then cook, stirring often, until softening (approx. 10 min). Be sure to scrape up any browned bits from the bottom of the pot. If it looks dry, add a little more oil or fat.
-
Increase the heat under the casserole to high (or ensure the IP is hot) and pour in the cider and cider vinegar, stirring to scrape the bottom of the pot again.
Allow to bubble until reduced to about a third (approx. 5 - 8 min).
Meanwhile, peel the apples and cut into rough chunks.
-
Put the browned pork back into the pot, along with the chopped apples, and HALF the fresh sage.
Add enough stock to almost cover (approx. 400 ml), then push the meat underneath the liquid.
Bring up to a boil.
-
If using an IP
Press the Keep Warm/Cancel button, lock on the IP lid and make sure the lever is pointing to Sealing. Press the Manual button then use the + / - buttons to set the time to 40 minutes.
Leave until the time has elapsed and the indicator has counted down to zero. Switch off and leave until the pressure has naturally released. Switch the lever to Venting then carefully remove the lid. With two forks, test the pork: if it isn't completely tender then cook for a further 5 minutes and check again.
If cooking in the oven
Bring to a boil on top of the stove, then put in the preheated oven with a tight fitting lid. Cook until the pork is very tender (1.5 - 2 hours for rib eye, possibly longer for pig cheeks). Tip: at 45 min stir then push the meat under the liquid. If at any point too much liquid has evaporated, add a little more of the stock.
-
Remove the cooked pork from the pot and set aside.
To thicken the sauce (optional) use a stick blender to partly puree it without making it completely smooth.
If the sauce seems too thin (more likely if you've used the IP) then bubble on top of the stove or use the Sauté button until it's your desired consistency.
-
Stir in the double cream and the remaining sage and bubble to reduce a little.
Taste, and add more salt or pepper if needed.
Return the pork to the pot and gently simmer for 5 minutes before serving.
-
Can be stored in the fridge for 2 days or frozen. Reheat gently (after defrosting in the fridge overnight if necessary) on top of the stove or low oven.