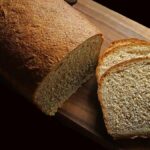
Simple Wholemeal Bread
A one hundred per cent wholemeal loaf that's nutritious and full of flavour. Easy enough for beginners, it's a versatile, everyday bread that's great for sandwiches, toast, or eaten with soup and salads.
It's recommended that you read the accompanying blog post before starting the recipe and use digital scales and metric measurements.
Ingredients
- 600 g wholemeal/wholegrain strong bread flour (plus extra for dusting)
- 2 tsp salt
- 1.5 tsp instant dried yeast (i.e. the type that does not need activating before adding to the rest of the ingredients)
- 1 tsp sugar
- 1 tbsp olive oil
- 350 - 475 ml warm water (see Recipe Notes)
- 1 tsp any oil (for greasing the bowl)
- butter for greasing a 2lb/900 ml loaf tin (can be replaced with sunflower or other bland oil)
Instructions
-
Put the wholemeal bread flour in a large mixing bowl along with the salt, yeast, and sugar. Stir.
Make a well in the middle and pour in the olive oil.
Gradually add approximately 250 ml of the warm water to the olive oil, stirring as you do, to start bringing the mixture together. Add more water, a little at a time, until a dough has almost formed: you are unlikely to need all the water.
Now switch to your hands and fold/knead the dough into a ball that leaves the sides of the bowl clean: add a little more water if necessary but don't let the dough become too wet: see image in the blog post for how it should look.
-
Dust a small amount of wholemeal flour over your work surface (ideally covered with a silicone mat) then knead for 7 minutes. If the dough seems wet, use the smallest amount of extra flour possible to prevent sticking.
-
Put the teaspoon of oil in the wiped-out bowl and turn the dough over in it.
Cover the bowl or place it in a large reusable polythene bag.
Put in a warm place (e.g. in a microwave or other small space with a jug or mug of boiling water placed inside) and leave until doubled in size: 1 - 2 hours depending on the temperature.
-
Grease a 950 ml / 2 lb capacity loaf tin with butter or oil (the dough is less likely to stick if you use butter).
-
When the dough is risen, transfer it to your work surface, ideally covered with a silicone mat. Note: due to the oil, you should not need to add extra flour during this stage.
Fold the dough over itself several times until it's smooth, at the same time shaping it to fit the loaf tin.
Put the dough in the prepared tin, place back in a large polythene bag or cover it, then return to a warm place until almost doubled in size (approx. 45 minutes depending on temperature).
-
While the dough is proving:
Preheat your oven to 220°C / 200°Fan /Gas 7 / 425°F with a shelf in the middle.
Tip 1 put a shallow baking tray on the middle shelf to heat up: this will give the dough an immediate boost.
Tip 2 place another shelf in the lowest position and put a deep roasting tin on it to preheat. Later, you will pour in cold water to create steam and help the bread rise. DO NOT use a GLASS roasting dish as it could shatter when the cold water goes in.
-
Check that the dough is proved:
If, when a finger is gently inserted, the dough slowly springs back but leaves a slight indentation then it is ready to bake.
If the dough springs back quickly then it's not yet fully proofed: leave another 5 -10 minutes and check again.
-
Place the bread on the middle oven shelf and pour cold water from a jug into the hot roasting tin below. Immediately close the door and bake for 30 minutes.
-
After 30 minutes open the oven door (be careful: steam could rush out) and remove the tin of water.
Remove the loaf tin (and any tray you put it on), take the bread out, then put it back in the oven directly on the shelf.
Bake for another 10 minutes or until the base sounds hollow when you tap it.
-
Leave on a wire rack until completely cold before slicing.
Best eaten within 3 days or can be frozen.
Tip: slice before freezing so you can take out as much as you need without waste.
Recipe Notes
Water temperature
Ideally, the temperature of the water should be around 38 degrees Centigrade. If you don't have a food thermometer then the water should be pleasantly warm if you put a finger in it, not hot. If in doubt, err on the side of cooler: the dough will take longer to rise, but this is better than hot water killing the yeast.
Amount of water
Different flours absorb varying amounts of liquid, so it isn't possible to be exact about how much water you will need. I recommend making up a 475 ml jug of warm water and gradually add only as much as necessary.