Christmas Chocolate Tiffin
Christmas Chocolate Tiffin combines a favourite no-bake sweet treat with traditional festive flavours. Added to the familiar crushed biscuit, fruit, and chocolate goodie are mixed spice, cinnamon, orange zest, cherries, ginger, and dried peel. Topped with a layer of melted chocolate and edible decorations, everyone will love Christmas Chocolate Tiffin. Makes a great gift too!

Disclosure: this post may contain affiliate links. If you buy via my links, I may earn a small commission at no extra cost to you.
Jump to Recipe

WHAT IS TIFFIN?
Look up the word ‘tiffin’ and non-Brits may be confused. Originally, tiffin was the tradition of a snack or informal light meal introduced to India by British colonialists. However, while in India tiffin can now mean a sweet or savoury snack, packed lunchbox or afternoon tea, in Britain today it almost always refers to an unbaked sweet treat based on biscuits and chocolate.

Incredibly easy to make, a base is formed by mixing crushed biscuits (often dried fruit too) with melted butter, golden syrup, sugar and cocoa powder. This is pressed into a tin and left to set. A topping of melted chocolate is then added plus any edible decoration you want. After chilling, the firm chocolate tiffin is cut into squares to eat.
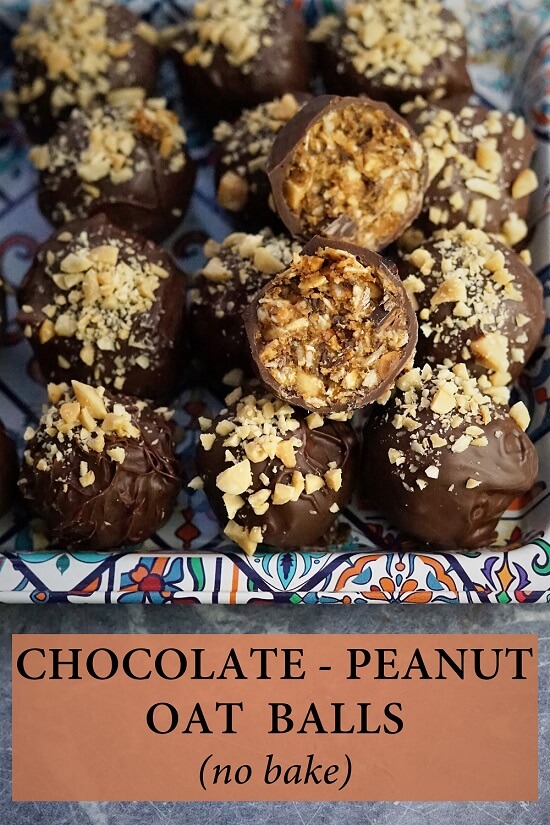
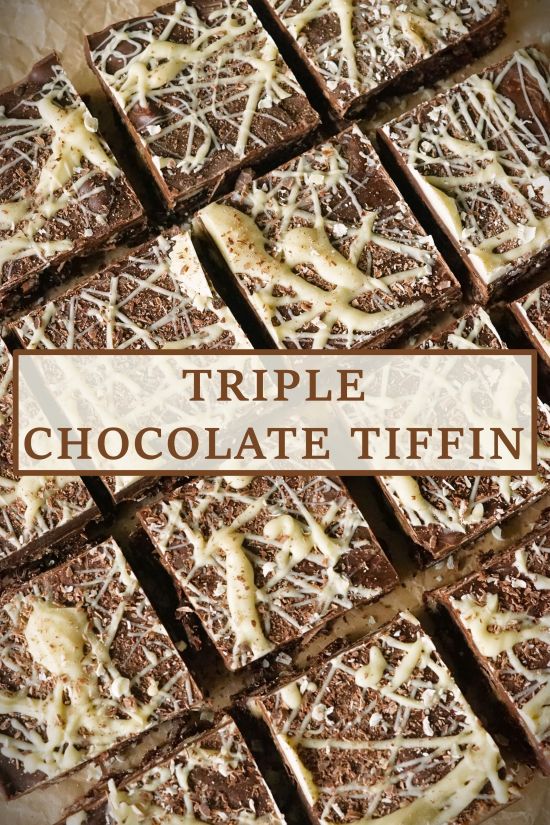
Earlier this year I shared my recipe for indulgent Triple Chocolate Tiffin. Now I have something even more sumptuous for you. Christmas Chocolate Tiffin. It’s just as easy as a simple tiffin. But extra special and delicious thanks to some traditional festive flavours.

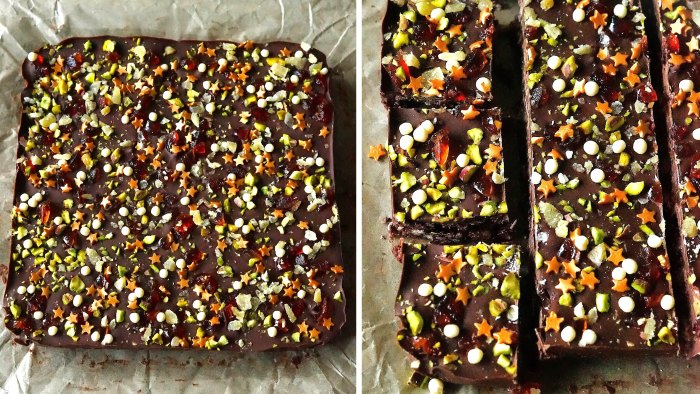
The crushed biscuit, raisin and chocolate base has mixed spice, cinnamon, orange zest, glacé cherries, stem ginger, and dried peel. The topping is dark and milk chocolate sprinkled with Christmassy nibbles including gold sugar stars. crystallized ginger, and chopped pistachios. You can easily swap in different dried fruits, spices etc if you don’t like any I’ve chosen.
HOW TO MAKE CHRISTMAS CHOCOLATE TIFFIN
You’ll find ingredient amounts and detailed instructions in the recipe card at the end. But I recommend you read the whole of this post for extra tips and step-by-step images to guide you. You should also use digital scales and metric measurements as these were used to create and test the recipe.
I think chocolate tiffin should always be made a day in advance. This is so it can chill completely and give you the best firm texture and melding of flavours. If you really can’t wait though, 5 hours should be ok.

EQUIPMENT
I make all my tiffin in a baking tin with a base that’s approximately 20 cm square (affiliate link). However, as it’s not going to be baked, you could use any suitable square or oblong container. If you use a smaller size to get thicker tiffin, I wouldn’t go below 18 cm square, or they might be too thick to bite into comfortably.
So you can remove the tiffin easily, first line the container with baking paper, foil, or cling film.
INGREDIENTS
For the base, you’ll need approximately 300 grams of biscuits. I’ve used all-butter shortbread, but digestives, rich tea, or ginger biscuits would be good too. Below I’ve listed the remaining ingredients. As mentioned earlier, if you don’t like a particular flavouring then swap in your favourites. Just keep amounts the same.

- Butter. I only buy salted butter, but unsalted is fine if you prefer it.
- Golden syrup. For sweetness and binding the ingredients.
- Caster sugar. Adds crispness as well as sweetness.
- Cocoa powder. For a dark chocolatey flavour.
- Mixed spice. A British Christmas isn’t Christmas without this distinctive blend.
- Cinnamon. Adds sweeter notes to the mixed spice.
- Orange zest. Classic Christmas taste and aroma.
- Salt. I love a hint of salt with rich chocolate but leave out if you don’t.
- Raisins. For a juicy, fruity hit.
- Dried mixed peel. Another Christmas favourite.
- Glacé cherries. Brings sweetness and colour.
- Stem ginger. Its warmth is wonderful with dark chocolate.
- Chocolate for the topping. I like the balance that milk and dark melted together brings. If you like, include a smaller amount of sweeter white chocolate in the decoration.
STEP 1: MAKE THE BASE
Start by breaking up your biscuits. I put them in a strong polythene bag, lay it down flat, then take a rolling pin and roll over firmly. Although it’s tempting to bash away, you’re much less likely to make a hole in the bag if you roll rather than hit. I like a combination of small crumbs and larger pieces.

Next, take a saucepan that will comfortably fit all the base ingredients and add the butter, golden syrup, caster sugar, cocoa powder, mixed spice, cinnamon, plus a pinch of salt if using. Place over medium-low heat and stir until everything has melted to a dark shiny mass. Check there’s no undissolved sugar or lumps of cocoa powder, then take off the heat.

Tip in the crushed biscuits, raisins, dried peel, chopped glacé cherries, stem ginger, and orange zest then stir well until they’re all coated in the chocolatey liquid. Transfer the contents of the saucepan to your prepared baking tin, levelling and smoothing it with the back of a spoon. Now put aside to firm and set a little while you prepare any decorations and make the chocolate topping.
Note that if you add the topping while the base is still very wet then they could merge rather than being two distinct layers. On the other hand, if you’re tempted to put in the fridge to speed things up don’t let it completely chill at this stage. If the base is completely cold and firm when you pour on the melted chocolate the two won’t stick together properly.
STEP 2: MAKE & ADD THE TOPPING
I melt the chocolate for the topping in my microwave, but I’ve included instructions in the recipe card for a top of the cooker method as well. Whichever method you choose, do it slowly and stop when there’s still a few small pieces of chocolate left. Keep vigorously stirring until they melt too. This way, you’re less likely to overheat it.

When all the chocolate’s melted, pour it over the tiffin base. Use the back of a spoon to spread it evenly. I tap it on the work surface to get rid of any air gaps too.
STEP 3: DECORATE
You should sprinkle on your edible decorations before the chocolate topping sets as this will help them stick. It’s worth leaving a minute or two though so any heavier ones don’t sink.
The options for decorating your Christmas Chocolate Tiffin are almost endless. Here I’ve used gold sugar stars, white chocolate crispy balls, chopped glacé cherries, crystallized ginger, and pistachios.

Other possibilities include:
- melted white chocolate drizzle
- grated chocolate
- hundreds and thousands
- pretzels broken up
- dried cranberries, apricots or other dried fruit
- other nuts e.g. pecans, flaked almonds
- edible glitter
STEP 4: CHILL AND CUT
As I’ve said, for the best taste and texture you should ideally chill chocolate tiffin overnight in the fridge. But even if you can’t, do make sure it’s thoroughly chilled before attempting to cut it, otherwise it may fall apart.
The easiest way I’ve found is to hold a big kitchen knife (not your best!) against the tiffin and firmly hit it with a rolling pin. I cut into 4 long pieces and each of those into 4 squares, giving me 16 substantial Christmas Chocolate Tiffin. To make 64 mini bite-size tiffin which are great for gifts, cut each of those into quarters.
To store, I put the tiffin in a container and return it to the fridge. Although in our house the tiffin rarely lasts more than five days as it gets eaten up, there’s no reason it shouldn’t keep for a week.

Certainly at five days I find the biscuit still nice and crisp. You could also freeze it. Be aware though that frozen tiffin can take on a whiteish bloom. This is completely harmless but can spoil the look.
EASY INDULGENT CHRISTMAS CHOCOLATE TIFFIN
Tiffin must be one of the easiest, tastiest chocolate homemade treats there is. Even in its most simple form with just crushed biscuits and raisins it’s rich and indulgent. But I think adding some traditional Christmas ingredients and flavours makes it even more special.

And during the festive period, when you’ve probably lots of cooking to do, having an irresistible no-bake delight that doesn’t need an oven is a real boon. Both adults and children will love Christmas Chocolate Tiffin, so it makes a thoughtful gift packed into a bag or box.

If you’ve made this recipe, I’d love to know what you thought. Please do leave a comment and rating.
MERRY CHRISTMAS!

Christmas Chocolate Tiffin
A simple no-bake recipe that takes a favourite treat and adds traditional festive flavours to make it extra special and delicious.
It's recommended you read the accompanying blog post before starting to cook. Use digital scales and metric measurements as these were used to test the recipe.
Ingredients
For the base
- 300 g biscuits (e.g. shortbread, digestives, ginger biscuits)
- 180 g butter (salted or unsalted)
- 65 g golden syrup
- 40 g caster sugar
- 25 g cocoa powder
- 1 rounded tsp mixed spice (increase to a heaped tsp for a stronger flavour)
- ½ tsp ground cinnamon
- 1 large pinch salt (optional)
- 60 g glacé cherries (chopped, quartered or halved)
- 50 g raisins
- 50 g dried mixed peel
- 50 - 75 g stem ginger (finely chopped, approx. 2 - 3 balls)
- 1 large orange (zest only)
For the topping
- 125 g dark chocolate (can be replaced with milk chocolate)
- 125 g milk chocolate (can be replaced with dark chocolate)
Decoration (choose as many as you like)
- crystallized, glacé or stem ginger (chopped)
- glacé cherries (chopped)
- nuts e.g. pistachios (chopped)
- edible stars, balls, grated or melted white chocolate etc.
Instructions
Make the base
-
Line a 20 cm square baking tin or similar with baking paper, foil, or cling film so it comes up the sides.
-
Put the biscuits in a strong polythene bag or similar and roll over or hit with a rolling pin until you have a mixture of crumbs and larger pieces. Set aside.
-
Put the butter in a saucepan large enough to fit all the ingredients for the base and place over low-medium heat.
When the butter has melted a little, add the golden syrup, sugar, cocoa powder, mixed spice, cinnamon, plus the salt if using.
Stir until everything is melted into a smooth, shiny mixture with no undissolved sugar granules or cocoa powder then take off the heat.
-
Stir in the crushed biscuits, cherries, raisins, peel, stem ginger, and orange zest until they're completely coated in the chocolate mixture.
Transfer to the prepared tin, smoothing and levelling the mixture with the back of a spoon.
Put aside to set a little while you make the topping and prepare any decorations.
Tip 1. Setting a little means the base and topping won't merge into one when you pour the melted chocolate over, but should stay in two layers.
Tip 2. Don't leave the base until completely set and cold before adding the topping or the two layers won't stick together properly.
Make and add the topping
-
Break the dark and milk chocolate into pieces and put in a microwave-safe bowl or jug.
Melt on full power in 10 - 20 second bursts, stirring between each one, until just a few small pieces of un-melted chocolate remain. Stir vigorously until completely smooth.
Alternative: on top of the stove. Melt the dark and milk chocolate in a heatproof bowl above a pan of gently simmering water. Stir constantly and make sure the water doesn't touch the bottom of the bowl.
-
Pour the melted chocolate onto the base and spread it evenly to cover. Tap on the work surface to knock out any air gaps.
-
Sprinkle over your chosen decorations before the chocolate sets so that they stick on, but leave a minute or two before adding any heavier decorations so they don't sink.
Chill and cut
-
Transfer to the fridge and leave until completely chilled. This is likely to take a minimum of 5 hours but the taste and texture is improved if left overnight.
-
Cut into 16 squares or 64 mini, bite-sized tiffin.
See blog post for tips on cutting.
-
Store in an airtight container in the fridge where it should keep for a week.
Can also be frozen, although the top may develop a (harmless) whiteish colour.
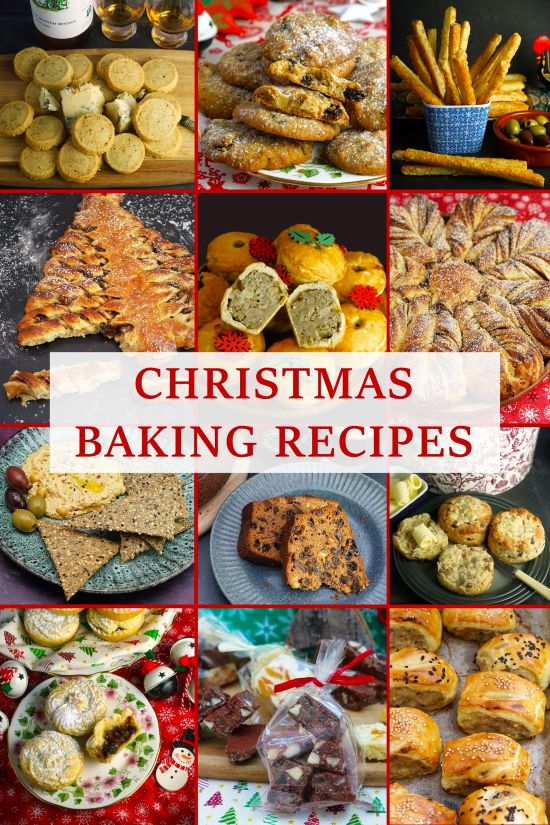
RELATED RECIPES