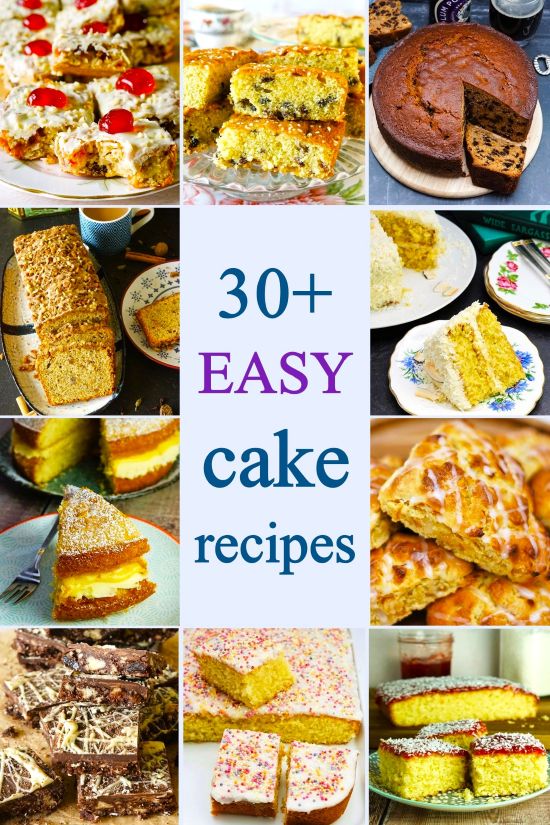
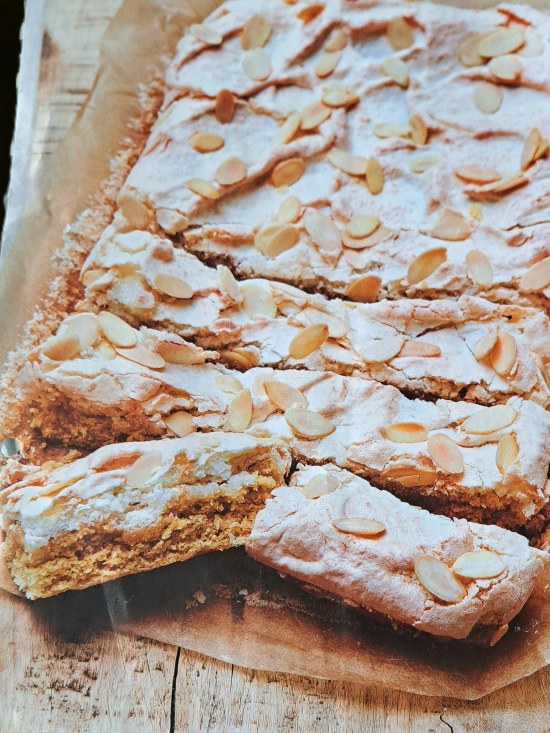
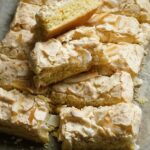
Coconut Meringue Slices
Coconut Meringue Slices look impressive and taste delicious. The buttery sponge base topped with coconut-flavoured delicate crispy meringue makes a wonderful teatime treat. Adapted from a Mary Berry recipe, my version is more coconutty and has extra tips for beginner bakers.

Disclosure: this post may contain affiliate links. If you buy via my links, I may earn a small commission at no extra cost to you.
Jump to Recipe
COCONUT MERINGUE SLICES
Unusually, the recipe I’m sharing today is not one I’ve created myself. I came across Mary Berry’s Coconut Meringue Slices in the now defunct Delicious magazine, in 2021, I think. And very inviting they looked with their golden sponge base and topping of crispy, coconut-flavoured meringue scattered with flaked almonds.
Coconut is one of my favourite flavours, so it wasn’t long before I gave the recipe I try. I loved it, the simple ingredients coming together in a hugely enjoyable bake. I couldn’t help thinking though that the written recipe would be better for beginners if there was a bit more detail.

For example, she says the mixture for the base is ‘quite stiff’. This turned out to be the understatement of the year! But once I understood that it’s a very different texture to that for Victoria Sponge Cake for instance, I found a way to make it easier work with. But a beginner might assume they’d done something wrong. Especially as the recipe’s touted as ‘fast’ and ‘easy’.

Over time, I slightly adapted the recipe including replacing the almonds with more coconut. Now I’ve perfected how I like to make Coconut Meringue Slices I thought I’d share it and why I’ve made the changes. Hopefully, this will help beginners get even better results and give others a few different options.
COCONUT MERINGUE SLICES
You’ll find a recipe card at the end with ingredients amounts and full instructions for my version. But it’s still essentially Mary Berry’s recipe and truly delicious. I especially love the meringue: so delicate and crispy with a slight chew and wonderful sweet flavour of coconut.

If you’d like to see the original recipe, you can buy a hard copy of Mary Berry’s Fast Cakes: Easy Bakes in Minutes here or the Kindle edition here. These are affiliate links (as are those below) which help support this blog at no extra cost to you.
MY VERSION OF MARY BERRY’S COCONUT MERINGUE SLICES
The slices are cut from a traybake cooked in a tin 27.5 x 17.5 centimetres, lined with baking paper. My tin has a base of approximately 26 x 16 centimetres and works fine: here’s a similar one. Unless you have strong wrists, you’ll also need electric beaters, especially for the meringue.
There are 2 elements to the bake: the sponge base and a coconut meringue topping.
MAKING THE SPONGE BASE
In her original Coconut Meringue Slices recipe, but not in the Delicious magazine version, Mary Berry uses baking spread. Personally, I wouldn’t have margarine in the house (that’s what it is despite the marketing makeover) so use butter instead. This means I’ve also ignored her advice to use it cold straight from the fridge. Try creaming together cold butter and caster sugar (as the magazine version asks you to do) and you won’t get very far! She adds a few drops of vanilla extract later, but I prefer a teaspoonful at this first stage.
Two egg yolks go in next. Although yolks alone are less likely to curdle the mixture than whole eggs, just in case I beat in a little of the measured self-raising flour at the same time (I add a pinch of salt too). Same with the milk; add a little more flour with it. Finally, the remaining flour is folded in, although I continue using my electric beaters as it’s more thorough.
TIPS FOR SPREADING THE SPONGE BASE
The first time I made Mary Berry’s Coconut Meringue Slices, I thought the next step would take about 30 seconds. Wrong! The instructions say, ‘the mixture will be quite stiff. Spread it carefully in a smooth layer over the base of the tin.’ I think a better description would be very firm. And quite sticky too. That first attempt I got into a right pickle, the batter that’s almost a dough clinging to my spoon and making spreading almost impossible. However, follow my tips and you won’t have a problem.
- Instead of scraping the mixture into the prepared baking tray in one big mass, dot blobs of it all over. This means you don’t have to spread it so far.
- Have a little bowl of water and dip a metal dessertspoon into it, shaking off any excess, and use the back of it to spread the mixture. Keep dipping as often as you need to without letting the mixture get wet.
This will still take a longer than spreading a regular sponge mix, so I’ve added 5 minutes to the prep time. But the resulting slices are so good it’s worth a little extra work. And the rest of the recipe is pretty simple anyway.
MAKE THE MERINGUE
For the meringue topping you’ll need 2 egg whites, caster sugar, and desiccated coconut.
If you haven’t made meringue before, don’t worry. It isn’t difficult. Here’s a few tips that might help beginners.
- As mentioned above, unless you have strong wrists use electric beaters.
- Whatever beaters you have, make sure they (and the bowl you use) are scrupulously clean. It’s especially important not to have any grease or fat on them as this can prevent the whites from whipping up into a foam.
- Beat the egg whites until stiff before gradually adding the sugar. If you add the sugar too soon or all at once it can take a long time for the meringue to come together or not at all.
Once your meringue is done, fold in the coconut.
FINISHING TOUCHES & BAKING COCONUT MERINGUE SLICES
Happily, the meringue is easy to spread over the base. For Mary Berry’s Coconut Meringue Slices, she sprinkles over flaked almonds before transferring to a preheated oven. While these are very nice, I prefer to continue the coconut theme. So, I now replace them with coconut flakes/shavings.
The snag is that coconut darkens very quickly. The bake only needs 35 minutes in the oven, while the coconut will be nicely toasted in just a few minutes. So instead of sprinkling on at the beginning, I add after 32 minutes of baking. As the meringue has already firmed by this point, they don’t stick very well. But I don’t mind that as I much prefer the flavour here, as well as their combination of crispness and chewiness.

If you don’t want almonds or coconut, the original recipe suggests finely chopped glacé cherries as an alternative.
COOLING, SLICING AND STORING
As the bake is quite delicate, it’s important to leave in the tin until completely cold before slicing. Mary Berry says to cut into 16 slices. While this may account for her trim figure, I would be laughed out of our house if I did that! 12 slices seems much more sensible, although does make it quite calorific. But that’s cake for you, and this one is so worth it.

The original recipe says the cake should keep ‘for up to 2 days in an airtight container’. I made the batch you see in this post on Friday morning and when we finished it at Sunday teatime it was just as good.
PERFECT COMBINATION FOR COCONUT LOVERS
Coconut is one of my favourite flavours, so I’m especially partial to coconut cakes. And I think Coconut Meringue Slices is up there with the best. The buttery sponge is lovely; not airy-light but substantial and satisfying. On top the delicate, coconut meringue is both crispy and chewy.

Together, I think they’re the perfect combination of flavour and texture for coconut lovers. And I hope my extra tips mean even more people, particularly beginner bakers, can enjoy this great sweet treat.
If you’ve made the original recipe or my version, I’d love to know what you thought. Please do leave a comment.

Coconut Meringue Slices
Buttery sponge topped with coconut-flavoured delicate crispy meringue makes a delicious teatime treat. Adapted from Mary Berry's recipe, this version has more coconut and extra tips for beginner bakers.
Please read the accompanying blog post before starting and use metric measurements.
Ingredients
For the base
- 75 g soft butter (see Recipe Notes)
- 100 g caster sugar
- 1 tsp vanilla extract
- 2 large egg yolks
- 175 g self-raising flour (or plain/all-purpose + 1¼ tsp baking powder sifted together)
- 2 tbsp milk
- 1 pinch salt
For the coconut meringue
- 2 large egg whites
- 100 g caster sugar
- 50 g desiccated coconut
For sprinkling
- 1 - 2 handfuls dried coconut flakes/shavings (can be replaced with flaked almonds or finely chopped glacé cherries)
Instructions
-
Take a baking tin that's approximately 27.5 x 17.5 cm and line with baking paper.
-
Preheat oven to 160°C / 140° Fan /Gas 3 /325°F.
Make the base
-
Put the butter, sugar, and vanilla extract in a mixing bowl and, preferably using electric beaters, cream together until soft and light.
-
Add the egg yolks to the bowl along with approx. 1 tablespoon of the measured flour. Beat again until combined, then add the milk with another tablespoon of the flour and beat again.
Whisk or fold in the remaining flour plus a pinch of salt: the mixture will be very stiff but this is how it should be.
-
Spoon blobs of the mixture over the base of the prepared tin then spread as evenly as you can, making sure you go right into the corners.
Tip: use the back of a metal spoon, occasionally dipping it in water and shaking off excess, to more easily spread the mixture.
Make the meringue
-
Put the egg whites in a clean bowl and using clean beaters, ideally electric, whisk until stiff.
-
Stir in the sugar a tablespoon at a time, then fold in the desiccated coconut.
Assemble and bake
-
Spread the meringue over the base.
If using flaked almonds or glacé cherries sprinkle them over the top.
If using coconut flakes see NOTE below: don't add now or they'll burn.
-
Put in the preheated oven and bake for 35 minutes.
NOTE if using coconut flakes: take out of the oven after 32 minutes, sprinkle on top then return to the oven for another 3 minutes.
When done the meringue should be lightly browned, firm and crispy on top.
-
Remove from the oven but leave in the tin. Place on a wire rack until completely cold before peeling back the paper and cutting into 12 - 16 slices.
-
Stored in airtight container the slices should keep for 2 - 3 days.
Recipe Notes
Soft butter. The original Mary Berry recipe calls for 'baking spread' (i.e. margarine) cold from the fridge. However I don't buy margarine so use butter. Cold butter is almost impossible to cream with the sugar so I have it soft.
Adapted from a recipe published in Delicious magazine based on that in Mary Berry’s Fast Cakes: Easy Bakes in Minutes, Kindle edition here (affiliate links).
RELATED RECIPES