Ham, Olive & Cheese Quick Bread (French Savoury Cake)
Ham, Olive & Cheese Quick Bread is inspired by French cake salé or savoury cake. Easy but delicious, it’s made with self-raising flour and eggs so there’s no kneading and no proofing. Just mix up the ingredients and bake.
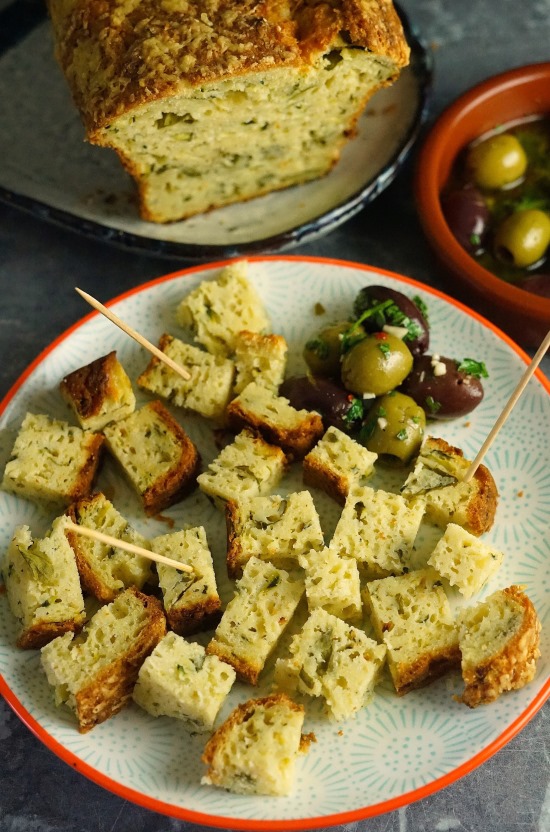
With a moist and soft, cake-like texture, it has a rich cheese flavour studded with pieces of ham and olive. Perfect as a snack, as a nibble with drinks, alongside meats and cheeses, or soups and salads.

Disclosure: this post may contain affiliate links. If you buy via my links, I may earn a small commission at no extra cost to you.
Jump to Recipe

QUICK BREAD OR SAVOURY CAKE?
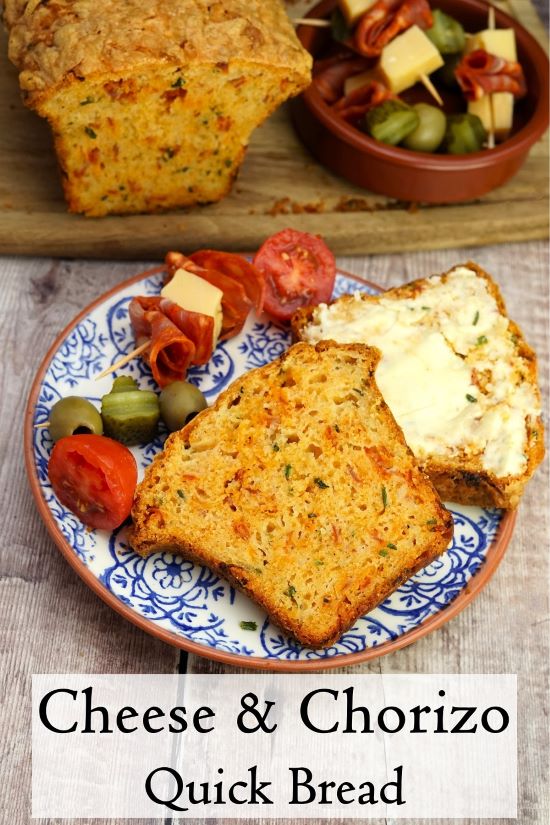
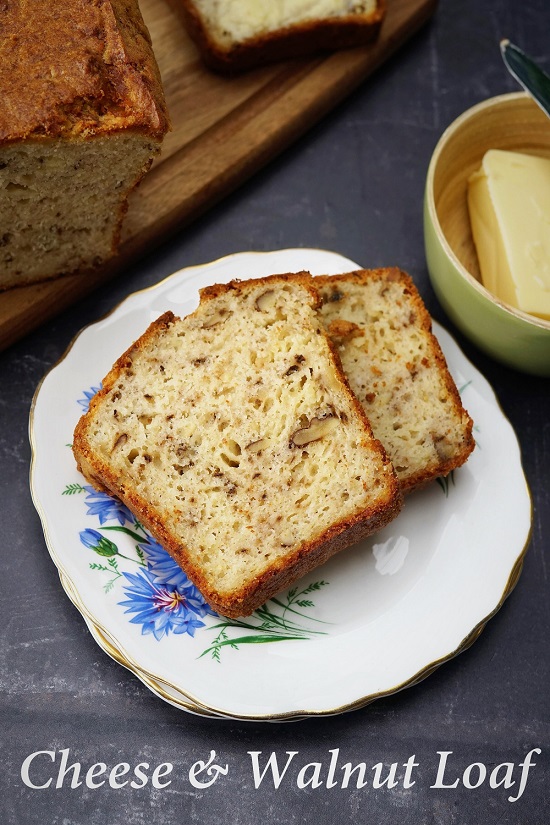
I’ve been baking delicious and easy savoury quick breads for several years now. Made with self-raising flour and eggs rather than bread flour and yeast, they have a soft and moist, cake-like texture. With no kneading or proving, quick breads really do live up to their name. To that simple base of flour and eggs plus butter, milk, and usually cheese too, you can add almost any savoury flavours you like. The recipes I’ve already shared include Cheese & Chorizo Quick Bread and Cheese & Walnut Loaf.

But it was only relatively recently I learned that they’re particularly fond of such bakes in France. Known as cake salé or French savoury cake, slices or cubes are often served with other nibbles and drinks at pre-dinner social gatherings known as l’heure de l’apéro.
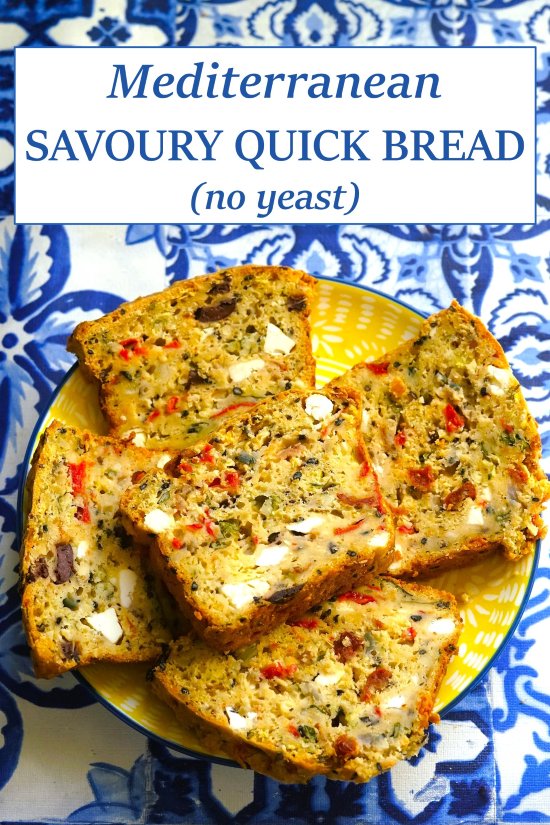
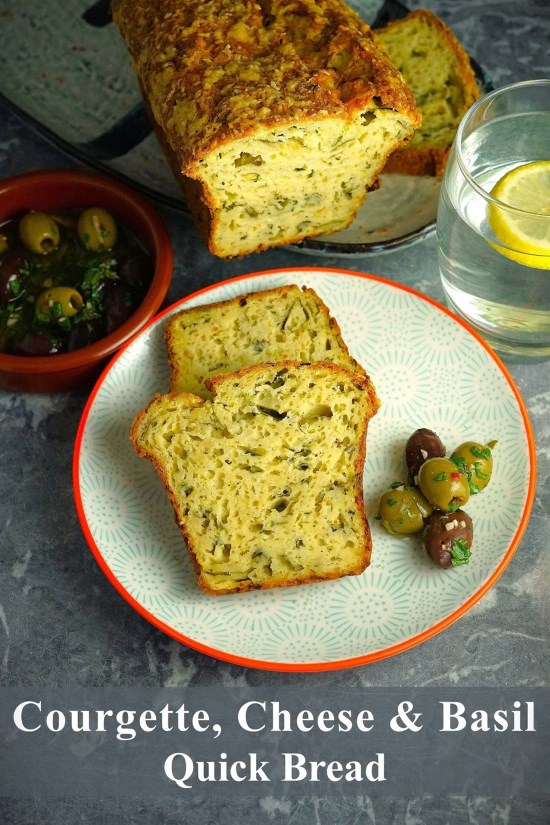
That knowledge inspired my last savoury cake, Courgette, Cheese & Basil Quick Bread. With a nod to Provençal Soupe au Pistou, it was full of gutsy flavour.
When I was researching cake salé, a commonly occurring flavour was a loaf featuring cooked ham, pitted green olives, and cheese. Elegantly simple, I decided to make a version using my own tried and trusted savoury quick bread base. And I loved the result. Soft and moist, with a good cheesy tang, studded throughout with tasty morsels of ham and grassy olives.

HAM, OLIVE & CHEESE QUICK BREAD
You’ll find ingredient amounts and detailed instructions for making Ham, Olive & Cheese Quick Bread in the recipe card at the end. But I recommend you read this whole blog post before getting started as there’s extra tips and step-by-step images to guide you.

INGREDIENTS & PREPARATION
Whenever you bake with raising agents like baking powder, bicarbonate of soda, or self-raising flour, it’s important to prepare all the ingredients first. That’s because as soon as you mix the wet ingredients into the dry, they’ll start working. So, whatever you’re making should go into the oven as soon as possible before they lose their power.
To get the best results, you should ensure that the flour and raising agents are well within their ‘Best Before’ date. Once a pack is open, ideally you should use it within a few weeks.

- Self-raising flour. I use this as it conveniently already contains raising agents. If you prefer, use plain flour plus 2 level teaspoons of baking powder.
- Butter. For flavour and binding. I always use salted, but unsalted is fine if that’s what you have or prefer.
- Cheese. A mature Cheddar is best or a good gruyere. Be sure to keep a little aside for sprinkling on top to get a toasted cheese crust.
- Cooked ham. Any type is fine, diced or shredded. Shredded ham hock has good flavour and is widely available in supermarkets.
- Olives. Pitted and sliced or chopped. I think green rather than black works best in this recipe.
- Eggs. Binds the ingredients and helps create a fluffy, cake-like crumb.
- Milk. Used to moisten and create the batter.
- Salt & black pepper. For flavour.
EQUIPMENT
The only piece of equipment you need is a small loaf tin with a capacity of 450 ml. These are usually sold as 1lb tins. Mine is non-stick, but I grease it with extra butter anyway. If in doubt, line the bottom of your tin with a strip of greaseproof or baking paper that’s long enough to come up above the rim of either the long or short sides. If necessary, you can lift the loaf out using these ‘handles’.
QUICK & EASY SAVOURY CAKE
Once you’ve grated the cheese, diced or shredded the ham, sliced or chopped the olives, making the batter will probably take less than ten minutes.
Start by sifting the self-raising flour with salt and pepper into a bowl, then rub in the butter (I grate it in which speeds things up). The cheese, ham, and olives are stirred in next. The cheese and ham will probably stick together a bit, so just rub the mixture through your fingers to separate and ensure everything has a light coating of flour.

Now tip in the beaten eggs and, as you begin stirring them into the dry mix, start gradually adding the milk. Because different flours absorb varying amounts of liquid, it’s not possible to be exact about how much you’ll need to add. I’ve given a guide of 50 – 100 ml in the recipe card, but you may need a splash more or less. The important thing is that it should be a thick batter which looks like the image below.

Transfer to your loaf tin, pressing down lightly and making sure it goes right into the corners. Level and smooth the top, then sprinkle over finely grated cheese.
BAKING THE QUICK BREAD
Ham, Olive & Cheese Quick Bread should take around 55 minutes in the middle of an oven preheated to the temperature shown in the recipe card. When it’s done, the loaf should be risen, deep golden brown, and cooked all the way through. To check, insert a skewer or cocktail stick which should come out clean.
As ovens can vary, I recommend you check how it’s going after 30 – 35 minutes. If it already looks quite dark, then cover loosely with a piece of foil for the rest of the cooking time.

When you’re sure it’s baked, transfer the tin to a cooling rack and leave it for 5 – 10 minutes before turning out. Put it back on the rack until cold or just a little warm. Don’t be tempted to cut while it’s hot: just like their sweet siblings, savoury cakes will crumble.
SERVING & STORING HAM, OLIVE & CHEESE QUICK BREAD
You can eat this beautifully soft and moist, tasty bread (buttered or not) as a snack, with cooked and cured meats, cheeses, pickles, and more olives. Or try it alongside salads or soup. Sliced or cut into chunky dice, it’s a perfect savoury nibble with drinks too.

Ham, Olive & Cheese Quick Bread is best eaten with 2 – 3 days, but its interior is fluffiest on the day of baking. After the first day, I ping in the microwave to get it slightly warm and fluffy again. But it’s also very good toasted which will intensify the flavours.
To store, I wrap the loaf in foil then keep in a tight-lidded plastic container. It also freezes well, wrapped, either as a whole loaf or in slices.
If you’ve made this recipe, I’d love to know what you thought. So please do leave a comment and rating.
Ham, Olive & Cheese Quick Bread
This soft, moist quick bread gets its rise from self-raising flour and eggs instead of yeast. That means no kneading and no proofing. Just mix and bake.
With ham, green olives and cheese, its flavours are inspired by French cake salé or savoury cake. Perfect as a snack, as a nibble with drinks, alongside meats and cheeses, or soups and salad.
It's recommended that you read the accompanying blog post for extra tips and step-by-step images before starting the recipe. You will need a small loaf tin of 450ml/1lb capacity.
Ingredients
- 225 g self-raising flour (or plain flour + 2 level tsp baking powder)
- 1 pinch salt
- ¼ tsp black pepper
- 75 g butter (plus extra for greasing the loaf tin)
- 150 g mature Cheddar or gruyere cheese (divided: 125g coarsely grated, 25g finely grated)
- 100 - 120 g cooked ham (diced small or shredded)
- 75 g pitted green olives (chopped or sliced)
- 2 med - large eggs (beaten)
- 50 - 100 ml milk
Instructions
-
Preheat the oven to 180°C / 160° Fan / Gas 4 / 350°F with a shelf positioned in the middle.
-
Butter a small, non-stick loaf tin (approx. 19 x 9 x 6 cm, capacity 450ml or 1 lb).
-
Sift the flour, salt and pepper into a mixing bowl.
Grate the butter into the flour mixture (dip the butter into the flour now and again to stop it sticking to the grater) then rub in with your fingertips.
Stir in the 125 grams of coarsely grated cheese, the diced or shredded ham, and the chopped or sliced olives. If the cheese or ham sticks together, rub the mixture between your fingers to separate them and ensure all are coated in flour.
Make a well in the centre of the mixture and tip in the beaten eggs.
Start stirring in the eggs while also adding enough of the milk to form a thick, cake-like batter: see image in accompanying blog post for how the batter should look.
Note: different flours absorb different amounts of liquid so you may not need all the milk or might need a splash more
-
Transfer the mixture to the prepared tin, pressing down lightly and smoothing the top. Sprinkle over the 25 grams of finely grated cheese.
Place the tin on a baking tray and put into the preheated oven.
Bake until risen, golden brown and firm: a skewer or cocktail stick inserted should come out clean when done. (50-55 min).
Recommended: check at 30-35 minutes that the top isn't browning too quickly. If it is already quite dark, cover loosely with a piece of foil.
-
When the loaf is done, leave a few minutes, then tip or lift out of the tin and place on a wire rack. Leave until cold or only just warm before slicing.
The loaf is best eaten with 2 - 3 days, buttered or not, but is fluffiest on the day of baking. After the first day, heating slices for a few seconds in the microwave will make the interior fluffy again. It's also very good toasted and buttered.
To store, wrap well in foil and keep in a tight-lidded container. Can also be frozen as a whole loaf or in slices.
RELATED RECIPES

Hello – your recipe collection is right up street!
Regarding your quick breads, can they be made individually (muffin sized or mini, individual sized loaves) and if so, what temp and duration please?
Thank you.
Hi and thank you!
I would follow the time and temperature in this savoury muffin recipe and see how you go: https://moorlandseater.com/cheese-and-vegetable-muffins/
I’d be interested in your feedback if you try it!
I will remember to report back in due time. I currently have your smokey chutney simmering, and it already tastes fantastic. I cannot wait to make the savoury items like the quick breads and cheesy scones. Thank you for replying, it’s a huge help.
You’re welcome!
So sorry, me again.
Can this be doubled and baked in a 2lb loaf tin please?
It’s to be sliced and served at a charity fair.
Thanks again.
Yes, that should be fine. The baking time will presumably be longer but do check regularly so it doesn’t overcook.
It’s just out of the oven can’t wait to taste it don’t know if I can resist. Love the recipes from moorlands eater, which she had a cook book.
Thank you Bryan!
Gosh! That was quick, easy and delicious. I will definitely be making it again.
Thank you so much, Jacqueline!
I made this with my flour which is half brown, half white. the flavour is great. it was a bit dry, due to not enough liquid, or I overcooked it by a few minutes. Otherwise fine. I would bake it again.
I do find that brown, wholemeal, and rye flours tend to need more liquid than white. Glad you found the flavour great!