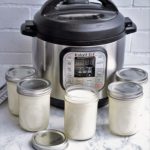
Homemade Yogurt in an Instant Pot
Homemade Yogurt is easy with an Instant Pot electric pressure cooker. Eat it plain, flavour it, or strain to make thick & creamy Greek-style yogurt.
Ingredients
- 2 litres whole cow's milk
- 2 tbsp live plain yogurt at room temperature store bought or saved from your last batch
Instructions
-
Scald the Instant Pot (IP) inner with boiling water to ensure it's perfectly clean. Dry and put back in the IP.
-
Pour the milk into the IP.
Lock on the lid with the lever pointing to Venting. Switch on.
-
Press the Yogurt function on the IP and then press the Adjust button until the display reads 'boil'. Note: if you have a newer model that doesn't have an Adjust button, press the Yogurt function twice and 'boil' should be displayed.
Leave until the IP beeps to tell you it's reached boiling (approx 35 min).
-
Switch off the IP and remove the lid.
IMPORTANT: Using a clean thermometer, check that the temperature of the milk is at least 83 degrees Celsius (180 Fahrenheit): this is to ensure any harmful bacteria is killed and will also help the yogurt thicken.
If the temperature is less than 83 degrees, switch the IP back on (with the lid still off) and press the Saute button to heat the milk to 83 degrees Celsius (approx 5 min).
-
Remove the IP inner and leave to cool until the milk is no more than 46 degrees Celsius (115 Fahrenheit). This is important as, if the milk is too hot when the starter is added, the live bacteria needed to make yogurt will be destroyed.
Left on the work surface, cooling to this temperature will take around an hour, but putting the inner in a bowl of cold water containing ice should reduce the time to around 20 minutes.
-
When the milk has cooled, skim off any skin and discard.
-
Have your starter in a small bowl. Take some of the milk out of the pot and whisk it into the starter. Tip this back into the pot of milk and whisk to distribute it.
-
Put the inner back into the IP (dry the outside first if necessary), put on the lid with the lever pointing to Venting. Switch on.
-
Press the Yogurt button, then press the Adjust button until it reads '8:00'. This will set the IP to work for 8 hours.
-
When the 8 hours are up, the IP will beep. Switch off then remove the lid. Yogurt should be soft to medium firm.
-
Put the yogurt, still in the inner, into the fridge to cool completely. Overnight is best. A length of paper towel, draped over the top of the pot, will help absorb any condensation.
-
The next day, whisk the yogurt and transfer into very clean containers. Washed jars can be sterilised in a low oven but make sure they're cold before putting the yogurt in them.
Store in the fridge and use within 10-14 days.
-
Greek-style yogurt
Make thick and creamy Greek-style yogurt by lining a sieve with muslin cloth, add the yogurt and leave it to drain over a bowl in the fridge for 1-3 hours. The longer you leave it, the thicker the yogurt will be.
See Recipe Notes for using the whey which is a byproduct of straining yogurt.
Recipe Notes
Don't forget to put aside 3 tbsp of your Homemade Yogurt to use as a starter in your next batch. This can be stored in the freezer. To use, defrost overnight in the fridge but bring to room temperature before using.
After straining the yogurt to make it Greek-style, don't throw away the liquid which will have collected. This is whey, full of nutrients and protein. Use it in smoothies, porridge, soups or in baking scones, bread etc.