Homemade Yogurt in an Instant Pot
Homemade Yogurt is incredibly easy using an Instant Pot electric pressure cooker. In this post I give you step by step instructions that will produce fresh yogurt with surprisingly little effort. Eat it just as it is, or strain to make thick and creamy Greek-style yogurt.
Disclosure: this post may contain affiliate links. If you buy via my links, I may earn a small commission at no extra cost to you.
Jump to Recipe
I knew my Instant Pot electric pressure cooker had a yogurt function, but I didn’t really give it much thought. Although I do eat a fair bit of plain yogurt (in smoothies, salad dressings, baking and whatnot), I suppose I’d assumed making my own would be too much faff.
However, away on holiday and without my blender, we’d taken to buying flavoured yogurts instead of making our own smoothies at breakfast time. The price of the quality, organic ones got me thinking. Maybe I should try out that yogurt button on the Instant Pot when I got home?

I was surprised to find that the Instant Pot manual doesn’t actually include full details for making yogurt. But a bit of research told me it should be pretty easy. And I was over the moon when my first batch worked perfectly. I haven’t bought yogurt since.
MILK & STARTER
Yogurt is made by fermenting milk. This is done by adding live, but harmless, bacteria to it. The bacteria thickens the milk and gives it that characteristic tangy yogurt flavour.
I always use whole milk as I much prefer the taste and texture to lower fat versions. Although you can make yogurt with plant milks, I’ve only tested the method I’m sharing here with dairy milk.
For your first batch of Homemade Yogurt you’ll need two tablespoons of plain live yogurt. This is your ‘starter’ and you can’t make yogurt without it. Check the label to make sure it contains nothing but plain yogurt plus live bacteria such as lactobacillus acidophilus or bifidobacterium.
Once you’ve made some yogurt, you can put a little aside and use that as the starter for your next batch. I put it in a container in the freezer and it keeps fine in there. Once defrosted (it should be at room temperature when you use it) the yogurt has usually split and looks awful. But don’t worry. It will still work as a starter.
Interestingly, I’ve found that using more starter than about 1 tablespoon per litre (or 2 pints) of milk can actually make the yogurt less thick. I’ve no idea of the science behind this, but don’t be tempted to add lots of starter.
EQUIPMENT
To follow my method for Homemade Yogurt, you’re going to need an Instant Pot. Obviously.
Be aware though, that not all Instant Pots have a yogurt function. You can make yogurt in lots of different ways (including with other Instant Pot models) as long as you can keep it at the required temperature over several hours.
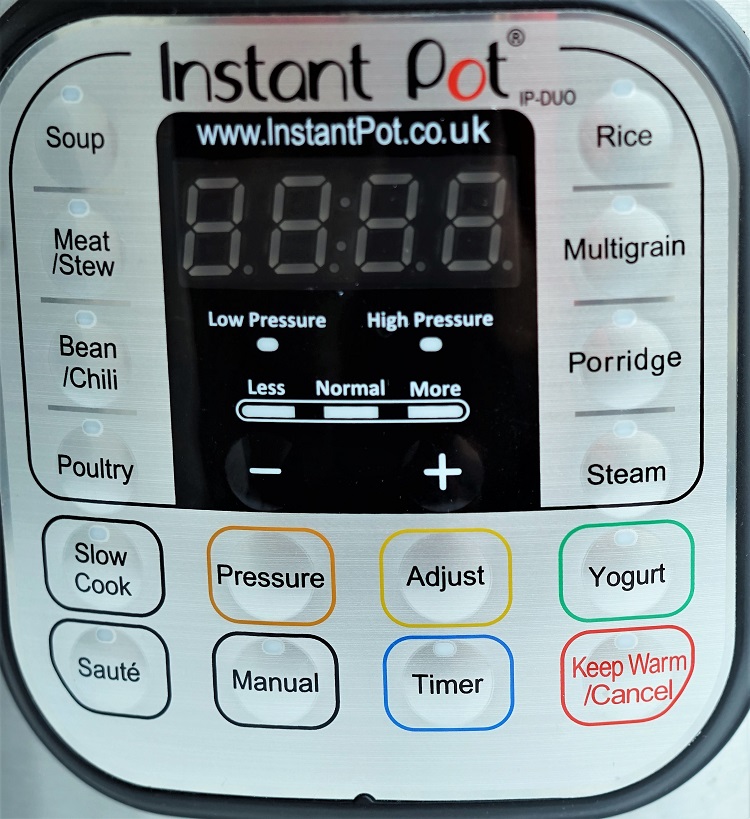
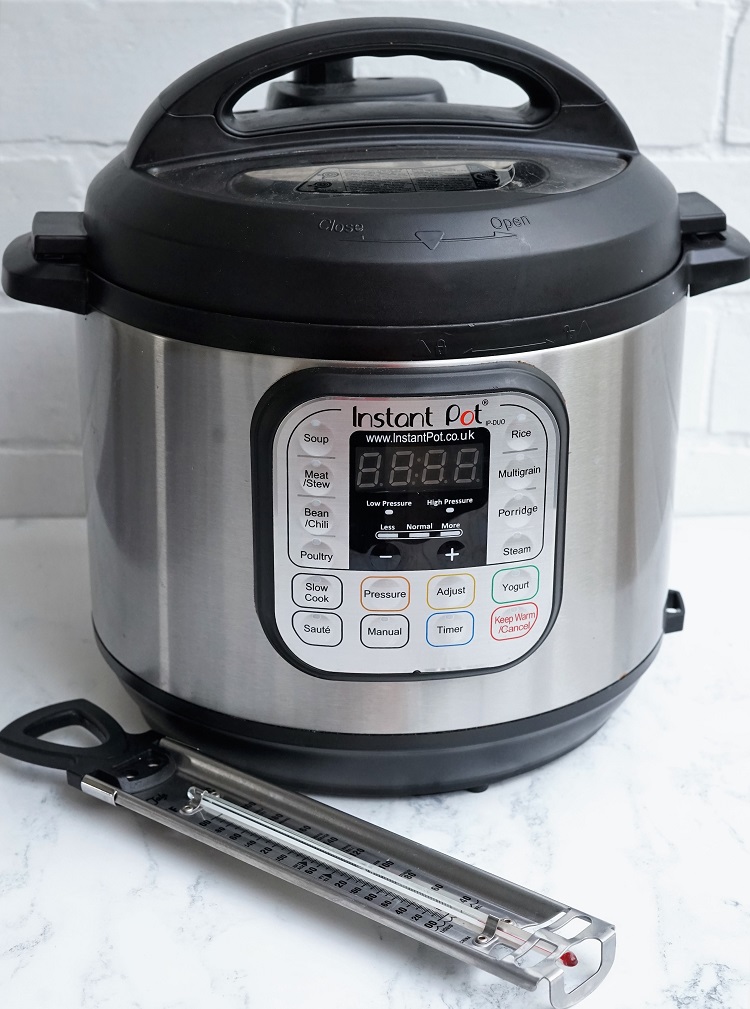
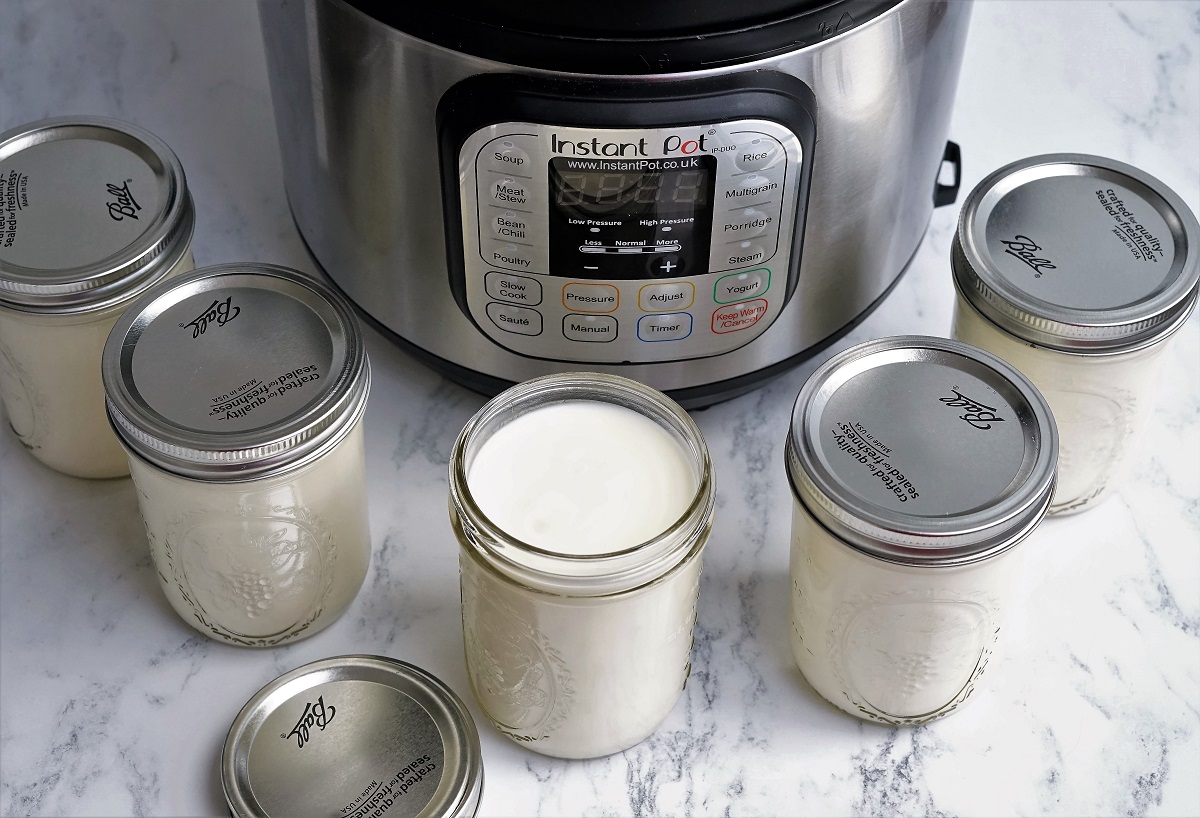
However, I have the 5.7 litre Duo 7-in-1 Instant Pot (affiliate link) and it’s instructions for that and similar models which I give in this post. As you can see in the image below, the Yogurt button is on the bottom right of the panel, just above the Keep Warm/Cancel button.
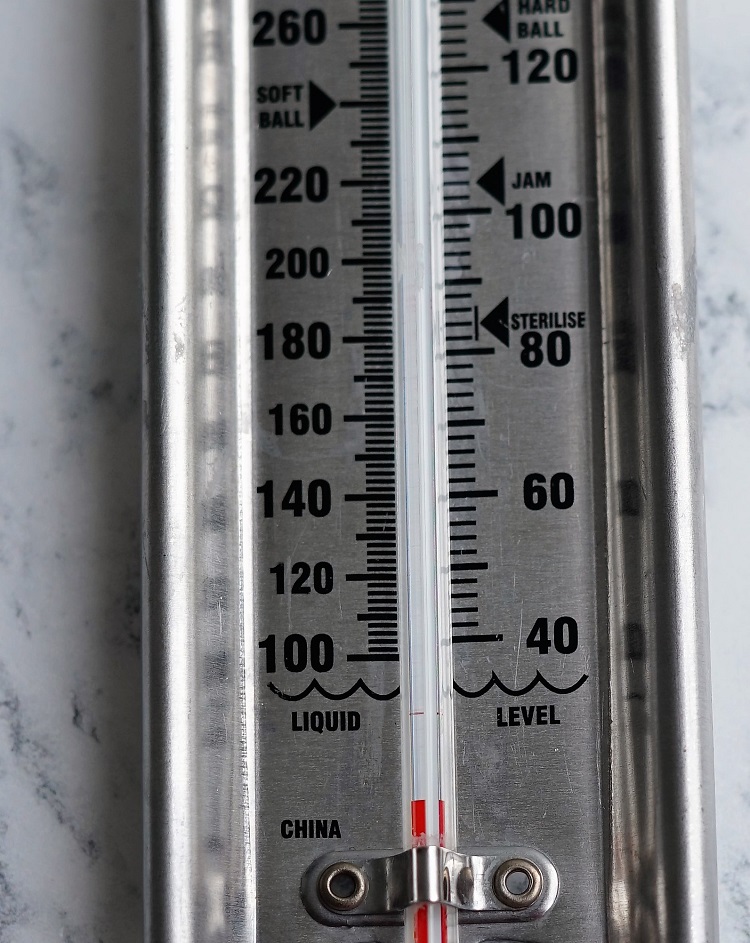
You’ll also need a thermometer. If you have one which is glass, don’t dunk it straight into near-boiling liquids from cold, or vice versa. Extremes of temperature can cause the glass to shatter, so I keep a saucepan of warm-to-hot water nearby while making yogurt and stand the thermometer in there.
MAKING HOMEMADE YOGURT
You need the thermometer because there are two important temperature readings to take when making yogurt.
The first stage for Homemade Yogurt is to boil your milk. To be precise, you need to get it to a temperature of 83 degrees Celsius (around 180 Fahrenheit). This gets rid of any harmful bacteria which could multiply during fermentation, but also changes the structure of proteins in the milk which helps it to thicken.
Helpfully, some thermometers will have this temperature marked: on mine it says STERILISE next to 81 – 83 degrees.
STEP 1: BOIL
Before I start, I like to put some boiling water from a kettle into the Instant Pot inner and (carefully!) give it a swish about. This should help to ensure that any bacteria we don’t want has been zapped.
Once that’s done, I dry the inner with a paper towel and pour in the milk. Depending on the supplier, my milk comes in either 2 litres or 4 pints. I don’t think it’s worth making any less than this amount as the yogurt keeps for 10-14 days anyway.
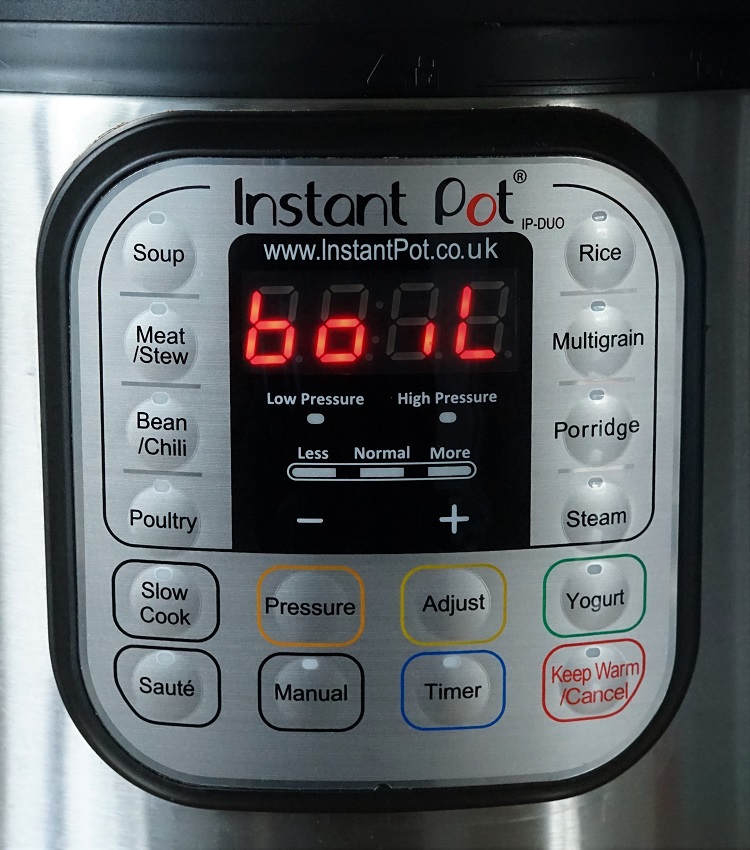
With the power switched on, I put on the Instant Pot lid with the lever pointing to Venting. After pressing the Yogurt button, I hit the Adjust button until ‘boil’ appears on the display. [Update: people with newer models tell me that there’s no longer an Adjust button, but if you press the Yogurt button twice then ‘boil’ will be displayed].
Then you just leave it. The Instant Pot will let you know when it’s done by beeping. I’ve found it takes around 35 minutes, give or take a few, for this to happen.
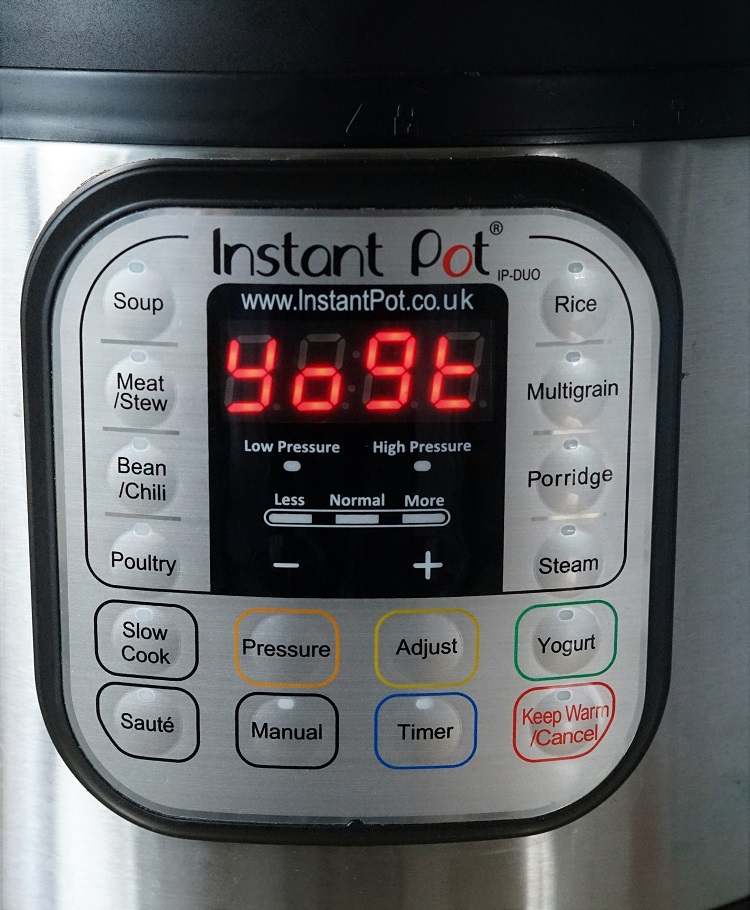
Now you’ll need your thermometer to check that the temperature has reached the magic 83 degrees Celsius. Obviously the accuracy of your thermometer comes into play here, but I almost always find the milk to be 80 degrees at this point. I simply use the Sauté button to heat the milk a little more. It usually takes three to five minutes to get to the correct temperature.
STEP 2: COOL
Before you add your yogurt starter, it’s extremely important that the milk is cooled. That’s because otherwise the heat will kill off the good bacteria in your ‘live’ starter. The end result of that will be a large pot of tepid milk instead of Homemade Yogurt.
This is where you’ll need your thermometer again, to check that the milk’s cooled to 46 degrees Celsius (115 Fahrenheit) or less.
Switching off the Instant Pot and removing the inner, you could just leave it on the work surface to cool. This is likely to take a good hour though, so I put the inner in a washing up bowl half filled with cold water and a few ice cubes. This usually gets the milk down to 46 degrees in about twenty minutes. Less if you change the water a time or two.
At 46 degrees or below, there will be a bit of a skin on top of the milk, so just scoop it off. Our dog loves this as a treat.
STEP 3: FERMENTING
When the milk has cooled, you’re ready to add your starter and get fermenting.
The easiest way to combine your starter with the milk is to have the starter in a small bowl. Take out some of the milk and whisk it into the starter. Then tip the whole lot back into the milk and whisk again.
Next, it’s into the Instant Pot again with the lid on.
First pressing the Yogurt button once more, you then tap Adjust until the display reads ‘8:00’. This means the yogurt will ferment for 8 hours, which is the minimum time required. I’ve experimented with 10 hours but couldn’t really detect any difference in terms of taste or texture. Once you’re familiar with the method, do your own experimenting and see what you think.
And that really is it. The Instant Pot will count up to 8 hours and beep when it’s done. So you can just go off and do something else.
YOUR FIRST HOMEMADE YOGURT
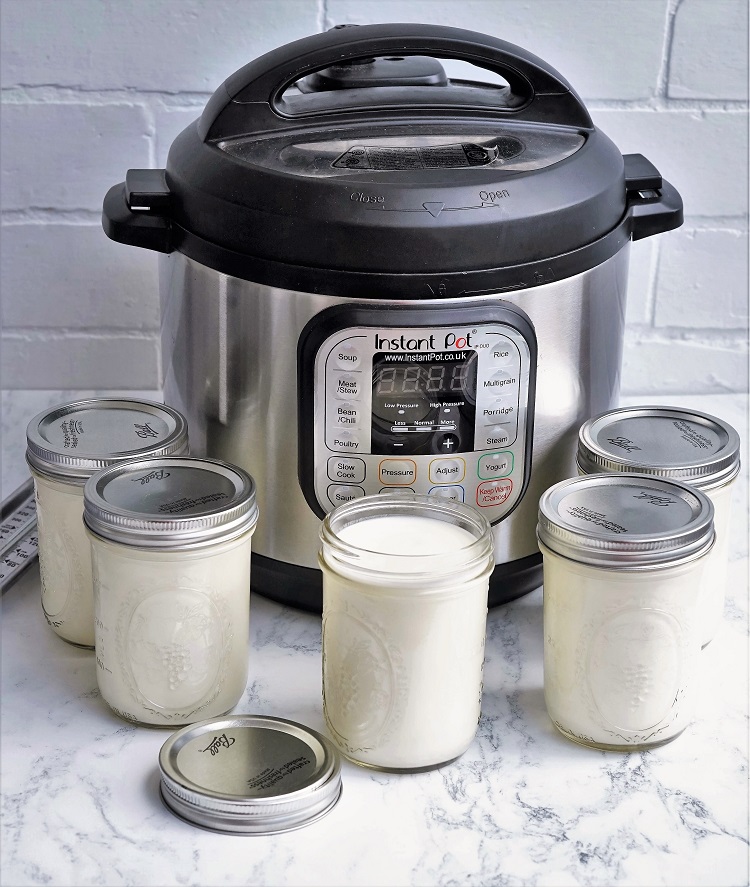
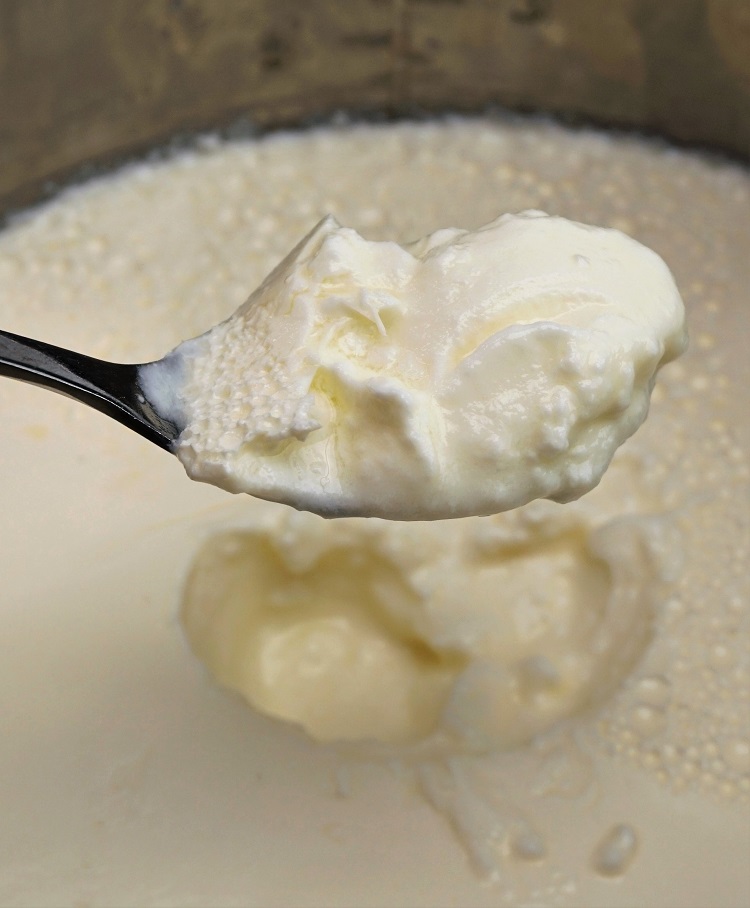
I always start my yogurt in the morning so that it’s done by evening. And I always get excited taking off the lid off to see creamy milk almost magically transformed into thickened, tangy yogurt.
The yogurt, still in its pot, is best left overnight in the fridge to completely cool down and set a little more. I place a length of paper towel over the top to help catch any condensation. The next day, I whisk the yogurt and transfer to clean containers.
Once I knew I was going to make Homemade Yogurt regularly, I bought myself some lovely preserving jars especially for it. I prepare these just as I would for jam or chutney: a good wash in hot soapy water, rinse, then dry in a very low oven. Unlike with jam or chutney though, you must let the jars go cold before putting in the yogurt. Once the lids are on, you can pop the jars into the fridge until needed.
Stored like this, I’ve had yogurt stay fresh for up to two weeks.
Oh, and don’t forget to take out two tablespoons of yogurt and put it in the freezer, ready to use as the starter in your next batch of easy Homemade Yogurt.
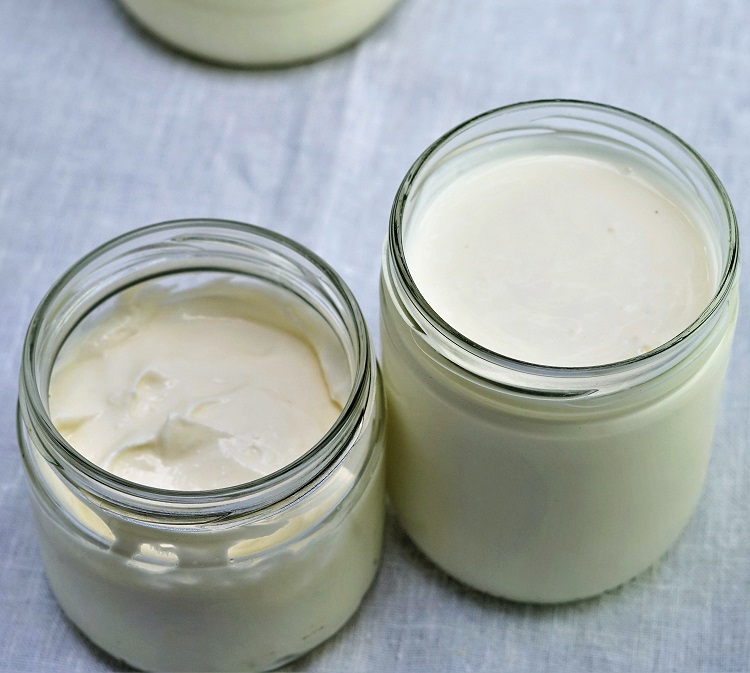
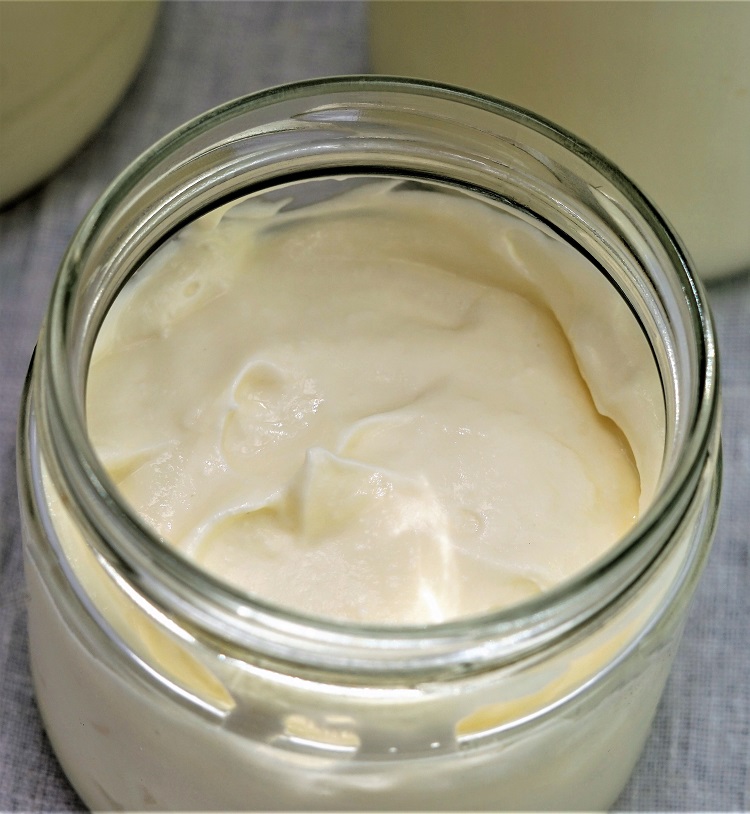
GREEK STYLE YOGURT
Once completely cold, my Homemade Yogurt is medium thick. Not exactly runny, although still pour-able. But I love thicker and creamier Greek-style yogurt. So I strain about half of my yogurt by putting a clean muslin cloth in a sieve over a bowl and adding the yogurt. I bring together the sides of the cloth and tie with string.
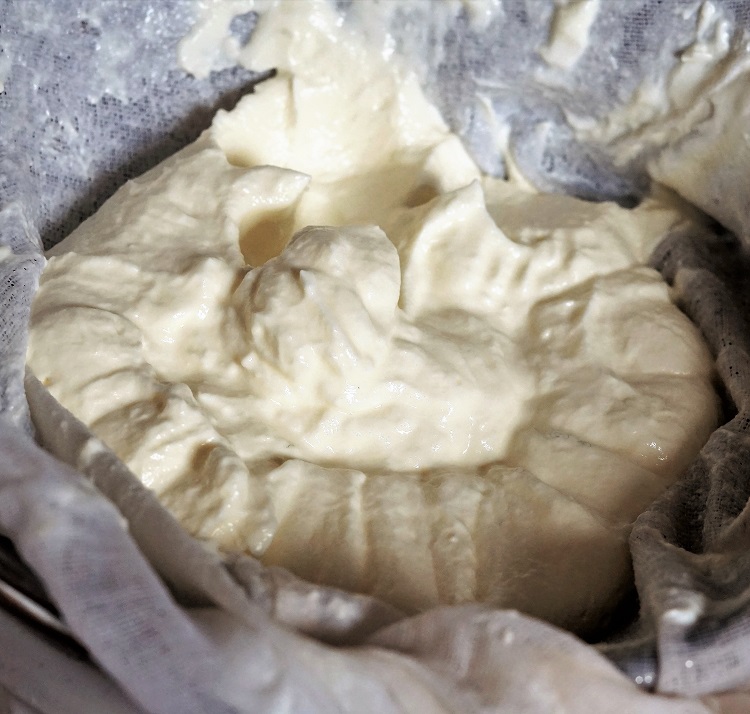
After a couple of hours in the fridge, you’ll get rich, creamy yogurt ready to pack into a jar. The longer you strain it, the thicker it will get. Leave it overnight or longer and you can make labneh, the Middle Eastern yogurt cheese.
Don’t throw away the liquid that will have collected in the bowl either. This is whey and it’s full of nutrients and protein. Add it to smoothies, porridge, soups or use in baking. I save it in a jar in the fridge and use it to replace some of the water in my Crusty Homemade Bread.
EASY & COST EFFECTIVE
I hope you Instant Potters out there will give Homemade Yogurt a try. As well as being easy, I think it’s so satisfying making something like this yourself.
If you eat a fair bit of yogurt it’s also quite a money saver. Two litres or four pints of milk will make around two kilos of yogurt, but at less than half the cost of store bought yogurt.
So, Instant Potter yogurt virgins, what are you waiting for?
Homemade Yogurt in an Instant Pot
Homemade Yogurt is easy with an Instant Pot electric pressure cooker. Eat it plain, flavour it, or strain to make thick & creamy Greek-style yogurt.
Ingredients
- 2 litres whole cow's milk
- 2 tbsp live plain yogurt at room temperature store bought or saved from your last batch
Instructions
-
Scald the Instant Pot (IP) inner with boiling water to ensure it's perfectly clean. Dry and put back in the IP.
-
Pour the milk into the IP.
Lock on the lid with the lever pointing to Venting. Switch on.
-
Press the Yogurt function on the IP and then press the Adjust button until the display reads 'boil'. Note: if you have a newer model that doesn't have an Adjust button, press the Yogurt function twice and 'boil' should be displayed.
Leave until the IP beeps to tell you it's reached boiling (approx 35 min).
-
Switch off the IP and remove the lid.
IMPORTANT: Using a clean thermometer, check that the temperature of the milk is at least 83 degrees Celsius (180 Fahrenheit): this is to ensure any harmful bacteria is killed and will also help the yogurt thicken.
If the temperature is less than 83 degrees, switch the IP back on (with the lid still off) and press the Saute button to heat the milk to 83 degrees Celsius (approx 5 min).
-
Remove the IP inner and leave to cool until the milk is no more than 46 degrees Celsius (115 Fahrenheit). This is important as, if the milk is too hot when the starter is added, the live bacteria needed to make yogurt will be destroyed.
Left on the work surface, cooling to this temperature will take around an hour, but putting the inner in a bowl of cold water containing ice should reduce the time to around 20 minutes.
-
When the milk has cooled, skim off any skin and discard.
-
Have your starter in a small bowl. Take some of the milk out of the pot and whisk it into the starter. Tip this back into the pot of milk and whisk to distribute it.
-
Put the inner back into the IP (dry the outside first if necessary), put on the lid with the lever pointing to Venting. Switch on.
-
Press the Yogurt button, then press the Adjust button until it reads '8:00'. This will set the IP to work for 8 hours.
-
When the 8 hours are up, the IP will beep. Switch off then remove the lid. Yogurt should be soft to medium firm.
-
Put the yogurt, still in the inner, into the fridge to cool completely. Overnight is best. A length of paper towel, draped over the top of the pot, will help absorb any condensation.
-
The next day, whisk the yogurt and transfer into very clean containers. Washed jars can be sterilised in a low oven but make sure they're cold before putting the yogurt in them.
Store in the fridge and use within 10-14 days.
-
Greek-style yogurt
Make thick and creamy Greek-style yogurt by lining a sieve with muslin cloth, add the yogurt and leave it to drain over a bowl in the fridge for 1-3 hours. The longer you leave it, the thicker the yogurt will be.
See Recipe Notes for using the whey which is a byproduct of straining yogurt.
Recipe Notes
Don't forget to put aside 3 tbsp of your Homemade Yogurt to use as a starter in your next batch. This can be stored in the freezer. To use, defrost overnight in the fridge but bring to room temperature before using.
After straining the yogurt to make it Greek-style, don't throw away the liquid which will have collected. This is whey, full of nutrients and protein. Use it in smoothies, porridge, soups or in baking scones, bread etc.
RELATED RECIPES


Hi. Is your Instant Pot a 5.7 liter or a 8 liter. ? Thanks !
Hi Sheila, thanks for your interest! I have the 5.7 litre Instant Pot. I’ve added this info to the blog post text in case it’s helpful for anyone else.
Thank you so much, I just tried your recipe for the first time and it worked beautifully! I just wish I’d scrubbed the inner pot before scalding it – my lovely yoghurt tastes a tiny bit like chicken biryani… Thank you again 🙂
So glad my recipe worked so well for you!
Chicken biryani flavoured yogurt actually sounds quite nice – although not sure I’d want it with my morning fruit and muesli 😂
Thanks so much for taking the time to get in touch!
It might have been the seal that was tainted. The IP yoghurt instructions mention using a new seal to avoid this.
I keep a spare seal just for making yogurt for this reason.
A question before I make this if possible – can I do this without a thermometer? I do need to buy a kitchen thermometer but I’ve just moved into a place, and the only thing in the shared kitchen drawer is an old meat thermometer I’ve not really looked at.
Hi, I personally wouldn’t make yogurt without a thermometer, although the meat thermometer you have should be fine: the one I currently use is one of the probe type rather than that shown in the post (which I wrote some years ago now).
As I say in the post, you need to get the milk to 83 degrees Celsius (around 180 Fahrenheit) for safety reasons. “This gets rid of any harmful bacteria which could multiply during fermentation, but also changes the structure of proteins in the milk which helps it to thicken.”
You also need a thermometer to check the milk has cooled to to 46 degrees Celsius (115 Fahrenheit) or less before adding a starter. Otherwise the heat will kill it.
While some experienced in yogurt making may choose not to use a thermometer, I always do and strongly recommend it.
Hope this helps!
If your milk is ULTRA PASTEURIZED, THERE IS NO NEED TO WORRY ABOUT THE FIRT STEP IN BOILING. THE MILK HAS ALREADY COME TO THAT TEMPERATURE IN THE ULTRA PASTEURIZED PROCESS.
Known as UHT or ultra heat treated in the UK, it’s worth noting that it’s heated to DOUBLE the temperature of pasteurised milk. This does slightly reduce its nutritional value and protein quality. It also has a sweetish taste (due to caramelization of the sugars) which I personally don’t like. But if it works and you don’t mind the taste then that’s all that matters I guess!
I tried this recipe and was disappointed as the milk never turned into yogurt. I thought that I did everything perfectly BUT I used 2% milk. Would that have been the reason that it didn’t turn out or do you have other ideas? Also, can I use the same milk (that was in fhe refrigerator and covered per directions all night)?
Hi Teresa, following this recipe should definitely give you yogurt at the end (all other current ratings are 5-star) so I’m afraid I can only assume an error was made. A few thoughts:
While using 2% milk might produce a thinner yogurt, I think you’re saying it didn’t thicken at all so I guess that isn’t the issue.
Did you use fresh, LIVE yogurt as a starter? If so, then it suggests to me that after heating to 83C (180F) you maybe didn’t cool it sufficiently (to no more than 46C / 115F) and so the live culture was killed. Alternatively, you might have cooled it too much so the bacteria didn’t get to work.
The only other thing I can think of is if you used UHT milk: this doesn’t have the same protein structure as regular milk and isn’t recommended.
On your last sentence, do you mean reuse the failed yogurt? If it’s been chilled all night then it should be fine to consume, although if you mean use it to try and make yogurt again then I personally wouldn’t. Best to start afresh I think.
Hope this helps and thanks for trying my recipe. I’ve made it loads of times and it’s always worked for me.
Thanks for your response!
I used Great Value Greek plain nonfat yogurt. ..maybe that’s why? If that isn’t ‘live ‘ yogurt, where do I get that?
Here in the UK live yogurts are widely available in supermarkets and will say so on the label, either in the ingredients or elsewhere. In the blog post I say “Check the label to make sure it contains nothing but plain yogurt plus live bacteria such as lactobacillus acidophilus or bifidobacterium.” I would think other countries would be similar.
This turned out absolutely perfect. I used kefir starter. So delighted it turned out so good on my first attempt. Thank you
Good to know it works with a kefir starter too. Thanks for your great feedback!
The best and easiest way to make yorgurt. I’ve made it so many times . Thank you for sharing the recipe.
You’re welcome!
I have looked all over trying to get an answer for my question. I have the instant pot duo. It has the yogurt feature. I was able to get it to boil but to incubate it stayed on “less” and I couldn’t get it to go on to normal. Temperature of the yogurt wouldn’t go any higher than 75 degrees. Hours later with the temp still too low I cleared it and cancelled it pressed yogurt the pressure and was finally able to get it into normal setting. It still stayed under 100 degrees. I don’t have the adjust button or any other button that seems to control temperature. It looks like yogurt but I’m pretty sure the temp was not high enough.
I’m a little bit confused about your question, to be honest. Sounds like you got it to boil OK but then you’re trying to incubate it at that higher temperature?
After boiling (technically, getting it to 83C to kill harmful bacteria) you should be cooling it, as per step 5, to no more than 46C before adding the starter. It then goes back in the IP to incubate at that temperature, not a high one.
But it sounds like you got yogurt in the end, so maybe I’m misunderstanding you?
If you’re concerned about safety, then as long as you tested that it got to at least 83 at the start, and it was incubated in the IP, then you should be fine.
Hope that helps!
I’ve now made this recipe twice and it’s worked out very well both times. Thank you for the tips on how to use the whey!
You’re most welcome! Thanks so much for taking the time give your feedback 🙂.
Great recipe! This is the second time I’ve made it and my family loves it.
Is there a way to avoid the yogurt from getting grainy? Everything I’ve searched says it’s due to the milk being heated too fast.
So glad you’re enjoying my recipe, Kelsey!
Grainy yogurt isn’t a problem I’ve had or know anything about, I’m afraid. But I did a bit of research and found this post which suggests a number of possibilities in addition to heating the milk too fast: https://fatrice.kitchen/why-is-my-yogurt-grainy/
Hope this is helpful rather than more confusing!
Hi, whilst my milk is cooling (step 5) can I put it in the fridge to quicken the process?
Yes you can, although it’s even quicker if you put the inner pot in a large bowl of iced water.
I can’t wait to make this tomorrow! My toddler LOVES yogurt and it’s hard to find full fat versions for her, so this will be a great addition to our diets. Can I double this recipe? Or make it twice in a row using starter from the batch I make right away for a second batch the next day? I doubt I’ll need to freeze any starter because she’ll eat a cup or more of yogurt every day. 😂
Hi Deborah, yes you can make a double batch or use some from the first as a starter to make the second. Whichever suits you!
Can you add vanilla or other flavorings and if so, when?
Hi Jennifer, yes you can add other flavourings such as vanilla. I would stir them in after the yogurt is made.
I add vanilla extract at the beginning of the process. I’ve had no problems.
That’s useful to know, thanks so much for the info!
How much vanilla do you add? I added like 3-4 TBSP and it definitely wasnt enough for the batch. I like to taste vanilla. I obviously dont want to add too much though…
Have you tried using organic oat milk for this recipe? If so, do you change anything in the instructions?
Hi Theresa,
No, I don’t use oat milk at all.
My understanding is that, as non-dairy milks don’t contain lactic acid, the proteins in oat milk will not coagulate in the same way as ‘real’ milk. This means that a thickener such as agar agar needs to be added.
If you do a search, there are recipes online for making oat milk ‘yogurt’ in an Instant Pot. However, I have to say that, personally, I don’t consider the end product to be yogurt at all as it won’t have the same naturally tart flavour and is artificially thickened.
If you want to ferment nut milks, coconut milk, or other besides cows milk, you need a use special starter specific to what you want to ferment. I have seen coconut and almond yogurts, but I have not seen oat, so I dont know if oat is possible.
I have the”instant pot” but it doesn’t have the adjust button for boil. Any suggestions?
[Updated reply 09/02/2024]
Hi Marian! Delia and Paula below have kindly responded: on newer models pressing the Yogurt button twice should display ‘boil’. I’ve now updated the blog post and the recipe card to include this info.
Sounds like you have a newer Instant Pot without an Adjust button and I’m afraid I don’t know what the steps are for those models.
Press the yogurt button twice, then it will read boil.
Thanks so much, Delia! I’ve now amended the blog post and recipe card with this info to help people with newer models.
Hi there, I spent ages looking for a ‘boil’ button but you just press the yogurt button twice! Hope this helps
Hi Paula, Delia above has said the same thing so I’ve now amended the blog post and recipe card for those with newer models. Thanks for your help!
Good recipe, but can be done in ordinary pot. I just heat the milk in a pot till all most boiling (starts foaming) Let it cool till lukewarm. (judge by finger) stir in the starter cover with a lid and stick it in the bed for 8 hours under a hevy feather blanket …. that’s all
Thank you!
Yes, there’s lots of ways of making yogurt as it’s really just about keeping it at a constant temperature, isn’t it? I know some people use thermos flasks too.
But, for people like me with an Instant Pot with a yogurt function, it makes sense for us to use it. Weirdly though, the instruction manual doesn’t give detailed instructions for this, hence my post.