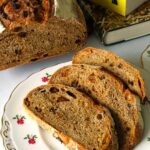
Spiced Fruit Bread
With cinnamon, mixed spice, orange zest and bursts of juicy plumped dried fruit, this yeasted bread is wonderful, toasted or not, buttered for breakfast, with a cuppa, or part of an afternoon tea.
Made with an easy no-knead overnight method and minimal hands-on time, you can bake Spiced Fruit Bread in a covered pot, Dutch oven, or in a loaf tin: see Recipe Notes below for baking in a tin.
It's recommended you read the accompanying blog post and Recipe Notes below before starting to cook. Use digital scales and metric measurements as these were used to test the recipe.
Ingredients
- 1 tbsp honey, maple syrup or other sweetener (increase to 2 or 3 tbsp for a sweeter bread)
- 500 ml hot tea (e.g. black, masala chai, herb, fruit)
- 150 g mixed dried fruit (e.g. raisins, currants, sultanas)
- 1 orange, zest only (finely grated and chopped small)
- 450 g strong white bread flour (plus extra for dusting)
- 150 g strong wholemeal bread flour (can be replaced with more white bread flour)
- 2 level tsp instant dry yeast (i.e. the sort which does not need activating before adding to the rest of the ingredients)
- 2 level tsp salt
- 2 rounded tsp mixed spice (can be replaced with chai masala spice mix)
- 1 rounded tsp ground cinnamon
Instructions
The day before baking
-
Dissolve the honey, maple syrup or other sweetener in the hot tea.
Put the dried fruit and orange zest in a heatproof bowl and pour the tea over. Stir then leave to soak until the liquid is cold.
Over a jug to catch the liquid: strain the fruit through a sieve then press with the back of a spoon to remove as much liquid as possible.
-
Put the flours in a large bowl and stir in the dry yeast, salt, and spices. Stir in the soaked and well-drained fruit.
Make a well in the centre and gradually stir in enough of the soaking liquid to form a dough that's wettish but firm rather than sloppy and with no dry bits of flour: see image in the blog post for how it should look. You may not need all the liquid or you may need a little more: tap water is fine.
-
Cover the bowl or place the whole thing in a large reusable polythene bag and leave to ferment at room temperature overnight.
Tip: If you want to slow fermentation down (e.g. if the room is warm or it's more convenient) do the fermentation in the fridge or leave at room temperature for a few hours then put in the fridge overnight.
On the day of baking
-
The dough should have risen, spread out and be bubbly. If not, leave a little longer. If it's been in the fridge, allow to come to room temperature before proceeding.
Dust flour over your work surface, ideally covered with a silicone mat, and scrape the dough onto it. Fold over itself several times until smooth: add only as much extra flour as needed to prevent sticking.
Sprinkle flour inside a lined banneton (or an improvised proving vessel such as a bowl lined with a tea towel).
Fold the dough again, this time shaping to fit your proving vessel. Sprinkle the top with more flour then put it in the vessel with the rounded side facing DOWN. Dust the side now facing up with a little flour.
Place in a large reusable polythene bag or cover it, then leave in a warm place for approximately 30 - 45 minutes (e.g. in a switched off microwave with a jug of very hot water alongside).
While it's proving: preheat your oven to 240°C / 220° Fan / Gas 9 / 475° F and put a lidded cast iron pot or Dutch oven on the middle shelf.
-
Check if the dough is ready to bake: gently insert a finger into the dough and see if the dough quickly or slowly springs back.
- If the dough springs back slowly and leaves an impression, it's ready.
- If it springs back immediately and doesn't leave an impression then prove another 5 - 10 minutes and check again.
-
When ready to bake, remove the pot from the oven and take off the lid.
Carefully flip the dough into the pot so the rounded side is now facing UP.
Use a sharp knife or baker's blade to make a slash along the length of the dough.
Put the lid on the pot, place in the oven and bake for 35 minutes.
-
After 35 minutes, reduce the heat to 220° C / 200° Fan / Gas 7 / 425°F.
Remove the pot from the oven, tip the bread out of it, then return the loaf to sit directly on the oven shelf.
Bake for a further 8 - 10 minutes or until the bread is cooked through: it should sound hollow when tapped underneath. If you're unsure, switch off the oven but leave the bread in for the final few minutes.
Tip: ovens do vary, so if the top is darkening too quickly, reduce the oven temperature a little.
-
Place on a wire rack until completely cold before slicing.
Best eaten within 3 days or can be frozen.
Tip: slice before freezing so you can take out as much as you need without waste. Can be toasted from frozen.
Recipe Notes
ESSENTIAL EQUIPMENT (further details and affiliate links in the accompanying blog post)
Unless you're doing the variation below (i.e. baking in a tin), you'll need:
- a heavy, lidded pot or Dutch oven in which to bake the bread. It should have a capacity of at least 3.5 litres. Check that any knobs or handles can also withstand the high temperatures required.
- to support the dough on its second rise or prove, you'll need a banneton or proving basket or improvise one by lining a large bowl with a tea towel or other cloth.
OPTIONAL EQUIPMENT (further details and affiliate links in the accompanying blog post)
A dough scraper plus a silicone mat to cover your work surface are highly recommended: they make it easier to remove doughs from their bowl, fold and shape, and make clean-up quicker.
BAKING IN A TIN
If you don't have a suitable pot or Dutch oven, this bread can be baked in a 2lb/900 ml capacity loaf tin. Follow 'The day before baking' instructions as above, then switch to the 'On the day of baking' instructions from this recipe: Cinnamon Raisin Oat Bread (omit the oat topping).