Chocolate Orange Marble Traybake
Chocolate Orange Marble Traybake features a light sponge that’s rich with swirls of dark chocolate and orange zest. Add to that a topping of fudgy chocolate-orange frosting and you have an impressive-looking cake that also tastes fantastic.

But Chocolate Orange Marble Traybake is surprisingly easy to make and bakes in just 25 minutes. Leave to cool then pour over a super-simple, buttery chocolate topping and you’ll have a wonderful, sweet treat.

Jump to Recipe
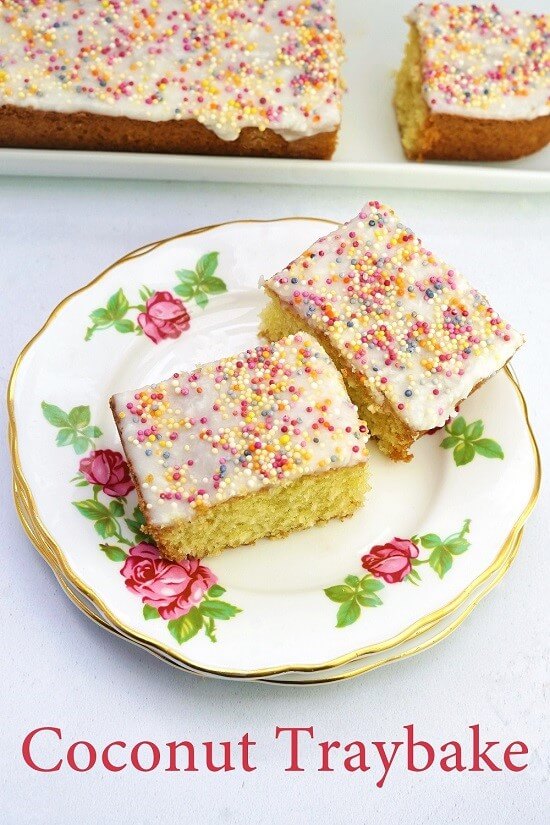
I love a good traybake cake. For me, there’s something particularly homely about them. My Coconut Traybake is a great example of that as it’s the one that most reminds me of my long-departed Mum.
But I also have a very practical reason for liking them. And that’s because, baked in a shallow-ish tray (I use one 24 x 17 x 4 centimetres) rather than a deep cake tin, traybakes usually take just 20 – 25 minutes to cook. That’s less than half the time you need for ‘big’ cakes like my Apple & Cinnamon Cake, admittedly divine Genoa Cake, or fruity Porter Cake. While I’ll always return to those, traybakes are perfect when you have less time but want to whip up a delicious sweet treat.
CHOCOLATE ORANGE MARBLE TRAYBAKE
Besides speed of baking, another property I associate with traybakes is simplicity. So perhaps it seems odd, if you’ve never made a marble cake before, to come up with a Chocolate Orange Marble Traybake? But the effect is very simple to achieve. Honest.

Although you’ll find a detailed recipe card at the end, I recommend you read on for the step-by-step images and tips, especially if you’re a beginner.
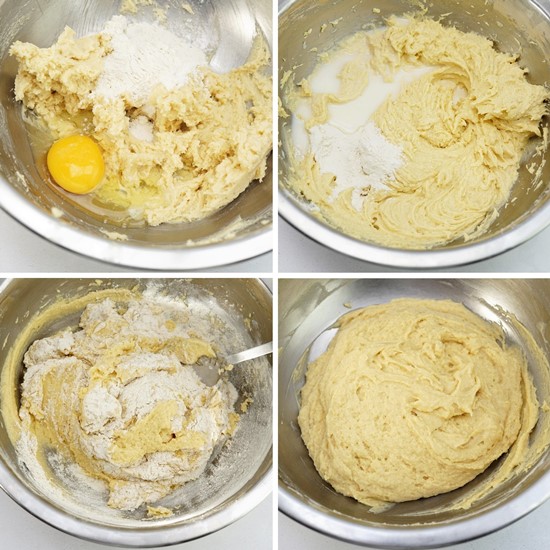
The basis of the cake is a regular sponge cake batter. We start by beating together equal amounts of soft butter, caster sugar, and vanilla extract until light and fluffy. Next, we beat in 3 eggs, one at a time. As each egg is beaten in, we add a tablespoon of self-raising flour, baking powder and salt which we’ve previously weighed out and sifted together. This helps to prevent the batter splitting. We do the same when we next beat in a couple of tablespoons of milk. Finally, the rest of the measured flour mixture is folded in.
To create the marble effect, we swirl together two different flavours of cake batter. So, we first need to divide the mixture in half. If, like me, you’re terrible at estimating things like this, I strongly suggest you use scales.
CREATING THE MARBLING
To one half we fold in finely grated orange zest. I find one and a half medium oranges to be plenty, so save half the zest from the second orange for decoration. To the other batter we fold in melted dark chocolate. We don’t want the chocolate to be hot so I melt it in the microwave before getting started on the batter. This means it’s cooled enough to use by the time I need it.
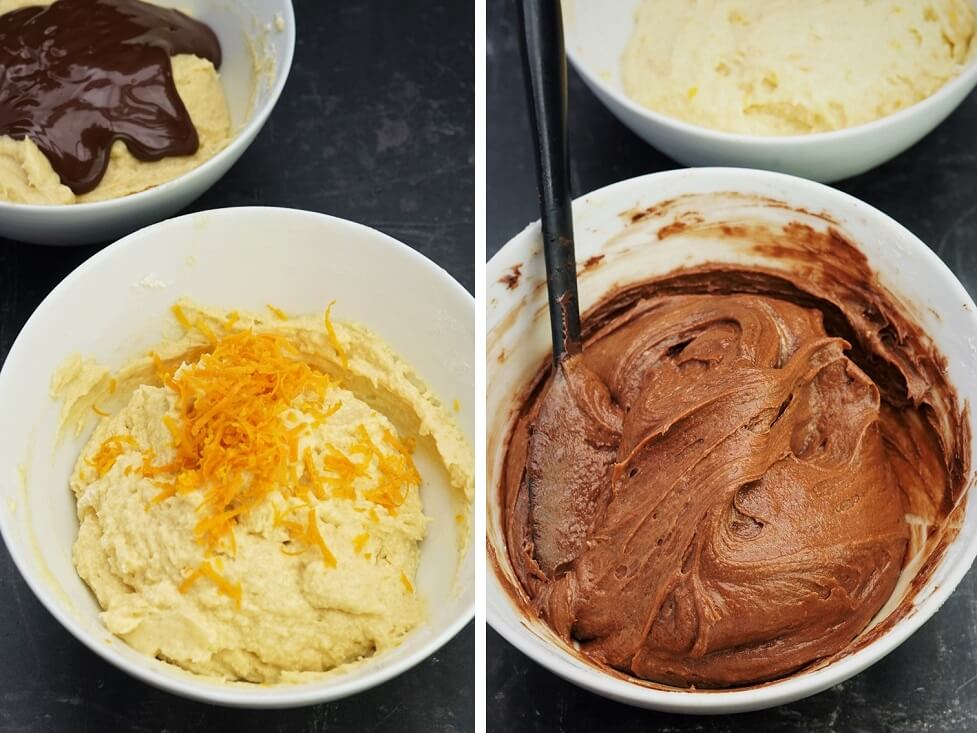
Once we have our two flavours, we can layer them in the baking tray. I start with one half of the chocolate batter, then half of the orange batter, then the remaining chocolate, then the remaining orange. Although it’s tempting, try to resist the urge to use a spoon, palette knife or similar to spread out the layers. Doing this could squidge them together, meaning you’ll have less of a marbled effect. It’s much better to pick up and tilt the tin to get it to spread. Tapping it firmly on the worksurface a few times will help and should knock out any air pockets.

Just before putting into the preheated oven, take a knife or skewer and drag it through the mixture, swirling it as you go.
BAKING & COOLING
Chocolate Orange Marble Traybake will take around 25 minutes to get risen, golden brown, and set all the way through. Because ovens vary, I suggest you check after 15 minutes and turn the temperature down a smidgen if you think it’s browning too quickly.
When the cake is done, you should see the edges slightly pulling away from the sides of the tin. If you gently and briefly press down on the top it should feel springy. You can also test by inserting a skewer or cocktail stick. It should come out clean if the traybake’s completely cooked through.

Put the tin on a wire rack and leave for 5 – 10 minutes before removing the cake. Then place it directly on the rack and leave until completely cold.
CHOCOLATE ORANGE FROSTING
When the cake is cold, we add the dreamy, fudgy chocolate-orange topping. For this, you’ll need more dark chocolate plus butter. I keep orange extract in my cupboard so include a teaspoonful. But if it’s not something you usually have or might use again, then I wouldn’t buy it just for this recipe. You could always add some extra orange zest instead.
All you do is melt everything together. Again, I use a microwave, but you’ll find instructions in the recipe card for doing it over a pan of simmering water if you prefer. Pour and spread the shiny chocolate on top of the traybake. I like to let it run down the sides a little, then sprinkle over orange zest.

Leave the topping to set firm before serving.
EASY BUT IMPRESSIVE CHOCOLATE ORANGE MARBLE TRAYBAKE
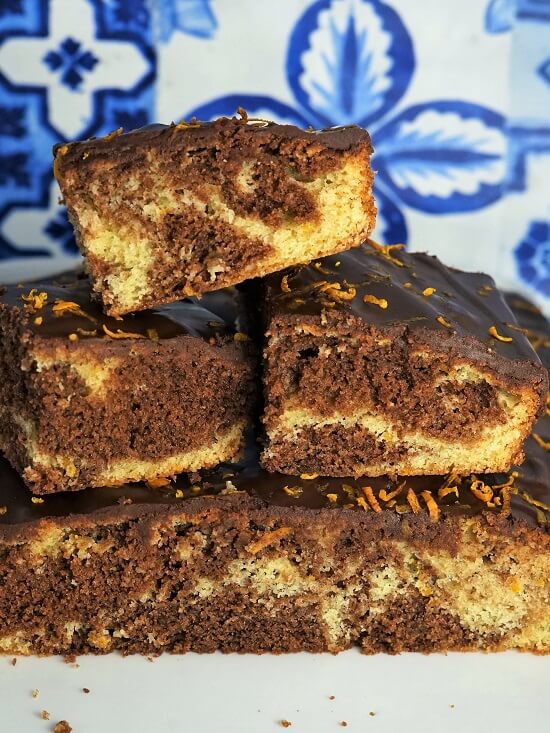
I hope you’ll agree that making impressive-looking Chocolate Orange Marble Traybake isn’t difficult at all. And if you enjoy this classic flavour combination, I think you’ll love the taste too. Cut through the rich topping and you’ll find light sponge with its swirls of dark chocolate and orange perfumed cake.
Stored in an airtight container, this marvellous marbled cake keeps well for several days. I made the one you see in this post on a Friday, and we still enjoyed the last pieces on the Monday.
If you’ve made this recipe, I’d love to know what you thought. Please leave a comment and don’t forget to rate it.

Chocolate Orange Marble Traybake
An easy but delicious sponge cake with swirls of dark chocolate and orange zest plus a fudgy chocolate-orange frosting.
Ingredients
- 75 g dark chocolate
- 175 g self-raising flour
- 1 level tsp baking powder
- 1 pinch salt
- 175 g soft butter salted or unsalted plus extra for greasing
- 175 g caster sugar
- 1 tsp vanilla extract
- 3 large eggs
- 2 tbsp milk
- 1½ oranges zest only, finely grated
For the chocolate topping
- 100 g dark chocolate
- 50 g butter
- 1 tsp orange extract optional: see Recipe Notes
- ½ orange zest only, finely grated
Instructions
-
Preheat the oven to 180°C / 160°C Fan / Gas 4 / 350°F
-
Butter a non-stick rectangular baking tin approximately 24 x 17 x 4 cm. If not non-stick, line the base with baking paper.
-
Break the 75 grams of chocolate into pieces and put in a microwave-safe bowl.
Melt on full power at 10 - 30 second intervals, stirring between each one.
Alternatively, melt the chocolate in a bowl above a pan of gently simmering water: stir constantly and make sure the water doesn't touch the bottom of the bowl.
When the melted chocolate's completely smooth, set aside to cool.
-
Sift together the flour, baking powder and salt then set aside.
-
In a large bowl and preferably using electric beaters, beat together the butter, sugar and vanilla extract until soft and light. Scrape down the sides of the bowl as necessary during this and subsequent steps.
Beat in the eggs one at a time along with approximately 1 tbsp of the sifted flour mixture each time.
Beat in the milk a tablespoon at a time with another scant tablespoon of the flour mixture each time.
Fold in the remaining flour.
-
Divide the cake batter in half (use scales for accuracy) and put each half in a separate, clean bowl.
Fold the orange zest into one half and the melted chocolate into the other.
-
Spoon HALF of the chocolate batter into the base of the prepared tin: it doesn't need to completely over the base, just spread it out a little.
Spoon over HALF of the orange batter. Avoid spreading it with a spoon, palette knife or similar as this could squash the layers together and the cake won't be marbled. Instead, tilt the tin to get it to spread then tap it firmly down on the worksurface a few times to knock out any air gaps.
Spoon over the remaining chocolate batter, tilting and tapping as before to spread it.
Spoon over the remaining orange batter then tilt and tap so that cake batter covers the base of the tin.
Take a knife or skewer and swirl it through the mixture to create a marbled effect.
-
Put in the oven and bake until risen and golden brown: when done the edges should be pulling away from the sides of the tin, the top springy when lightly pressed, and a skewer or cocktail stick should come out clean (approximately 25 min).
Tip: check after 15 minutes and if the bake is browning too quickly before it's set, turn the temperature down a little.
-
When done, transfer the baking tray to a wire rack and leave to cool for 5-10 minutes.
Carefully remove the cake and put directly on the wire rack until completely cold.
Chocolate topping
-
Break the 100 grams of chocolate into pieces and put in a microwave-safe bowl with the butter plus the orange extract if using or extra zest if liked.
Melt on full power at 10 - 30 second intervals, stirring between each one until completely smooth.
Alternatively, melt in a bowl above a pan of gently simmering water: stir constantly and make sure the water doesn't touch the bottom of the bowl.
-
When the cake is completely cold, pour and spread the topping all over it.
Sprinkle with orange zest and leave to set. Cut into squares to serve.
Store in an airtight container and eat within 4 days.
Recipe Notes
If you don't have orange extract for the topping you could add the zest of a small orange, finely chopped, to the chocolate and butter mixture.
RELATED RECIPES