Grilled Spring Onions with Romesco Sauce
Grilled Spring Onions with Romesco Sauce turns an everyday ingredient into a simple but oh-so-good feast.
Based on a Spanish-Catalan classic, spring onions are doused with olive oil and grilled. Or, if it’s barbecue weather, you can char them over hot coals.

But what takes the spring onions to the next level is the accompanying sauce. Pour over or dip into a rich mix of roasted peppers, tomatoes, garlic, plus almonds and smoked paprika.
Perfect as a starter or light meal. Or eat tapas-style, as one of a series of small dishes.

Jump to Recipe
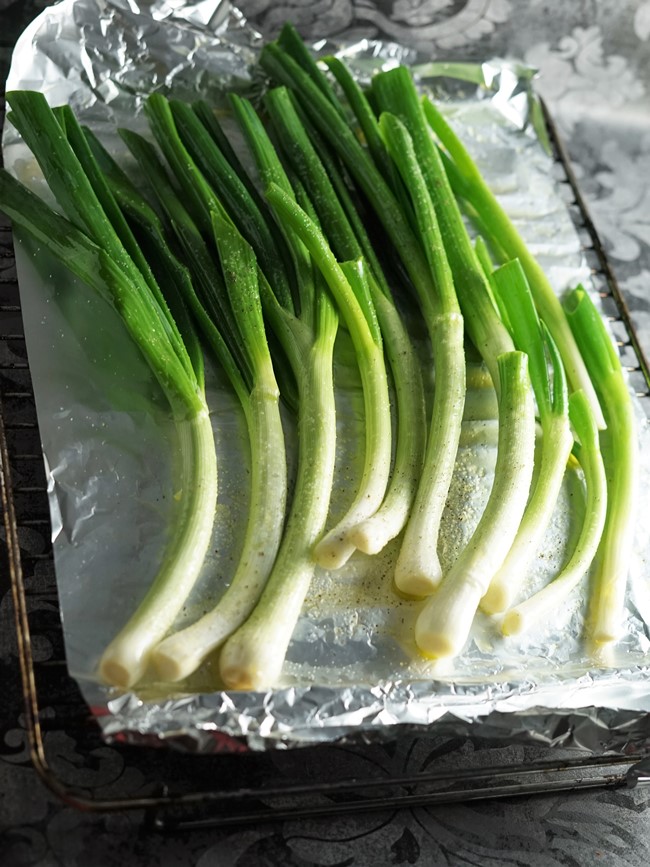
I was prompted to finally make Grilled Spring Onions with Romesco Sauce when I received some amazing organic spring onions in my Moorland Veg Box delivery.
It’s probably difficult to gauge from this photo just how large they were. But, honestly, they must have been 40 centimetres or more.

I’ve been aware of the classic Spanish, or more specifically Catalan, dish of calçots con salsa romesco for some time. I’ve also made numerous batches of spicy, nutty, smoky romesco sauce.
So, when I got those beautiful spring onions, I just had to put them together. The result was something rather special.
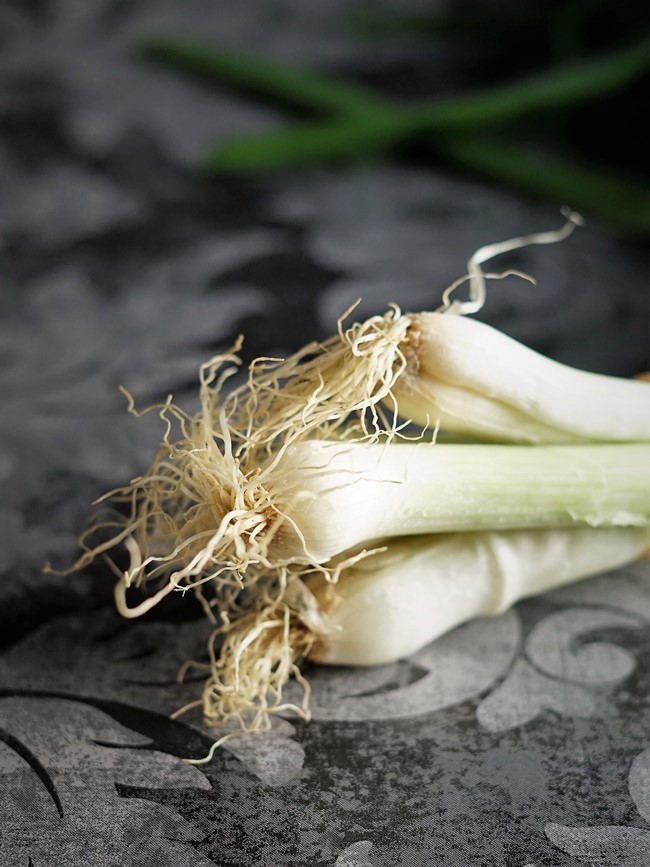
By the way, you don’t have to have huge spring onions to make this recipe. I cooked some of the standard sized, widely available ones alongside and they worked well too.

Calçots and Calçotadas
Although I’ve never seen a calçot in the flesh, from images, they look more like a small leek to me.
In fact, I imagine baby leeks would work in this recipe. Although the flavour would not be the same, of course.
Anyway, so loved are the fat calçots in their native Catalonia that entire festivals, known as calçotadas, are devoted to them.
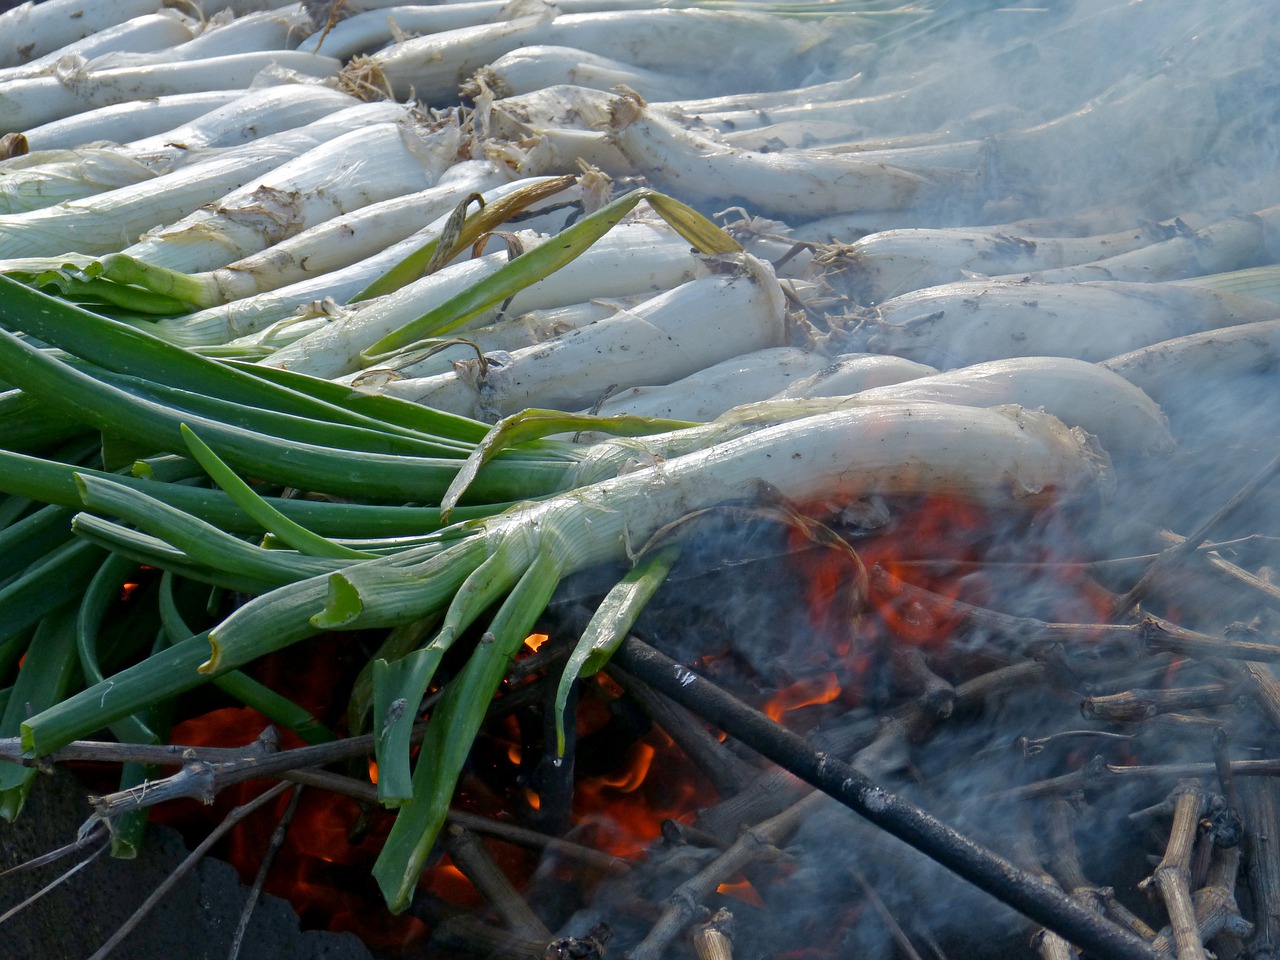
The calçots are cooked over open fires, then wrapped in newspaper to rest and finish cooking.
When ready, the now-blackened outer layer is stripped away. Before eating, each bite is dipped into romesco sauce.

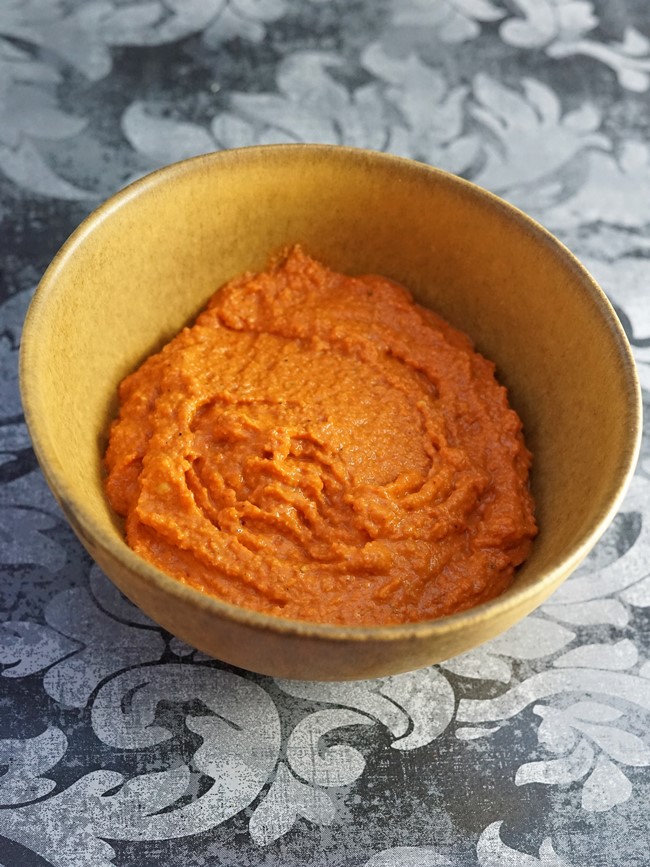
ROMESCO SAUCE
Salsa Romesco is one of those sauces that I think should be in every cook’s repertoire.
Said to have originated in the Catalan city of Tarragona, it’s incredibly well-flavoured and goes with so many foods: fish, meat, eggs as well as vegetables.
There are different versions of romesco sauce, and I certainly don’t claim any authenticity for mine. But it’s how I like to make it, using easily available ingredients.
First off, traditional versions are made with dried peppers. Most recipes will tell you that dried ñora peppers are required, and I have used these to make salsa romesco in the past.
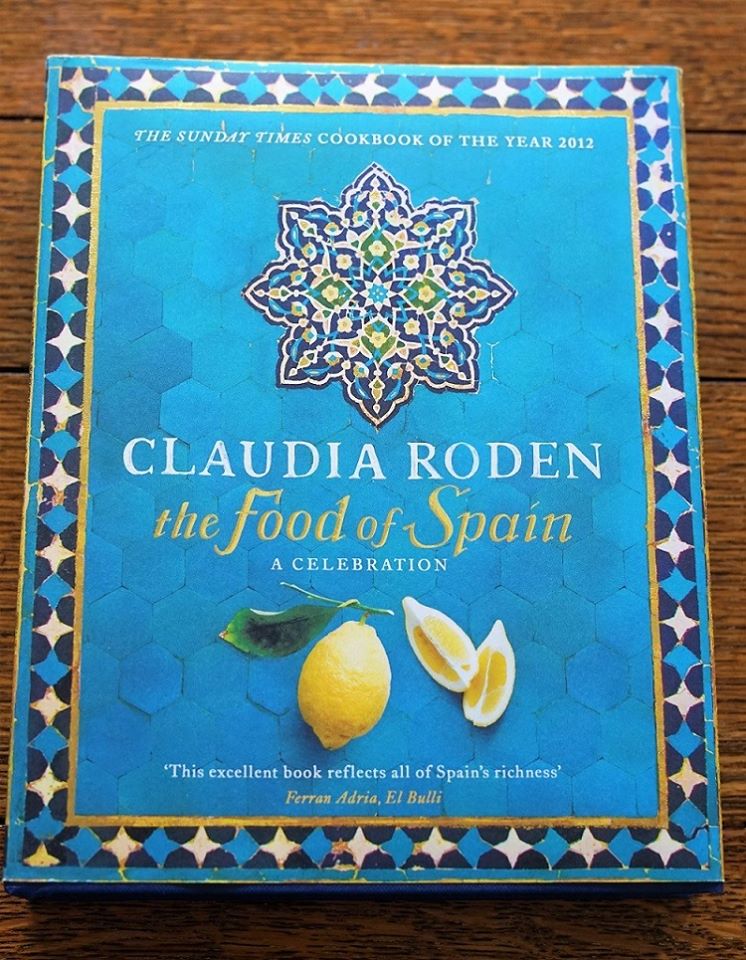
However, I’ve recently learned that the cuerno de cabra (‘goat’s horn’) dried pepper was originally used. According to Claudia Roden in The Food of Spain the ñora only became popular as it was less expensive.
The fact that ñoras come from Murica, not Catalonia, is surely a clue that they aren’t wholly traditional for romesco sauce anyway?
An even bigger clue, I also learned from Roden, is that the other name for the goat’s horn pepper is romesco.
MY PEPPER, TOMATO & ALMOND SAUCE
But I’m digressing, because this version of salsa romesco doesn’t contain any dried peppers. For convenience, I’ve used a roasted pepper from a jar, sweet smoked paprika and dried chilli flakes.
If you prefer, you can use hot smoked paprika instead of the chilli flakes. Or you could stick to sweet paprika only if you don’t want any heat at all.

Also in the sauce are grilled tomatoes (although these can be replaced with another pepper if you like) and garlic, toasted almonds, fried bread to thicken, olive oil and red wine vinegar. As well as salt and pepper, I like to add a little sugar to balance the acidity of the tomatoes.
Note that I’ve used a mix of different almonds: whole blanched ones, flaked and chopped. I was using up odds and ends of bags, but they all work.
Full instructions are given in the recipe card at the end of the post, but the sauce is really easy to make.
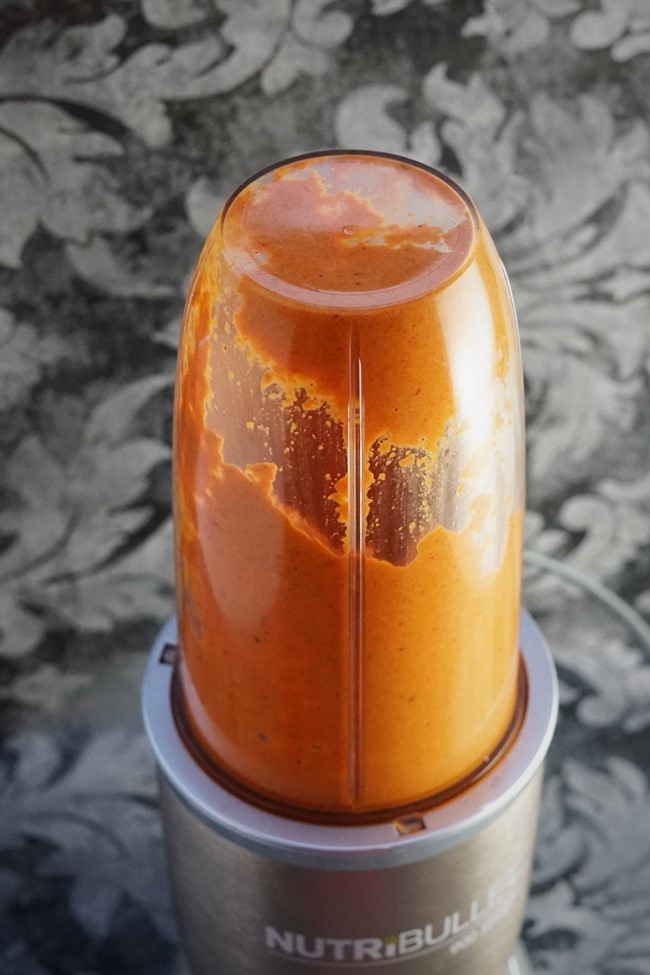
The ingredients, once prepped, are simply whizzed together as smoothly or as chunkily as you like.
The sauce is then set aside at room temperature while you grill the spring onions.
GRILLED SPRING ONIONS
Assuming that you are using standard sized spring onions, I’ve suggested three bunches to serve two people. However, if you can get larger ones then you may only need one or two bunches.
When you’re preparing the onions, you don’t need to remove the outer layer as you might for a salad etc. This will become charred, protecting the inside and keeping it moist. Any tough skin can be discarded as you eat.
All you do then is heat up the grill and lubricate the onions with a smear of olive oil. Season them with a little salt and pepper too.
Depending on the size of your spring onions, they’ll take between 5-12 minutes to grill. The outside should be nicely charred, and the bulb end soft.
While the huge calçots are traditionally wrapped and rested in newspaper to finish cooking, I’ve found that wasn’t necessary with even my large spring onions.

But they won’t come to any harm if you do want to wrap them in foil to keep warm while you prep any other accompaniments.
SERVING GRILLED SPRING ONIONS WITH ROMESCO SAUCE
By all means, eat these spring onions as the Catalans eat their calçots: dip one into the romesco sauce, tip your head back and dangle it in!
However, I think there’s nothing at all wrong with simply spooning over some sauce and eating with a knife and fork.
Admittedly, I found that some of the stringier, more well-cooked spring onions were best picked up in the fingers and dipped into the bowl of sauce. But they will taste good no matter what.

We ate them as part of a main meal, with a big beetroot and feta salad alongside.
You could also try grilled spring onions as an unusual starter or as one of a series of tapas.
You may find there’s sauce left over. But it should keep for two days and is great for almost any roast or grilled veg, fish and meats.
I hope you’ll try this unusual but fantastic way of eating spring onions and, if you haven’t made it before, grow to love romesco sauce as much as I do.

Have you made this recipe?
Leave a comment and don’t forget to leave a star rating!

Grilled Spring Onions with Romesco Sauce
Based on a Spanish classic, this recipe turns an everyday ingredient into a simple but delicious feast: charred spring onions with a sauce of roasted peppers, garlic, almonds and smoked paprika.
Ingredients
- 3 bunches spring onions see Recipe Note 1
- olive oil
- salt and black pepper
Romesco sauce
- 200 g tomatoes see Recipe Note 2
- 6 cloves garlic papery skins left on
- 40 g blanched almonds whole, flaked or chopped
- 2 tbsp olive oil divided
- 1 thick slice crusty bread
- 1 large roasted pepper, skinned and deseeded from a jar is fine
- 2 tsp smoked paprika sweet or hot
- ½ tsp dried chilli flakes optional
- 1-2 tbsp red wine vinegar or sherry vinegar
- ½-1 tsp sugar optional
- salt and black pepper
Instructions
Make the Romesco Sauce
-
Heat the grill to high.
Put the tomatoes and garlic cloves on a piece of foil and place under the grill.
When soft and charred all over, remove. (10-15 min)
Tip: if the garlic is blackening too much before it's soft, fold over a corner of the foil to cover it.
-
Meanwhile, put the almonds in a dry pan over low-medium heat.
Gently toast, stirring all the time.
Transfer the nuts to a bowl when browned and wipe the pan with a piece of kitchen paper.
-
Put 1 tablespoon of the olive oil in the pan over medium heat.
When hot, put in the slice of bread and fry on both sides until crisp and golden.
Remove from the pan.
-
Discarding the skins, put the charred tomatoes and garlic in a food processor or blender (remove any hard centres from the tomatoes if necessary)
Add in the roasted red pepper, roughly chopped if necessary, along with the toasted almonds, torn up fried bread, smoked paprika, chilli flakes if using, the remaining tablespoon of olive oil, 1 tablespoon of the vinegar, ½ teaspoon of sugar if using, plus a little salt and a good grind of black pepper.
Blend to create a sauce that is either smooth or slightly chunky, depending on your preference.
Taste and add more seasoning, vinegar, paprika etc. if needed.
Set aside while you prepare and grill the onions.
Grill the spring onions
-
Heat your grill to high and either brush the rack with oil or place a piece of foil on the rack.
-
Trim the ends of the spring onions, removing any green ends that are damaged.
Tip: you don't need to remove the outer layer as this will help to keep the onions moist inside. Any tough parts can be discarded after charring.
-
Rub each spring onion all over with a little olive oil then season with salt and pepper.
-
Put the spring onions under the grill and cook, turning often, until they're charred on the outside and the bulbs feel soft (5-12 min depending on thickness).
Serving
-
Put the spring onions on a platter and either spoon over the romesco sauce or serve the sauce in a bowl for dipping.
Leftover sauce can be stored in the fridge for up to 2 days.
Recipe Notes
Note 1. The classic dish on which this recipe is based uses a very large form of spring onion: the calçot. Try to get the biggest, thickest spring onions you can. However, I've assumed you are using the standard sized spring onions usually available in the UK, so have suggested 3 bunches to serve 2 people. If you can get larger ones, then you may need only 1 or 2 bunches.
Note 2. If preferred, you can replace the tomatoes with another roasted red pepper.