Homemade Malt Loaf
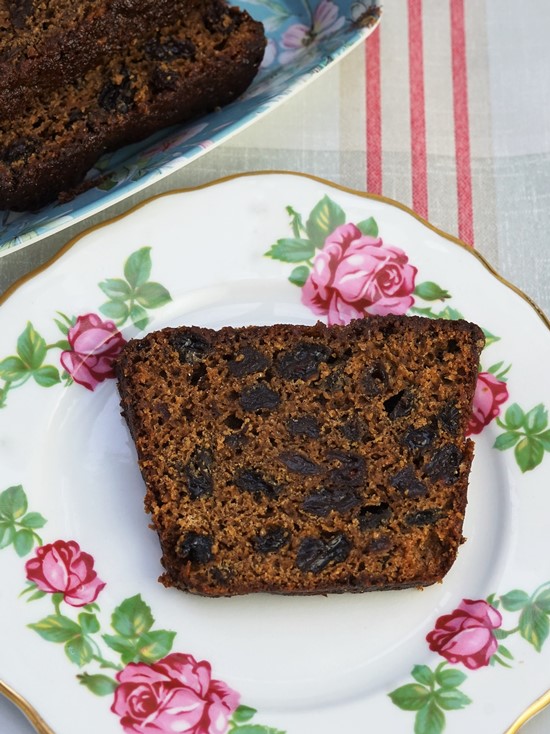
Homemade Malt Loaf, despite its name, is a traditional British favourite that’s a type of teatime cake. With a gloriously sticky texture, the rich, dark loaf is packed with juicy raisins and has the intriguing flavour of malt extract.

So easy to make, Malt Loaf is best left to mature for a few days before slicing and spreading generously with butter. Kept tightly wrapped in an airtight container, you can go on enjoying this classic treat for at least a week.

Disclosure: this post may contain affiliate links. If you buy via my links, I may earn a small commission at no extra cost to you.
Jump to Recipe
Like so many Britons, I came to know malt loaf through the shop-bought, brightly coloured packet version. Sweet and sticky, and seemingly only made by one well-known company, we loved it sliced and spread with butter. These days though, I much prefer to make my own bread and cakes.

First off, I know exactly what’s in them: no ultra-processed ingredients like ‘partially inverted sugar syrup’ or environmentally disastrous palm oil – both of which you’ll now find in that famous packet.
Homemade also means I can adjust flavours and textures to my own taste. In fact, someone recently giving me a slice of the once-loved brand was the spur to creating my Homemade Malt Loaf. The mass-produced one was so sweet and sticky it stuck unpleasantly to my teeth.

Happily, I now know that a well-flavoured, rich, and fruity malt loaf (sweet, but not too sweet) is very easy to make at home. The only slightly tricky bit is summoning the willpower to leave it a few days to mature before digging. But, trust me, it’s worth it.

MALT LOAF AND TEA BREADS
Although they have ‘loaf’ in their name, malt loaves are not a bread as such. While a few versions contain yeast (mine doesn’t), they’re more in the tradition of the British cakes known as tea breads.
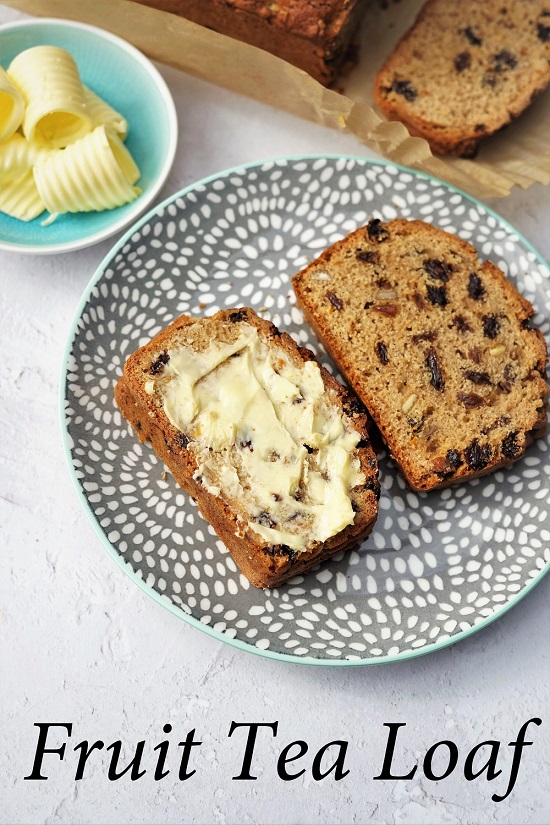
As I wrote in the blog piece to accompany my Fruit Tea Loaf recipe, we in the British Isles are particularly fond of tea breads or tea loaves. Fruit-filled sweet bakes to serve sliced and spread with butter, they’re perfect alongside a cuppa, or as an alternative to Sultana Scones for afternoon tea.
While tea loaves would probably once have all been made with yeast (hence the name) these days it’s more usual to use self-raising flour or plain flour plus baking powder. Which makes them wonderfully quick and easy. But don’t go expecting a light and airy cake. Although a good malt loaf shouldn’t be heavy, it must be satisfyingly dense with concentrated flavour.
I haven’t been able to find the precise origin of the tea bread known as malt loaf. It’s been suggested that the Scotsman who filed a US patent for it claimed a patent for ‘Making Malted Bread’ had existed in Great Britain since 1886. According to the Foods of England Project they became popular here from 1930 onwards.

THE ‘MALT’ IN MALT LOAF
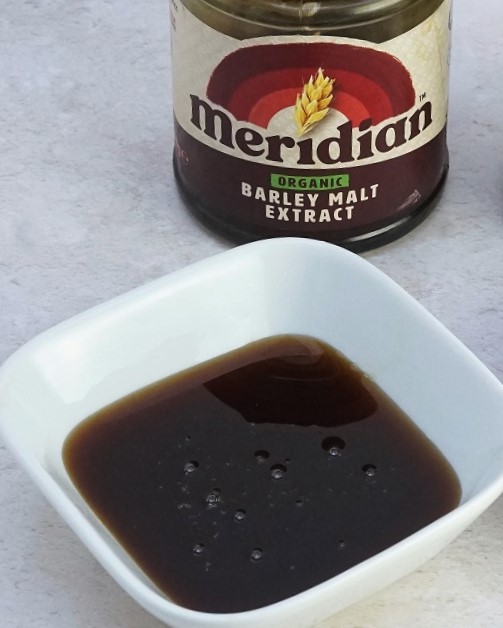
So, you may be thinking, what exactly is the ‘malt’ in Homemade Malt Loaf? The answer is malt extract or, to be precise, barley malt extract.
Malt extract, runny and sticky, is a by-product of the brewing industry. In beer making, ‘malt’ is grain (usually barley as it’s most suited to the process known as ‘malting’) which has been soaked so that it germinates and is then dried. During malting, starches in the cereal are turned into sugars, creating the naturally sweet syrup called malt extract.
As to the flavour of malt extract, if you’ve ever eaten those red and white bags and boxes of confectionery marketed as ‘the lighter way to enjoy chocolate’, or had a bedtime malted milk drink, then you’ll already be familiar with it.
Used in baking, malt extract doesn’t just give a rich, distinctive flavour though. It also keeps bakes moist and improves their keeping qualities. Both properties made use of in my Homemade Malt Loaf.
You’ll find jars of malt extract in health food shops and larger supermarkets.
OTHER INGREDIENTS FOR HOMEMADE MALT LOAF
Most of the other ingredients you’ll need to make malt loaf are ones you probably already have at home.
- Dried fruit: I stick with the traditional raisins, but you can swap in sultanas, chopped figs or dates, or use a mixture.
- Strong black tea: soaking (or microwaving) the dried fruit in tea plumps it up and makes it juicier.
- Flour: My preference is for half white, half wholemeal but you could use all white or all wholemeal. If you have plain flour, then you’ll need to add baking powder in the amounts shown in the recipe card at the end.

- Bicarbonate of soda: gives a helping hand to the raising agent in the flour (or the baking powder if using plain).
- Butter: many tea breads don’t contain butter, but I like a little in malt loaf where it helps to amalgamate the wet ingredients.
- Salt: balances the sweet elements.
- Egg: helps bind the mixture.
The malt extract will add some sweetness. But I want to go into a little more detail about two other sweetening ingredients that I feel are important to the flavour of my Homemade Malt Loaf.
DARK MUSCOVADO SUGAR
I recommend this unrefined sugar for malt loaf as dark Muscovado has wonderfully deep, rich flavour.
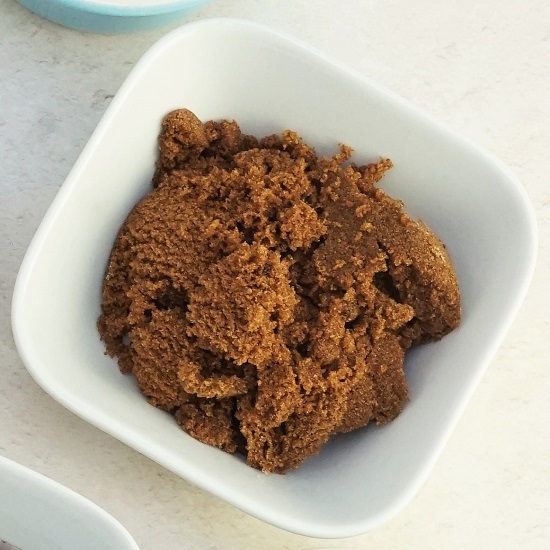
You could substitute dark brown soft sugar (which is refined white sugar that’s had molasses added to it) if that’s what you have. But if you’re buying especially for this recipe, then go for the more complex flavour of dark Muscovado.
I don’t recommend lighter sugars for this recipe as I think you might be disappointed with the result.
MOLASSES
Molasses is the black, thick syrup that’s left over when most of the sugar has been extracted from sugar cane or sugar beets. Although it still contains some sugar, I include a little for its pleasing bitter notes rather than sweetness. You buy it in jars from the same places as malt extract.
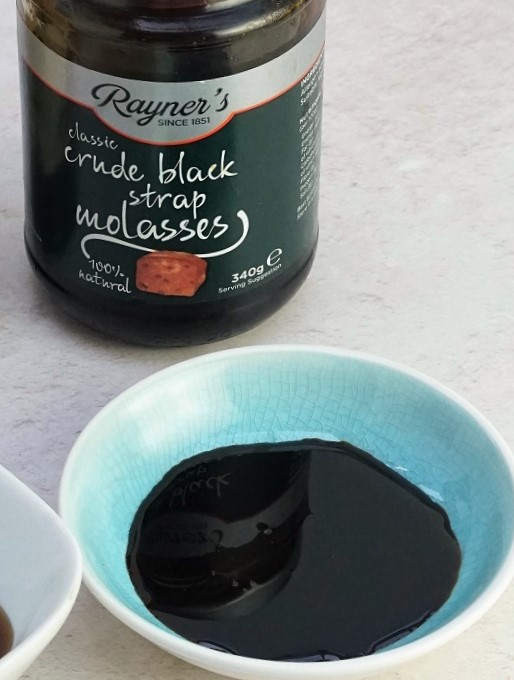
Because we’re only going to add a small amount, if you have treacle in the cupboard (the black one mind you, NOT the golden syrup used in modern treacle tarts) then you could use that instead. But, as with the Muscovado, if you’re shopping specifically for this recipe, go for the superior taste of molasses. Products labelled ‘treacle’ or ‘black treacle’ are usually molasses mixed with a cheaper sugar syrup.
READY TO BAKE? Jump to Recipe
WANT MORE TIPS AND STEP BY STEP IMAGES? READ ON.
EASY HOMEMADE MALT LOAF
Once you’ve gathered your ingredients, putting the Homemade Malt Loaf together goes incredibly quickly. It’ll probably take you well under 15 minutes.
Start by preheating your oven to 150 C / 130C Fan / Gas mark 2. Position a shelf in the middle.
My recipe makes one small malt loaf, similar in size to the shop bought ones. You’ll need a small loaf tin with a capacity of 450 ml or 1lb in old parlance, preferably non-stick.
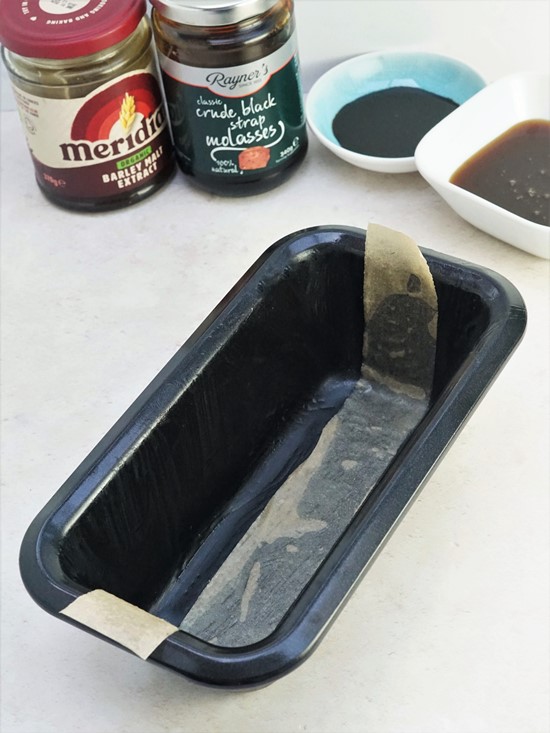
Although mine IS non-stick, I take a belt and braces approach. Not only do I grease the tin with a little extra butter, but I also put a thin strip of greaseproof or baking paper along the bottom. Make sure it’s long enough to come up above the short ends. This will help you remove the malt loaf later.
1. PLUMP UP THE RAISINS
Traditionally, the dried fruit in tea breads was soaked in cold black tea overnight. Previously, I’ve speeded this up by several hours by pouring over hot tea. But I’ve recently discovered a method that takes just minutes: microwaving.
Simply put the raisins and tea in a microwave-safe container, cover with cling film and poke a few holes through it. Microwave on full power for 2 minutes, then CAREFULLY (there will be lots of steam) peel away the cling film. Stir, then re-cover and microwave for another 2 minutes. Job done.

I strain the raisins through a sieve with a jug underneath to catch any soaking liquor that hasn’t been absorbed. This can be added to the batter later.
2. MIX THE DRY INGREDIENTS
Next, I sift the flours, baking powder if using, salt, and bicarbonate of soda into a mixing bowl. Then I toss in the plumped raisins so each one has a coating of flour. This should help keep them suspended in the rather wet batter instead of sinking to the bottom as it cooks.
3. HEAT THE WET INGREDIENTS
The easiest way to combine the malt extract, molasses, butter, and Muscovado sugar (which tends to clump together) is to heat them. I put them in a small saucepan over medium-low heat and stir just until the sugar dissolves, the butter melts, and I have a shiny, glossy confection.
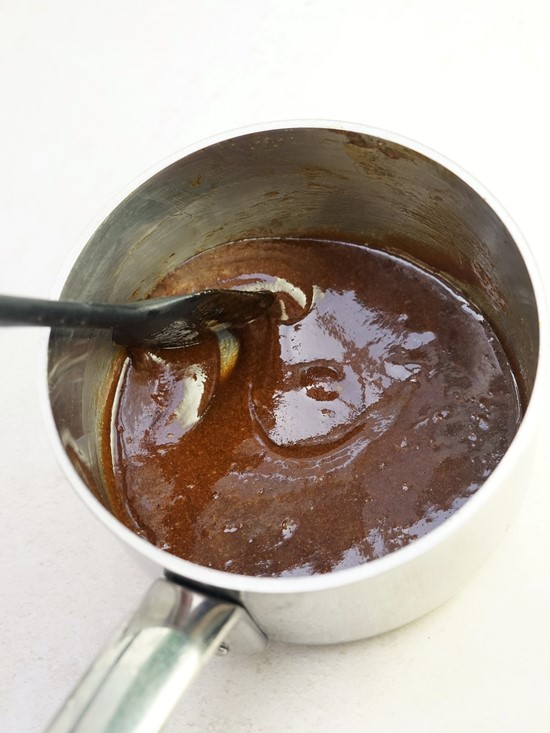
Don’t let it get too hot and start to bubble. Take off the heat as soon as everything’s smoothly blended.
4. COMBINE WET & DRY INGREDIENTS
All that’s left to do then is tip the contents of the saucepan into the flour mixture, crack in the egg, and tip in the reserved soaking liquor. Fold everything together well so there are no dry bits of flour visible.

Don’t worry if the batter looks very wet. It will be fine. Just pour into the prepared tin, smooth the top, then pop into the oven.

BAKING & COOLING
I made several versions of Homemade Malt Loaf before perfecting the final recipe, but every single one took exactly 50 minutes to bake. Obviously, ovens can vary though. I recommend checking after 30 minutes just in case it’s browning a little too quickly. Protect with a loose cap of foil if necessary.

Don’t expect the malt loaf to have a round top. Although mine always reaches the top of the tin, they’ve all been flattish – just like the shop bought ones. Also like those, it may sink a little – although only my first one did. But it will still taste good anyway.
As soon as it’s out of the oven, brush a generous amount of malt extract over the top of the loaf. Not only will this give an attractive shiny glaze but will also gradually seep inside to moisten and flavour the loaf further.

Leave it, still in the tin, until only just warm. Then you can lift out the malt loaf using the ends of the greaseproof paper strip and place it on a wire cooling rack. Gently remove the paper strip and leave until completely cold.

MATURING & SERVING HOMEMADE MALT LOAF
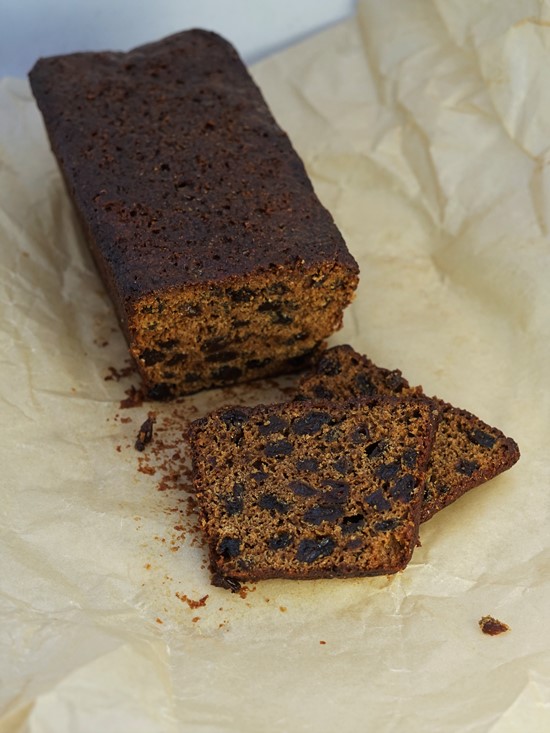
While you could eat the malt loaf as soon as it’s cold, I really hope you’ll leave it a few days to mature. Because the flavour, and that famous, sticky texture, really does develop and take this easy bake to the next level. I’d say 2 days minimum. But 3, 4, 5, even 6 or 7, is better. And if you really can’t wait that long, as soon as one malt loaf is out of the tin, you could get started on making another. Eat the first and mature the second!
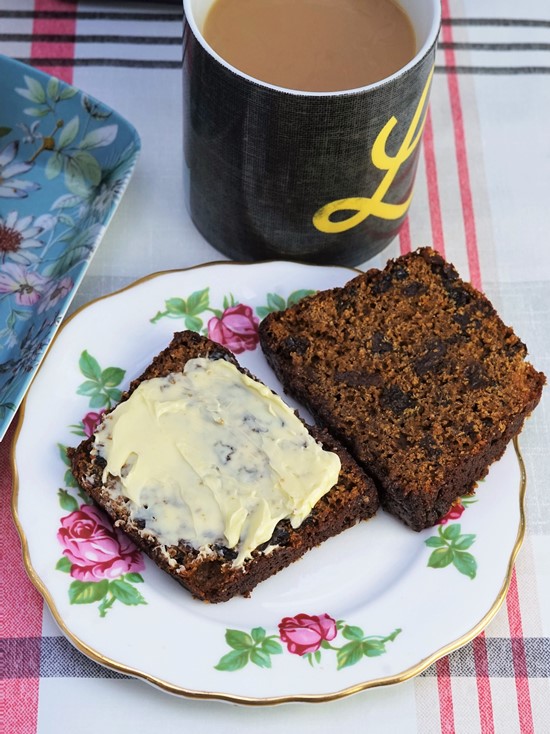
The malt loaf illustrated in this post was made on a Friday, unwrapped and cut into on Tuesday, i.e. on day 5. And it was fantastic.

Of course, we all know that after a few days, cake becomes unpleasantly dry. So it’s important to wrap your Homemade Malt Loaf really well. I first wrap it in baking or greaseproof paper. That’s followed by a sheet of foil. Finally, I put the whole thing in an airtight container and sit it in a dark corner of the kitchen. Then I see how long I can resist.

Once you’ve sliced into the malt loaf, so long as you double wrap again and return it to its container, leftovers will be good for several more days. I’ve even eaten carefully rewrapped malt loaf (first cut into on day 5) on day 9 and it still tasted good and fresh.
The only thing you need to serve with malt loaf, besides perhaps a cuppa, is plenty of butter. I always buy salted butter and love the contrast with the dark, fruity, malty cake.
HOMEMADE IS BEST
Great for a snack, as part of an afternoon tea, picnics or in lunchboxes, this British classic is sure to please.
Is my version exactly the same as those mass-produced packets? No. But I think that’s all to the good. Full of flavour, nicely gooey without being overly sticky or too sweet, I much prefer mine.

So easy to make, once you’ve sourced malt extract and molasses, I hope you’ll soon be enjoying your own Homemade Malt Loaf too.
Tried this recipe? Leave a comment below and don’t forget to rate it.
Homemade Malt Loaf
An easy homemade version of the favourite British teatime treat. Rich, dark and sticky, malt loaf is best matured for a few days before slicing and enjoying spread generously with butter.
Ingredients
- 180 g raisins or other dried fruit
- 100 ml hot strong black tea
- 85 g malt extract (plus extra for glaze) see Recipe Notes #1
- 15 g molasses see Recipe Notes #2
- 50 g muscovado sugar see Recipe Notes #3
- 15 g butter plus extra for greasing
- 65 g self raising white flour or plain flour + ¼ tsp baking powder
- 65 g self raising wholemeal flour or plain flour + ¼ tsp baking powder
- ¼ tsp bicarbonate of soda
- 1 large pinch salt
- 1 egg
Instructions
-
Preheat your oven to 150 C / 130C Fan / Gas 2.
Butter a 1lb/450g loaf tin (capacity appox 800ml) and put a strip of greaseproof or baking paper along the bottom, coming up approx 2cm above the short sides.
-
Plump up the raisins.
Put the raisins in a microwave safe container and pour over the hot black tea. Cover with cling film and poke a few holes in it with the tip of a knife.
Microwave on full power for 2 mins, CAREFULLY remove the cling film (there may be a lot of hot steam), stir, re-cover than microwave for another 2 minutes.
Strain the raisins through a sieve, keeping any liquid that drains out.
Alternatively, soak the raisins in the tea overnight and strain in the morning, or soak for a few hours in the hot tea before straining.
-
Mix the dry ingredients.
Sift the flours, baking powder if using, bicarbonate of soda and salt into a mixing bowl.
Toss the drained raisins into the flour mixture to coat them (this should help to suspend them in the batter rather than sinking to the bottom of the loaf).
-
Heat the wet ingredients.
Put the barley malt extract, molasses, muscovado sugar and butter in a small saucepan. Over medium-low heat stir until the sugar gently dissolves, the butter melts, and everything is well combined. Don't allow the mixture to bubble and take off the heat as soon as it's done.
-
Combine wet and dry ingredients.
Tip the contents of the saucepan into the flour and raisin mixture and crack in the egg.
Fold everything together until thoroughly combined, adding the reserved soaking liquor to create a wet batter.
-
Pour the batter into the prepared tin, smoothing the top.
Put into the preheated oven and bake for 50 minutes or until an inserted skewer comes out clean.
-
Add the glaze and cool.
Put the tin on a cooling rack and brush extra malt extract over the top of the malt loaf.
Leave to cool until just warm then remove from the tin, using the ends of the strip of baking paper to lift it onto the cooling rack. Remove the paper.
Leave until completely cold.
-
Maturing and serving.
Tightly wrap the loaf in a layer of greaseproof paper, then a layer of foil. Place in an airtight container to mature for 2 - 7 days before cutting into.
Serve sliced and spread with butter.
Re-wrap leftovers and return to the airtight container (I've eaten carefully rewrapped leftovers on day 9 and the loaf still tested good and fresh).
Note: the malt loaf CAN be eaten as soon as it's cold on day 1, but greatly improves in flavour and texture if left to mature.
Matured loaves can be frozen either sliced (wrap the individual slices well) or left whole.
Recipe Notes
Note #1 Malt Extract you'll find jars in health food shops and larger supermarkets.
Note #2 Molasses you can buy jars from the same places as malt extract above. You could substitute black treacle although this will have a less intense taste.
Note #3 Muscovado Sugar can be replaced with dark brown soft sugar if that's what you have, although Muscovado has a more complex flavour.
RELATED RECIPES


First time bake, looked just like the picture. Not sure how it was suppose to taste like but family really liked it.
I found it a bit dry, even after a few days well wrapped.
Many thanks for your feedback: so glad the family really liked it!
I’m sorry you found it a bit dry. It’s not I problem I’ve had with this recipe, so perhaps your oven runs a little hotter and cooking it a few minutes less might help?
Thanks will do that soon!
Another great recipe, second loaf in the oven.
Might try a dash of rum next time.
Thanks for the lovely feedback David. Rum sounds lovely – maybe even soak the raisins in it? 😋
rum or brandy soaked raisins will be my make. Will the recipe double up for a larger loaf tin?
Although I haven’t tried doubling up the recipe and cooking in a larger tin, there’s no reason why it wouldn’t work. You’ll just need to watch the timings – it will need longer but not twice as long. Maybe add another 20 minutes and see how it goes? If you do try doubling up, it would be great if you could come back and let me know how it went – I’m sure others would be interested too.
Love the sound of rum or brandy soaked raisins!