Nasturtium Capers
Nasturtium Capers, with their piquant flavour, are an easy homemade alternative to capers. In fact, they’re not related to capers at all. They’re simply the pickled seeds of a colourful and common garden plant.

Look among the leaves when your nasturtium plants have flowered, and you’ll find the peppery-tasting green seeds.
Pickle them for two to three weeks and you can use Nasturtium Capers just as you would true capers, but at a fraction of the cost.

Leave whole or chop and include in salads, eat with pasta, in sauces for fish, or in salsa verde.
Jump to Recipe
Thank goodness I’m not a tidy gardener. Because, if I was, then I might clear away my rambling nasturtium plants as soon as they finished flowering.
I grow most of them around the edges of my little vegetable garden as a sacrificial plant. In theory, this means they help to draw blackfly away from the nearby runner beans.
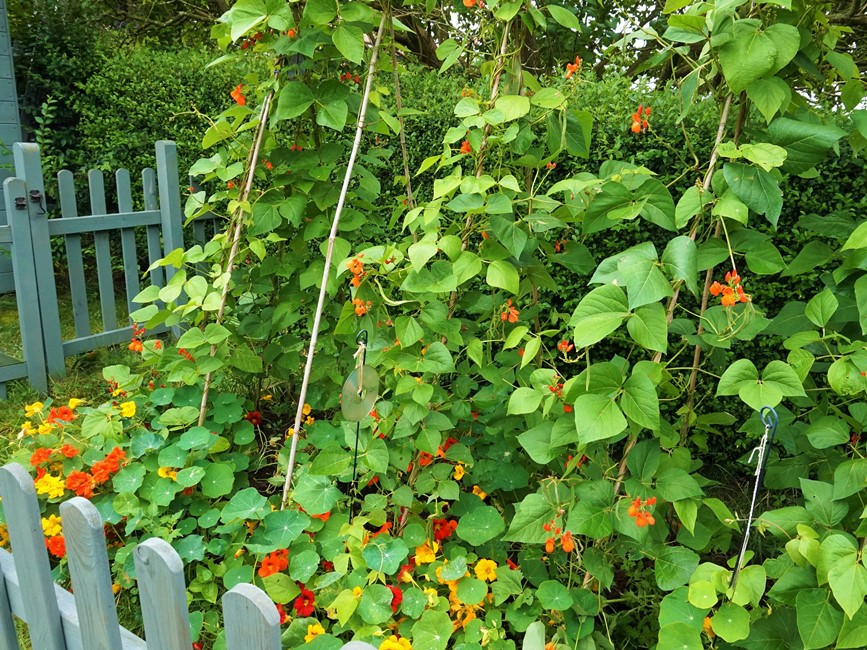
But I leave them long after most of the bright blooms have faded not just because I’m lazy. By leaving the nasturtiums in the ground, they’ll self seed. This means I get another crop the following year without having to plant more.
However, this year, I decided to use some of the seed in a little project I’d been meaning to try for a while. Making Nasturtium Capers.
EDIBLE NASTURTIUMS
I couldn’t imagine having a garden without nasturtiums. This annual plant is incredibly easy to grow. I love its profusion of bold colours and the way it meanders about.
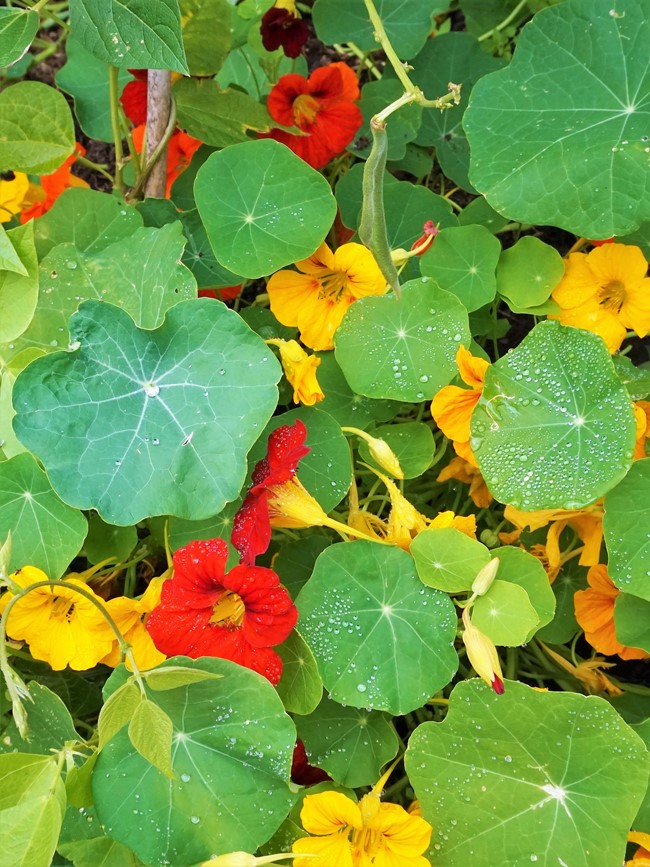
As well as drawing pests from other plants, they’re also great for attracting bees, butterflies, and other beneficial insects.
Besides the bee with its head in a nasturtium flower, can you spot the blurry, flying insect towards the bottom right in my photo below? A red damselfly, I think.

As if that wasn’t enough, every part of a nasturtium is edible. The leaves, the flowers and, as we’ll see, the seeds.
I must confess though, that I’m not the biggest fan of the flavour of the leaves and flowers. The ones I’ve tried in my garden are a little too pungent, although I’ve enjoyed smaller leaves I’ve eaten in restaurants.
But I was very happy to discover that brining then pickling the seeds mellows them beautifully.
NASTURTIUM CAPERS
In case you’re in any doubt, I should say that Nasturtium Capers are not actually capers. The capers you buy in jars (on the right in the image below) are the preserved flower buds of the caper plant.

However, nasturtium seeds, (on the left above) have a similar punchy flavour to capers. Eat one raw and you’ll find them quite spicy and peppery!
To start making Nasturtium Capers, try to gather the seeds on a dry day. Avoid any that look old, picking only the plump, green ones.
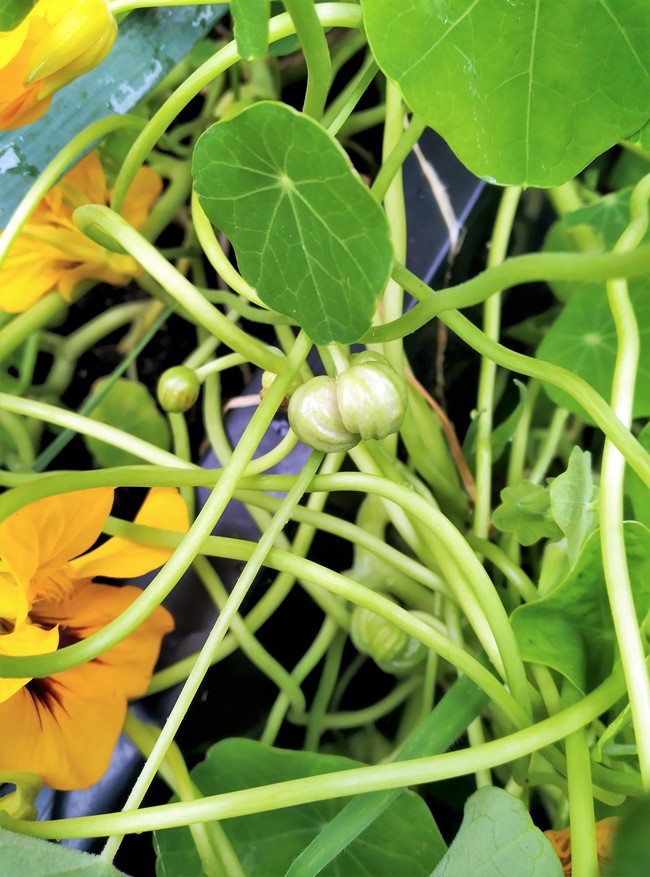
At first you may think there’s hardly any. But have a good ferret among the straggling leaves and you might be surprised how many you find.
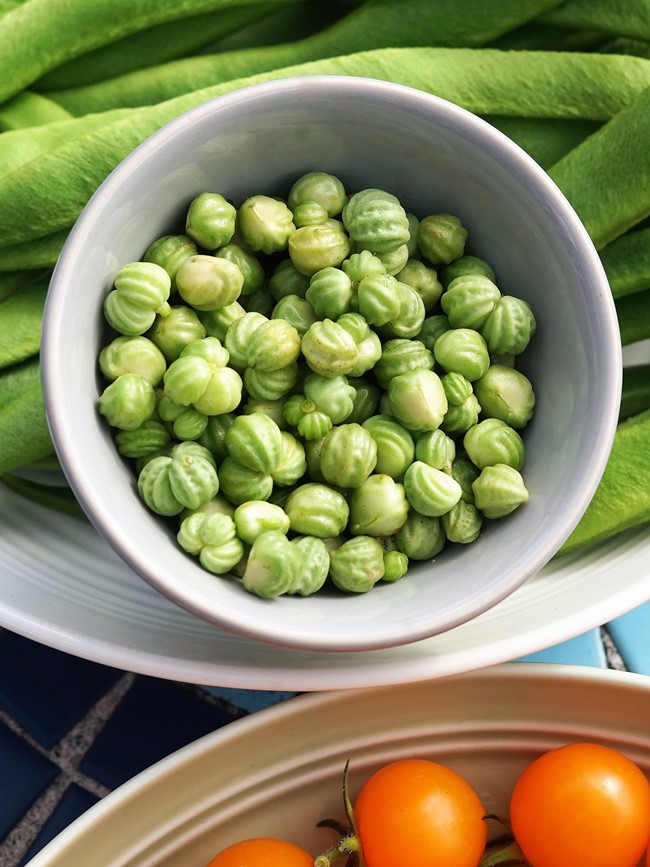
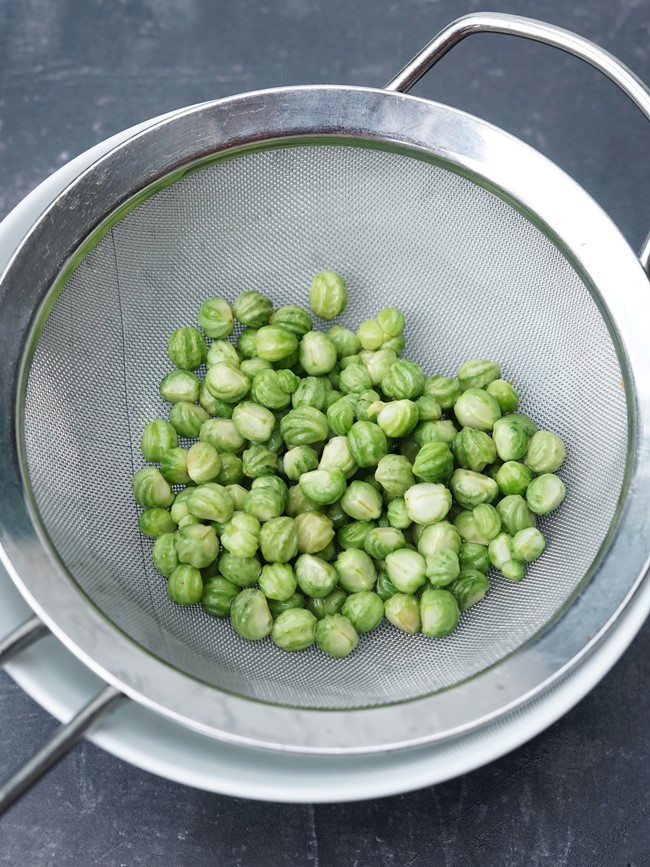
To fill one small jar, you’ll need somewhere between 80 and 100 grams of nasturtium seeds. They’re often clumped together in threes: just pull them apart.
BRINING & PICKLING
Being a newbie to this, I wasn’t sure I’d like very strong-tasting Nasturtium Capers. So, after picking the seeds I soaked them in a brine of salt and water, leaving them for 24 hours.
The next day, I packed the drained seeds into a sterilised jar.
It’s easy to sterilise jars in the oven. I tell you how to do it in the detailed instructions at the end of this post.

For the pickling liquor, you’ll need a mild vinegar such as white wine vinegar. Check the acidity level printed on the label. To prevent the growth of most harmful micro-organisms, it should have an acidity of at least five percent.
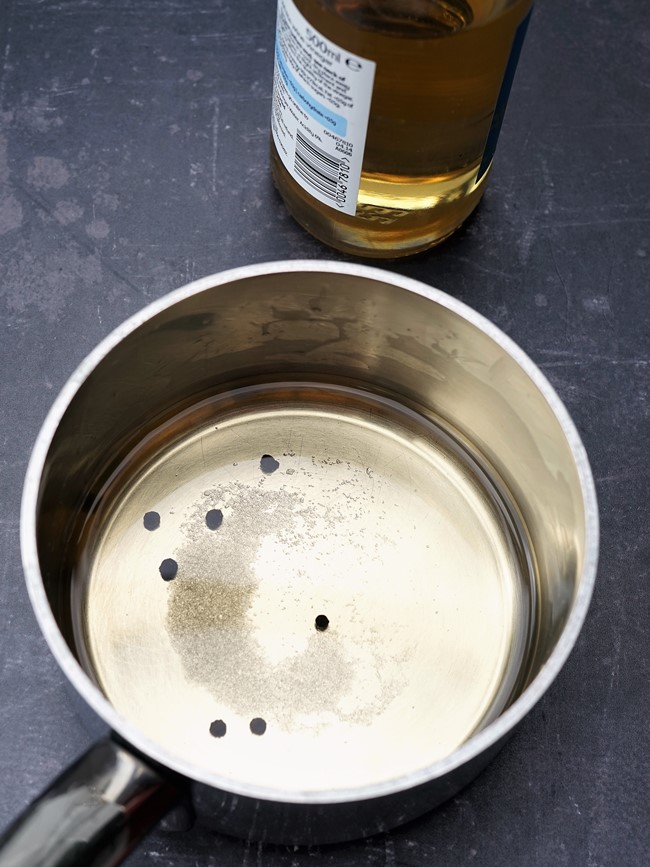
To mellow the vinegar, I included a little sugar and added a few peppercorns for flavour. If you like, you could add herbs too e.g. dill, parsley, or a bay leaf. I gently heated the vinegar just until the sugar dissolved.

The flavoured vinegar is then poured over the seeds and the lid put on.
STORING & USING
It’s usually recommended to leave Nasturtium Capers to mature for 2-3 weeks. As with most other preserves, they should be kept in a dark, preferably cool, place. I keep all my jams, chutneys, and pickles in a kitchen cupboard away from heat sources and they do fine there.
Busy with other things, mine ended up being left for nearly four weeks.

As you can see from the images, the ‘capers’ lost their bright green colour. But I was more than pleasantly surprised when I tasted them.
First I nibbled one and, against my expectations, quite liked it. Intrigued, I ate another one. And then another!
While the peppery, almost spicy flavour of nasturtium was still detectable, I found it had mellowed considerably.

The still-crunchy seeds did pack a punch, but nowhere near those of raw ones, or that of the leaves.
As you might expect, they didn’t taste exactly like capers. But, just as my homemade Dandelion Syrup could never be mistaken for honey, if you accept these on their own terms I think they’re a perfectly good substitute for capers.

Using seeds that many people would otherwise simply clear away at the end of the season, I think making Nasturtium Capers was s a really satisfying project.
And with the only other ingredients needed being a little vinegar and seasoning, what have you got to lose?
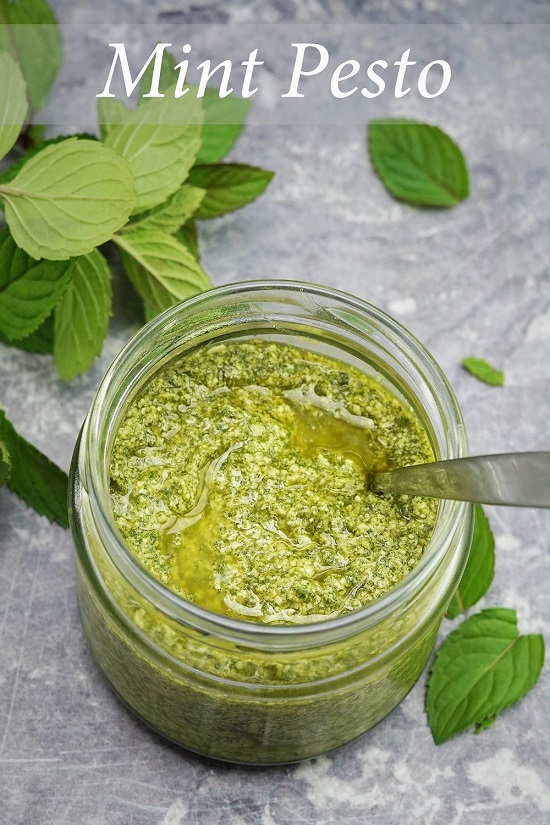
Some of my recipes where you can use them include: Tuna & Potato Salad, Tuna & Egg Salad, and Salsa Verde with Roasted Cauliflower. I think they’d be great in a tartar sauce with fish too.
HAVE YOU MADE THIS RECIPE?
LEAVE A COMMENT & DON’T FORGET TO RATE IT!

Nasturtium Capers
Nasturtium Capers are the pickled seeds of the popular and colourful garden plant. An easy, economical homemade alternative to true capers.
Ingredients
- 80-100 g freshly picked nasturtium seeds
- 3 tsp salt
- 300 ml water
- 200 ml white wine vinegar
- 0.5 tsp sugar
- 6 peppercorns optional
- a sprig of herbs or a bay leaf optional
Instructions
Day 1
-
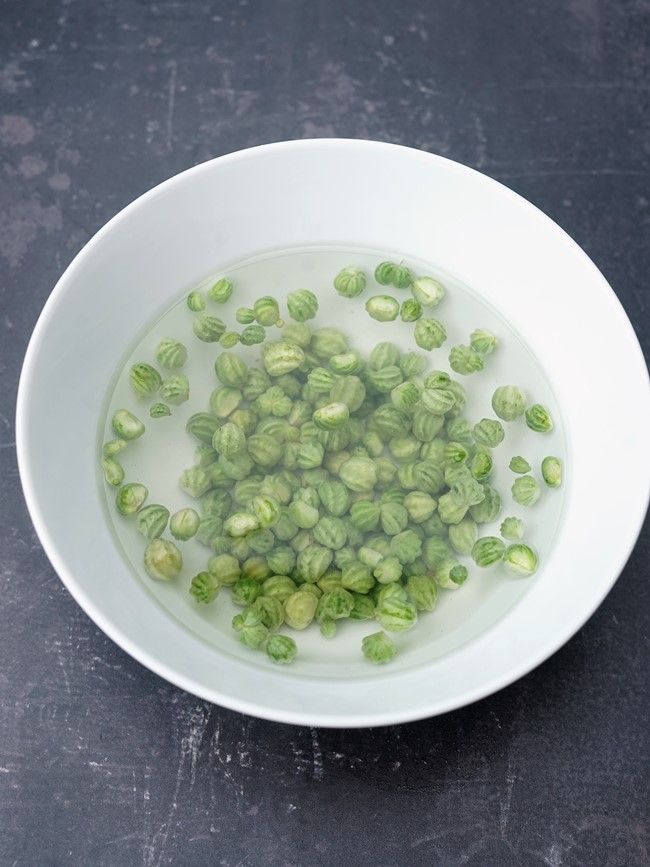
Put the nasturtium seeds into a bowl and more than cover with water. Scoop off and discard any bits of dead leaf or other matter that float to the top.
Rinse in a sieve under a cold running tap then leave to drain.
-
Put the salt into a bowl and pour in the water.
Stir to dissolve the salt then stir in the nasturtium seeds.
Soak for 24 hours.
Day 2
-
Sterilise a small jar:
Preheat your oven to its lowest setting.
Wash a small jar and and plastic-lined lid in hot, soapy water then rinse and leave to drain.
Put the jar and lid on a small baking tray in the oven and leave for 20 minutes.
Remove from the oven.
-
Drain the nasturtium seeds and dry on kitchen towel.
Pack them into the sterilised jar, leaving a gap approximately 1cm at the top.
-
Put the vinegar and sugar in a small saucepan along with the peppercorns and herbs if using.
Briefly heat to dissolve the sugar then take off the heat.
Pour the vinegar over the nasturtium seeds and put on the jar lid.
-
Store in a cool, dark place for 2-3 weeks before using as you would true capers: in salads, sauces, pasta etc.
Use within 12 months and store in the fridge once opened.
Recipe Notes
Recipe inspired by, among others, that in Pam Corbin's Preserves (River Cottage Handbook No.2).
ENJOYED THIS RECIPE? YOU MAY ALSO LIKE THESE

Is it normal to have a sulfury smell after the 24 hr salt soak or does that mean I did something wrong
Don’t worry, that mustardy smell is normal and will go after pickling!
I followed the directions and have stored them now for almost 1 year. They have preserved fine, but I have very crunchy nasturtium seeds, and I was aiming for softer ones, which I had last time I preserved some. I no longer have the previous recipe for my first batch, but I found them more versatile than the crunchy one.
Hi Kay, Thanks for trying my recipe. In the blog post, I do say that my pickled nasturtiums are crunchy. This is to be expected as they aren’t cooked at all.
To get softer ones, you should simmer in water until done to your liking then drain well before pickling.