Tamagoyaki Japanese Omelette
Tamagoyaki Japanese Omelette, with its layers of folded egg, may look difficult. But it’s actually easy once you know how.
Great for packed lunches and bento boxes, picnics, breakfast, or main meals, they make a tasty change from European-style omelettes.

Okay, you may not be able to achieve straight away the perfect, tightly rolled version like Japanese experts. But I think you can get impressive results on your first go. And it will still taste good.
For basic tamagoyaki all you need are eggs, soy sauce, mirin (Japanese rice wine), sugar, salt, plus oil for cooking.
Once you’re happy with that, add different flavours like spring onions, seaweed, cheese, or all kinds of cooked fish and meat.

Jump to Recipe
I think I first decided to make a Tamagoyaki Japanese Omelette after I bought the rather cute bento boxes used in this post.
Other half and I do like a picnic. But we had a rather ramshackle bunch of tubs, old sandwich boxes and cooler bags which really needed updating. So, for the coming picnic season, I bought two lovely new bento box sets.
It was these that got me thinking about traditional bento box items that I might like to have a go at making.
Eggs being one of my favourite foods (nutritious, versatile, tasty, and cheap), Tamagoyaki Japanese Omelette seemed like a good place to start.

Read my guide to picnicking, including food ideas and recipes, here
TAMAGOYAKI JAPANESE OMELETTE
Tamagoyaki is a type of omelette which is popular in Japan for breakfast, in bento boxes, as well as topping tamago nigiri sushi.
The first part of the name, tamago, simply means egg. The yaki ending is used for foods usually made by grilling, frying or roasting. I guess the most well-known of these in the West are teppanyaki and teriyaki.
What’s special about tamagoyaki omelette is that it is made up of several layers of cooked egg which are rolled together.

When sliced along its length, these layers are then attractively displayed.
From my research, authentic Tamagoyaki Japanese Omelette has a sweet as well savoury flavour. This is produced by flavouring the beaten eggs with rice wine, soy sauce, salt and sugar. Some versions include dashi stock.
MY TAMAGOYAKI-STYLE OMELETTE
I certainly don’t make any claims of authenticity for my tamagoyaki. But I do think my mirin and soy version (with optional nori seaweed) tastes and looks good.

A traditional tamagoyaki omelette is cooked in a special rectangular or square frying pan. These are available to buy online, but I use a regular, non-stick frying pan.
This does mean the ends aren’t so neat. But they can simply be cut off (and popped in your mouth, of course!).
I don’t like my eggs too sweet either. As I find mirin sweet enough, I leave out the additional sugar which is usually included.

For my Tamagoyaki Japanese Omelette, you start by mixing together soy sauce and mirin. Give it a taste before deciding whether you want to add any salt and sugar.
By the way, due to the inclusion of a fair bit of soy sauce in my version, the finished omelette won’t be the golden yellow of many tamagoyaki. If you want to achieve that, add only a little soy but season well with salt.
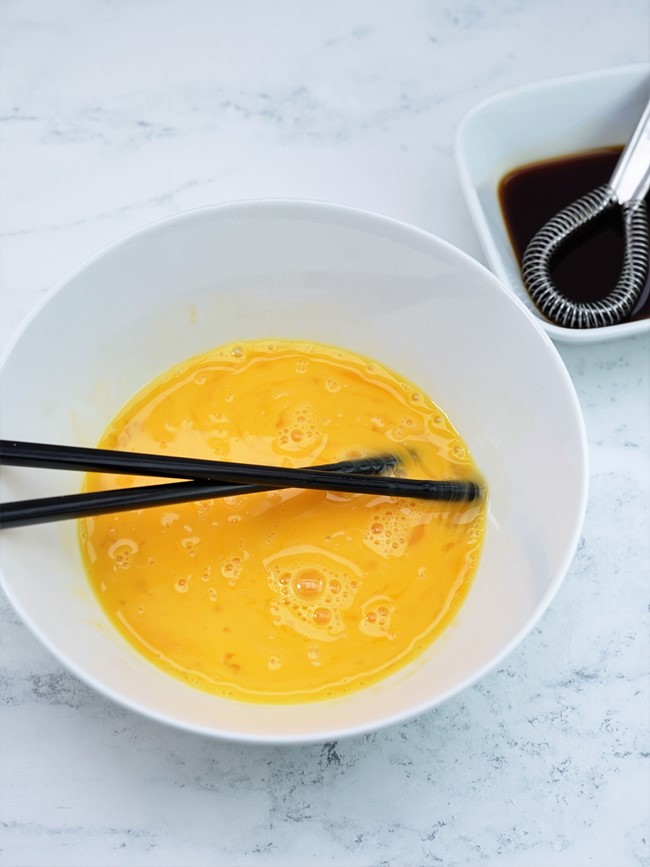
When you’re happy with the balance of sweet and savoury, combine the mixture with beaten eggs.
For an omelette to serve two people I use three or four large eggs, depending on what we’re having with it.

Now you’re ready to start building your Tamagoyaki Japanese Omelette!
Although the instructions in the recipe card look lengthy, this really isn’t difficult. After you’ve done it once, I doubt you’ll need to refer to them at all.
If you want to add seaweed or other flavourings to your omelette, I talk about that towards the end of the post.
CREATING THE LAYERS
To create the layers of tamagoyaki you make a series of omelettes, folding the previous ones inside the next.
Hopefully, the following images will help to explain.

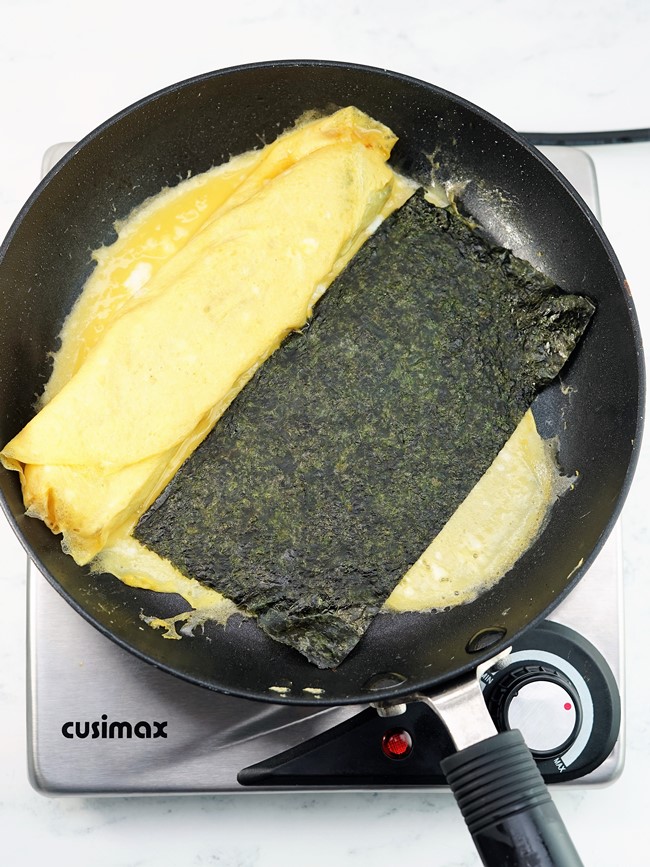
In the first photo in the set above, I heated a frying pan to medium and smeared a little oil in it. The easiest way to do this is with paper towel which you’ve dipped in a bowl of oil.
Then I poured in a thin layer of my egg mixture, just so it covered the bottom of the pan. When the underside was set, but the top still a little wet, I rolled up the omelette.
I oiled the pan again, making sure I went under the rolled omelette too, then poured in another layer of egg. Gently lifting the rolled omelette for a second or two, I tilted the pan so that the egg ran under it as well.
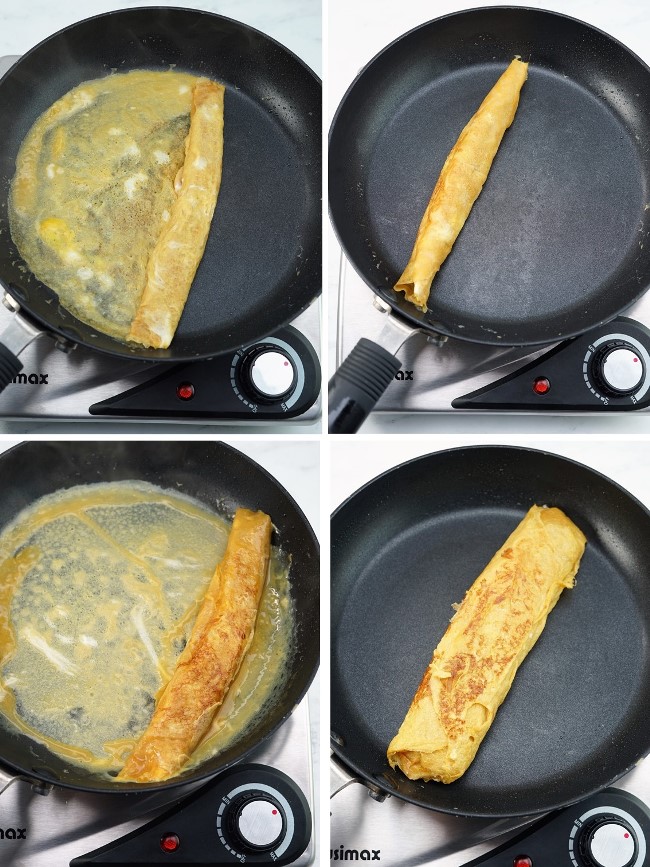
The next layer gets rolled up too, this time enclosing the first omelette.
After that, you just keep going until all the mixture is used up. Oil the pan, add a layer of egg, roll the whole thing up.
Tip: rolling up each omelette layer before the top is cooked will help the layers stick together.
Depending on how thinly you’ve made the layers, you should get between four and six layers from three or four eggs.
As you can see in the final image above, you’ll end up with a thick rolled omelette.
RESTING THE TAMAGOYAKI
Resting and cooling the tamagoyaki for five minutes, or leaving until completely cold, will make it easier to slice later.
Traditionally, this is done by tightly wrapping it in a sushi mat.

If you don’t have a sushi mat (I didn’t when I first started making tamagoyaki), you can roll it up in a clean tea towel lined with cling film.
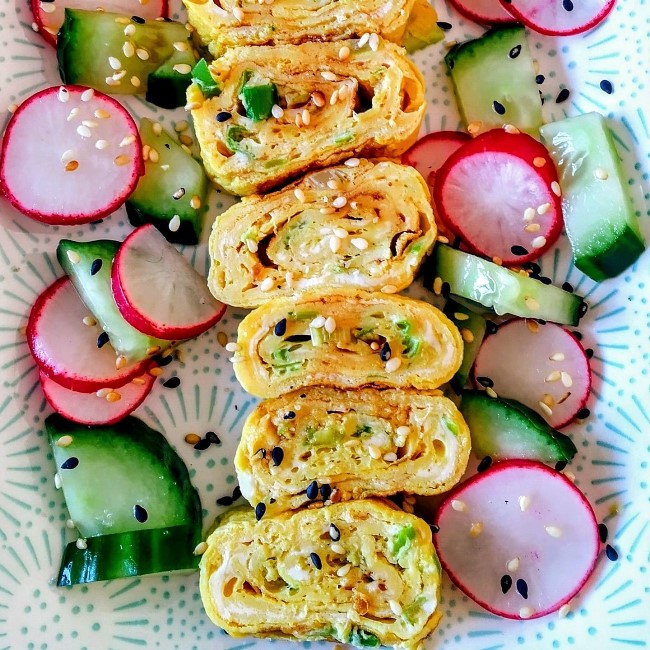
After unrolling, take a sharp knife and thickly slice the omelette.

Don’t worry if there are gaps between your layers, especially at the ends (like mine above!). This is to be expected, especially with a round pan, and should improve with practice.
You’ll probably also find that the layers of the central portion are closer together anyway.
IDEAS FOR FLAVOURINGS
I’ve shown you how to make the most basic tamagoyaki, but there are loads of different flavours you can add.
In this post, I’m sure you’ve noticed that some of my omelette slices have black lines.
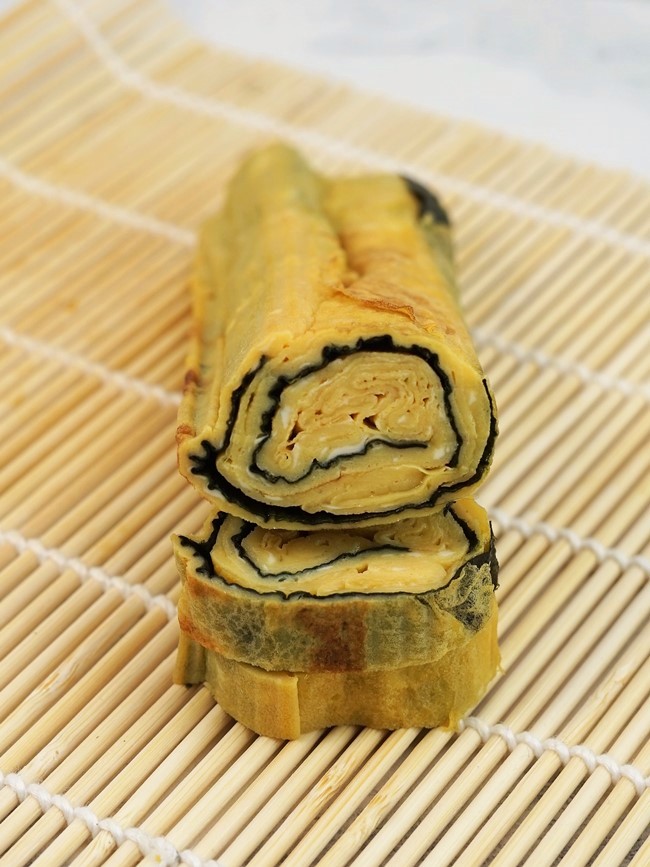
These are nori tamagoyaki.
To make it, simply add half sheets of dried nori seaweed between any of your omelette layers.
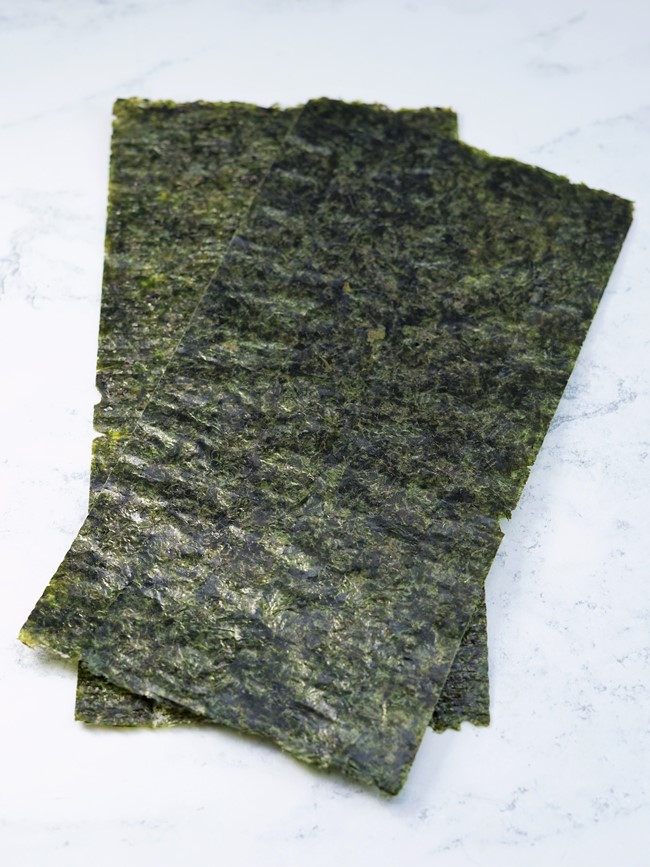
Because the nori is quite strongly flavoured, I find that two halves per omelette is sufficient.
Decide which layers you want to add it to and simply place them on just before rolling up.
Other ideas for fillings you can add between the layers include:
- grated cheese.
- finely chopped vegetables: either cook firm vegetables like carrots first or use leftovers.
- cooked meat or fish, finely chopped or flaked: e.g. leftover chicken, sausage, or ham, smoked salmon or smoked mackerel.
You can also add different flavours to the egg mixture:
- chopped herbs such as parsley, coriander, chives, wild garlic.
- finely chopped spring onions.
If you’re confident working with a more liquid egg mixture, try making dashimaki tamago. Here you mix pungent dashi stock (usually made with kombu seaweed and katsuobushi dried bonito flakes or shiitake mushrooms) into the eggs.
SERVING TAMAGOYAKI JAPANESE OMELETTE
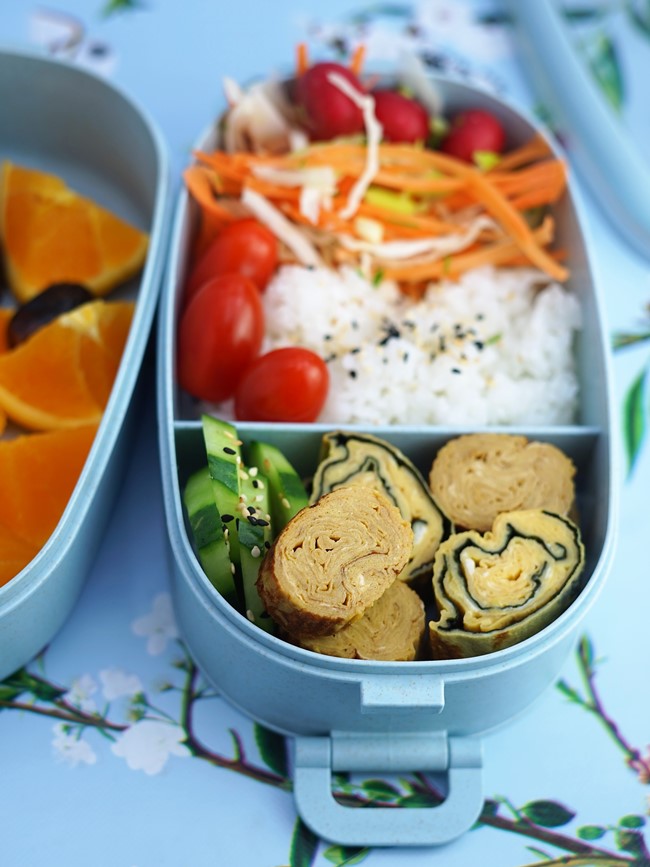
I think these pretty, flavoursome omelette slices are perfect for a packed lunch or picnic.
Set among a colourful selection of raw and cooked vegetables plus maybe some rice, who wouldn’t want to eat this?

But I think tamagoyaki work well in meals at home too.
Below, almost exactly the same ingredients as in the bento box made a hearty dinner. The only differences were a larger portion, I added smoked mackerel fillets, the rice is hot and flavoured with soy sauce.
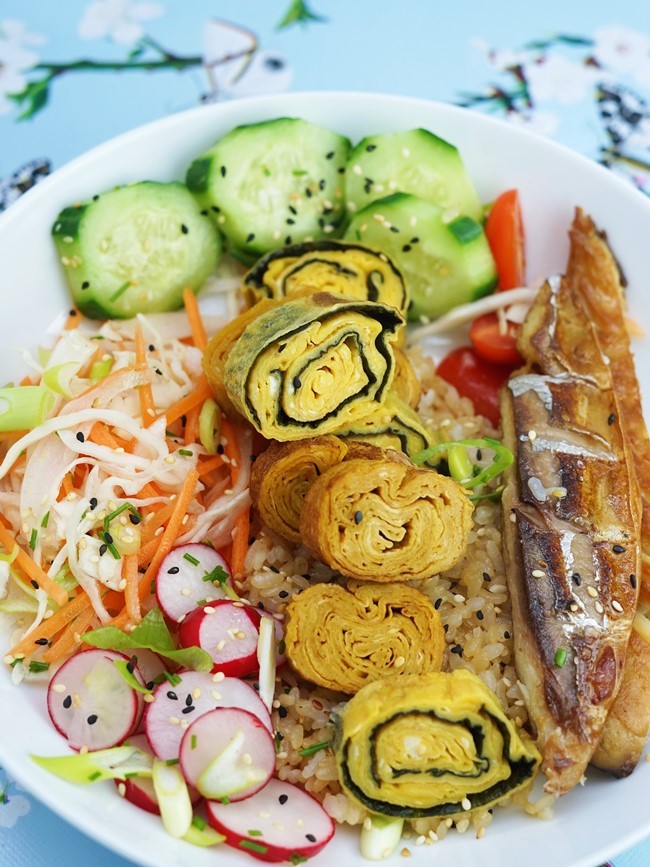
For the next bowl, I paired crispy pan-fried salmon, stir fried vegetables, brown rice, and quick-pickled vegetables with two types of tamagoyaki: spring onion and nori.

Because they stay good to eat for two days, you can also enjoy tamagoyaki for a quick breakfast if you make them the night before.
Or, of course, have them ready for your bento box and make work or school colleagues green with envy!

Have you made Tamagoyaki Japanese Omelette?
Leave a comment below and don’t forget to rate the recipe

Tamagoyaki Japanese Omelette
Made with layers of folded egg and your chosen flavourings, this Japanese style omelette is great for packed lunches and bento boxes, picnics, breakfast or main meals.
Ingredients
- 1 tbsp soy sauce use less for a more golden coloured result
- 1 tbsp mirin (Japanese rice wine)
- 1 pinch salt optional
- 1 pinch sugar optional
- 3 or 4 eggs
- 2 tbsp cooking oil e.g. groundnut, sunflower
- 2 half nori sheets optional: see Recipe Notes for more fillings
Instructions
-
In a small bowl, stir together the soy sauce and mirin, or use a small whisk.
Taste and add a pinch of salt and/or sugar if liked stir or whisk again until dissolved.
Set aside.
-
Crack the eggs into another bowl and lightly beat together.
Whisk the soy/mirin mixture into the eggs then transfer to a jug for easier pouring.
-
Put the cooking oil in a small bowl and have ready a piece of folded kitchen towel.
-
Put a non-stick pan (with a base approx 20cm in diameter) over medium heat.
-
Dip one end of the folded kitchen towel into the oil and smear a small amount over the base of the pan.
When you hear the oil sizzle, pour in just enough of the eggs to thinly cover the base of the pan: tilt the pan so the egg runs all over it.
-
When the base of the omelette is just set, but the top still a little uncooked, use a spatula to roll it up. Leave it on one side of the pan.
-
Dip the kitchen towel in the oil again and smear it over the pan: make sure to lift up the rolled omelette and smear underneath it too.
-
Pour another thin layer of egg and swirl it to cover the pan again: lift up the rolled omelette so that some of the egg runs underneath.
-
As before, roll up the omelette but this time enclose the first rolled layer inside the second.
See step below if using the optional nori sheets.
-
Continue making layers of omelette and rolling them up until all the egg mixture has gone.
The mixture should make 5-6 layers depending on how thickly you made them.
If using the optional nori sheets: place one on top of the first or second layer before rolling up and one after the third or fourth layer before rolling up.
-
If you want a browned exterior, turn the omelette in the pan for a few seconds.
Transfer to either a sushi mat or cling film lined towel before rolling up as tightly as you can.
-
Rest for 5 minutes or until completely cold.
Slice and serve or refrigerate for up to 2 days.
Recipe Notes
Other flavourings to add to your tamagoyaki:
- mix 2 very finely chopped spring onions into the raw eggs.
- add a handful of chopped herbs such as parsley, coriander or chives to the eggs
- grated cheese: sprinkle a little on each layer before rolling up.
- vegetables: either cook firm vegetables like carrots first, or use leftovers. Chop them small and add to the raw eggs.
- cooked meat or fish added to the eggs or sprinkled between the layers: e.g. leftover chicken, sausage, or ham, smoked salmon or smoked mackerel.
Like this recipe? Try Chinese-inspired omelette Egg Foo Yung
