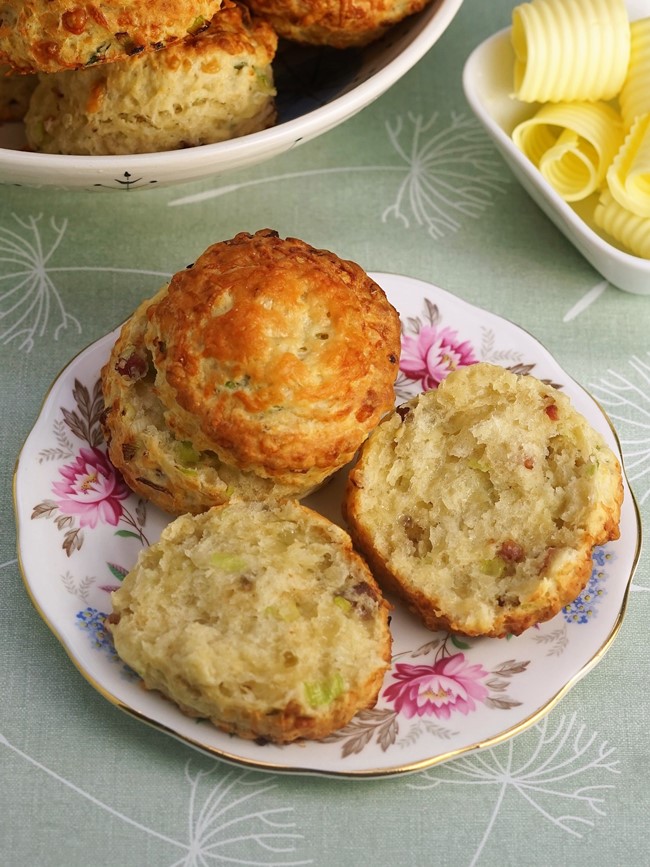
Cheese, Smoky Bacon & Spring Onion Scones
Cheese, Smoky Bacon & Spring Onion Scones take the classic cheese scone to a new level. Light and fluffy, they have a generous amount of cheese plus nuggets of smoky bacon and savoury spring onion flavour.
Eat warm with butter as a snack, for afternoon tea, or alongside soups and salad. So quick and easy to prepare, Cheese, Smoky Bacon & Spring Onion Scones freeze and reheat well, making them perfect to enjoy at any time.

Jump to Recipe
I really can’t get enough of cheese scones. Light, fluffy and oh-so-cheesy, they’re the perfect savoury snack. Homemade cheese scones, miles better than shop-bought, are incredibly easy too.

And, judging by the popularity of my Very Cheesy Cheese Scones, lots of you agree!
But since I created my original cheese scone recipe, I’ve made several variations on it. Ones I’ve added to the blog include Roasted Pepper, Salami & Cheese Scones and Cheese & Ham Scones with Wild Garlic.
Which brings me to their latest incarnation.
Seriously tasty Cheese, Smoky Bacon & Spring Onion Scones.
CHEESE, SMOKY BACON & SPRING ONION SCONES
Confession time.
I’ve actually been quite tardy in posting this recipe. Because I created Cheese, Smoky Bacon & Spring Onion Scones exactly a year ago during Christmas 2020.

Remembering how good it was to have the smoky, cheesy scones tucked away in the freezer, ready for a savoury snack during the holidays, I think now is time to get the easy recipe out there.
Of course, if you’re reading this at any other time of year, the scones will be just as good!
EASY CHEESE SCONES
Even if you’ve never made savoury or sweet scones before (see my Classic Sultana Scones for the latter), I think you’ll find this recipe pretty easy.
I’ve given full instructions in the detailed recipe card at the end of the post so, if you’re ready to start, you can Jump to Recipe here.
If you want a bit more background plus step-by-step images of how to make these ultra-savoury, light and fluffy scones then read on.

CHEESE, SMOKY BACON & SPRING ONION
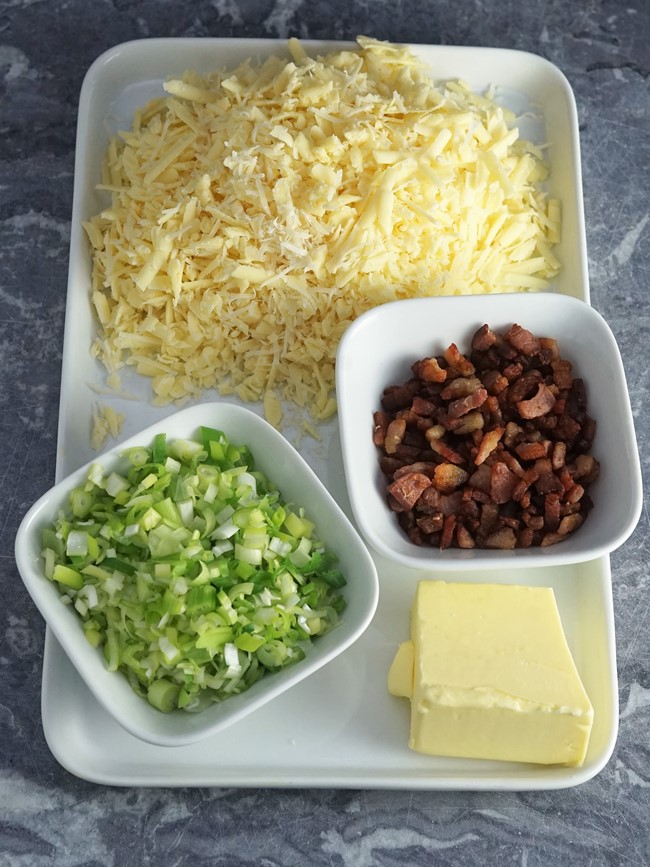
My preference for the cheese in cheese scones is a mature Cheddar. I like its flavour as well as melting texture.
But, depending on what I have in the fridge, I’ll sometimes substitute in a little gruyere or Parmesan.
The amount of cheese may seem a lot (250 grams for 12-14 scones) but it really is necessary for a very cheesy scone.
On the other hand, 60 grams of butter may seem stingy. But remember we’re also adding fat via the cheese and bacon. Not forgetting slathering more on when it comes to eating the scones of course!
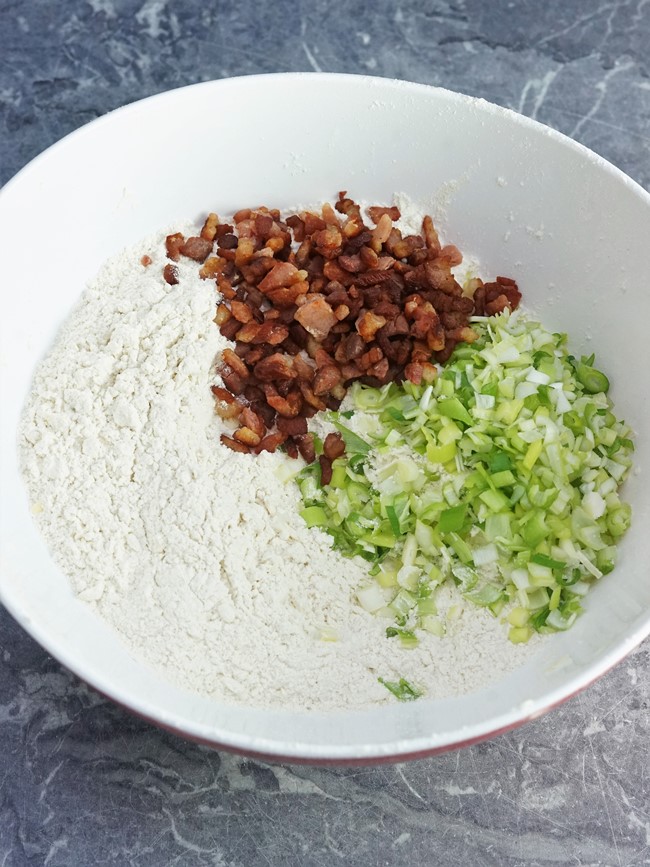
I use a good quality, local free-range smoked streaky bacon from Denstone Hall Farm Shop. You don’t need very much to give great flavour to the scones. I snip it up with scissors then cook in a little olive oil until starting to crisp.
Around six spring onions, finely chopped, add some freshness and extra savouriness.
MAKING THE DOUGH & ROLLING OUT
Making the scone mixture is dead simple.
Start by sifting together self-raising flour, baking powder and salt. Although the flour already has raising agents included, the baking powder will give extra oomph and rise.
You then rub in the butter before stirring in the cheese (reserving a little for sprinkling later), plus the bacon and spring onion.
You then have a choice of which liquid to use to bring the dough together.
These days I tend to use my Homemade Yogurt, sometimes thinned with whole milk.
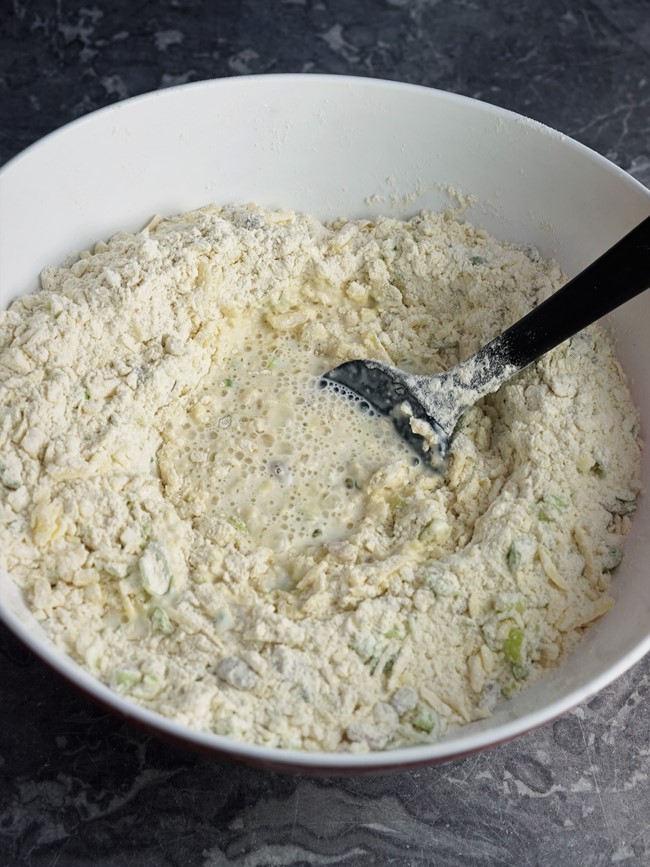
But you could use all milk, yogurt, buttermilk or a combination of these. If you strain yogurt to make Greek style yogurt or Labneh yogurt cheese, then even the leftover whey could be used.
Different flours absorb different amounts of liquid so it’s hard to be exact as to how much you’ll need to form a soft but not wet dough.

In the recipe card, I suggest you start with the lower amount and add more as necessary. You’re then ready to roll out the dough and stamp out the scones.
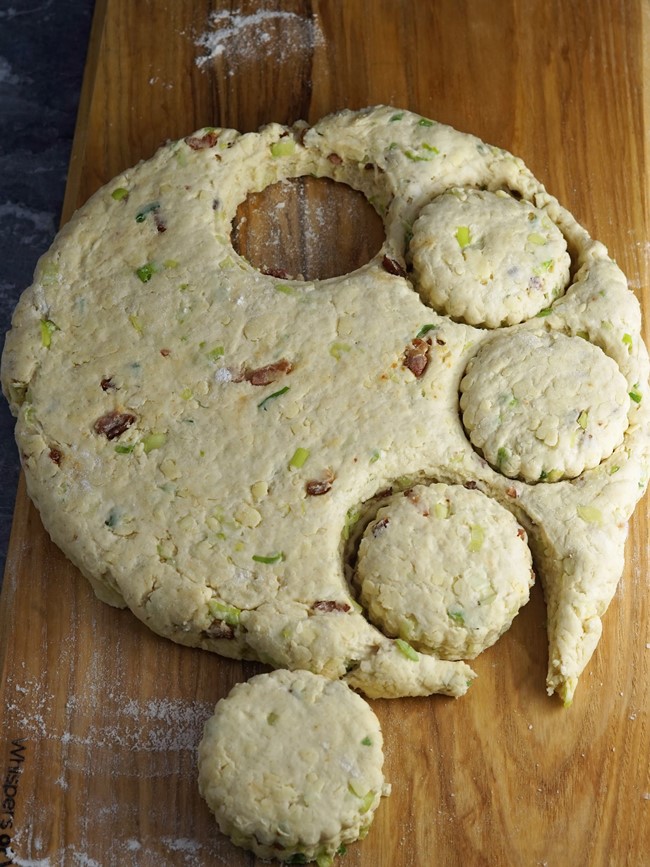
For a nice tall scone, roll out the dough no thinner than 2.5 – 3 cm. Stamp out scones then re-roll the scraps to make more until all the dough is used up.

Using a 6 – 7 cm cutter, this should give you 12- 14 Cheese, Smoky Bacon & Spring Onion Scones. As you stamp them out, transfer to a baking tray either greased with extra butter or lined with baking paper.
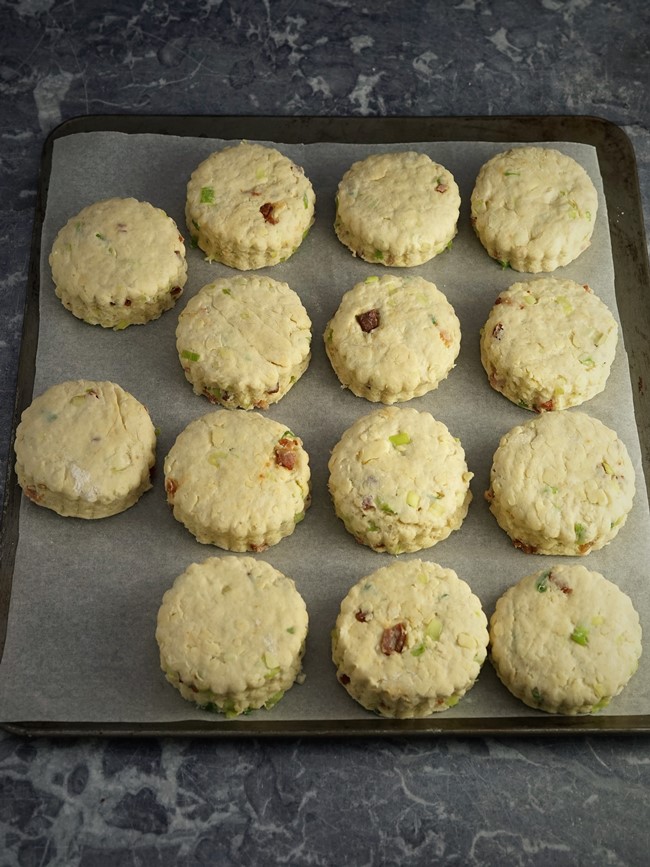
I brush the tops of the scones with a little extra yogurt and/or milk before scattering over the reserved finely grated cheese.

Then it’s into a preheated oven where the scones with take just 13-15 minutes to become risen, golden and terribly tempting.

SERVING & STORING
Although with the heady cheesy, smoky bacon aroma rising, it’s tempting to get eating straight away, the scones will benefit from a few minutes cooling. During this time the outside will firm up a little, but the inside will remain soft and fluffy.

To retain that lovely interior texture, did you know that you should pull apart a warm scone rather than cutting with a knife?
Even more so than with a regular cheese scone, I must first have a sniff and enjoy the additional pleasure of smoky bacon and savoury onion.
Obligatory is plenty of butter for everyone to help themselves and slather on generously. Like all scones, these are best eaten with a day or two but will freeze very successfully.

Store in an airtight container or freeze once completely cold. A few seconds in the microwave or a few minutes in a low oven will be enough to warm them through again.
Light and fluffy, full of cheesy, bacony, oniony flavour, I think you’ll love Cheese, Smoky Bacon & Spring Onion Scones.
Made this recipe? Rate and comment below.

Cheese, Smoky Bacon & Spring Onion Scones
Light and fluffy, these easy scones have a generous amount of cheese plus nuggets of smoky bacon and savoury spring onion flavour. Serve warm, split and spread with butter.
Ingredients
- 1 scant tsp olive oil
- 150 g smoked streaky bacon cut into small pieces
- 450 g self raising flour plus extra for rolling
- 2 level tsp baking powder
- ½ tsp salt
- 60 g butter
- 250 g well flavoured cheese e.g. mature Cheddar
- 6 spring onions finely chopped
- 220-300 ml plain yogurt, milk, or buttermilk or a mixture of these
Instructions
-
Put the olive oil in a frying pan over medium-high heat.
Add the chopped bacon and cook until just starting to crisp.
Transfer the bacon to a plate lined with kitchen paper and set aside.
-
Preheat the oven to 200C/180C Fan/Gas 6.
Grease or line one large or two smaller baking trays.
Grate 220g of the cheese coarsely. Grate the remaining 30g finely and keep separate.
-
Sift together the flour, baking powder and salt into a large mixing bowl.
Grate in the butter (dip the butter into the flour now and then to stop it sticking) then rub it in using your fingertips.
-
Stir in the cooked bacon, the chopped spring onions, plus the 220g of coarsely grated cheese.
-
Stir in 220ml of the yogurt, milk or buttermilk and start to bring together: add more liquid as needed to create a soft but not wet dough.
-
On a floured surface, briefly knead the dough into a ball then roll out 2½ - 3 cm thick.
Using a 6-7 cm cutter stamp out scones and place them on the prepared baking tray(s). Re-roll the scraps to make more until all the dough is used up.
-
Brush a little milk, yogurt or buttermilk over the tops of the scones.
Sprinkle with the reserved 30g of finely grated cheese.
-
Place in the pre-heated oven and bake until risen and golden (13-15 min).
Transfer to a wire rack to cool for a few minutes.
-
Serve warm, split and spread with butter.
Tip: pull apart rather than cut to retain the light and fluffy texture.
Best eaten within 2 days of baking or can be frozen when cold.
Reheat in a low oven or the microwave.
RELATED RECIPES