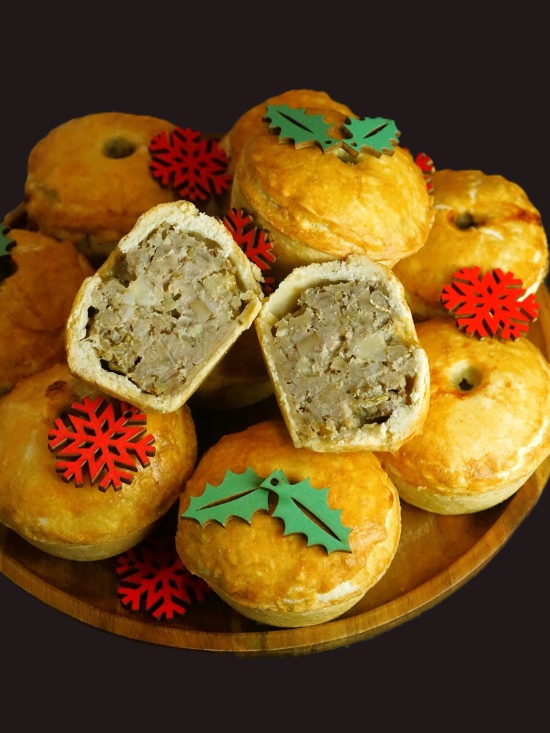
Christmas Sausage Pies
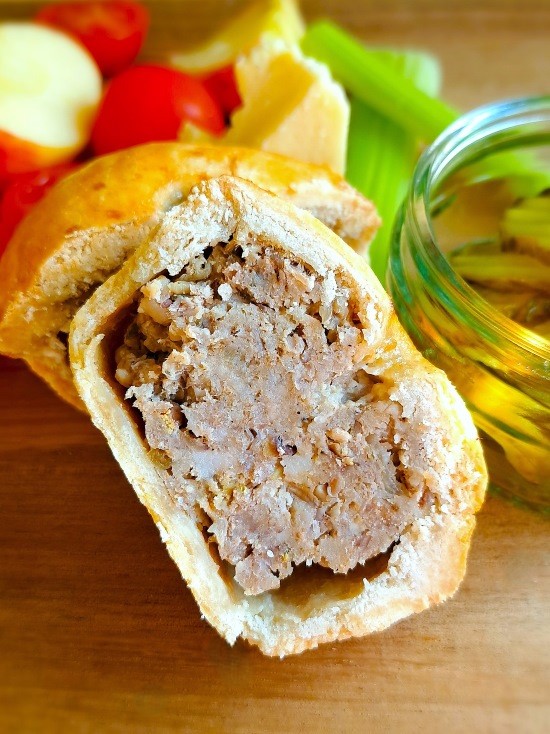
Christmas Sausage Pies are individual cold pies of crisp shortcrust pastry filled with delicious herby sausage meat, onions, and chestnuts. Cooked in a 12-hole deep muffin/bun tin, these easy pies are perfect for your Christmas parties and buffets. Also brilliant all year round as a snack, part of a salad meal, picnic, or for lunch boxes.
Disclosure: this post may contain affiliate links. If you buy via my links, I may earn a small commission at no extra cost to you.
Jump to Recipe
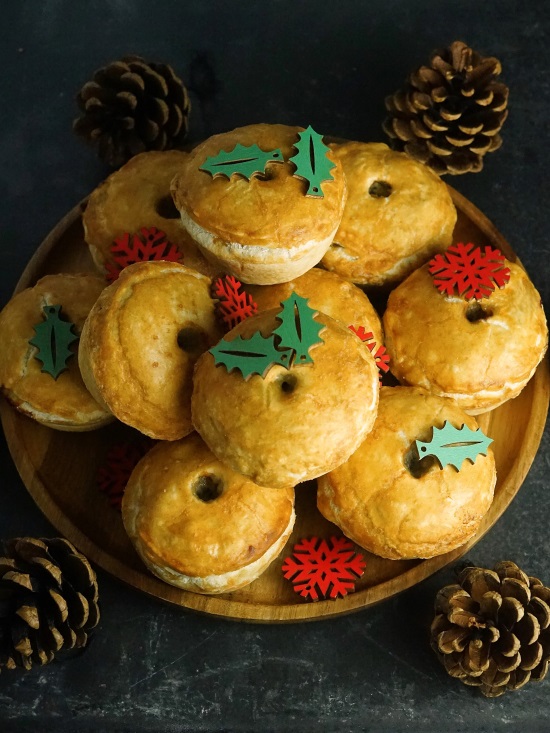
Here in Britain, we have a great tradition of cold pies. Most famously there’s the pork pie which often makes an appearance at Christmas gatherings and buffets. But I think the pies I’m sharing today are much easier for home cooks to make.
Instead of the hot water crust of traditional pork pies, there’s a simple shortcrust pastry. Inside, rather than cuts of pork, the filling is based on well-seasoned sausage meat. This is given an intensely savoury flavour with browned onions and garlic, thyme, sage, fennel seeds, and plenty of black pepper. Giving a little earthiness and texture are those most Christmassy of nuts: chestnuts.
You’ll find ingredient amounts and full instructions in the recipe card at the end. But I recommend you read on for extra tips and step-by-step photos to guide you.
CHRISTMAS SAUSAGE PIES
To make my individual Christmas Sausage Pies you’ll need a deep 12-hole deep muffin/bun tin. These make a lovely generous portion, or you can cut them into halves or quarters for a buffet.

There are just a few easy steps to making my Christmas Sausage Pies. 1. Make the pastry and chill it. 2. Make the filling. 3. Assemble the pies. 4. Bake and cool.
EASY HOMEMADE SHORTCRUST PASTRY
A simple, crisp shortcrust pastry really is quick to achieve at home. I use a food processor but it honestly doesn’t take that much longer by hand. In the recipe card I’ve given instructions for both.
For my Christmas Sausage Pies, I use half lard and half butter. I think this gives the best combination of crispness and flavour. But you could replace the lard with more butter if preferred.
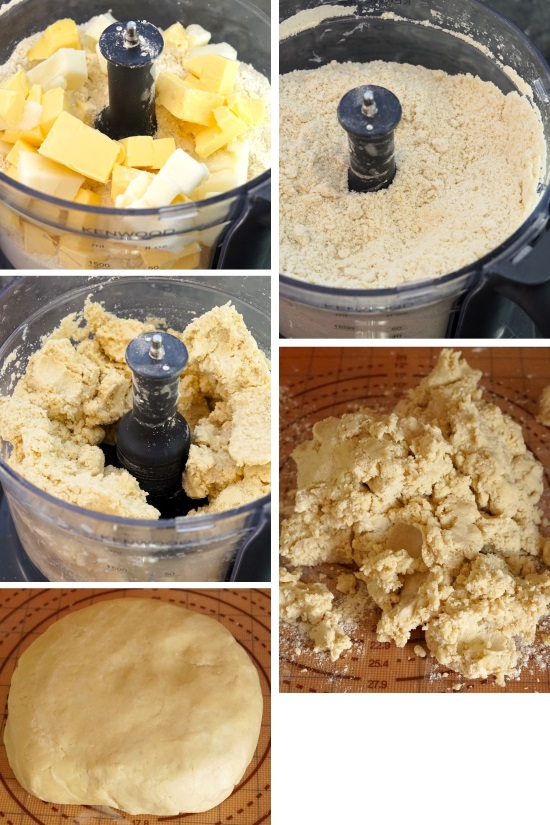
Whether you make by hand or in the processor, the principle is the same. Mix the cold fat into plain white flour seasoned with a little salt. Then you gradually add just enough ice-cold water until a dough starts to form. To bring it together into a smooth ball, you very gently and briefly knead it.
So you can easily roll out the dough, you’ll need to chill it in the fridge until firm. Allow at least thirty minutes for this. But you can make the dough up to a day in advance if you prefer. Or could freeze it.
MAKE THE FILLING FOR CHRISTMAS SAUSAGE PIES
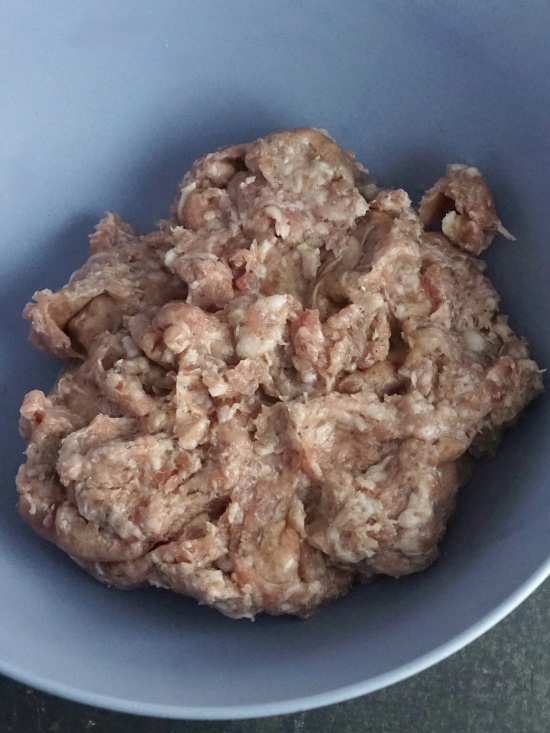
The most important ingredient for the filling is, of course, the pork sausage meat. Try to get the best quality you can. A poor-quality product will not only contain more fillers and additives but is likely to have lots of fat that will leak out and make your pastry soggy. Ideally, look for a meat content of 80 – 90 per cent. If you don’t have sausage meat, then use good quality sausages with their skins discarded.
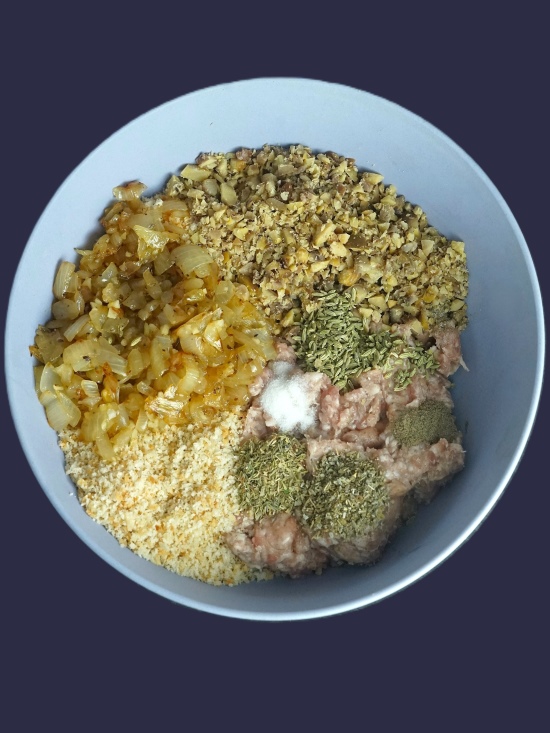
For plenty of savoury flavour with an edge of sweetness, we brown chopped onion in olive oil and butter, with garlic added for the final few minutes. Once that’s cool, we mix it into the rest of the filling ingredients. Chopped cooked chestnuts (I buy the vacuum-packed ones), breadcrumbs, dried sage and dried thyme, plus one of my favourite spices that’s wonderful with pork: fennel seeds. Add a little salt plus a generous amount of black pepper then stir everything together very well.
To make sure the filling is absolutely delicious, please don’t skip the next step! Take a small piece and roll into a ball. Wipe out the frying pan and add a little fresh oil. Now cook the sample of filling, leave to cool, then taste it. Adjust the pie filling as necessary by adding add more salt, pepper, or herbs.
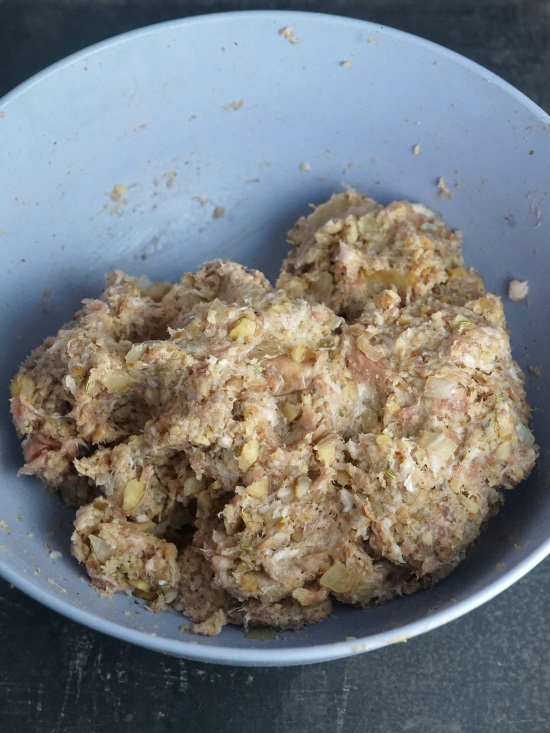
When you’re happy with the filling, you can preheat your oven to the temperature shown in the recipe card while you assemble the pies.
ASSEMBLE CHRISTMAS SAUSAGE PIES
Although the images below show assembling 6 pies, the recipe makes 12.
You’ll need to roll out the dough thinly (approximately 2 mm) and cut out 12 circles for the pie bases plus 12 smaller ones for the lids. The bases must be large enough to come up the sides of the holes in the muffin/bun tin. The exact diameter will depend on the size of your tin. For my deep tin, I made my bases 11 cm in diameter and the lids 8 cm. I didn’t have a cutter large enough for the bases, so used the lid from a round plastic container. To get all 24 circles, you’ll need to gather the scraps and re-roll them.
Place the 12 larger circles in the holes, gently pressing down so they sit on the bottom and come up the sides. Neaten the top edge by pressing down and smoothing with your fingers. Divide the filling into 12 pieces (I use scales for accuracy) and roll into a ball. Put one in each pastry case and press down to level it.
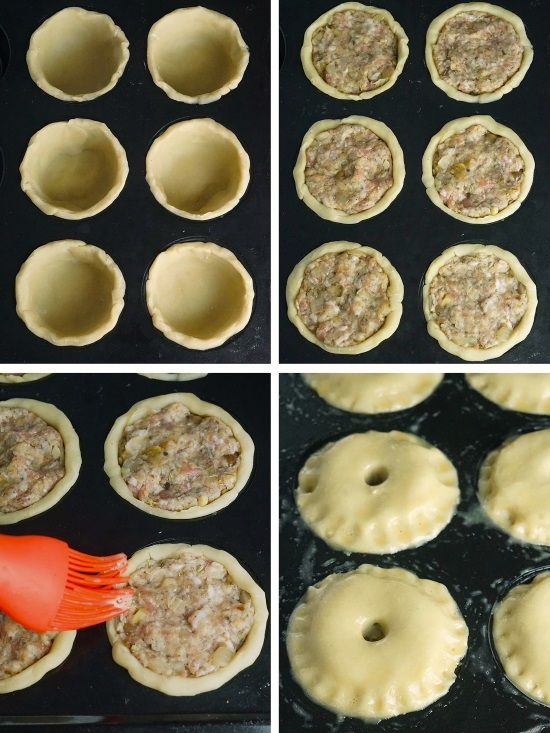
Now brush beaten egg all around the edge of each pastry case and put one of the smaller circles on top as a lid. Press down all around to seal. To make a pattern, you could use the end of a wooden spoon or the tines of a fork to press all around the edge. Dip the spoon or fork into flour now and then if you find it sticks.
The pies are now ready to bake. However, you can chill them if that’s more convenient. Thirty minutes or so in the fridge also means the pastry is less likely to shrink and any pattern you made around the edges is more likely to remain after baking.
BAKING & STORING CHRISTMAS SAUSAGE PIES
Before putting in your preheated oven, brush the pies generously with more beaten egg. Then make a hole in the top of each one for the steam to come out. I use the end of a wooden spoon.
Bake for 40 minutes or until the pastry is deeply golden and the filling piping hot. If you have a food thermometer, the middle needs to reach 65°C (150°F). At the halfway point, I like to brush on another layer of the egg glaze, taking the opportunity to also turn the tray around for even baking.
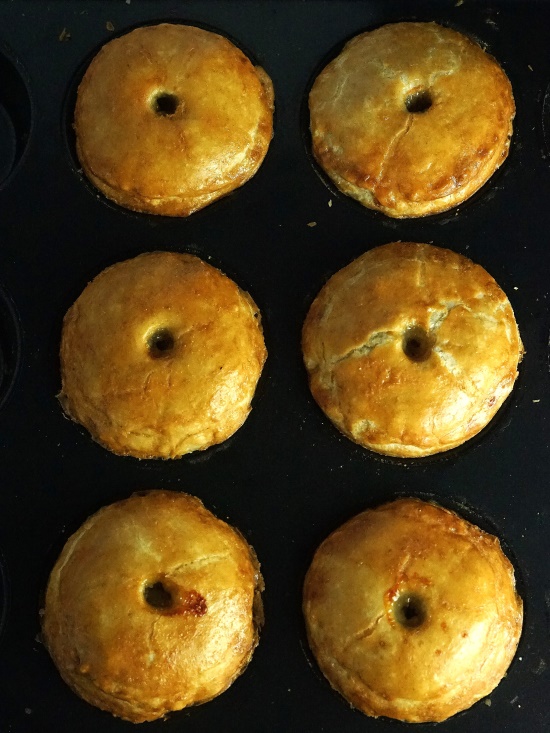
When the pies are done, place the tray on a cooling rack for 5 – 10 minutes to let the pastry settle. Then carefully remove the pies (gently go around with a knife first if necessary), and place directly on the rack. Leave until completely cold before eating or storing in the fridge.
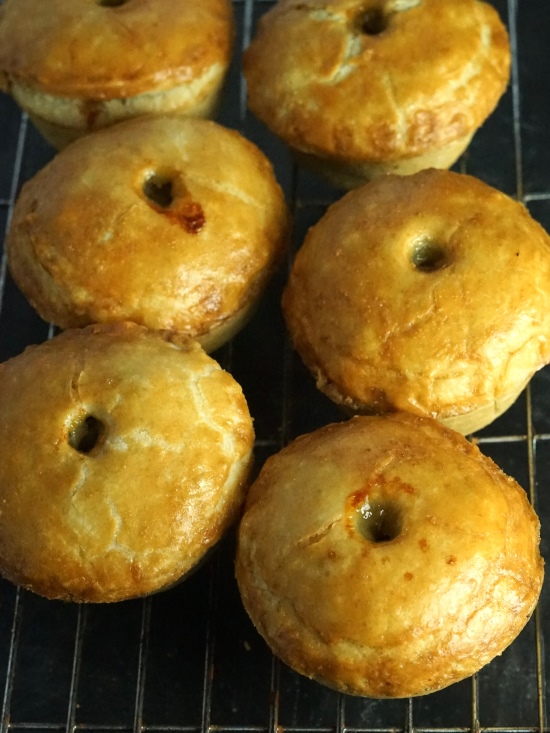
Christmas Sausage Pies will be fine chilled for 3 – 4 days. But for longer storage you can freeze them and defrost overnight in the fridge. For the best flavour and texture take them out of the fridge 20 – 30 minutes before you want them.
EASY AND DELICIOUS
I think these easy but delicious pies will go down a storm at your Christmas gatherings or as part of what we call a ‘picky tea’ with other nibbles like cheese, crackers, dips, sausage rolls, cheese straws etc.
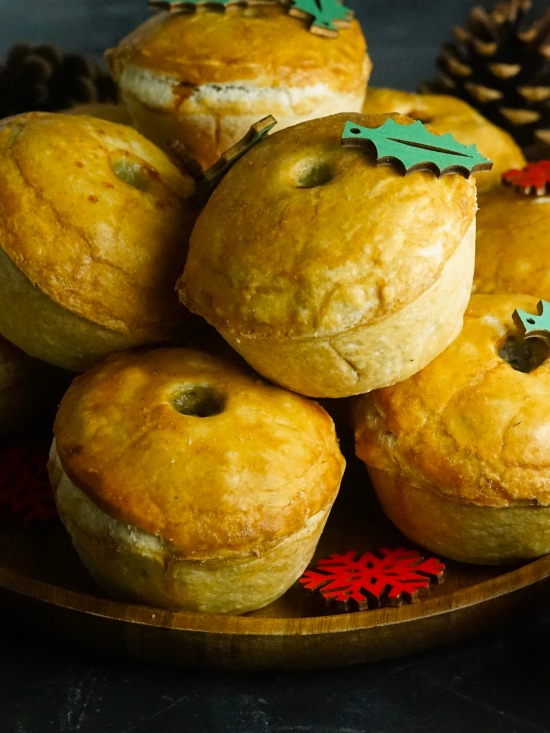
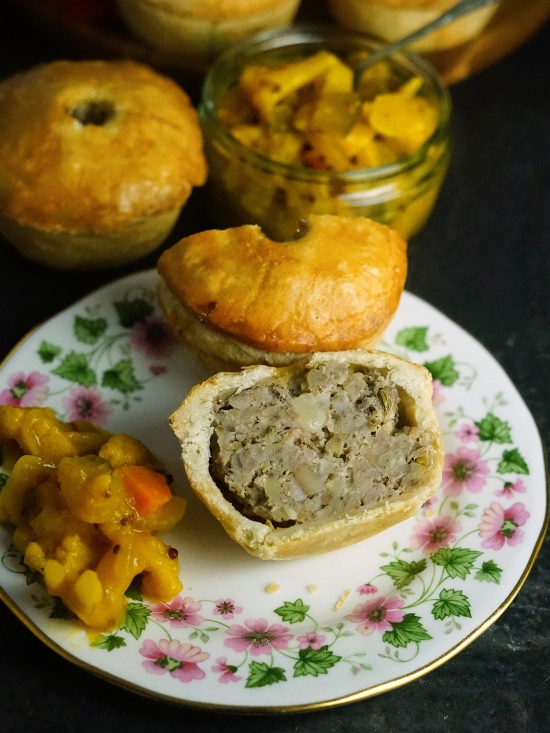
But with readily available ingredients and simple to make, you can enjoy Christmas Sausage Pies at any time of year. Try one for lunch, perhaps with a spoonful of homemade piccalilli or tomato-chilli chutney, gherkins, a few tomatoes, celery sticks, and an apple. Sturdy enough to transport, they’re perfect for packed lunches and picnics.
If you’ve made this recipe, I’d love to hear what you thought. Please do leave a comment and rating.

Christmas Sausage Pies
Individual cold pies of crisp shortcrust pastry filled with delicious herby sausage meat, onions, and chestnuts. The easy pies are perfect for your Christmas parties and buffets, but are brilliant all year long as a snack, part of a salad meal, picnic, or in lunch boxes.
You'll need a 12-hole deep muffin/bun tray to cook the pies in.
It's recommended that you read the accompanying blog post before starting the recipe.
Ingredients
For the pastry
- 400 g plain flour (plus extra for rolling out)
- 1 large pinch salt
- 100 g cold butter, diced
- 100 g cold lard, diced (can be replaced with butter)
- 4 - 5 tbsp iced water
- 1 small egg, beaten (for sealing and glaze)
For the filling
- 1 tbsp olive oil
- 15 g butter
- 1 large onion (chopped)
- salt and black pepper
- 4 cloves garlic (finely chopped)
- 500 g pork sausage meat (see Recipe Notes)
- 150 g cooked chestnuts (chopped)
- 120 g breadcrumbs
- 1 heaped tsp fennel seeds
- 1 level tsp dried sage
- 1 level tsp dried thyme
Instructions
Make the pastry
-
Using a food processor
Put the flour, salt, butter and lard into the food processor and whizz until the mixture looks like very fine breadcrumbs.
With the motor still running, add iced water, 1 tbsp at a time, until the mixture starts coming together.
Making by hand
Stir the flour and salt together in a bowl. Rub in the butter and lard so that the mixture resembles fine breadcrumbs.
Add 3 tbsp of cold water and stir it in with a round bladed knife. Continue adding tablespoons of water and stirring until the mixture starts coming together.
-
Turn out onto a lightly floured surface and gently knead into a smooth ball.
Flatten into a disc then wrap in foil or cling film and chill in the fridge for at least 30 minutes.
Make the filling
-
Put the oil and butter in a frying pan over medium heat.
When hot, add the onion, season with a little salt and pepper, and cook, stirring often, until it's softened and lightly browned (approx. 10 - 12 min.): add the garlic for the final few minutes.
Take off the heat and leave to cool.
-
Put the sausage meat, chopped chestnuts and breadcrumbs in a large bowl. Add the cooled onions and their juices plus the fennel seeds, sage, thyme, half a teaspoon of salt and a generous amount of black pepper. Stir everything together very well.
Taste a sample of the filling: break off a small piece and roll into a ball. Put a little more oil in the wiped-out frying pan, fry the ball until cooked through then leave to cool. Taste and adjust the pie filling if necessary, e.g. add more salt, pepper, or herbs.
Assemble the pies
-
On a lightly floured work surface, roll out the pastry thinly: approximately 2 mm.
Stamp out 12 circles large enough to come all the way up the sides when placed in the holes of a deep muffin/bun tin (approx. 10 - 11 cm diameter) plus 12 smaller circles for lids (approx. 7 - 8 cm diameter). You will need to gather the scraps and re-roll to make all 24 circles.
-
Place the 12 larger circles in the holes, gently pressing down so they sit on the bottom and come up the sides. Neaten the top edge by pressing down and smoothing with your fingers.
Divide the filling into 12 pieces (use scales for accuracy) and roll into a ball. Put one in each pastry case and press down to level it.
Brush some of the beaten egg all around the edge of each pastry case then put one of the smaller circles on top as a lid. Press down all around to seal: to make a pattern, use the end of a wooden spoon or the tines of a fork (dip in flour now and then to prevent sticking) and press all around the edge.
Tip: pies can be chilled at this point if convenient (chilling for a short while also means the pastry is less likely to shrink and the pattern you made around the edges is more likely to remain after baking).
Bake the pies
-
Preheat your oven to 200°C /180°C Fan /Gas 6 /400° F with a shelf positioned in the middle.
-
Brush the pies generously with more of the beaten egg, then make a hole in the top of each one using the end of a wooden spoon.
-
Transfer to the preheated oven and bake for 40 minutes or until the pastry is golden and the filling piping hot: if you have a food thermometer, the filling needs to reach 65°C (150°F).
Tip: halfway through cooking, you may wish to add another layer of beaten egg and also turn the tin around for even baking.
-
When the pies are done, place the baking tray on a cooling rack for 5 - 10 minutes then carefully remove the pies and place them directly on the rack.
Leave until completely cold before eating or storing.
Keep in the fridge and use within 3 - 4 days or can be frozen (defrost thoroughly overnight in the fridge).
Best eaten if taken out of the fridge 20 - 30 minutes in advance.
Recipe Notes
Pork Sausage Meat. For best results, use sausage meat (or sausages with their skins discarded) with a meat content of 80 - 90 per cent.
RELATED RECIPES


