Homemade crusty bread rolls with no kneading
I think you’ll love these homemade crusty bread rolls with a fabulously crunchy outside and a soft, open-textured crumb within. And the really great news is that there isn’t any kneading involved. Mix the dough in the evening and you can have fresh homemade crusty bread rolls for breakfast.
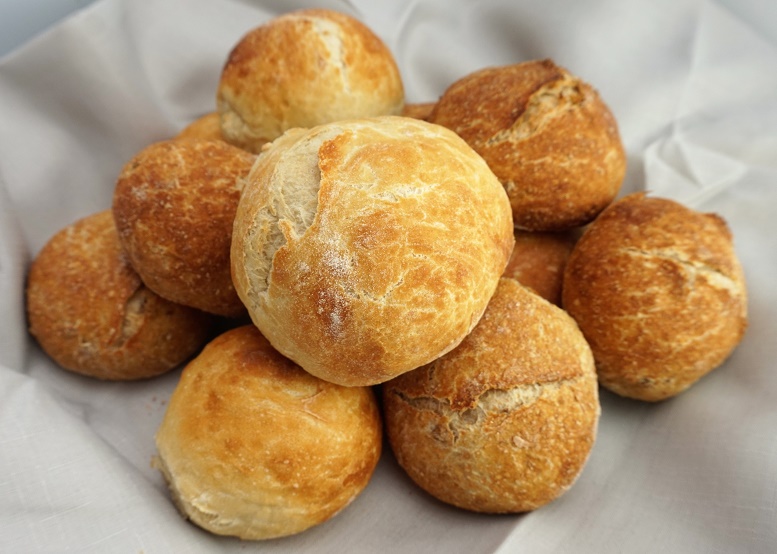
One of my most popular posts is all about how to get crusty homemade bread with no kneading. If you haven’t tried it, then you might think dough that hasn’t been kneaded would be incredibly heavy. That’s because, in conventional bread making, you knead in order to develop the gluten. And gluten is the protein which allows bread to rise.
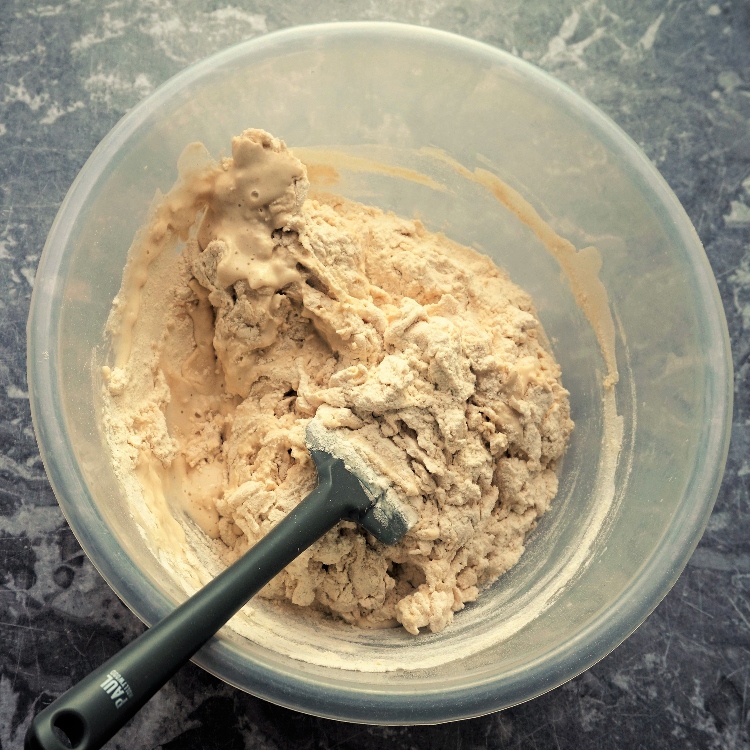
However, given enough time and a wetter than usual dough, the gluten will get along very nicely without you. To achieve this, I stir together a wet dough made from flour, salt, dried yeast and water. Don’t even bother trying to knead it; you’ll get into a right old sticky mess. The dough is then covered and left to rise slowly overnight.
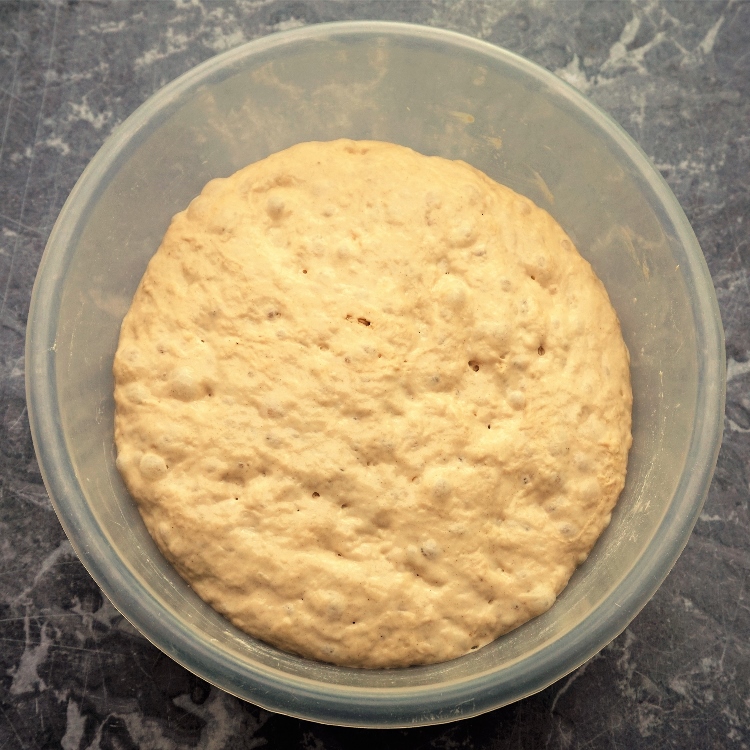
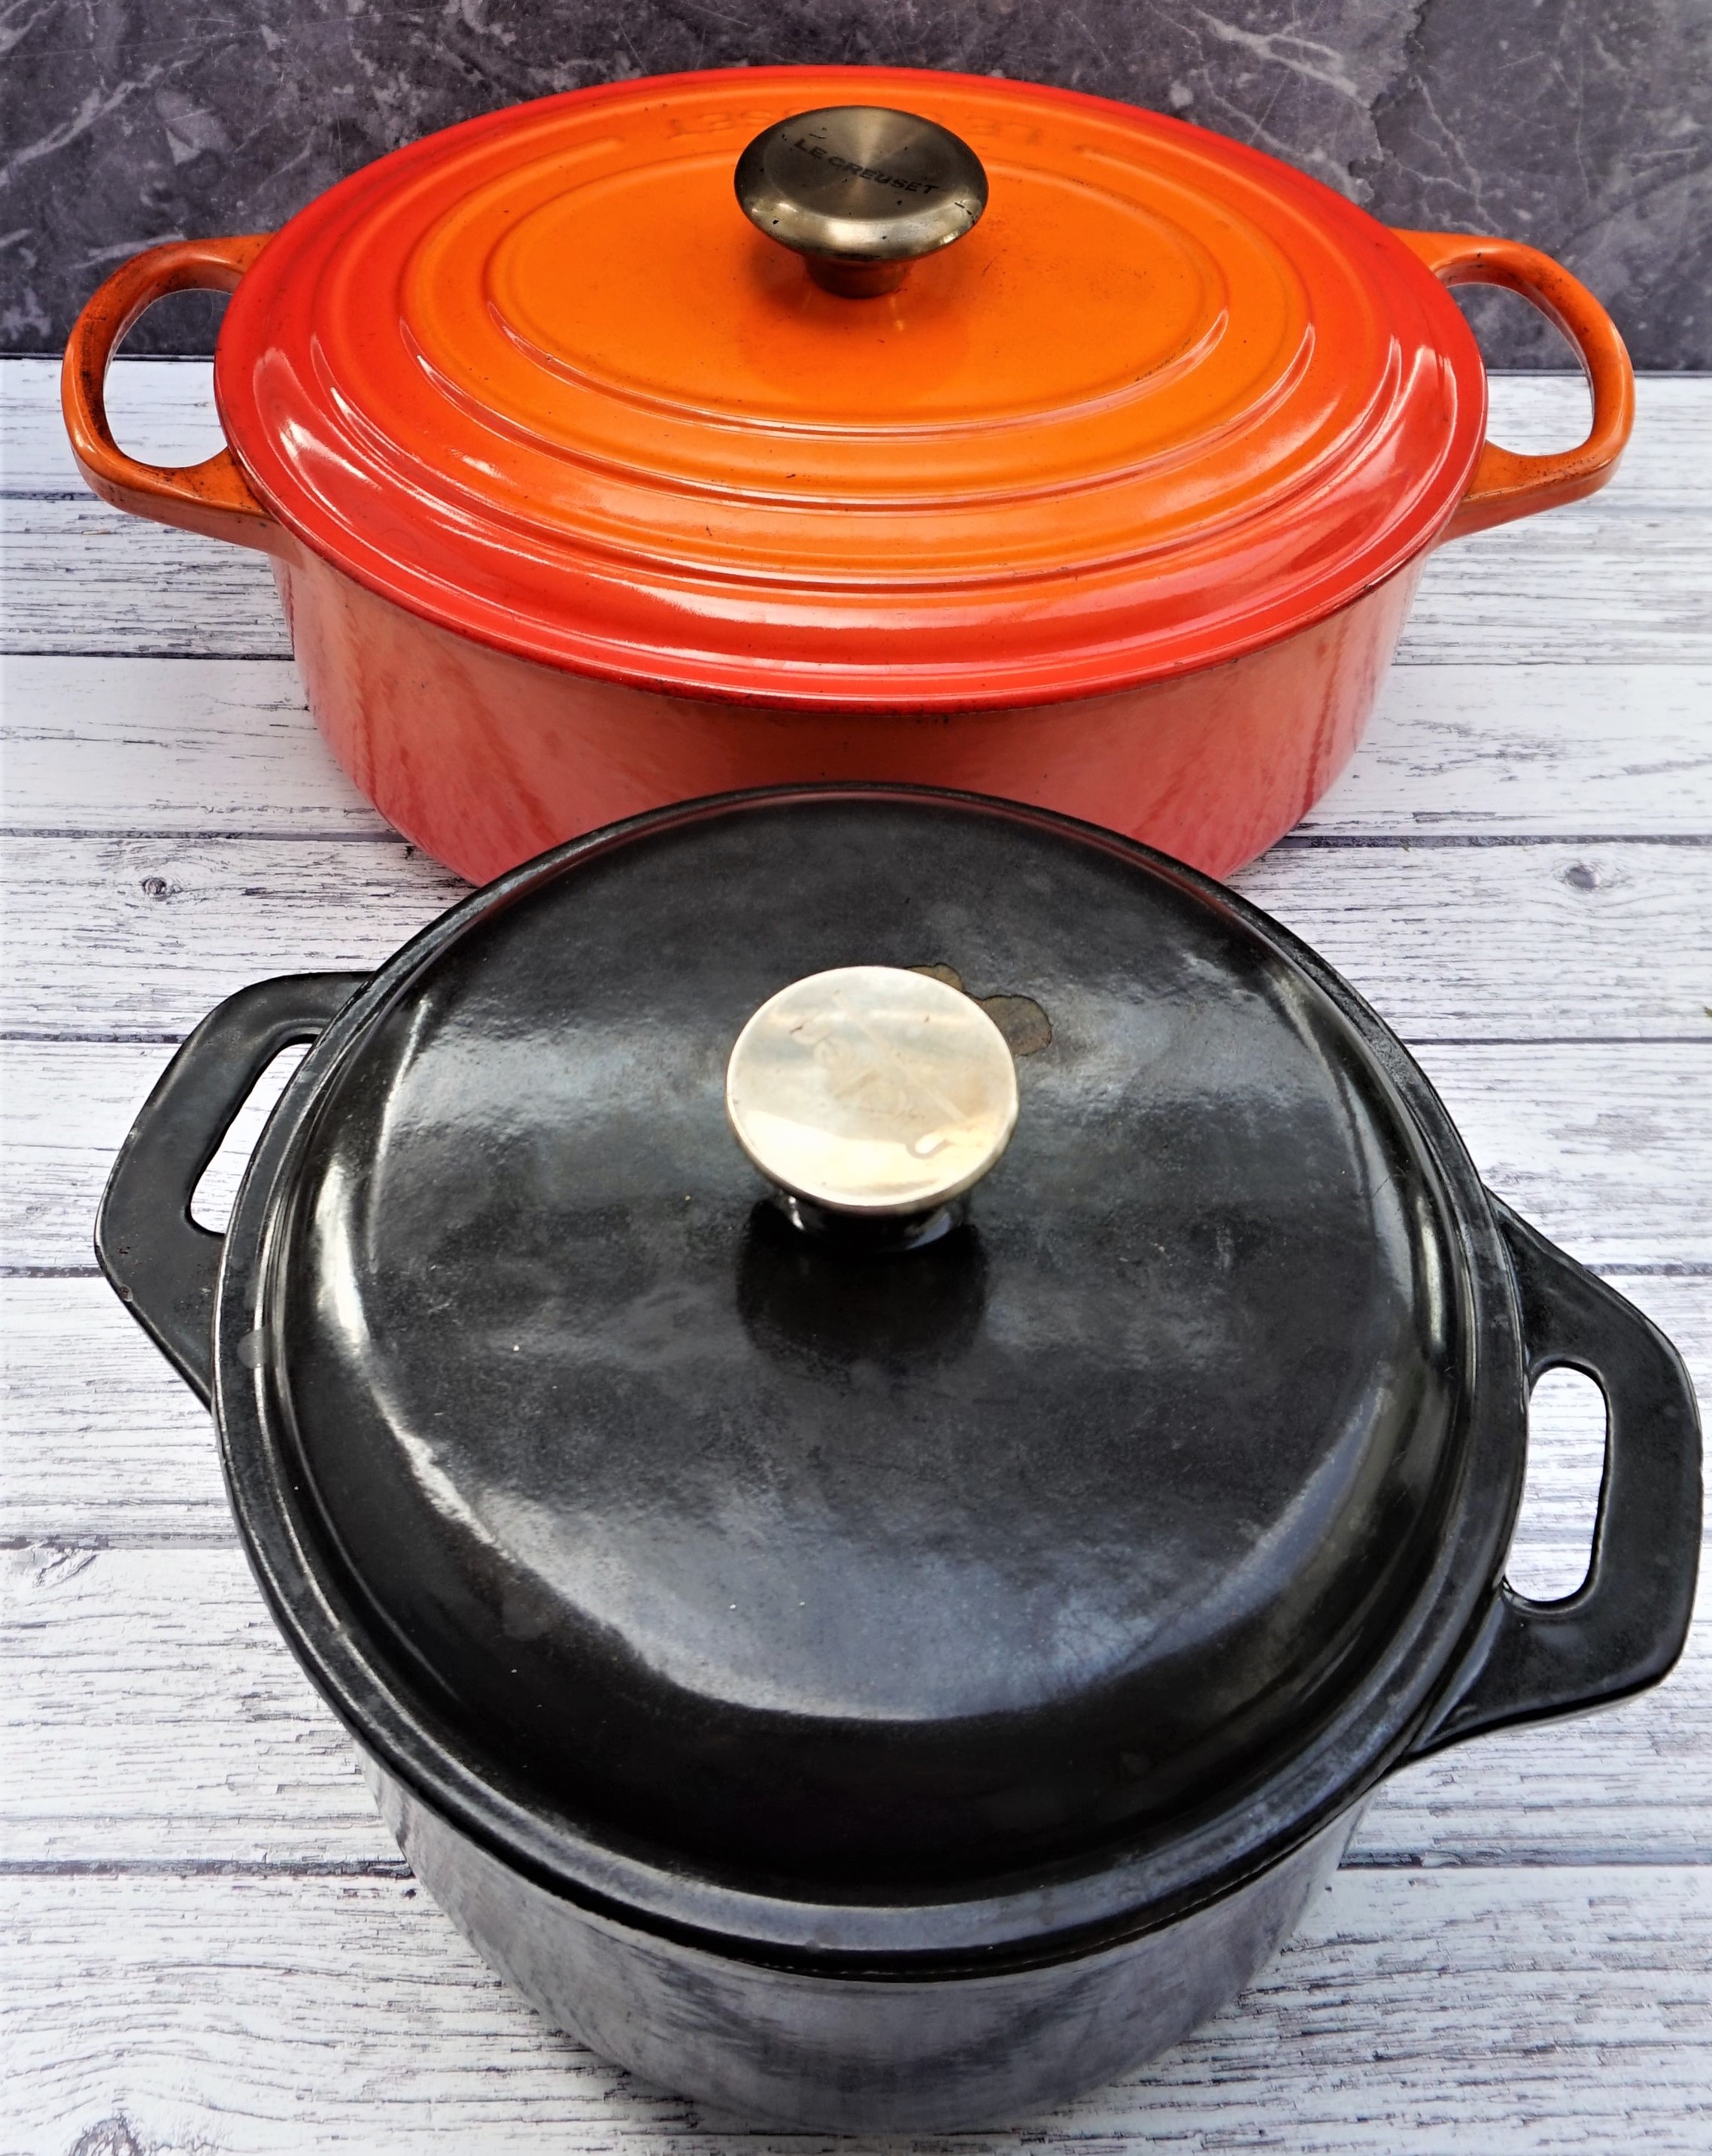
In the morning you’ll have a lovely, bubbly dough. All you do then is form it into 8 or 10 balls on a well floured work surface. These are set these aside for 20 minutes or so while you get your oven really hot. I bake the rolls in lidded cast iron pots, for the reasons outlined below.
EASY HOMEMADE CRUSTY BREAD ROLLS
For these Homemade Crusty Bread Rolls I’ve simply adapted my original no-knead recipe which makes a crusty loaf. So as not to repeat everything here, I suggest you first have a read of that post.
A few things to note:
- Make sure that the dry yeast you buy is labelled ‘quick’, ‘fast acting’ or similar. Don’t buy dried yeast which has to be activated with warm water and sugar first. That won’t work with this method.
- You’ll need one or more heavy, lidded cast iron pots, a Dutch oven or similar. The hot and steamy environment inside the pot gives a good rise to the bread and a lovely crust.
- I cook my Homemade Crusty Bread Rolls in batches as I can’t fit them all in my lidded pots. But each batch cooks in 12-18 minutes so it still doesn’t take very long.
Besides the convenience of not having to knead, breads made with slow-risen dough will give you a much better flavour. Also, many people who struggle to digest quick-risen, additive-packed mass produced bread find that they have no problem with slower risen breads.
With my no knead, overnight method it really is easy to get great tasting, fresh Homemade Crusty Bread Rolls.
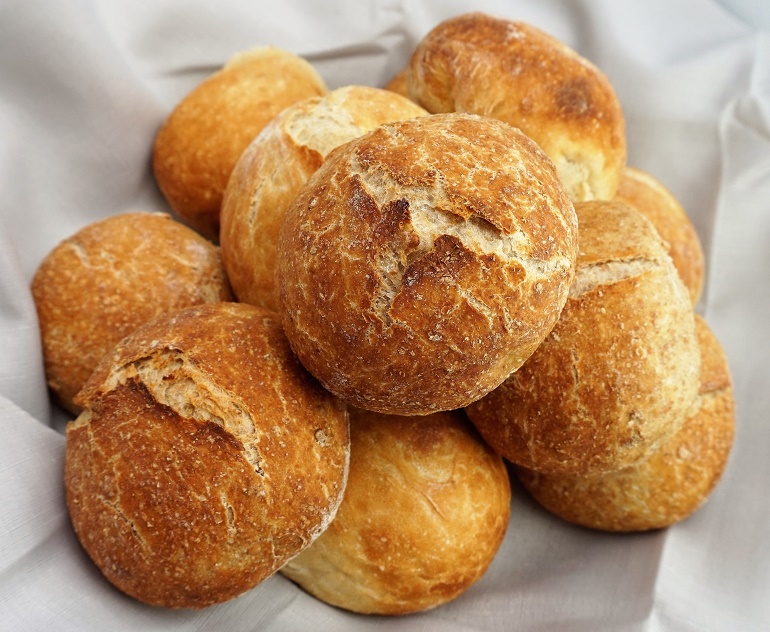
Homemade Crusty Bread Rolls with no kneading
Homemade crusty bread rolls with a fabulously crunchy outside and a soft, open-textured crumb. No kneading required
Ingredients
- 600 g bread flour
- 7 g fast acting dried yeast
- 1-2 tsp salt
- 460 ml water
Instructions
The evening before you want to bake the bread rolls:
-
Put the flour, dried yeast and salt in a large mixing bowl and gradually stir in all the water.
-
Use a rubber spoon or spatula to bring the mixture together into a rough, wet dough.
-
Cover with cling film and leave overnight or 12-14 hours.
On the day of baking:
-
Scrape the dough out onto a well-floured work surface. Fold and shape into a rough ball. Divide into 8 equal pieces (or 10 if you want smaller bread rolls).
-
Shape into balls and leave on the floured work surface, covered with a tea towel or cling film. Leave for approx 20 minutes.
In the meantime, preheat your oven to its highest setting, with the lidded pot(s) inside.
-
After 20 minutes, reduce the oven temperature to 220C, remove the pot(s) from the oven, take off the lid(s) and carefully put the dough balls in the hot pots. Don't crowd them - you may need to cook in several batches.
-
Replace the lid(s), put the pots in the oven and leave to bake for 10 minutes.
-
After 10 minutes, reduce the heat to 200C. Remove the pot(s) from the oven, take the bread rolls out and return them to the oven DIRECTLY ON THE OVEN SHELF.
-
Bake for a further 2 - 8 minutes until the rolls are cooked through - they should sound hollow when tapped underneath. Place on a wire rack to cool.
-
If cooking in batches, heat the oven back to 220C and continue with the rest of the bread rolls.
Hi, do you know how long this would need to bake as a whole loaf in a Dutch oven?
Thanks for your question, Tom! You’re in luck because these rolls are based on this loaf which I make in a lidded casserole: https://moorlandseater.com/crusty-homemade-bread-with-no-kneading/
So, you can follow those instructions which include 30 minutes in the pot followed by 10 – 15 minutes directly on the oven shelf.
Hope that helps!
I have been baking no knead bread and rolls for years. I tried your recipe because it is overnight. There is no video or pictures of the steps but the dough in the picture looks easy to work with. I followed the quantities and the instructions. I got a thin and sticky wet dough, I put more and more flour, it didn’t help. I had to place pieces of dough on the pan without shaping them, of course they rose only a little and have no resemblance to the beautiful and puffy buns in your picture. Not tasty. It is likely that the amount of water was too much in your recipe.
So sorry to hear you didn’t get a good result with this recipe, but the amount of water IS correct. I say that with confidence because the proportion of water to flour is one I still use for these rolls and also the crusty no knead loaves I make every week.
While different flours do absorb varying amounts of liquid, I’m surprised that adding more flour to your thin dough didn’t help at all.
Sorry I can’t be more helpful, but if you’re 100 per cent sure you started with the correct amounts I’m at a loss to know why it didn’t work.
Thanks for trying my recipe.
I don’t have any lidded pots, can I just bake them on a tray?
Yes you should be able to bake them on a tray, but I suggest at a lower temperature. Maybe try 200°C / 180°C Fan / Gas 6 ?
Do let me know how it goes if you try!
Can you just halve the ingredients for 4 rolls?
Yes Gordon, you can 🙂
Hi,
just started this recipe, dough is covered on the counter. Can you tell me how far apart the dough balls should be when placed in the Dutch oven.
Thanks Peter
Hi Peter,
Ideally you want them spaced enough so that when they rise they don’t touch, so a couple of centimetres apart – although to be honest mine often do end up touching as it’s difficult to estimate how much a particular dough might spread.
I also use at least 2 pots or cook in batches if necessary.