Crusty homemade bread with no kneading
Crusty Homemade Bread with no kneading is perfect for bread making beginners.
Perhaps you want to make your own bread but think it’s too difficult? Or maybe you struggle to fit traditional bread making into your day?

In this post I show you that getting fabulous, crusty homemade bread is not difficult nor time consuming.
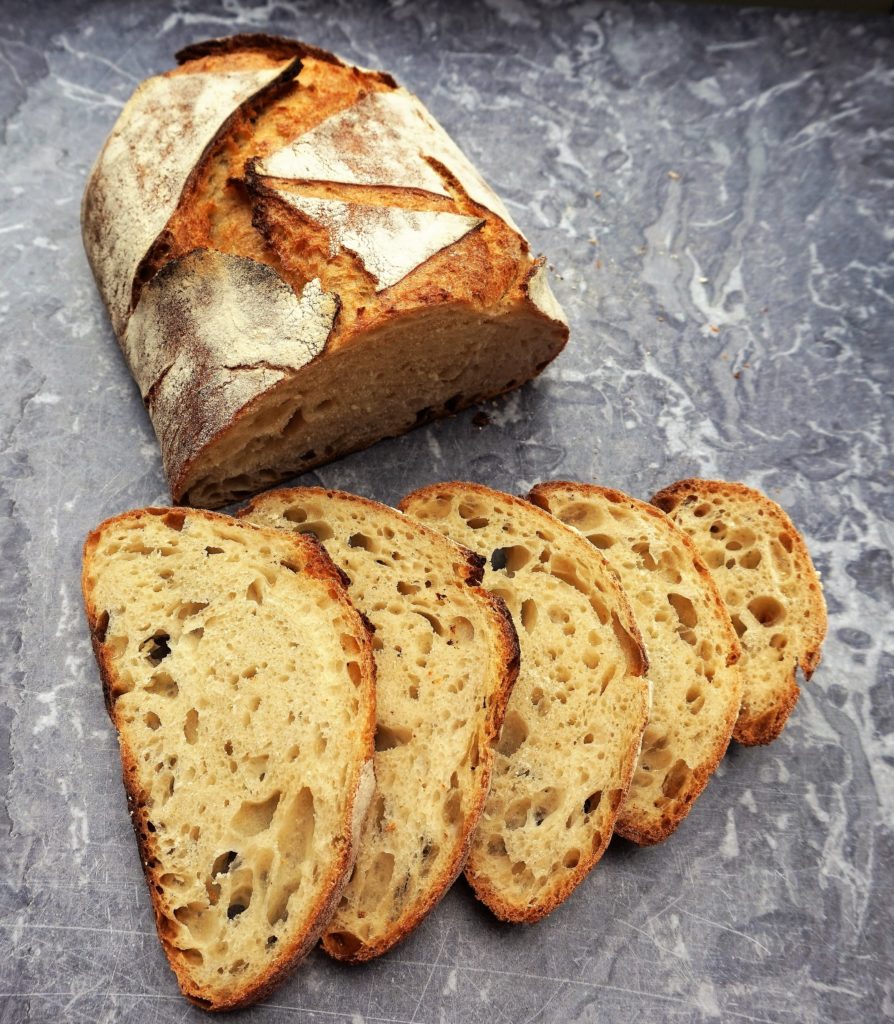
A simply dough, easily made in 5 minutes, no kneading required, is left to rise overnight and the next day is baked in a lidded pot. This technique creates an impressively risen, satisfying loaf, full of flavour, with an open texture within and a crunchy crust.
Disclosure: this post may contain affiliate links. If you buy via my links, I may earn a small commission at no extra cost to you.
Jump to Recipe
CONVENTIONAL HOME BREAD BAKING
I used to make homemade bread the conventional way. Mixing the dough, kneading it for about 10 minutes until ‘smooth and elastic’ (but always feeling it was never quite smooth enough, never quite elastic enough), leaving it for a couple of hours (all the while wondering whether the room was too hot, too cold), then kneading again before another rise and finally baking it.
Don’t get me wrong, I’m not saying making bread the conventional way is too much trouble or not worth it. When we baked like that, myself and my partner both worked full-time and one of us still managed to make a couple of loaves most weekends, easily enough to see us through the week. So it certainly can be done if that’s the way you want to do it.
But I rarely make kneaded bread now. Not since I discovered that extended rising times can take the place of all that kneading.
NOT SURE BREAD BAKING IS FOR YOU? TAKE A LOOK AT MY SIMPLE STEPS IN THE VIDEO
LET TIME DO THE WORK
When you knead dough, what you’re doing is developing the gluten. Gluten is the protein which allows bread to rise but, given enough time and a wetter than usual dough, the gluten will get along very nicely without you. As an added bonus, Crusty Homemade Bread with a slow-risen dough results in a far better-tasting loaf. Incredibly, many people who struggle to digest quick-risen, additive-packed mass produced bread find that they have no problem with it either.
When I say slow-risen dough, we’re talking about 12-14 hours for the initial rise. Compare that to bread made by the industrial Chorleywood Process, which has been used for almost all mass-produced loaves in Britain since the 1960s. In that process, the dough is lucky to get even an hour in which to develop flavour and character.

For homemade, no-knead loaves, the extended time usually means it’s most convenient to let the dough rise overnight. So I make mine in the evening and then come back to it the next day. If it fits in better with your routine, you can even put the dough in the fridge after the overnight rise and then deal with it in the evening when you come home from work or wherever. Just let it come back to room temperature before proceeding with the recipe.
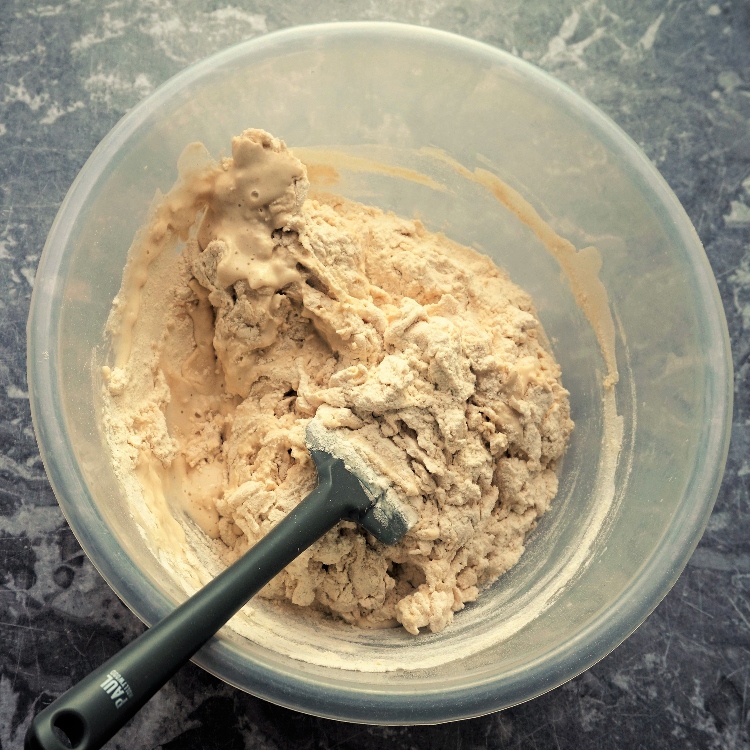
Making the dough for Crusty Homemade Bread will literally take you about 5 minutes. The only ingredients involved are flour, dried yeast and salt plus water straight out of the tap. These are mixed together into a rough, wet dough which is covered and left at ordinary room temperature until the next day.
SOURDOUGH vs ADDED YEAST
These days, pretty much all of my homemade bread is sourdough. But I wanted to write this post to encourage people who’ve never made bread before to have a go, so I’ve used fast-acting dried yeast instead of a sourdough starter. I hope that makes the process rather less daunting. It also means you can get on with it straight away without having to make a starter.

For this recipe you must make sure that the dry yeast you buy is labelled ‘quick’, ‘fast acting’ or similar. The instructions on the pack should say to add it with the rest of the dry ingredients. What you don’t want is the type of dried yeast which you have to firstly activate with warm water and sugar. The latter will not work with this method.
If you enjoy making my no-knead bread and think you’d like to continue bread making at home, I’d really encourage you to have a go at making sourdough too. The technique is almost identical to the one used here and you’ll get an even better tasting loaf with no added yeast needed.
Click here for my no-knead sourdough recipe
THE NEXT DAY
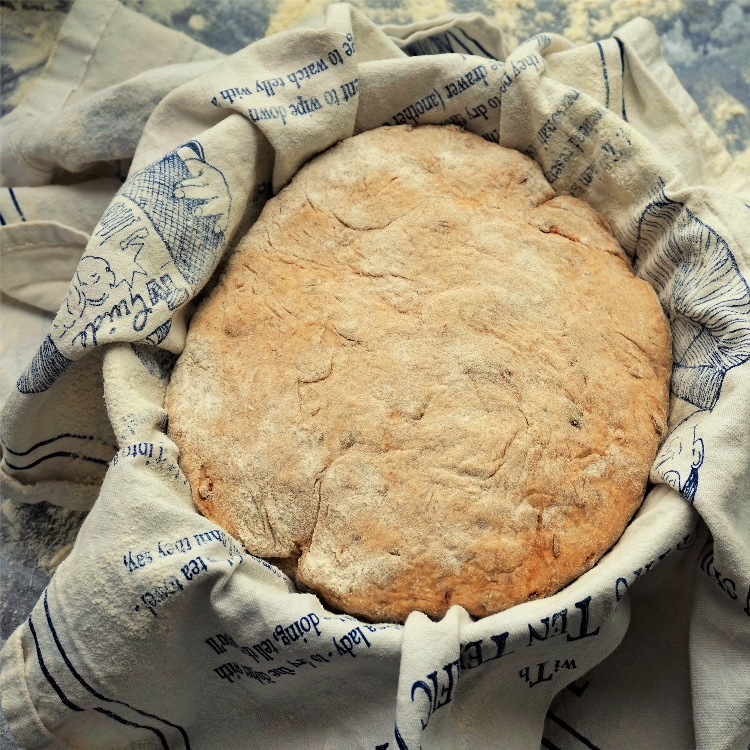
The morning after you’ve made the dough, you’ll find that it will have risen and spread out substantially. Especially if your kitchen is on the warm side. But it will happily sit there a few more hours if you need to get on with something else.

When I’m ready to get started, I scrape the dough out of its bowl onto a well-floured worktop. Incidentally, if you’re going to make bread regularly I suggest you buy a dough scraper for this sort of job; they’re very cheap (mine was just over £2) and make moving dough around, and clearing up afterwards, so much easier.

After flattening the dough out and folding into thirds a couple of times (this helps to build the structure of the finished dough but isn’t absolutely necessary) I roughly mould it into the shape I want the finished loaf to be.
PROVING
The dough is then left to rest on the floured worktop for a few minutes, covered with cling film or the upturned bowl, while you prep a basket or bowl in which to prove the dough, which is the final rise before baking.

You can buy specially made baskets for proving bread, called bannetons, some of which come with a liner. But you can also use a bowl lined with a tea-towel (if you’re very lucky, a nice friend may buy you a John Shuttleworth tea-towel which you can keep for just this purpose – see image below). I have a banneton for my oval breads but use a bowl for my round ones as I keep forgetting to buy another banneton. Whichever you use, just make sure they’re well-floured to prevent the dough sticking when you turn it out. The dough is then covered with cling film or another tea-towel and left to prove for 30 minutes.
My homemade bread technique is based on that of Jim Lahey of Sullivan Street Bakery in New York who bakes his loaves in a heavy, very hot, cast iron pot with a lid. I explain why this is done in the section below, but for now you just need to know that while your dough’s proving, you’ll need to switch on your oven to its highest setting. At the same time put in an ovenproof pot, with its lid on, so that it can get nice and hot too.
If I’m making an oval loaf, I’ll use my Le Creuset 29cm / 4.7 litre oval casserole. For a round loaf I use a cheaper brand cast-iron pot. Not as good as the Le Creuset (you can perhaps see from the image below that some of the outside enamel is wearing off) but it does the job until I invest in another Le Creuset. Update: since writing this post, I’ve replaced the old round pot with a lovely 24 cm Le Creuset.
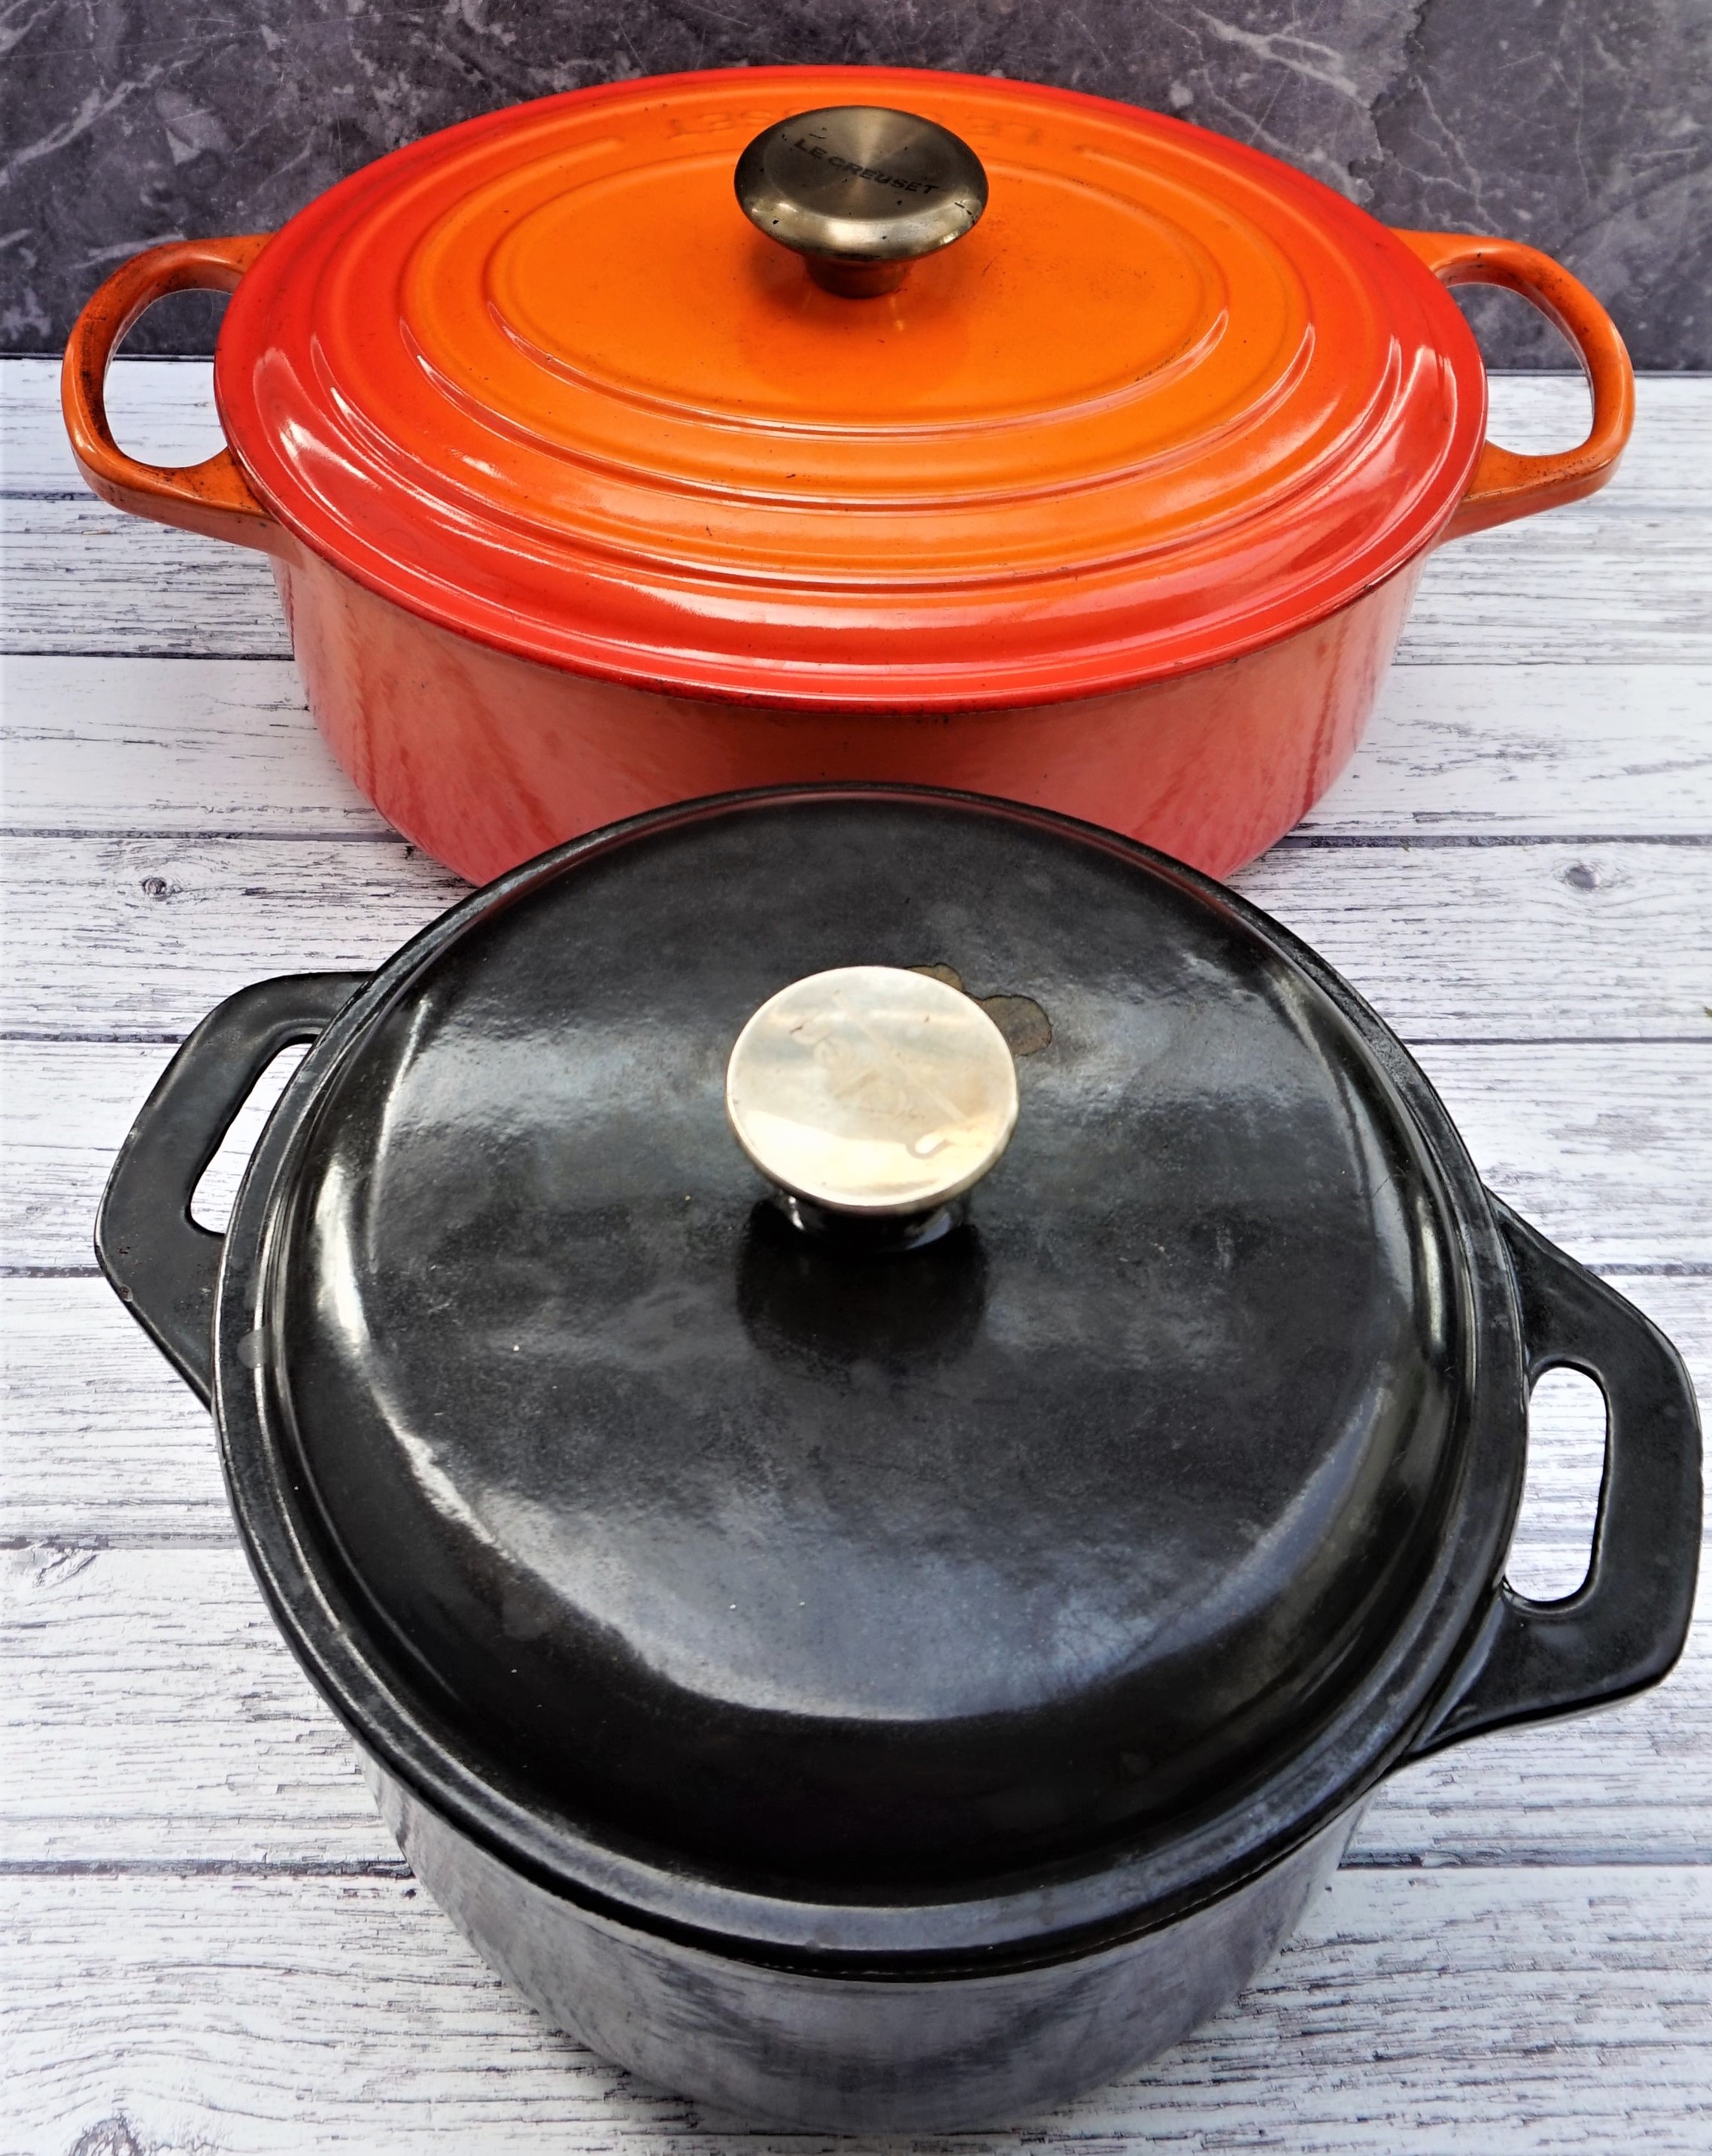
But any heavy pot or Dutch oven should be fine. Just make sure any knobs or handles can withstand high temperatures.
THE SECRET TO GREAT BREAD: STEAM
The reason I bake bread in a very hot, lidded pot is to create steam, but why do I want steam? Because a steamy, moist environment inside the pot will encourage the bread to continue to rise in the oven (this is known as ‘oven spring’) as the dough will stay soft for longer before a crust starts to form and which eventually inhibits further rising.
You may see various conventional bread recipes that encourage you to do things such as have a baking tray of water in the bottom of the oven or use a spritz of water to create steam. But I’ve found none of these methods really make much difference, while cooking in a lidded pot works every single time. This is because when we use a covered pot we’re creating our own little mini oven that gets fiercely hot and, because we’re using a wetter than usual dough, lots of steam is produced and that all gets concentrated and trapped inside the pot, not wafting all around the oven.
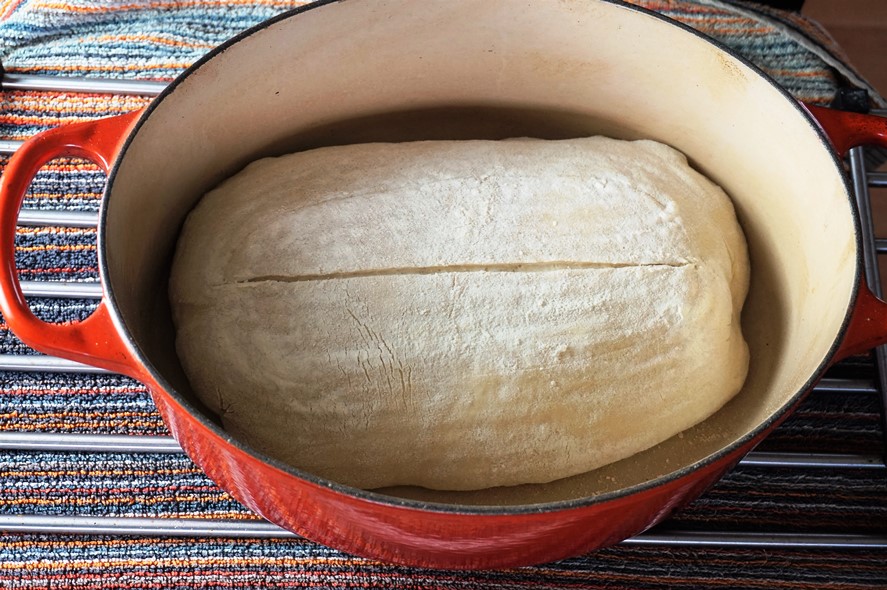
Once the 30 minutes proving is up and the oven is seriously hot, turn the temperature down to 240°C / 220° Fan / Gas 9 , carefully take out the pot, remove the lid and flip the dough into the pot, face down. Your loaf will most likely split somewhere as it rapidly rises, so slash the top to encourage it to split where you’d like it to. I like to use a lame or grignette blade to do this, but a very sharp knife will do. Experts at this slashing do all sorts of fancy cuts to make the loaf look good once baked, but just start simple. After slashing, quickly put the lid back on and place the whole thing back in the oven.
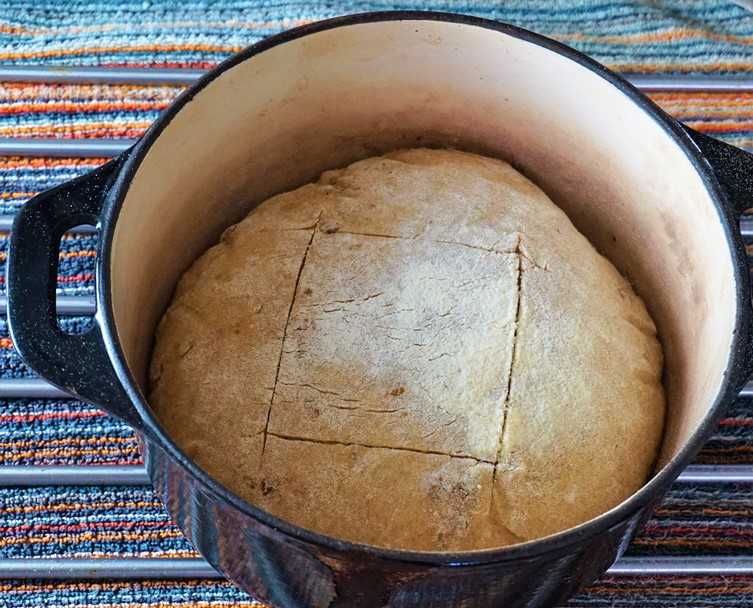
After 30 minute’s baking, the partially cooked loaf is taken out of the oven. I always think this is the most exciting part of making bread and, particularly if you’ve never made your own bread before, I guarantee that you’ll love it. Carefully taking off the lid, what you should see is a wonderfully risen loaf that’s starting to brown and will smell incredibly appetizing.

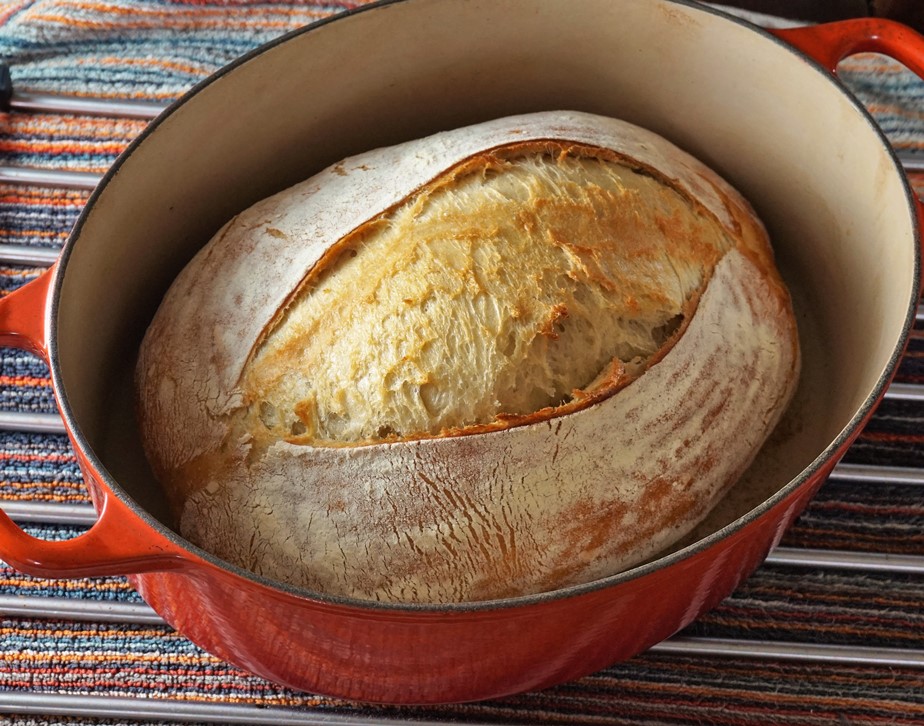
At this point, much of the moisture has been driven out of the dough, so less steam is being produced and a fabulous crust is starting to form. The pot is now unnecessary and, to ensure more even cooking and less chance of a burnt bottom (on the bread, that is) I take the loaf out of the pot and place it back in the oven, directly onto the shelf. I turn the temperature down to 220°C / 200° Fan / Gas 7 and continue to bake for around 10 – 15 minutes, so that the loaf finishes cooking all the way through without over-browning. I keep an eye on the bread at this point, just in case I need to turn the oven down a little more if I feel it’s browning too quickly.
When the loaf sounds hollow if tapped underneath, this usually means it’s cooked, but experience helps a little too. I sometimes leave the bread in the switched off oven for a few minutes, just to make doubly sure.

Then all you have to do is leave the bread on a cooling rack. Stand by, and after a minute or so, you should hear a satisfying crackling sound from the crust as it starts to cool down.
EASY HOMEMADE BREAD
I hope you’ll agree that this method of achieving homemade bread really isn’t that daunting and, with a few tweaks, could be fitted into most people’s routines – just pop the dough in the fridge at any point you need to stop things for a while.

With simple planning and just 5 minutes work the night before, you could be enjoying delicious homemade bread with your weekend breakfast – try soldiers of white bread, thickly buttered, dipped into soft-boiled eggs or nutty malted grain and spelt with butter and local honey.

If not using all of a loaf within a day or two, I slice it and then freeze; if you don’t pack it too tightly you can just remove however many slices you need with no wastage.
Stale bread makes great toast, of course, and for a delicious lunch try a few slices of homemade bread toasted or charred in a griddle pan, rubbed with a clove of garlic and topped with lightly mashed peas, fresh mint, olive oil and goat’s cheese.

MASTERED THE TECHNIQUE? TRY SOME OF THESE VARIATIONS
Once you’ve mastered the basic technique for my no-knead Crusty Homemade Bread, try experimenting with different flours and added ingredients.
In the breads made to demonstrate the method here, I used a white bread flour for the oval loaf and a mixture of two-thirds malted grain plus one-third spelt flour for the round loaf. The bruschetta with peas and goat’s cheese was a mixture of rye, wholemeal and malted grain. Try different combinations to see what you like best.
- A few seeds such as sunflower, sesame, pumpkin or flax will add flavour, texture and nutrition to your loaves.
- Toasted bulgar wheat folded into the dough makes it wonderfully nutty.
- Chopped onion and garlic, roasted with herbs in olive oil then left to cool makes a lovely savoury loaf when folded into the dough after the overnight rise.
- To make fruit bread, add a little honey to the water at the start of the recipe and fold in sultanas, raisins, chopped apricots etc. before you pop the dough into the proving basket.
- Add a little sugar, mixed spice and orange zest to the dry ingredients for a spicy hot cross bun flavour.
Once you get started, and find out just how good Crusty Homemade Bread can be, you’ll find that making it and thinking up new variations can become pretty addictive.

Crusty Homemade Bread with no kneading
Crusty homemade bread isn't difficult or time consuming with my no knead, overnight method. It takes just 5 minutes to mix the dough then next day just shape, rest & bake it.
Ingredients
- 600 g bread flour
- 7 g fast acting dried yeast
- 1-2 tsp salt
- 460 ml water
Instructions
The night before you want to bake the bread:
-
Put the flour, dried yeast and salt in a large mixing bowl and gradually stir in the water: different flours absorb different amounts of liquid so you may not need it all or you may need a splash extra.
-
Use a silicone spoon or spatula to bring the mixture together into a rough, wet, but not sloppy dough.
-
Cover with cling film and leave overnight or 12-14 hours.
On the day of baking:
-
Scrape the dough out of its bowl onto a well-floured worktop. Flatten out then fold the dough into thirds a few times before moulding it into your desired shape of loaf. Leave to rest for a few minutes, covered, while you prepare a proving basket/banneton or bowl (see next step)
-
Prepare a basket or banneton by dusting well with flour. If using a bowl, line with a clean tea-towel and dust that with flour.
-
Place the dough in the prepared banneton or bowl and cover. Leave to prove for 30 minutes. Pre-heat your oven to its highest setting with a heavy, lidded pot inside to heat up also.
-
After 30 minutes, reduce oven temperature to 240°C / 220° Fan / Gas 9, remove the pot from the oven, take off the lid and carefully flip the dough from the proving vessel into the pot.
-
Slash the top of the dough, replace the lid and put the pot back in the oven. Leave to bake for 30 minutes without removing the lid.
-
After 30 minutes, reduce the heat to 220°C / 200° Fan / Gas 7. Remove the pot from the oven, take the bread out of it and put the bread back in, directly onto the oven shelf. Bake for a further 10-15 minutes until the bread is cooked through. If necessary, reduce the oven temperature to stop the crust overbrowning before the loaf is finished baking.
-
When the loaf sounds hollow if tapped underneath, it should be cooked. Place on a wire rack to cool.
MORE BREAD RECIPES


Another successful ‘crusty homemade no knead’ loaf, this time I used half white/half wholemeal flours. This is so easy to do, especially the proving overnight. Thank you!
So glad you’re enjoying the recipe, Lindsay! Once you’ve got the method, you can really swap in whichever flours you like.
Thanks so much for taking the time to comment and rate 😀.
I really love the look of all your bread recipes although not made any of them yet ,I have just one question do you leave the dough in the fridge overnight or not. Thank you for all the fabulous looking recipes..
Hi Hilary. Unless you live in a particularly warm climate, there’s no need to put the dough in the fridge overnight. However, if you want extend the rising time (either because it’s more convenient for you, or to develop greater flavour) then you can.
These days, I often leave mine in the fridge for 24 hours or a little more.
If you try my recipe, do come back and let me know how it went!
Hello, I love the look of this! How large a pan would be needed for this?
I mainly use my 4.7 litre oval Le Creuset casserole dish. But anything over 3.5 litre should be fine. Hope you enjoy the recipe if you try it!
So glad I stumbling on your site. Have found making the crusty bread and rye bread recipes so easy to follow. Think bread baking no knead method is going to be a regular weekly thing. Thank you Lynne for taking the time to explain things to me and for your encouragement. Have recommended your site to my regular bread makers too.
Thank you for your lovely feedback Nancy! It was a pleasure to help you on your no knead journey 🙂
Just made this bread and its absolute delicious and could not be more simple to make. I love bread, I could live on bread, but I’ve never braved the baking of it. I may now be inspired to try sourdough, but first I’ll start with the spiced fruit loaf. Thank you for sharing such a great recipe!
Thanks for the wonderful feedback, Sadhana.
So pleased to have helped you get started on your bread baking journey and look forward to hearing more about how you get on!
Preposterously delicious and stress-free recipe. We generally suck at bread making but this loaf was a joy to behold. Held up perfectly for bruschetta on Day 2. We did the easy yeast option and it proved beautifully. We made it again in quick succession. Thank you.
Thanks so much for the lovely feedback, Victoria 😊
Makes me so happy when people love this bread & find it easy too!
WOW!
I made this bread this morning and it is truly delicious. I started doing sourdoughs back in March but I’ve become really out of sync with my starter, I used to feed it in the morning and it would be ready when I got home from work to do an overnight sourdough loaf but for the past month it’s really sluggish, never floating and sometimes taking 24 hours to rise . I’ve been desperate to make a loaf but needed an overnight proof so I can bake it early before work and thankfully I found your recipe!
It’s SO simple and tastes so great! I’m going to try some different things with my starter to try and get it going again but now I know I can still make a loaf when I want to.
One question for you though, do you think I could use some of my non-ready starter in this dough with the yeast? I’m thinking it would give it a sourdough flavour AND a great rise?
Cheers,
Laura
Hi Laura,
Many thanks for your feedback – so glad you like my overnight bread recipe!
I tend to alternate between making sourdough and this yeasted bread – we don’t eat bread every day so I don’t keep my starter constantly lively. This means it can take a while to get it going again (especially when the weather’s cooler) so the yeasted version is great.
I don’t think it’s a problem to use your starter as well as yeast when the starter’s not quite ready. I’ve been known to add a little yeast if I feel my starter’s not quite there. Actually, today I made my Walnut Bread that includes starter & yeast. Definitely have a go!
Once you start making this bread you can’t stop. I’m making it every second day as it is so simple and so delicious. The recipe is very easy to follow. Thank you Moorlands Eater. – Kamila X
Thanks for the feedback Kamila. So glad you enjoy making this bread!
Having been threatening to do this for ages, stage 1 is done 🙂 Looking forward to seeing how this looks in the morning and then cooking in time for brunch!
Can’t wait to hear how it turns out!
I really enjoyed making this bread, it was so simple and fuss free to do,.
Anyone who has been put off making their own bread need not worry when following this recipe, it’s very straightforward and easy to follow.
Thank you Moorlands Eater for sharing.
You’re welcome. Many thanks for the feedback. So glad you enjoyed making the bread & found the recipe useful.
This is such a wonderful, thorough and encouraging post about making bread. I absolutely love making my own bread and I know several people who want to try it but feel daunted by the process. I am going to send them a link to this post! Makes everything crystal clear. Thanks for taking the time to explain everything so thoroughly – Jenny x
Thanks so much for your kind words, Jenny! In writing the post, and making the little video, it was exactly my goal to get beginners to see that bread making doesn’t have to be difficult but is so worth it. I’ve had some of my Facebook followers, who’ve never made bread before, report back that they found the process easy & loved the results. Thanks for spreading the word – it’d be great to hear feedback from anyone else that has a go! Lynne.
I’ve been baking bread on and off for a few years and this is my go to recipe for great bread everytime. I’ve been using a lidded ceramic casserole dish up to now which was okay but a bit small and have just purchased a proper 5L iron pot The bread is even better this time and I’m going to start experimenting with different flours and seeds. Thanks for the recipe.
Thanks for your lovely comments, Mark!
So pleased you get great results with this recipe. Enjoy your experimenting!