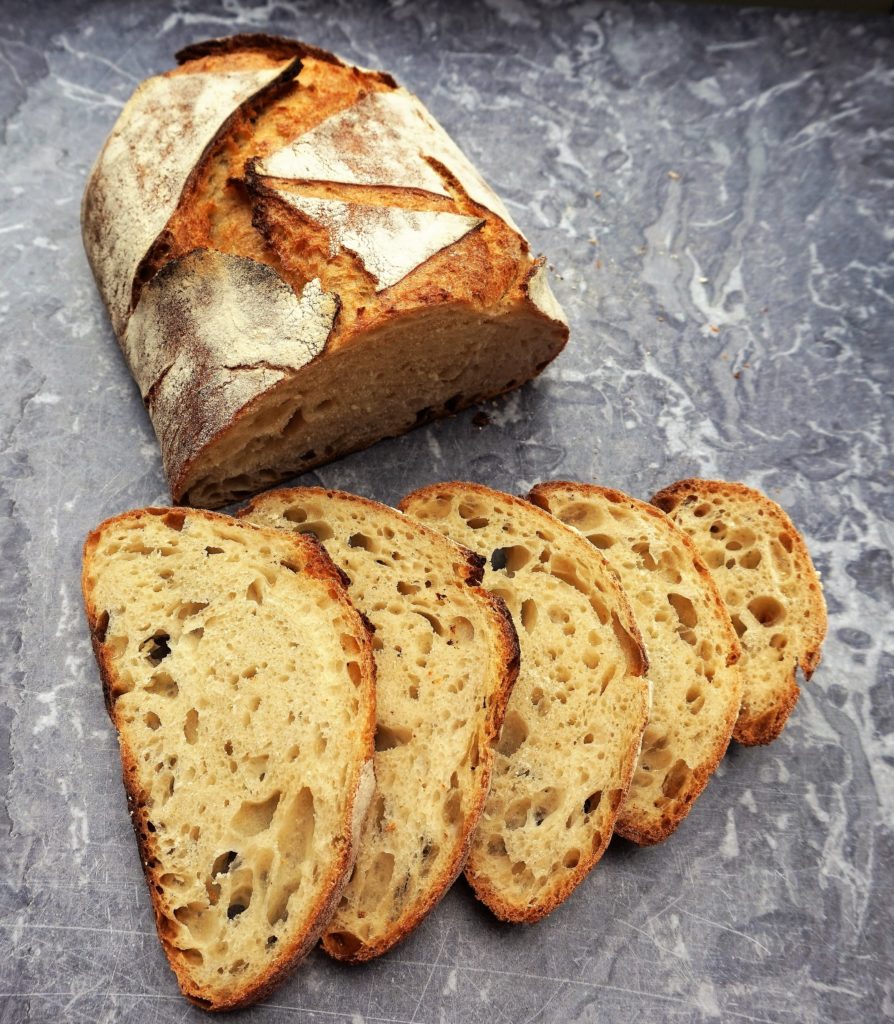
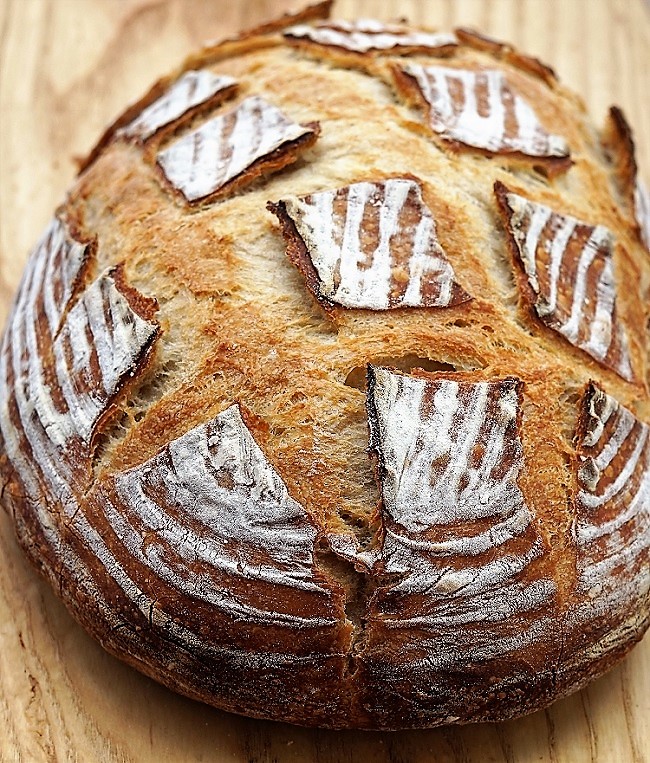
No-knead sourdough
In this post I share my easy method for wonderful homemade no-knead sourdough bread. Let time do the work of developing gluten by creating a wetter than usual dough and letting it ferment overnight. In the morning, bake in a heavy lidded pot that will create steam and give you a beautifully risen bread.
Disclosure: this post may contain affiliate links. If you buy via my links, I may earn a small commission at no extra cost to you.
Jump to Recipe
What is sourdough?
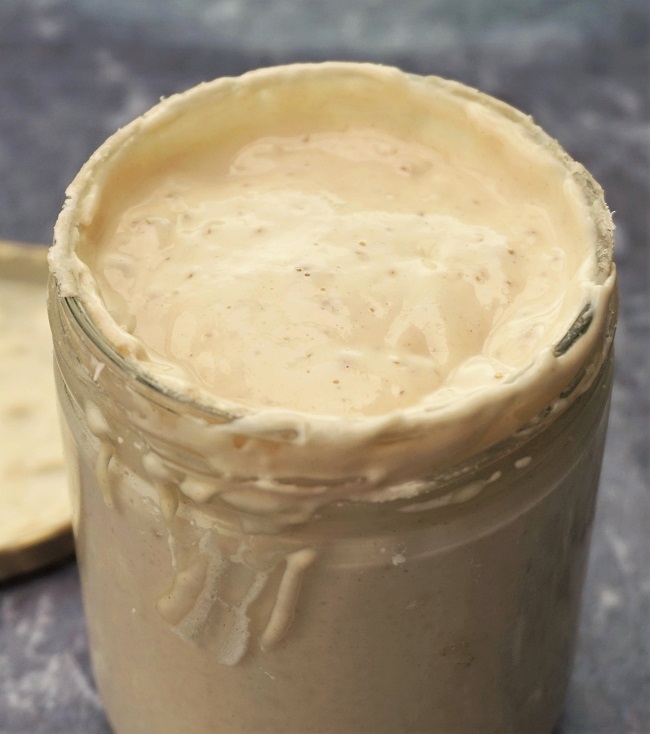
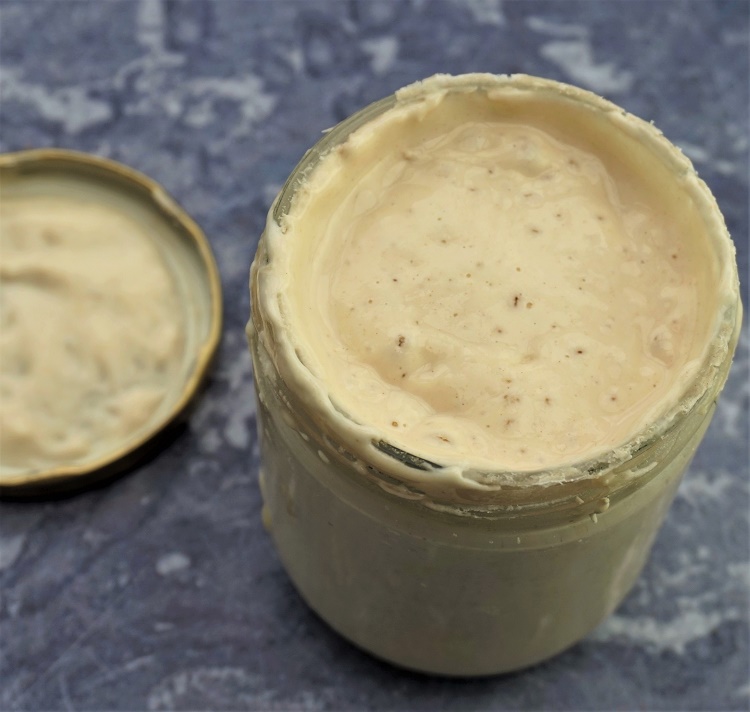
The basis of sourdough bread is a starter. This is a mixture of flour and water containing naturally occurring yeasts and lactic acid bacteria. It’s used in bread making to raise doughs instead of commercially produced yeast. The quality of your starter, which you keep alive by regularly feeding with more flour and water, is the key to good sourdough.
I’ve kept my starter going, stored in the fridge between breadmaking sessions, since 2010. Not quite as impressive as those reportedly passed down the generations for decades, but not bad.
There are various methods of getting a starter going. I made mine many years ago and long before I started this blog. I do plan to write an in-depth piece about creating and maintaining a sourdough starter when time permits, but note that this current post assumes you already have a starter.
When I began, I used Dan Lepard’s inspiring book, The Handmade Loaf to create a starter and bake my first sourdough loaves. But do a search online and you’ll find lots of different methods. Or maybe try this simple one from the Real Bread Campaign.

Actually, if you want to learn more about sourdough generally, the Real Bread Campaign. is a great place to start. They aim to get more people discovering the delights of proper bread and also support independent bakeries who make the genuine article. They also promote Sourdough September which generates lots of interest every year.
my overnight, no-knead sourdough method
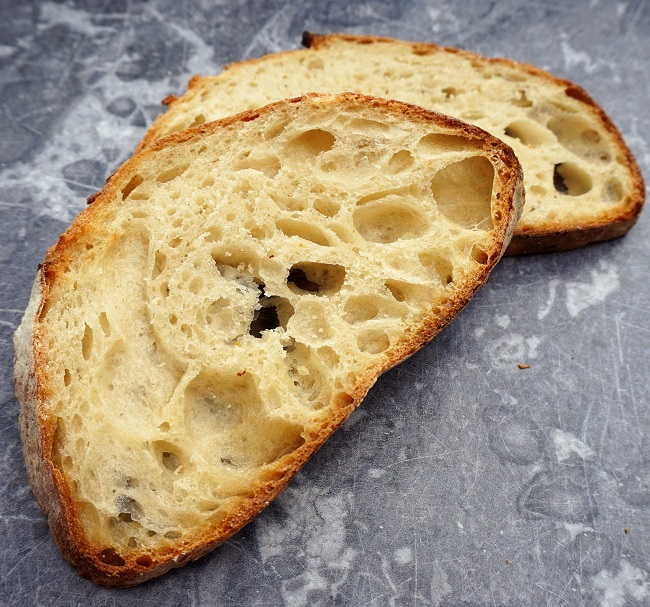
Over the years, I’ve developed a method of making sourdough loaves that works for me and fits comfortably with my routines. Overnight, no-knead sourdough cooked in a covered pot. Admittedly, this goes against everything I learned when I started making bread 30-odd years ago. And it still might raise a few eyebrows among traditionalists. But I end up with a delicious loaf with the stunning crust and the classic open-crumb inside.
NO NEED TO KNEAD
When you knead dough, what you’re doing is developing the gluten. Gluten is the protein which allows bread to rise but, given enough time and a wetter than usual dough, the gluten will get along very nicely without you. As an added bonus, slow-risen doughs result in a far better-tasting loaves. Also, many people who struggle to digest quick-risen, additive-packed mass produced bread find it suits them.
THE SECRET TO GREAT BREAD: STEAM
The reason I bake bread in a very hot, lidded pot is to create steam. But why do I want steam? Because a steamy, moist environment inside the pot will encourage the bread to continue to rise in the oven. This means the dough will stay soft for longer before a crust starts to form and inhibits rising.
Incidentally, my overnight, no-knead method also works for a crusty loaf made with yeast instead of sourdough starter.
the night before you want to bake
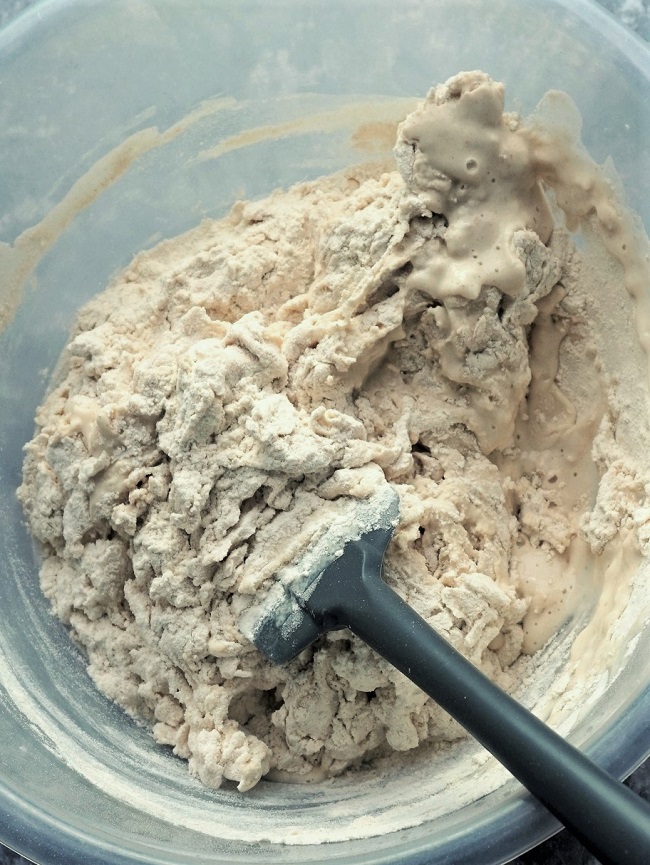
For a basic no-knead sourdough loaf, the evening before I want to bake, I mix together a small amount of my starter with water, bread flour and salt. You’ll find ingredient amounts and full instructions in the recipe card at the end.
If the starter has been stored in the fridge for a while, than I’ll plan the loaf a few days ahead. I’ll need to feed the starter over the course of a day or more, depending on how long it’s been dormant. The starter needs to be full of bubbly life to make a great loaf. As a general rule, it should have at least doubled within 4 – 6 hours of being fed.
This no-knead dough is much wetter than a standard bread dough, so I use a rubber or plastic spatula to bring the mix together. You’ll most likely get into a right old mess if you try to use your hands.
Covering the bowl with a tea towel, large plate or cling film, I leave the dough on the kitchen worktop overnight, for a total of 12-16 hours.
the next day
The next day, the dough should have risen (and probably spread out) substantially. But it will sit happily for a good few hours more without coming to any harm. In fact the longer you leave the dough, the better-tasting bread you’re likely to end up with. As I usually walk the the dog first thing in the morning, my dough is left until I get back.
One of the joys of this method is that timings are not critical. If it’s more convenient for you to make the bread later in the day (e.g. when you come home from work), then you can do most of the initial rise in the fridge. Just bring the dough back to room temperature before you continue.
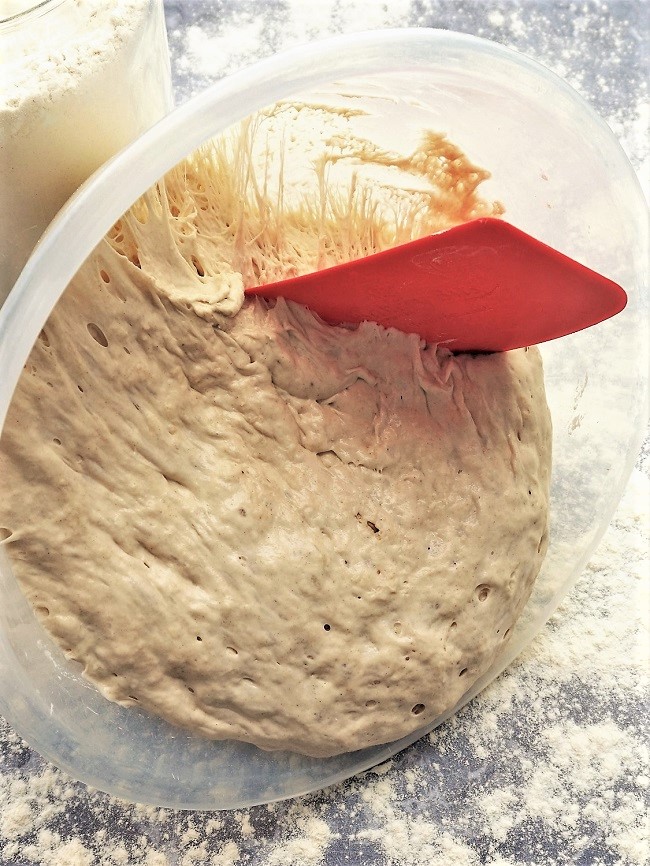
When I’m ready to get started, I scrape the dough out of its bowl onto a floured worktop. Due to the wettish dough, I recommend a dough scraper for this.
Now you can stretch (rather than knead) the dough by flattening it out then folding into thirds a couple of times. This will encourage good structure, although simply folding to create your desired shape is usually sufficient. The dough is then left to rest on the floured worktop, covered, for about 10 minutes.
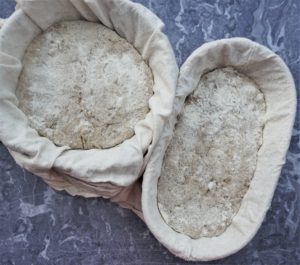
Next, I put the dough into a proving basket or tea towel-lined bowl. Whichever you use, make sure these are floured well to prevent sticking. I then re-cover and leave for about 60-90 minutes. The breads should be ready to bake when the depression left by a finger pressed into the dough slowly springs back and leaves an indentation. If it springs back immediately then you need to leave a little longer.
baking no-knead sourdough bread
For the final 30 minutes of proving time, I switch on my oven to its highest setting. At the same time, I pop in my chosen cooking vessel, complete with lid.
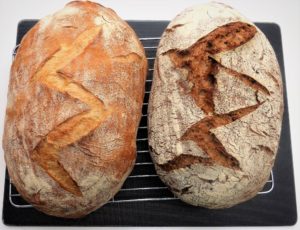
If I’m making an oval loaf it will be my Le Creuset 29cm / 4.7 litre oval casserole. For a round loaf I have a cheaper brand cast-iron pot. It’s not as good as the Le Creuset (you can perhaps see from the image below that some of the outside enamel is wearing off). But it does the job until I get around to investing in another. Update: I now use this 24cm round Le Creuset.

Any heavy pot or Dutch oven should be fine though. Just make sure any knobs or handles can withstand high temperatures.
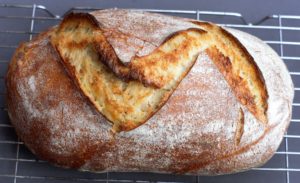
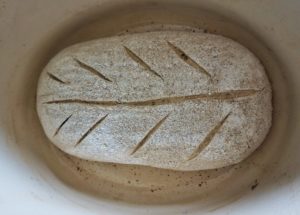
When I’m ready to bake, I turn down the oven to 240C/220 C Fan / Gas 9). Then I remove the pot from the oven and flip the dough into it so that the side that was facing up in the proving basket is now face down in the pot. I slash the top with a lame or grignette blade, put the lid back on and place in the oven. You can now leave it to bake for 30 minutes.
After 30 minutes (you might want to give heavier wholemeal loaves a couple of minutes longer), I remove the pot from the oven, take the bread out of it then put the bread back in the oven, straight onto the oven shelf. I leave it to bake for a further 10 – 15minutes depending on the type of bread. Generally, I find that loaves made with white flour take less time than denser wholemeal, rye or similar. You can also turn the oven down if the outside is getting too brown before the bread is cooked through.
cooling, storing & varying your no-knead sourdough
Bread is said to be cooked when it sounds hollow when tapped underneath. But I think experience comes in here too. Some dense breads can sound hollow, but I find they sometimes still benefit from a little more cooking. Leave the bread to cool on a wire rack. You should hear a satisfying crackling sound as the crust starts to cool down.
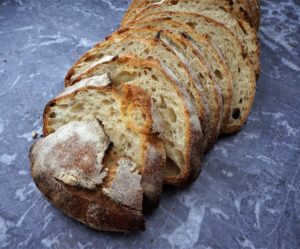
If we’re not eating the bread that day or the next, when cold I cover it with a tea towel, leave until morning and, to avoid any wasted bread, slice and freeze it. That way we always have good bread to hand.
You can vary your no-knead sourdough by using different flours such as wholemeal, spelt, rye, malted grains or any combination of these. I often like to add a few seeds such as sunflower or flax.
I hope you’ll give my overnight, no-knead sourdough bread a try and let me know how it went in the Comments. Over the years, I’ve found that when it comes to sourdough there’s no ‘one size fits all’. Flours, starters, and ovens vary, so experiment and find out what works for you.

No-knead sourdough bread cooked in a cast iron pot
Ingredients
- 600 grams bread flour
- 2 tsp salt
- 60 g/ml sourdough starter (see Recipe Notes)
- 400 ml water (see Recipe Notes)
Instructions
The night before you want to bake the bread:
-
Put the flour in a large bowl and stir in the salt.
-
Dissolve the starter in the water.
-
Stir the liquid mix into the flour until you have a rough dough that leaves the sides of the bowl clean.
-
Cover the bowl and leave overnight or 12-16 hours.
On the day of baking:
-
Scrape the dough out of its bowl onto a floured worktop. If liked, stretch the dough by flattening then folding into thirds a few times to increase holes in finished loaf, otherwise simply shape to the proving vessel by folding. Cover and leave to rest on the worktop for 10 min.
-
Place the dough into a floured proving basket or tea towel-lined bowl, cover and leave for 60-90 min until a finger pressed into the dough slowly springs back rather than almost immediately.
-
Meanwhile, preheat the oven to its highest setting and put a cast iron pot with lid inside.
-
When ready, carefully flip the dough into the pot.
Slash the top, replace the lid and put into the oven.
Turn the heat down to 240C/220 C Fan / Gas 9 and bake for 30 min.
-
After 30 min, remove the pot, take the bread out and put the loaf directly on the oven shelf. Bake for 10-20 min more until the bread is cooked through, turning down the oven if necessary to stop outside burning.
-
Leave on a wire rack to cool.
Recipe Notes
Amount of starter. I use a relatively small amount of mature starter which works well for me. You can from 60 to 100 grams if preferred, but should reduce the flour in the recipe by 50 grams and the water by approximately 50 grams.
Amount of water. Different flours will absorb varying amounts of liquid so you may need to increase or decrease the water. The dough should be we but not sloppy.
More Recipes Using Sourdough Starter
Having successfully made this “unadulterated” several times I was going to try the beer version, unfortunately, I was out of beer so I used a roasted vegetable bouillon and a tablespoon of Italian seasoning, excellent results. I’m going to use different flavours to enhance future loaves.
My starter is a mere “toddler” as yet, but your recipe is perfect. Thank you, from a British baker 80 miles north of Las Vegas.
Hello Stephen and thanks so much for your wonderful feedback. I love the sound of your roasted vegetable bouillon and Italian seasoning sourdough loaf!
Wow, thanks so much for sharing your fantastic recipe and technique! I’ve always struggled fitting in bread baking with family life. I’ve baked this twice now and the results are fab.
Thanks so much!
Thank you Sophie, that’s lovely to hear!
I was a bit sceptical about this ‘no knead’ idea but it really works.! Coupled with the use of a cast iron pot I am able to make a perfect loaf every time. A brilliant method that I now use for both sourdough and instant yeast.
Thank you for your lovely feedback, Sarah! I’d been making bread for years before I discovered the no-knead method and was also rather dubious! But it totally transformed my bread baking. So easy now!
Referencing your 16/07/2021 query to JO “Have you ever used your sourdough starter successfully at all i.e. in any other recipes? I ask because the obvious culprit would be a starter that just isn’t lively enough to get the dough to rise. Is it nice and bubbly before you use it and is the dough nicely risen in the morning after the overnight rise?” — I have never had a lively starter, it’s bubbly and doubles in volume but smaller bubbles. Starter is about three months old. So, guess I need to beef up my feedings. The finished loaf does have a doughy look rather than a finished texture. Thank you for this easy to follow recipe and your informative replies.
Thanks for your input, Suzanne! I would say that if your starter doubles in volume then that’s quite lively. At three months it’s still a baby though 🙂 so lots of time to mature. If your bread is doughy then it probably needed baking a little longer. Ovens do vary so it’s hard to be exact. In their comment below, Alex says they get good results baking at 240 degrees for an hour with the lid on.
Hi, I’ve only just recently discovered your website and I was instantly convinced that I absolutely have to try this recipe, the similar one with potatoes and the flaky cheese crackers. Tried the crackers yesterday, this no-knead sourdough today and I’ll add the potatoes one tomorrow, I’m very happy with the results, thanks a lot for the recipes, they are both easy to fit into a busy schedule and very tasty. I’m looking forward to trying many other recipes of yours, thank you very much for sharing them and I wish you and your readers vrry happy holidays!
Thank you for your lovely comments and happy holidays to you too!
I am really interested in trying your recipe, but I am used to measuring my starter by weight. Can you tell me the approximate weight in grams of 60 ml starter? Thank you
Hi Carol,
Thanks for your interest in my recipe!
The weight of 60ml of starter will vary between starters due to different hydrations and the particular flour used.
However, as a rough guide, assuming your starter is 50:50 flour and water:
30ml water weighs 30g
30ml of flour is generally converted to around 30g
Therefore 60ml of starter will weight approximately 60g, which is rather convenient! (I’ve now added a note to the ingredient list in case others have the same question).
As starters will naturally vary in their liveliness, I don’t think we have to be exact down to the last millilitre anyway. 🙂
Do let me know how it goes if you try the recipe.
Thanks so much. I am very eager to try it, as the timing fits into my schedule perfectly. Will let you know
Lovely!
I have been making the Tartine bread for two years now with all that slapping and folding. I didn’t see how this might work but it turned out great. I think next time I will put it in the fridge awhile as it was hard to handle when so soft. Genius recipe!!
If it was really soft when doing the final shaping, maybe the dough needed a little less water? As you probably know, different flours absorb different amounts of water and perhaps yours needs a little less.
Glad the recipe turned out great for you anyway!
I’ve made 2 white loaves, both according to your recipe and instructions on cooking both have been very doughy when cooked! Taste great but very heavy and seem to be not cooked enough.
Help please!
Hi Jo, Sorry to hear that.
Have you ever used your sourdough starter successfully at all i.e. in any other recipes? I ask because the obvious culprit would be a starter that just isn’t lively enough to get the dough to rise. Is it nice and bubbly before you use it and is the dough nicely risen in the morning after the overnight rise?
A second thought would be that you’re not proving the dough enough. After the second rise, I use the ‘poke’ test to see if it’s ready to bake: when you think it might be ready to put in the oven, give it a poke with your index finger and see how quickly the impression springs back. If it comes back very quickly, it’s not ready. If it comes back quite slowly but there’s still a very slight depression then I’d consider it ready. If it barely springs back at all then it’s probably over-proofed.
Doughy bread might also suggest not enough liquid was added. Different flours absorb different amounts of liquid so just make sure you add enough water to create a very loose dough before proving overnight.
Unfortunately there are so many local variables in making sourdough that it’s hard to pin down why one person can follow a recipe and get great results and someone else not so much!
I hope this helps and you get better results next time.
Thank you I’ll try again and see what happens!!
Hi Jo, I had this same problem. I found I got excellent results with Lynne’s recipe when I cooked the bread for longer and at a higher temp – 240 degrees for an hour with the lid on. That seemed to solve the doughiness! It now works a treat everytime.
Thanks for the input Alex! You’re right that oven temperature can be another variable in getting the loaf absolutely right for your particular conditions.
Hi out of curiosity what would you say is this bread’s hydration? Thank you
Hi Leni,
Like most of my cooking, I make my bread mainly by experience and ‘feel’ rather than considering things like hydration which, to be honest, I’ve never really got my head around. Not very scientific I know, but that’s me!
When feeding my starter, I don’t even measure the flour and water either, just adding enough so it feels ‘right’ to me, so I’ve no idea what hydration it is.
If you want to work it out, here’s a hydration calculator https://www.sourdough.co.uk/sourdough-hydration-calculator/
Sorry I can’t be more helpful on this one!
Not a problem. To be honest I find it confusing as well. From what I’ve been reading I think the higher the hydration the wetter the dough is which for a simple homebaker like myself it’s too hard to handle. I’m currently half way through making your beautiful spiced chai fruit sourdough and so far I’m very happy with how things are developing. I’ll be sure to tag you once I’m finished. Thank you for sharing your recipes 🙂
Yes Leni, the higher the hydration the wetter the dough.
I think there are so many variables when making any bread (your room temperature, liveliness or not of starter or age of yeast, types of flour etc. etc.) that recipes can only be a guide for you to find a method that suits your own particular circumstances and requirements.
Hope you like the spiced fruit sourdough!
Hi, I live in Singapore and with the warmer weather, should I just leave the mixture in the fridge insteead?
Hi Ruth. The dough should be fine in the fridge. I often put it in there to slow things down.
Thank you so much for a sourdough recipe that finally worked for me. The bread was soft with only a hint of sourdough flavor and crispy on the outside. I will certainly make it again. I ended up leaving it outside for about 10 hours and popping it in the fridge to prove. The next day, I took it out of the fridge and left it to return to room temperature before baking.
That’s fantastic, Ruth! Always love to hear that people are enjoying my recipes. 🙂
I just wanted to say this recipe has changed my life, thank you so much! I make a loaf every night, and our 6 children love love love it. Sometimes I add raisins and spices to make a fruit loaf, sometimes I make it half wheat or half rye. So simple and doesn’t take much time, thank you so much for sharing this recipe 😊 my family loves it ❤️
It makes me so happy to receive comments like this! So pleased you and the family are enjoying the bread!
I do like your recipes. They all work well. This is my go to for standard loaf. Very simple and forgiving if you need to slow it down. I’ve tried several variations on this from other writers but consistently this gets great results. Thank you.
Thanks so much for your kind feedback, John! Always lovely to hear that people are getting good results from my recipes.
You are a genius! This method works perfectly and so easy to fit around life. I have even better results if I put the dough in the fridge for a few hours or overnight. Thank you for such a simple recipe thst it’s already committed to memory and clear method.
Thank you for the lovely feedback Sue! It really is an incredibly simple method isn’t it? As you’ve found, it’s easy to fit around individual circumstances & lifestyle – I often pop the dough in the fridge if I suddenly find I need to get on with something else & then come back to it when I’m ready. Thanks again!