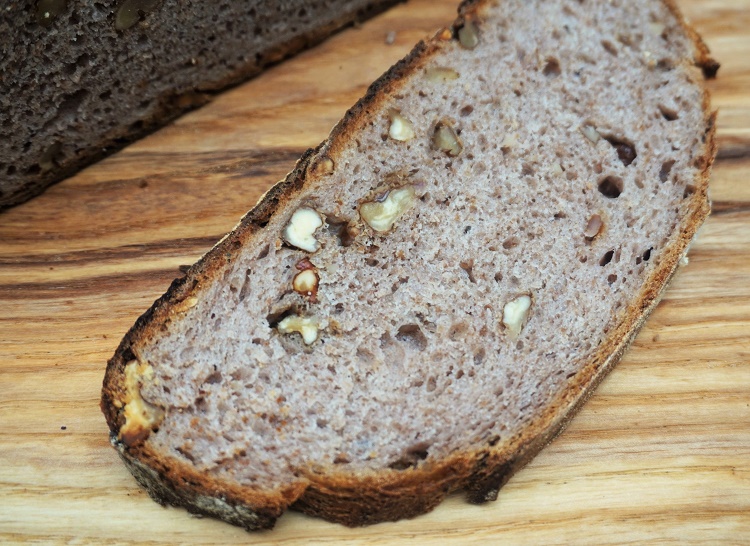
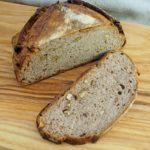
Walnut Bread
Walnut Bread is a wonderful, tasty loaf. Equally good with cheese or toasted and slathered with butter and honey. With a mix of white, rye and wholemeal flours, the bread has substance without being heavy. Walnut pieces give the loaf a satisfying crunch, while a few ground ones distribute the flavour throughout.

I found this recipe for Walnut Bread in Dan Lepard‘s The Handmade Loaf. It was that book which got me started on my sourdough journey. I’d been baking bread off and on for many years before then, but never sourdough. Following Dan’s step-by-step instructions, I made my own sourdough starter and began making basic loaves. That sourdough starter is still going strong, almost ten years later.
I’ve since developed my own preferred method for overnight, no-knead bread, both sourdough and yeasted. Now more confident in my own baking abilities, I’ve recently gone back to The Handmade Loaf for inspiration, but adapted its recipes to my own method.
This Walnut Bread was the first of those adaptations, and I’m pretty pleased with it.
The recipe uses both sourdough starter and a little dried yeast.
WALNUT BREAD
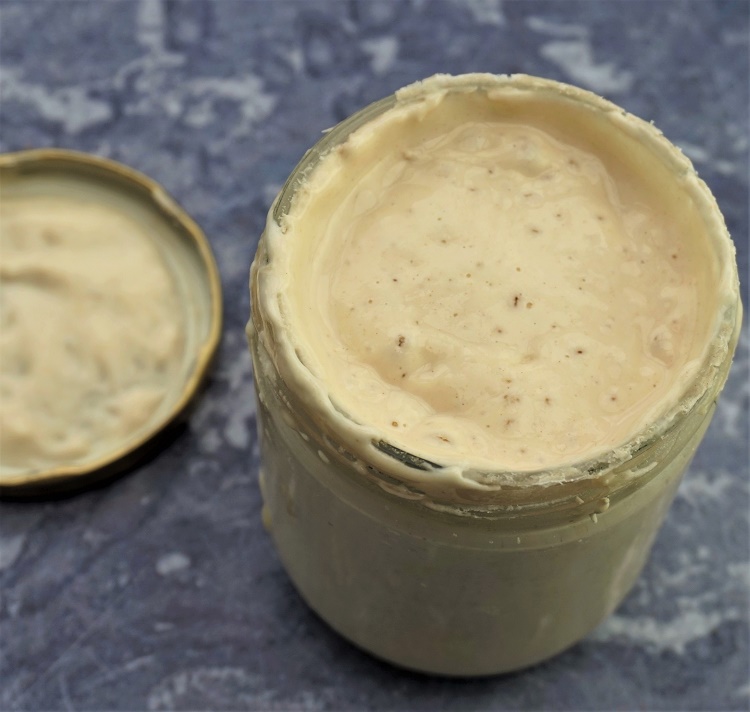
The thing I like about this Walnut Bread is that it’s very walnutty! That’s because, besides the chunks of walnut studding the loaf, you also make a paste of ground walnuts which is incorporated into the dough.
This distributes the walnut flavour throughout the bread and gives the dough a pleasing, almost pinkish-purple tinge.

Besides adapting it to suit my overnight, no-knead method, virtually the only change I’ve made to the original recipe is to add a few more walnut pieces.
THE NIGHT BEFORE
If you’ve read any of my other posts about bread making, you’ll know that you mix the dough the night before you want to bake. For this recipe, you’ll need some sourdough starter that’s been recently fed and is nice and lively, so get cracking on that a few days before if your starter is a little lackluster.
After making a paste with ground walnuts, water, honey, melted butter and salt, it’s mixed with the rest of the ingredients into a dough – no kneading required.
Once the dough is covered, you can forget about it for the next 12-14 hours.
See an overview of my overnight, no-knead method here
BAKING THE BREAD
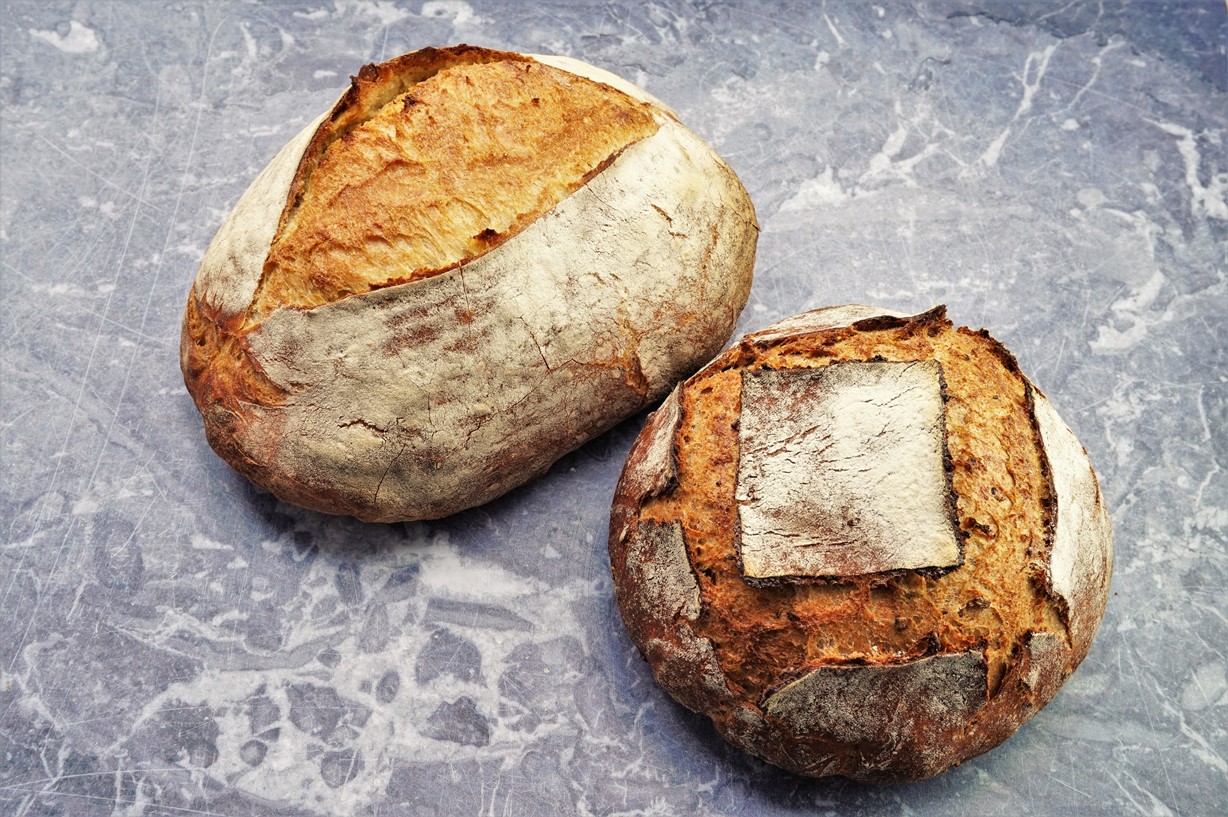
For the first 30 minutes of cooking, I bake the bread in a very hot, cast iron pot with a lid. This creates a steamy, moist environment which encourages the bread to rise.
To finish the loaf (about another 15-20 minutes), I bake the bread out of the pot, directly on the oven shelf, at a slightly lower temperature.
And that’s it. A wonderfully risen, crusty bread full of walnut flavour.

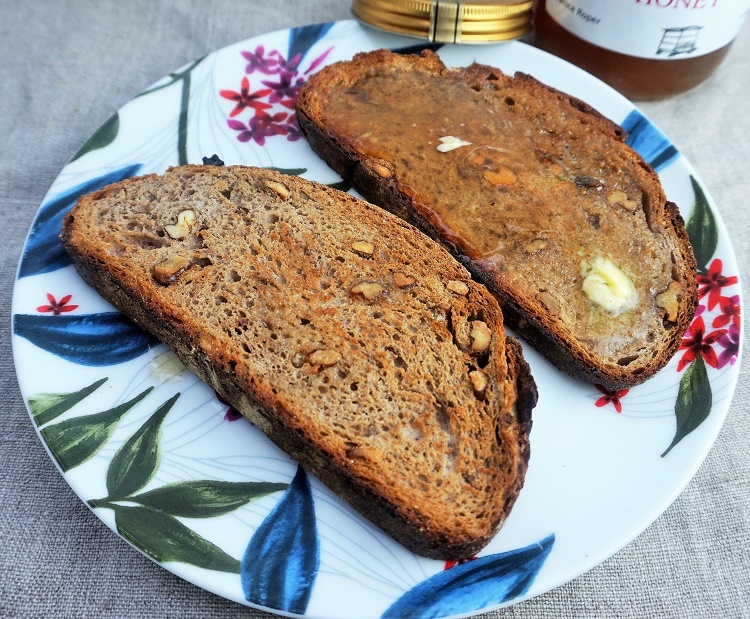
EATING WALNUT BREAD
I find that toasting the Walnut Bread brings out even more of the nutty flavour in the crumb. It was delicious spread lavishly with butter. I’m a big fan of honey on toast too and the combination of earthy, crunchy Walnut Bread and sweet, dripping honey was a sublime one.
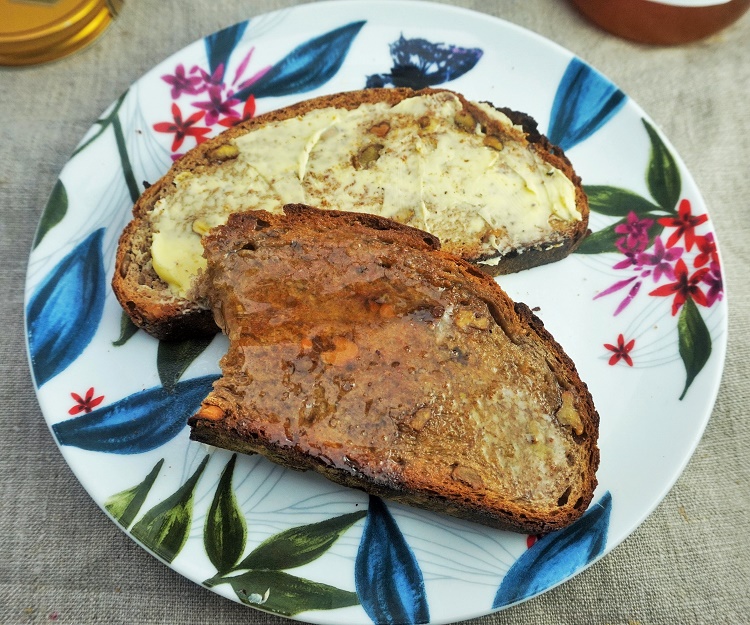
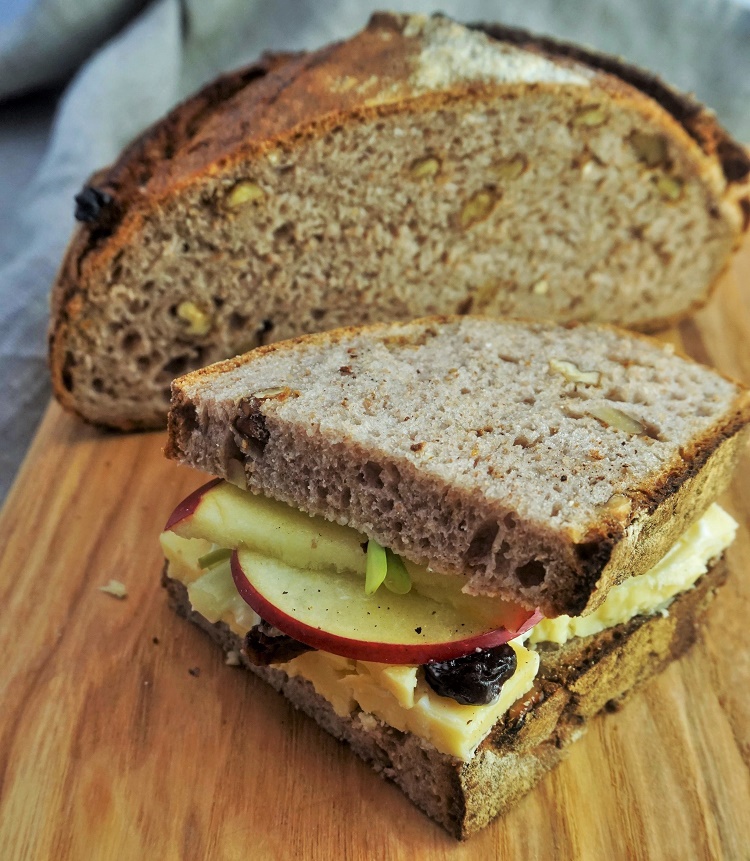
But Walnut Bread is equally good with savoury pairings.
Try it in a sandwich with good, strong cheese, crisp apple and celery plus a sprinkle of sweet raisins.
The bread should be fine to eat for at least three days. It also freezes well; I slice and freeze virtually all my homemade bread if not eaten on the second day to make sure there’s no waste. Just take out as many slices as you need – you don’t even need to defrost before popping in the toaster.
Walnut Bread
Walnut Bread is equally good with cheese or toasted and slathered with butter and honey. Walnut pieces give the loaf a satisfying crunch, while a few ground ones distribute the flavour throughout. You'll need some recently fed, lively sourdough starter for this recipe.
Ingredients
For the walnut paste
- 50 g walnuts ground
- 50 g water
- 2 tbp honey
- 20 g butter melted
- salt pinch
For the dough
- 350 g white bread flour
- 100 g rye flour
- 50 g wholemeal flour
- 1.5 tsp salt
- two thirds tsp dried yeast
- 120 g walnuts broken or halved
- 100 g sourdough starter
- 220 g water
Instructions
THE DAY BEFORE YOU WANT TO BAKE THE BREAD
For the walnut paste
-
In a bowl, mix all the ingredients together to form a paste. Set aside.
For the dough
-
Put the flours, salt, dried yeast and walnuts in a large bowl then set aside.
-
Whisk the sourdough starter into the water then stir in all the walnut paste.
-
Pour all the water/starter/walnut paste liquid into the large bowl containing the flour mixture.
-
Use a rubber spoon or spatula to bring the mixture together into a rough, wet dough.
-
Cover the bowl and leave overnight or 12-14 hours.
ON THE DAY OF BAKING
-
Scrape the dough out of its bowl onto a well-floured worktop. Flatten out then fold the dough into thirds a few times before moulding it into your desired shape of loaf. Leave to rest for a few minutes, covered, while you prepare a proving basket/banneton or bowl (see next step)
-
Prepare a basket or banneton by dusting well with flour. If using a bowl, line with a clean tea-towel and dust that well with flour.
-
Place the dough in the prepared banneton or bowl and cover. Leave to prove for 30 minutes. Pre-heat your oven to 250C or its highest setting, with a heavy, lidded pot inside to heat up also.
-
After 30 minutes, reduce oven temperature to 220C, remove the pot from the oven, take off the lid and carefully flip the dough from the proving vessel into the pot.
-
Slash the top of the dough, replace the lid and put the pot back in the oven. Leave to bake for 30 minutes without removing the lid.
-
After 30 minutes, reduce the heat to 200C. Remove the pot from the oven, take the bread out of it and put the bread back in, directly onto the oven shelf. Bake for a further 15-20 minutes until the bread is cooked through. If necessary, reduce the oven temperature to stop the crust over browning before the loaf is finished baking.
-
When the loaf sounds hollow if tapped underneath, it should be cooked. Place on a wire rack to cool.
Recipe Notes
Recipe adapted from Dan Lepard's highly recommended book, The Handmade Loaf.
ENJOYED THIS RECIPE? YOU MAY ALSO LIKE: