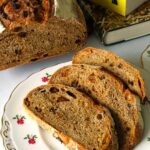
Spiced Fruit Bread
Spiced Fruit Bread is flavoured with cinnamon, mixed spice, orange zest, and is studded with bursts of juicy, plumped-up dried fruit. Wonderful buttered for breakfast or afternoon tea, I think it’s even better toasted first to bring out the subtle sweetness and rich taste.
Made with an easy no-knead overnight method and minimal hands-on time, you can bake Spiced Fruit Bread in a covered pot, Dutch oven, or in a loaf tin.

Disclosure: this post contains affiliate links. If you buy via my links, I may earn a small commission at no extra cost to you.
Jump to Recipe

One of the very first recipes I posted when I started this blog back in 2017 was for Spiced Fruit Sourdough. Full of complex spicy, fruity flavour, it still gets rave reviews and five-star ratings. So, I thought it was time I made a version for non-sourdough home bakers. My Spiced Fruit Bread still uses an easy no-knead, overnight method, but incorporates instant dried yeast instead of a sourdough starter.

Spiced Fruit Bread is delicious sliced and buttered, toasted or not. And with most of its sweetness coming from dried fruit (there’s just a tablespoon of added honey, maple syrup or sugar in one large loaf) you can even eat it with cheese or other savoury toppings as well as jam, marmalade etc.

NO KNEAD, OVERNIGHT SPICED FRUIT BREAD
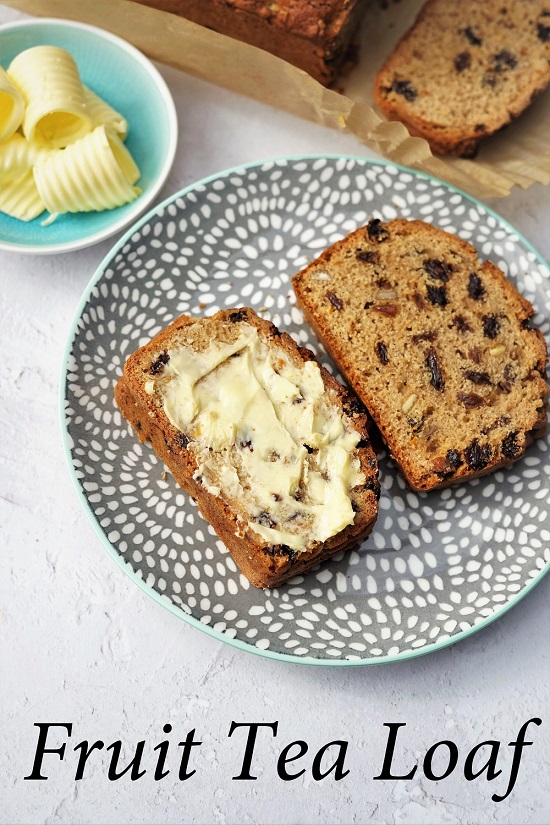
Although this is a yeasted bread, not a cake-like quick bread such as my Fruit Tea Loaf, that doesn’t mean you have to knead the dough.
Many years ago, I discovered that a wetter than usual dough combined with a long fermentation (sometimes call first proof or prove) can replace the kneading of conventional bread making. Together, these promote the development of gluten which is normally achieved by kneading. And it’s gluten that gives bread its rise and structure.

When I say long fermentation, we’re talking 12 – 14 hours at normal room temperature. For most of us, this means it’s convenient to mix up the dough in the evening then shape and bake the next day. But the method is very forgiving, and you can adjust it to your own routine. For example, if you’re out all day, you can slow down fermentation in the fridge. It will sit there happily until you come home the following evening.

EQUIPMENT
For a good rise and exceptional crust, I bake my Spiced Fruit Bread in a heavy, lidded pot. The interior gets incredibly hot and steamy which keeps the dough softer for longer as crust formation is delayed. The pot, including any handles or knobs, needs to withstand temperatures up to 240°C / 220° Fan / Gas 9 / 475° F. It’s this method you see in the images here, but for those who don’t have a suitable pot, you’ll find instructions for baking in a loaf tin in the notes to the recipe card at the end.
Although they’re expensive, I think Le Creuset pots are a great investment. Various editions can be heated to the required temperature, and they last for years. The one you see in this post is my Le Creuset 29cm / 4.7 litre oval casserole (affiliate link) and I’ve been baking bread in it for over a decade. Of course, you may be able to find cheaper ones with similar properties or use a Dutch oven.

During the dough’s second rise or prove, I place it in a baker’s basket called a banneton. These usually come with a cloth liner. For oval loaves I have a 25 cm long basket (affiliate link). Alternatively, you can improvise with a suitably sized bowl or other container lined with a cloth. Note that if you’re baking in a loaf tin, you won’t need a proving vessel.
OTHER EQUIPMENT: OPTIONAL BUT RECOMMENDED
(affiliate links)
Silicone spoon Much better than a wooden spoon when stirring up doughs.
Silicone mat Useful for all sorts of baking, not just breads. You need less flour to prevent sticking, and cleaning up is easier too.
Dough scraper Very cheap to buy (you sometimes get one free with the silicone mat above), a scraper makes handling dough and removing it from bowls and worksurfaces much easier.
HOW TO MAKE SPICED FRUIT BREAD
You’ll find full instructions and ingredient amounts in the recipe card at the end. But please read the whole of this post first for extra tips and step-by-step images to guide you. You should also use digital scales and metric measurements as these were used to test the recipe.

THE DAY BEFORE
In Britain, it’s traditional when making some types of fruit breads and cakes to soak the dried fruit in hot tea. This makes it plump and juicy, plus the flavourful soaking liquor can be used in the dough or batter. Here I’ve used ordinary black tea, but you could use your favourite: fruity, herbal, or even spicy chai.
Make the tea nice and strong. I use 2 tea bags for 500 ml of boiling water. To add a little sweetness and citrus flavour, I dissolve a tablespoon of maple syrup, honey or sugar in the tea and add the grated zest of an orange to the fruit. For a sweeter bread you can increase the sweetener to two or three tablespoons.

Pour the hot tea over the fruit, stir, then leave until cold. Strain in a fine sieve placed over a jug to catch the liquid. Push down on the fruit to get as much liquid out as you can. Otherwise, the dough could end up too wet.
MAKE THE DOUGH
Next, put strong bread flour in a mixing bowl. For this large loaf, I use 450 g of white bread flour and 150 g of wholemeal bread flour. You can replace the wholemeal with more white if you prefer. Now add to the flour instant dry yeast (i.e. the sort that doesn’t need activating in liquid first), salt, mixed spice and cinnamon in the amounts shown in the recipe card. Tip: if you used masala chai tea bags then replacing these spices with chai masala spice mix would be perfect.

Stir these in, then the soaked and drained fruit. Make a well in the middle then gradually stir in enough of the soaking liquor to form a dough that’s wettish but still firm rather than sloppy, with no dry flour visible. Use the right-hand image below to guide you. You may not need all the soaking liquor, or you may need a touch more. If you don’t have enough, topping up with tap water is fine.

Cover the dough (I place the whole thing in a large reusable polythene bag) and leave to ferment overnight. As mentioned, you can extend the fermentation in the fridge. This is also useful if the room is warm. You can also mix and match: leave at room temperature for a few hours then put in the fridge overnight.
THE NEXT DAY
In the morning, the dough will have spread out as well as risen and be bubbly. This is perfectly normal for wetter doughs. If it doesn’t seem that lively, leave a little longer. And if it’s been in the fridge, allow to come to room temperature before proceeding.

Dust a little flour over your work surface, ideally covered with a silicone mat, sprinkling some in your lined banneton or improvised proving vessel too. Transfer the dough onto the work surface and fold over itself several times until smooth. Add more flour if needed to prevent sticking but try to use as little as possible. Fold the dough again, this time shaping it to fit your proving vessel. If there’s any dried fruit peeking out of the dough, push it in as it can scorch easily.
SECOND RISE OR PROVE
Sprinkle the top with more flour then put it in the proving vessel with the rounded side facing DOWN. Dust the side now facing up with a little flour then cover again or put back in your large polythene bag. The dough now has its second rise or prove, ideally in a warmer spot. I use the small space of my microwave, putting a large mug or jug filled with boiling water next to the bowl. You can also prove at room temperature, although this will take longer.

Depending on temperature, the prove should take 30 – 45 minutes. The dough should almost double, but the best way to check if the dough is ready is to gently insert a finger. Does the dough quickly or slowly spring back? If it springs back slowly and an impression is left by your finger, then the dough is ready. If it springs back immediately and doesn’t leave an impression, prove for longer, then check again.
Towards the end of the second rise, you should preheat your oven to the temperature shown in the recipe card. Be sure to put in the cooking pot and its lid to preheat too.
BAKING SPICED FRUIT BREAD
When you’re ready to bake, remove the pot from the oven and take off the lid. Carefully flip the dough into the pot so the rounded side is now facing UP. Use a sharp knife or baker’s blade to cut a slash all along the length of the dough. Put the lid on the pot, place in the oven and bake for 35 minutes. After 35 minutes, reduce the temperature as per the recipe card. Remove the pot from the oven, tip the bread out of it, then return the loaf to sit directly on the oven shelf.

Bake for a further 8 – 10 minutes or until the bread is cooked through: it should sound hollow when tapped underneath. If you’re unsure, turn off the oven but leave the bread in for the final few minutes.

Given the wonderful aromas that will be filling your kitchen, it’s tempting to want to dive straight in. But you need to leave the Spiced Fruit Bread on a cooling rack until completely cold before slicing or storing.
EASY & DELICIOUS SPICED FRUIT BREAD
Considering how little effort it requires, I think this loaf really is excellent. Substantial without being heavy, nicely chewy and with those wonderful fruity and spicy flavours, Spiced Fruit Bread always feels like a treat to me. Lovely spread with butter, plus jam, marmalade or Apple Butter if you like, you can even have it with cheese as it’s not overly sweet.

As we’re a household of just two, whatever hasn’t been eaten the day after baking gets sliced and put in the freezer. It’s wonderful to be able to grab a few slices for breakfast, a snack, or afternoon tea and pop them straight in the toaster. Toasted is my favourite way to eat it, spread with salty butter, the heat bringing out the spicy flavour and caramelizing the sugars. Delicious!

If you’ve made this recipe, I’d love to know what you thought. Please do leave a comment and rating.

Spiced Fruit Bread
With cinnamon, mixed spice, orange zest and bursts of juicy plumped dried fruit, this yeasted bread is wonderful, toasted or not, buttered for breakfast, with a cuppa, or part of an afternoon tea.
Made with an easy no-knead overnight method and minimal hands-on time, you can bake Spiced Fruit Bread in a covered pot, Dutch oven, or in a loaf tin: see Recipe Notes below for baking in a tin.
It's recommended you read the accompanying blog post and Recipe Notes below before starting to cook. Use digital scales and metric measurements as these were used to test the recipe.
Ingredients
- 1 tbsp honey, maple syrup or other sweetener (increase to 2 or 3 tbsp for a sweeter bread)
- 500 ml hot tea (e.g. black, masala chai, herb, fruit)
- 150 g mixed dried fruit (e.g. raisins, currants, sultanas)
- 1 orange, zest only (finely grated and chopped small)
- 450 g strong white bread flour (plus extra for dusting)
- 150 g strong wholemeal bread flour (can be replaced with more white bread flour)
- 2 level tsp instant dry yeast (i.e. the sort which does not need activating before adding to the rest of the ingredients)
- 2 level tsp salt
- 2 rounded tsp mixed spice (can be replaced with chai masala spice mix)
- 1 rounded tsp ground cinnamon
Instructions
The day before baking
-
Dissolve the honey, maple syrup or other sweetener in the hot tea.
Put the dried fruit and orange zest in a heatproof bowl and pour the tea over. Stir then leave to soak until the liquid is cold.
Over a jug to catch the liquid: strain the fruit through a sieve then press with the back of a spoon to remove as much liquid as possible.
-
Put the flours in a large bowl and stir in the dry yeast, salt, and spices. Stir in the soaked and well-drained fruit.
Make a well in the centre and gradually stir in enough of the soaking liquid to form a dough that's wettish but firm rather than sloppy and with no dry bits of flour: see image in the blog post for how it should look. You may not need all the liquid or you may need a little more: tap water is fine.
-
Cover the bowl or place the whole thing in a large reusable polythene bag and leave to ferment at room temperature overnight.
Tip: If you want to slow fermentation down (e.g. if the room is warm or it's more convenient) do the fermentation in the fridge or leave at room temperature for a few hours then put in the fridge overnight.
On the day of baking
-
The dough should have risen, spread out and be bubbly. If not, leave a little longer. If it's been in the fridge, allow to come to room temperature before proceeding.
Dust flour over your work surface, ideally covered with a silicone mat, and scrape the dough onto it. Fold over itself several times until smooth: add only as much extra flour as needed to prevent sticking.
Sprinkle flour inside a lined banneton (or an improvised proving vessel such as a bowl lined with a tea towel).
Fold the dough again, this time shaping to fit your proving vessel. Sprinkle the top with more flour then put it in the vessel with the rounded side facing DOWN. Dust the side now facing up with a little flour.
Place in a large reusable polythene bag or cover it, then leave in a warm place for approximately 30 - 45 minutes (e.g. in a switched off microwave with a jug of very hot water alongside).
While it's proving: preheat your oven to 240°C / 220° Fan / Gas 9 / 475° F and put a lidded cast iron pot or Dutch oven on the middle shelf.
-
Check if the dough is ready to bake: gently insert a finger into the dough and see if the dough quickly or slowly springs back.
- If the dough springs back slowly and leaves an impression, it's ready.
- If it springs back immediately and doesn't leave an impression then prove another 5 - 10 minutes and check again.
-
When ready to bake, remove the pot from the oven and take off the lid.
Carefully flip the dough into the pot so the rounded side is now facing UP.
Use a sharp knife or baker's blade to make a slash along the length of the dough.
Put the lid on the pot, place in the oven and bake for 35 minutes.
-
After 35 minutes, reduce the heat to 220° C / 200° Fan / Gas 7 / 425°F.
Remove the pot from the oven, tip the bread out of it, then return the loaf to sit directly on the oven shelf.
Bake for a further 8 - 10 minutes or until the bread is cooked through: it should sound hollow when tapped underneath. If you're unsure, switch off the oven but leave the bread in for the final few minutes.
Tip: ovens do vary, so if the top is darkening too quickly, reduce the oven temperature a little.
-
Place on a wire rack until completely cold before slicing.
Best eaten within 3 days or can be frozen.
Tip: slice before freezing so you can take out as much as you need without waste. Can be toasted from frozen.
Recipe Notes
ESSENTIAL EQUIPMENT (further details and affiliate links in the accompanying blog post)
Unless you're doing the variation below (i.e. baking in a tin), you'll need:
- a heavy, lidded pot or Dutch oven in which to bake the bread. It should have a capacity of at least 3.5 litres. Check that any knobs or handles can also withstand the high temperatures required.
- to support the dough on its second rise or prove, you'll need a banneton or proving basket or improvise one by lining a large bowl with a tea towel or other cloth.
OPTIONAL EQUIPMENT (further details and affiliate links in the accompanying blog post)
A dough scraper plus a silicone mat to cover your work surface are highly recommended: they make it easier to remove doughs from their bowl, fold and shape, and make clean-up quicker.
BAKING IN A TIN
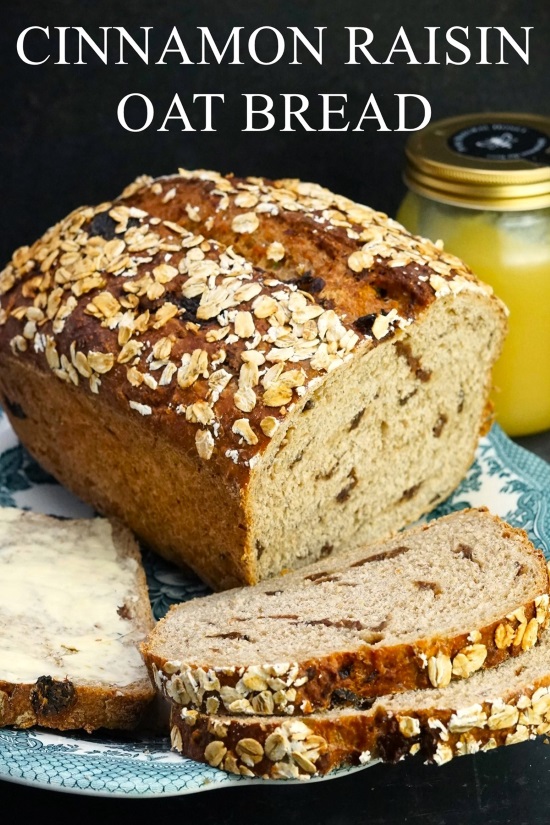
If you don't have a suitable pot or Dutch oven, this bread can be baked in a 2lb/900 ml capacity loaf tin. Follow 'The day before baking' instructions as above, then switch to the 'On the day of baking' instructions from this recipe: Cinnamon Raisin Oat Bread (omit the oat topping).
MORE RECIPES


Really easy and very delicious. I added a little more fruit and spice second time but great sliced, frozen and pulled out for breakfast toast. Thank you!
Thank you, Joanna. So glad you enjoyed my recipe!