Raisin & Lemon Oatmeal Scones
Raisin & Lemon Oatmeal Scones are a delightful variation on classic British sultana scones. With plumped raisins and fresh lemon zest, swapping in oatmeal for some of the wheat flour in these light and fluffy scones brings a hint of nutty flavour and makes them extra soft too. Delicious spread with butter, butter and jam, or cream and jam.
In this post I also share my top tips for making almost any British-style scone.

Disclosure: this post contains affiliate links. As an Amazon Associate if you buy via these I may earn a small commission at no extra cost to you.
Jump to Recipe
HOMEMADE SCONES: QUICK & EASY SWEET TREAT
Whenever I need a sweet bake but don’t have a lot of time nor want to buy in special ingredients, homemade scones are always near the top of my list of contenders. Because once you’re familiar with the simple method, classic British scones can be put together in 15 minutes. They bake in a similar time too. So you’re done and dusted in around 30 minutes.
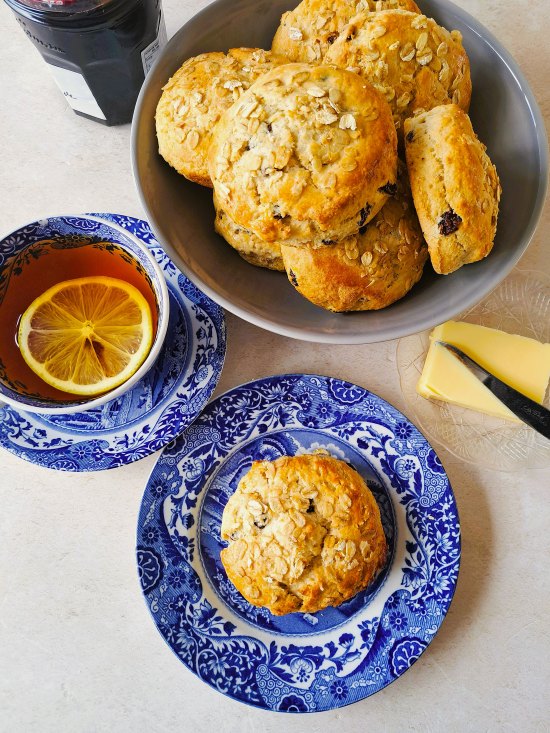
Light and fluffy inside, pleasantly crispy on the outside, just split open, spread generously with butter (plus jam and cream if you like) and you’ve a treat that always pleases.
Recently though, I’ve been adding an extra dimension to my homemade scones: oatmeal. Not only does this increase the nutrition and flavour, oatmeal can also make your scones even more soft and tender. Before I tell you more about that, here’s a rundown of the basic ingredients for virtually any British-style scone.
INGREDIENTS
The basic ingredients for British scones are ones I always have in the fridge and pantry.
- Self-raising flour (or plain/all-purpose + baking powder). I prefer mainly white wheat flour for scones, but you can replace some or all with wholemeal.
- Baking powder. Even if your flour already includes raising agents, this gives an extra boost.
- Salt. Enhances the flavour of the other ingredients.
- Butter. For flavour, texture and binding. Use it cold straight from the fridge.
- Sugar. White caster sugar or experiment with others e.g. soft light brown. Leave out if making savoury scones.
- Yogurt or alternative. I use plain yogurt, either my homemade Instant Pot yogurt or thick Greek-style, in all my scones as it makes them extra light and fluffy. Alternatively, you could use the more traditional buttermilk. Although my mother always made her scones with all milk, I find you get a better result using yogurt or buttermilk. I think it’s their greater acidity which gets the raising agents going.
FLAVOURINGS
To these base ingredients you add any extras and flavourings. Dried fruit is popular, as in my Classic Sultana Scones. Or how about fresh fruit and warm spice in Apple & Cinnamon Scones? And don’t forget the whole host of savoury scones. My delicious Very Cheesy Cheese Scones are always in the top 3 of my most popular recipes!




But the scone recipe I’m sharing today is my current sweet favourite. Raisin & Lemon Oatmeal Scones.
RAISIN & LEMON OATMEAL SCONES
You’ll find a recipe card at the end with ingredient amounts and full instructions. But I recommend you read the whole of this post first for extra tips plus step-by-step images to guide you. For the best results, please use digital scales and metric measurements as these were used to test the recipe.
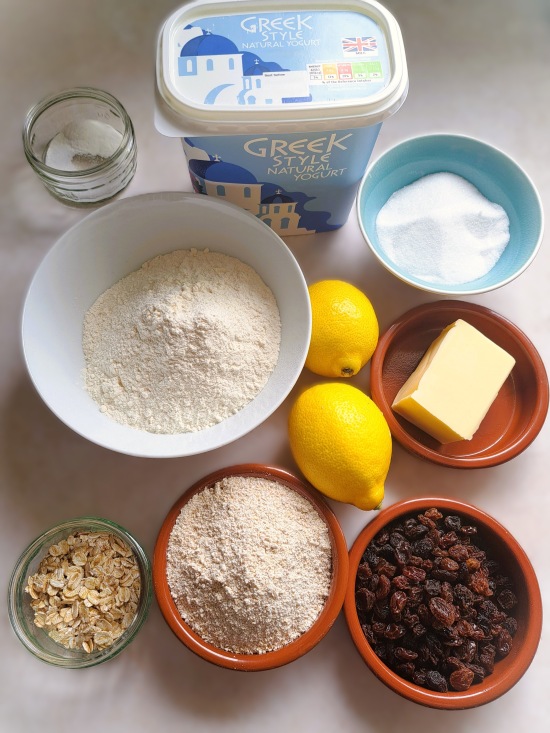
Here are the extra ingredients you need for my Raisin & Lemon Oatmeal Scones.
- Raisins. I think these have a richer, fruitier taste than sultanas. To make them nicely plump and juicy I soak in boiling water for around 10 minutes. Drain and pat dry before adding to the recipe. If you’re really short of time, skip the soaking – the scones will still be good.
- Zest from 2 lemons, finely grated. Gives a lovely fresh zingy flavour.
- Oatmeal. I think oatmeal brings an almost nutty flavour to all kinds of bakes. It also helps to make them softer which is great in scones. As oats are naturally gluten-free though, too much oatmeal can make bakes dense. I replace one-third of my usual wheat flour with oatmeal. Experiment with more if you like, but I wouldn’t go higher than another 50 g of oatmeal to keep things light.
- Rolled or porridge oats. To give a hint to what’s inside, I like to decorate the scones with a sprinkle of oats before baking.
What is oatmeal and how to make your own?
For those in the USA, what you know as oatmeal here in Britain we call porridge. For us, oatmeal is basically oat flour. You can sometimes buy fine oatmeal or oat flour in supermarkets. In my experience, oat flour tends to be more expensive but the product is little different. I buy oatmeal relatively cheaply from a local health food store.
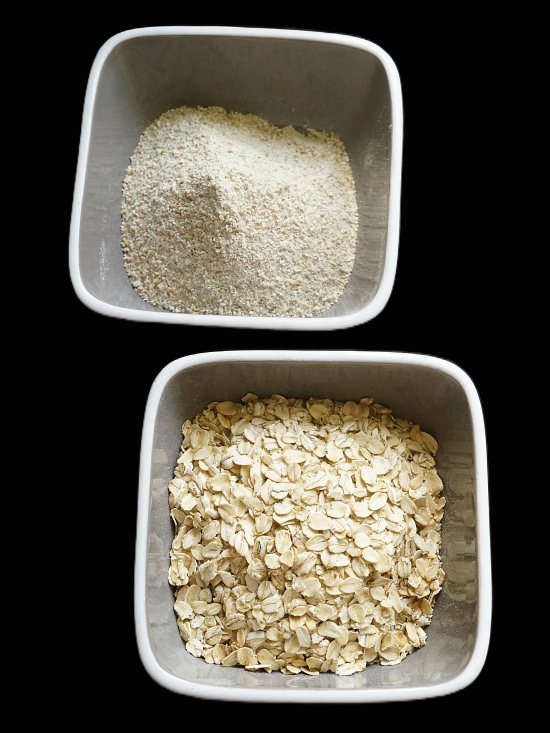
They sell fine, medium, or coarse, and it’s the fine sort that’s needed for Raisin & Lemon Oatmeal Scones. However, it’s dead easy and most likely cheaper to make your own oatmeal. Simply whizz up rolled or porridge oats in a blender or food processor until fine.
Due to the absence of gluten in oats, you may find that oatmeal scones don’t rise quite as much as all wheat flour ones. But I think the flavour and texture make up for that.
TOP TIPS FOR MAKING SCONES
Whatever flavour of scone you’re making, sweet or savoury, there’s a few tips well worth knowing. Follow these for the lightest and fluffiest homemade scones.

- Self-raising flour and baking powder lose their power quickly once open. So, always make sure packets are well within their best before date. If open for many months, even if still within date, they can also give a poorer rise. My advice is to keep in airtight containers and try to use within a few months.
- Once the liquid has been added, the raising agents will be activated. So work as quickly as you reasonably can without rushing. Don’t leave the dough hanging around: roll, cut out, and put the scones straight into the oven.
- To keep scones light, handle the dough as little and as gently as possible.
- Although scones will rise in the oven, roll the dough too thinly and they won’t be tall enough. I recommend rolling 2½ – 3 centimetres thick.
HOW TO MAKE RAISIN & LEMON OATMEAL SCONES
To make the dough, start by sifting the flour, baking powder, and salt into a mixing bowl. Add the oatmeal and stir in. Grate in the butter, dipping into the flour now and then to reduce sticking, then rub in with your fingertips. Next, stir in the sugar, raisins, and lemon zest.
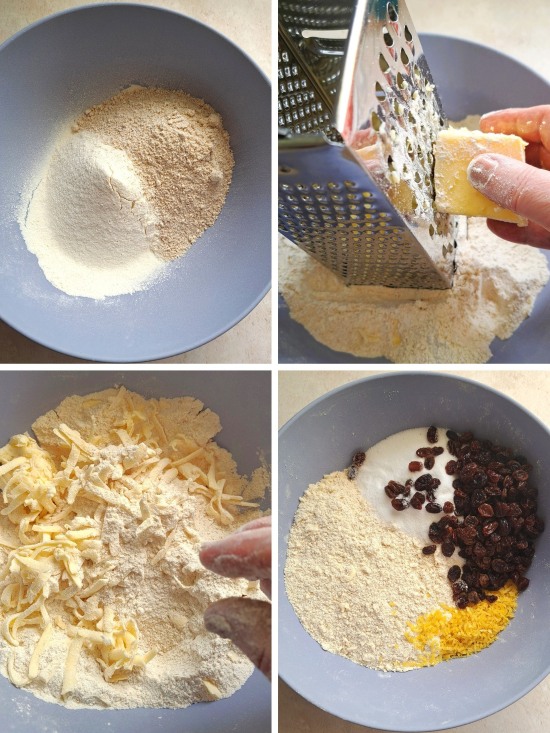
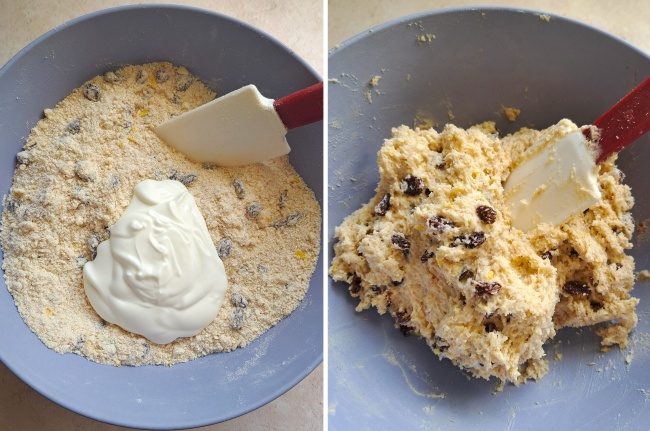
These are followed by the yogurt (or buttermilk if preferred). Because different flours absorb varying amounts even of the same liquid, it’s not possible to say exactly how much you should add. What you’re aiming for is a dough that’s soft without being wet. I find I usually need 150 – 175 ml. But you may not use all that or perhaps you’ll need a little more. Be guided by the image below and add the liquid gradually so you don’t add too much. I use one of these sturdy silicone spatulas to bring the dough together.
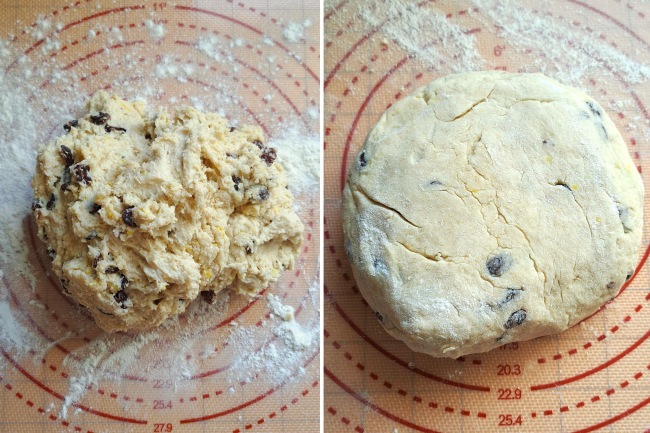
Before rolling out the dough, lightly sprinkle your work surface with a little flour. For loads of baking jobs these silicone mats are a real boon, reducing sticking as well as making clean up easier. Scrape the dough out and very gently knead it until it’s almost smooth. Don’t worry about the odd line across the top, they’ll largely disappear when you roll the dough.
Flour your rolling pin and roll the dough 2½ – 3 cm thick and stamp out scones. Dip your cutter into flour now and then if the dough sticks. Keep gathering the scraps and re-roll to make more scones.
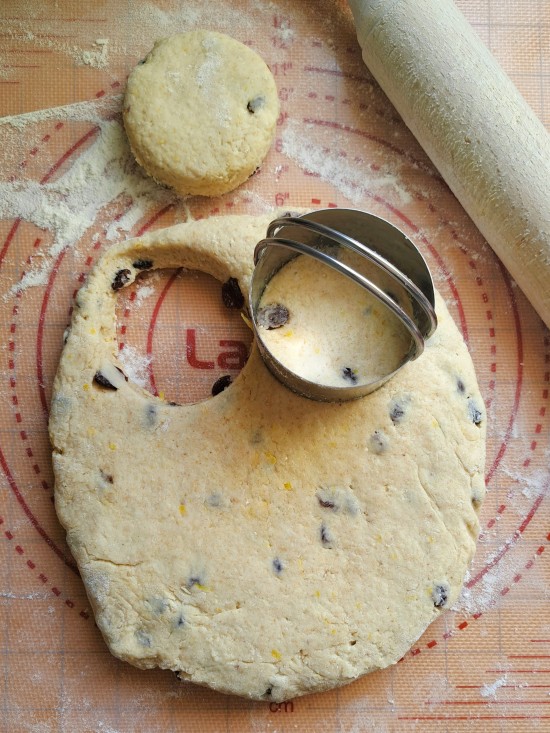
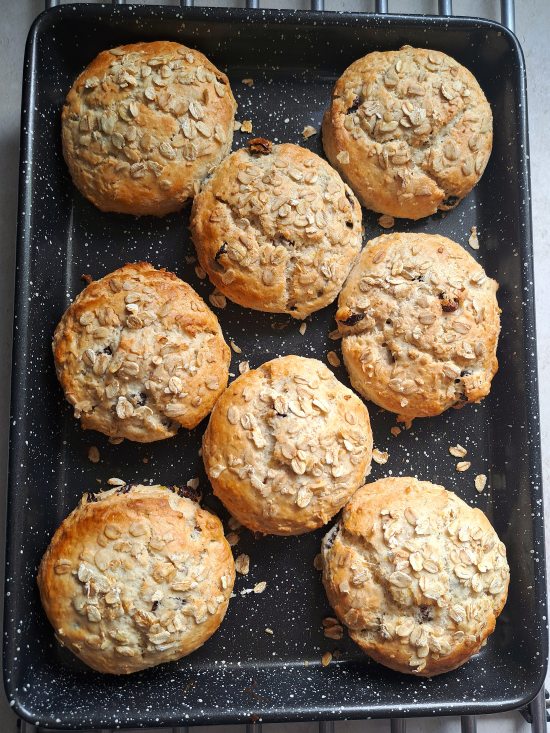
Depending how thickly you rolled and how big a cutter you used, you should get 6 – 8 scones. For the ones you see in this post, my dough was approximately 2½ cm thick and I got 8 scones using a round 6.5 cm cutter.
BAKING THE SCONES
As you stamp out the Raisin & Lemon Oatmeal Scones, place them on a baking tray that’s either greased or lined with baking paper. So that the oats stick to the tops, brush over more yogurt or buttermilk. Sprinkle over the oats and gently press down.
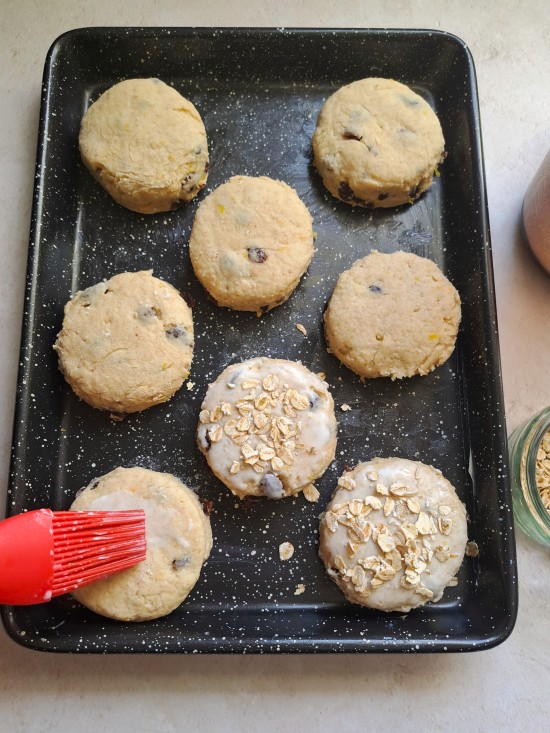
The scones should now go straight into the oven preheated to the temperature shown in the recipe card. Although ovens can vary, they should take around 12 – 15 minutes to become risen, firm, and golden brown.

Because my oven bakes unevenly, I turn the tray around after 10 minutes. When done, transfer the scones from the tray and onto a cooling rack.
SERVING & STORING RAISIN & LEMON OATMEAL SCONES
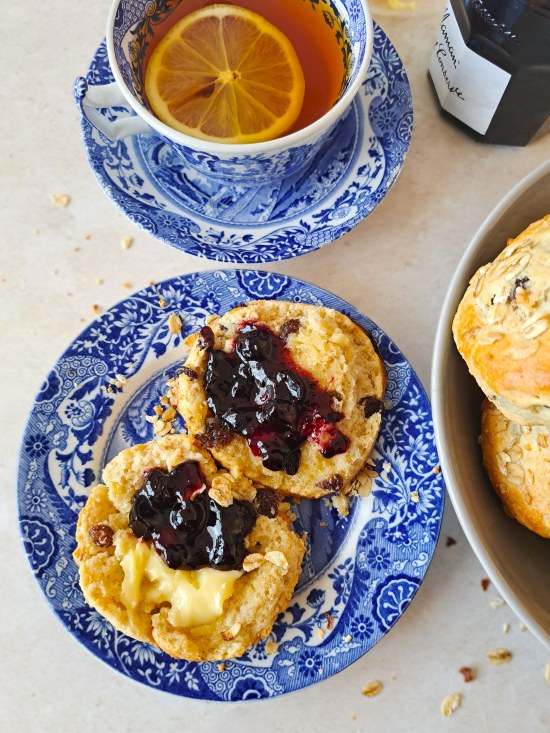
There’s something so pleasing about eating a warm scone, studded with plump dried fruit, split and spread with butter. And when you add zesty lemon and nutty oatmeal I think you’ve something extra nice. Perfect with a cuppa or as part of a traditional afternoon tea, they’re such a simple treat.
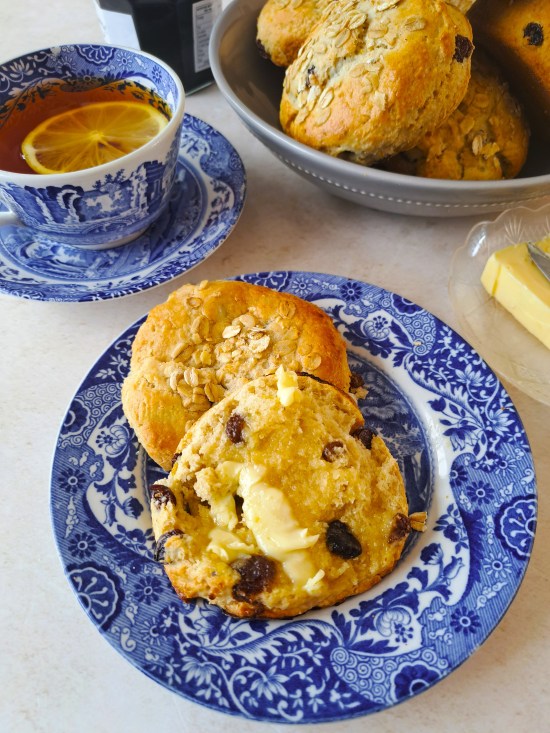
Add jam, plus cream too if you like. Personally though, I prefer just butter on my Raisin & Lemon Oatmeal Scones so I can fully enjoy their lovely combination of flavours.
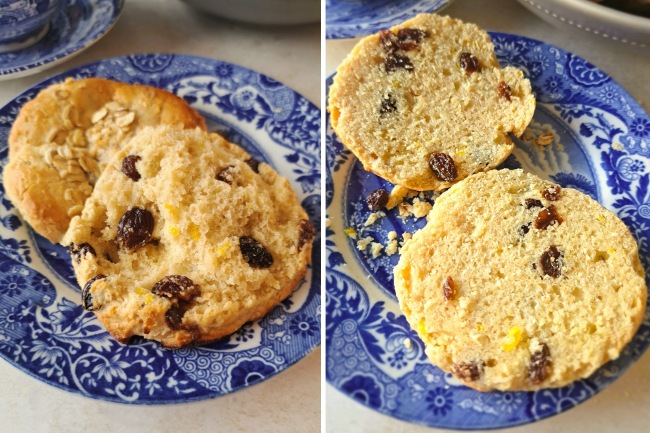
In case you don’t know, the best way to split a warm scone isn’t to use a knife. Just gently pull apart into top and bottom using your hands. This keeps the fluffy inside light rather than squished together. Remember though that as oatmeal scones are a little softer, they might break a little when split warm. If that bothers you then they are still gorgeous cold. The image below shows you the difference between a pulled apart warm scone and a cold one sliced with a knife. So take your pick!
If you’re not going to eat the scones straight away, cool and store in an airtight container and use within 2 – 3 days. They also freeze well. You can warm any scone in the microwave in around 20 – 30 seconds, or in a cool oven or air fryer for a few minutes. My favourite way to quickly warm a frozen scone is to start defrosting and heating in the microwave then finish in the air fryer for a crisper outside.
If you’ve made this recipe, I’d love to know what you thought. Please do leave a comment and rating.


Raisin & Lemon Oatmeal Scones
A delightful variation on classic British sultana scones. With plumped raisins and fresh lemon zest, swapping in oatmeal for some of the wheat flour in these light and fluffy scones brings a hint of nutty flavour and makes them extra soft too.
Please read the accompanying blog post before starting and use metric measurements and digital scales.
Ingredients
- 230 g self-raising flour (or plain/all-purpose flour + 2 additional level tsp baking powder)
- 2 level tsp baking powder
- 1 large pinch salt
- 120 g fine oatmeal or oat flour (see Recipe Notes)
- 100 g cold butter (salted or unsalted)
- 100 g caster sugar
- 100 g raisins (Optional but recommended: plump up by soaking in boiling water for 10 - 15 minutes. Drain well and pat dry before using)
- 2 medium lemons (zest only, finely grated)
- 150 - 175 ml plain full fat yogurt (or buttermilk, plus extra for brushing over the tops)
- a little extra flour (for rolling out)
- a few tbsp rolled/porridge oats (to decorate)
Instructions
-
Preheat your oven to 200°C /180° Fan /Gas 6 /400° F with a shelf in the middle.
Lightly grease or line a baking tray.
-
Make the dough.
Stir together the flour, baking powder and salt then sift into a large mixing bowl. Stir in the oatmeal.
Grate in the cold butter, dipping it into the flour now and then to prevent sticking. Using your fingertips, rub it in.
Stir in the sugar, raisins, and lemon zest.
Use a silicone spoon to stir in enough yogurt (or buttermilk) to start bringing together a soft dough.
Important. Different flours absorb varying amounts of liquid so you may not need all the suggested amount or you may need a little more. Add gradually so you don't make the dough too wet.
-
Roll and cut out.
Lightly flour your work surface, ideally covered with a silicone mat to reduce sticking, and put the dough onto it.
Very briefly knead so it comes together into a smooth dough (handling as little as possible gives the lightest scones).
Roll out 2½* - 3 cm thick. Stamp out scones, re-rolling the scraps to make more until all the dough is used up.
*A 6.5 cm round cutter should give you 8 scones if you roll out approximately 2½ cm thick.
Place the scones on the prepared tray.
-
Brush yogurt (or buttermilk) over the tops of the scones then sprinkle with the rolled or porridge oats, lightly pressing down.
-
Place the tray in the pre-heated oven and bake until risen, firm, and golden brown (12 -15 min).
Tip: if your oven bakes unevenly, turn the tray around after 10 minutes.
Transfer to a wire rack to cool a little.
-
Serve the scones warm, split and spread with butter plus jam and cream if liked.
Tip: pulling the scone apart into a top and a bottom half rather than cutting will keep the interior fluffy.
-
If not using straight away, cool completely before storing in an airtight container. Use within 2 - 3 days or freeze.
Reheat in a microwave for 20 - 30 seconds, or in a low oven or air fryer for a few minutes. Also good eaten cold.
Tip: to quickly serve frozen scones, defrost and lightly heat in a microwave then finish in an air fryer or oven to crisp the outsides.
Recipe Notes
Oatmeal (or oat flour) in the UK is ground oats. If you can't find it in supermarkets or health food stores, make your own by whizzing rolled or porridge oats in a blender, food processor or coffee grinder until fine. For more oatmeal flavour, you can replace up to 50 grams of the flour with additional oatmeal - but note this may affect the rise and make a denser scone.
RELATED RECIPES