Oatmeal Bread (no-knead, overnight recipe)
Oatmeal Bread is soft, tender, flavoursome, and easy with my no-knead, overnight recipe. Delicious as a sandwich loaf and to eat with soups, or toast it to bring out the sweetish, nutty flavours. With more fibre than plain white bread and keeping you fuller for longer, Oatmeal Bread might be healthier too. A great loaf you’ll want to make again and again.

Disclosure: this post may contain affiliate links. If you buy via my links, I may earn a small commission at no extra cost to you.
Jump to Recipe
OATS & OATMEAL BREAD
In recent years, it seems that oats have almost been lifted to the status of a superfood. Wholegrain, high in fibre, and a good source of protein, oats certainly have a healthier image than many other grains. Most notably, oats contain beta-glucan which can lower cholesterol.
However, although I use oats in loads of recipes like Staffordshire Oatcakes, Scottish Oatcakes, Savoury Flapjacks, and Homemade Digestive Biscuits, I must admit I love them for their versatility, and their slightly nutty, sweetish flavour. And that taste, along with their ability to make doughs soft and tender, makes oats perfect for adding to bread.

But another of oats’ well known properties, that of being naturally gluten-free, means that bread made only with oat flour would be very dense. That’s why it’s usual to only substitute a certain percentage of wheat flour for oats. To make one medium loaf of my Oatmeal Bread, I use 450 grams of white bread flour plus 150 grams of fine or medium oatmeal.
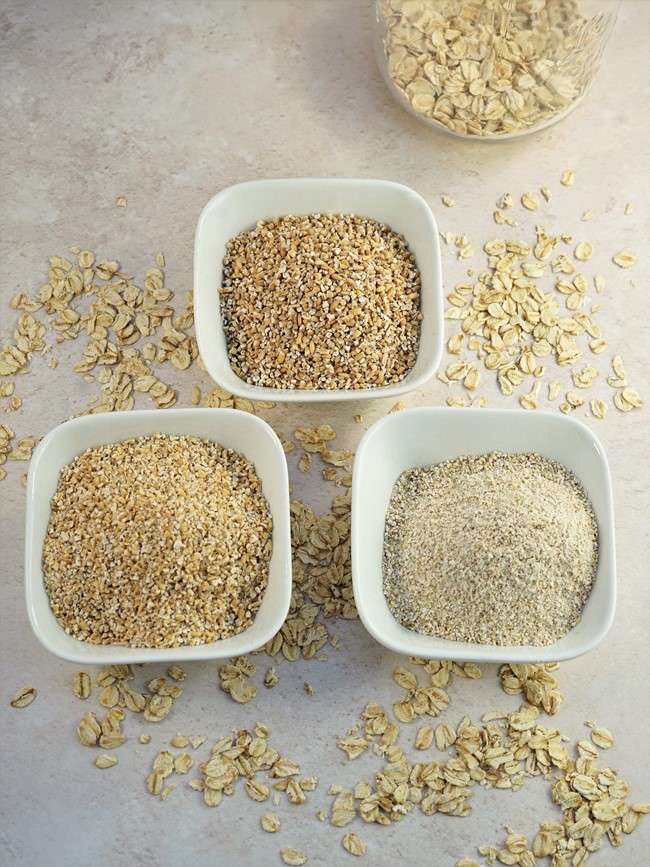
Although it’s unusual to find oatmeal in supermarkets (I get mine from a local health food store which stocks fine, medium and coarse), you can easily make your own by whizzing rolled or porridge oats in a food processor or coffee grinder.
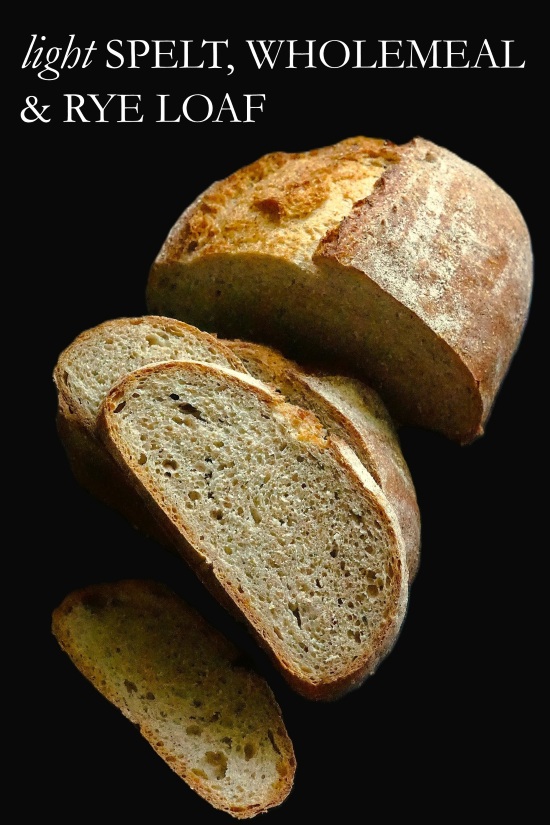
I like the light, soft and tender texture of Oatmeal Bread made with white bread flour and oats. But you can replace some of the white with wholemeal bread flour. But to avoid a heavy loaf, I recommend swapping no more than 50 – 100 grams.
NO KNEAD OATMEAL BREAD
Apart from the great flavour and texture, one of the other things I think you’ll love about my Oatmeal Bread is that there’s no kneading involved. We can omit this thanks to a wetter than usual dough and a long, overnight first rise (sometimes called first proof, prove, or fermentation). Together, these promote the development of gluten which is normally achieved by kneading. And it’s gluten which gives bread its rise and structure. Neat eh?

As I hope you can see from the above image, we still get the lovely, light and open crumb you’d hope to achieve with a kneaded loaf.
You’ll find a recipe card at the end with ingredient amounts and full instructions. But I recommend you read the whole of this post for extra tips and images to guide you.
EASY OATMEAL BREAD
Because the long first fermentation needs to be 12 – 14 hours at room temperature, it makes sense to mix up the dough the night before you want to bake the bread. If you want to extend the time even further, perhaps for convenience or just to get more flavour development, you can ferment the dough in the fridge for up to 24 hours.

To make the dough, you simply stir together the flour, oatmeal, 2 teaspoons of salt, and 2 teaspoons of instant dried yeast. Note that for my method, you must only use dried yeast that is labelled ‘instant‘, ‘fast‘, ‘easy blend‘ or similar. Dry yeasts that need to be activated in liquid before adding to the flour won’t work in this recipe. Due to the almost nil gluten content of the oats, I use an extra half teaspoon of yeast compared to most of my other breads.
For the liquid, I use half whole milk and half water. I think this gives good flavour but isn’t overly rich for an everyday bread. As different flours absorb different amounts of liquid, it’s not possible to be exact about the amount you’ll need. But you’ll most likely use around 360 ml to create a wettish but not sloppy dough.

Now cover the bowl with cling film or a wet tea towel, or pop the whole thing in a reusable polythene bag and leave on the work surface. If the room is particularly warm, you can put in the fridge instead, as mentioned above. Just bring it back to room temperature before proceeding with the next steps.
THE NEXT DAY
In the morning, the dough may well have spread out more than it’s risen upwards. But don’t worry. This is perfectly normal with wetter, overnight doughs. As you can see from the images below, although there are a few bubbles on the surface, most of the activity is taking place underneath. I used a clear mixing bowl precisely to show you this.

What’s going on below becomes even more obvious (and, to me, exciting!) when you start to scrape the dough onto your work surface. Revealed will be a delicate, intricate network of gluten strands.

Trying to add as little extra flour as possible to prevent sticking (I highly recommend using one of these silicone mats), we give the dough a few folds. Amazingly, just a few seconds should be enough to transform it into something smooth and bouncy. While I’m folding, I’m also shaping the dough into a fat sausage to fit a buttered 900 ml/2 lb loaf tin.

The dough now needs its second rise or proof, ideally somewhere warm. I preheat my main oven (to 180°C / 160° Fan / Gas 4 / 350°F) and put it in the unheated small oven above. After around 45 minutes, depending on the temperature, it should have almost doubled in size.
But the best way to test whether this, or any other dough, is ready to bake is to gently poke a finger into it. If the dough slowly springs back but leaves a slight indentation, then it’s ready. If the dough springs back quickly then it’s not ready, so leave a little longer and check again.
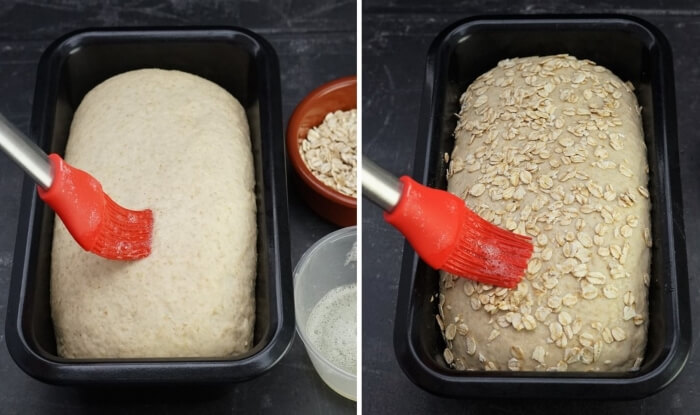
ADD OAT TOPPING & BAKE
To add extra flavour and a light crunch to the crust, as well as hinting at what’s inside, I like to add a rolled oat topping to my Oatmeal Bread. To get it to stick, just before baking I brush over a little egg white beaten with a splash of water. Then I sprinkle the oats over and gently press them down. To make doubly sure they don’t fall off after baking, I seal with another layer of egg white. Now the loaf can go into the oven where it’s baked for an initial 30 minutes.
But there’s an extra tip to get an even better rise. When I preheat my oven, I also put a deepish metal roasting tin (NOT glass: it could shatter) on the lowest shelf. Then, when I put in the Oatmeal Bread, I pour cold water into the hot tin and immediately close the door. This creates steam which delays the forming of a crust. This means the bread can rise for longer and should be lighter.

After 30 minutes carefully open the door (keep your face and hands out of the way as lots of hot steam may billow out) and remove the loaf from its tin. Then put the loaf back in the oven, sitting directly on the oven shelf. Give it another 5 – 8 minutes or until the bottom of the loaf sounds hollow when tapped.

Now transfer to a wire rack to cool. But I guarantee you won’t be able to leave this lovely loaf alone. I find myself keep going back to admire it and breathe in the oaty, just-baked aroma.
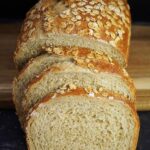
EATING OATMEAL BREAD
If you’ve seen many of my other bread recipes, then you’ll know that I most often bake them in a covered pot. But I decided on a tin loaf for my Oatmeal Bread as, perfect for sandwiches and toasting, I wanted the more regular shaped slices you get with a tin loaf.

With so much extra flavour than simple white bread, as well as a little more nutritious, the soft slices go with almost any sandwich filling you can think of. I especially love it with classic fillings like ham, tuna and cucumber, or egg mayo. Talking of eggs, Oatmeal Bread is gorgeous spread with butter and served alongside runny boiled eggs. Unadorned, thick slices are also brilliant to dunk into soups: my Scotch Broth being a great example of the pairing.

While Oatmeal Bread is best eaten within two days (or frozen), after then it makes wonderful toast. I think lightly toasting accentuates its sweetish, nutty flavours even more. Try it with any of your favourite toast toppings: butter and honey or jam, buttery mushrooms, grilled tomatoes, peanut butter, hummus etc.
If you’ve made this recipe, please let me know how it went by leaving a comment and rating.

Oatmeal Bread (no-knead, overnight recipe)
Soft, tender and flavoursome, Oatmeal Bread is great in sandwiches or to eat with soup. Or toast it to accentuate the sweetish, nutty flavours. With this easy no-knead method, start the bread the night before you want to bake it.
You can replace 50 - 100 grams of the white bread flour with wholemeal bread flour, although the loaf will not be as light.
Please read the accompanying blog post before starting the recipe.
Ingredients
- 450 g white bread flour (plus extra for dusting)
- 150 g fine or medium oatmeal (or rolled/porridge oats whizzed in a blender)
- 2 tsp instant dried yeast (i.e. the kind that does not require activating before use)
- 2 tsp salt
- 180 ml milk
- 180 ml water
- knob of butter (for greasing a 900g/2lb loaf tin)
For the oat topping
- 1 egg white (beaten with a splash of water)
- 3 - 4 tbsp rolled oats
Instructions
The day before you bake the bread
-
Put the flour and oatmeal in a mixing bowl and stir in the instant dried yeast and the salt.
Pour in all the milk plus roughly 100ml of the water then use a sturdy silicone spoon or spatula to start bringing the ingredients together. Add more water as needed to form a wettish but firm rather than sloppy dough. Stir well so there are no dry bits of flour, adding a splash more water if necessary.
-
Cover the dough and leave overnight or 12 - 14 hours.
Tip: If the room is warm, or if you'd like a longer rise for convenience or to allow more flavour to develop, you can put the dough in the fridge for up to 24 hours. Bring the dough back up to room temperature before proceeding with the recipe.
On the day of baking
-
Grease a 900g / 2lb loaf tin with butter.
-
The dough should have risen, spread out, and look a little bubbly. If not, leave longer.
Lightly flour a work surface (ideally covered with a silicone mat) and scrape the dough onto it.
Fold the dough over itself several times until it's smooth, at the same time shaping it to fit the loaf tin: try not to add much more flour but only just enough to prevent sticking to the work surface.
Put the dough in the prepared tin and place in a large polythene bag or cover with cling film or a wet tea towel. Set aside somewhere warm for 45 minutes or until almost doubled in size.
While the dough is proving: preheat the oven to 180°C / 160° Fan / Gas 4 / 350°F with a shelf in the middle and a deep metal roasting tin on the bottom shelf (this will be filled with cold water later to create steam and help the bread rise: DO NOT USE GLASS or it could shatter).
-
Check that the dough is proofed:
If, when a finger is gently poked into the dough, the dough slowly springs back but leaves a slight indentation then it is ready to bake.
If the dough springs back quickly then it's not yet fully proofed: leave another 5 -10 minutes and check again.
-
When ready to bake, add the oat topping:
Brush a layer of the beaten egg white and water over the top of the dough.
Sprinkle over the rolled oats, very gently press down to help them stick, then brush over another layer of egg white.
-
Place the tin in the oven then pour cold water from a jug into the hot roasting tin in the lower part of the oven. Immediately close the door.
Bake for 30 minutes.
After 30 minutes carefully open the oven door (caution: lots of hot steam may billow out so keep your face, hands etc. out of the way) and remove the tin of water.
Take the loaf out of its tin and place back in the oven directly on the middle shelf. Cook for another 5 - 8 minutes or until the bottom of the loaf sounds hollow when tapped.
-
Place on a wire rack until completely cold before slicing.
Best eaten within 2-3 days or can be frozen.
Tip: slice before freezing so you can take out just as much as you need without wastage.


This bread is amazing! Very easy to make and tasty.
Will make it again and definitely will try more recipes from the site.
Thank you for sharing. 🙂
Thank you so much for trying my recipe and for your lovely comments Patricia!
Hi,
Thank you for sharing this recipe and I would love to give it a try. However, I have an question that if there is any way I can have some add-ins (dried cranberries or chopped nuts) in the dough?
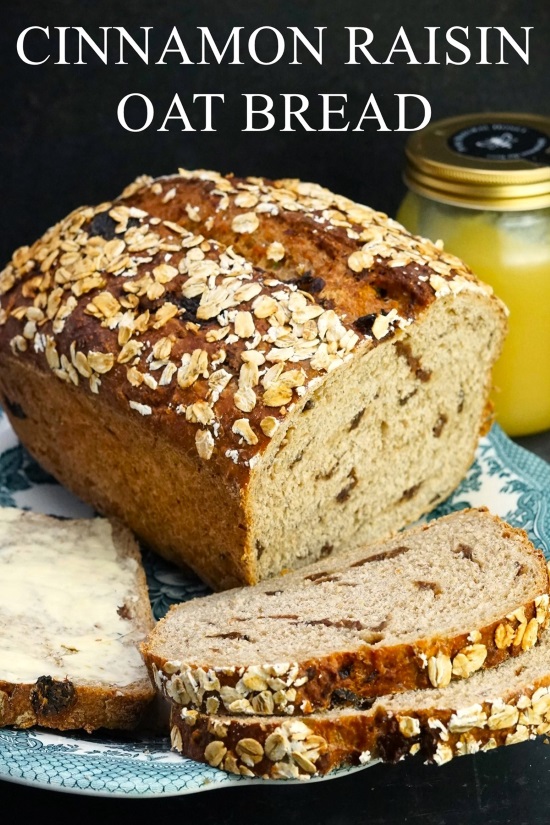
Yes, you certainly can! Here’s a version I make with soaked raisins and flavoured with cinnamon: https://moorlandseater.com/cinnamon-raisin-oat-bread-no-knead-overnight-recipe/
Just stir the add-ins into the dry ingredients before mixing in the liquid.
Do let me know how it went if you give it a try!
Hi, I was wondering if I could substitute the milk for a non-dairy milk, like almond or oat milk.
Hi Marina and thanks for your interest in my recipe. Although I don’t use them myself, I see no reason why you couldn’t use plant milk.
Love it!!! Sooo very easy & delicious…especially warm with butter & honey! Thank you!!!🤍
That’s lovely to hear, thank you!
Hi there. I was wondering whether I could use oat flour rather than the whizzed up oatmeal and if so, would I use the same weight of oat flour ?
Hi, yes you can use oat flour and at the same weight as oatmeal or whizzed up oats.
Hi there,
I have made this several times and loved it! Quick question though, if I need the loaf on the same day as making the dough can it be proofed more quickly rather than overnight please?
Hi Mandy, glad you’re enjoying my recipe!
If you wanted to bake the loaf on the same day as making the dough then you would have to knead it for 5 – 10 minutes before proving. This is because it’s the long, overnight rise, coupled with a wetter than normal dough, which takes the place of kneading in developing the gluten and giving bread its rise and structure. I’d recommend reducing the amount of liquid too otherwise it will be too wet to knead. Start with around 250 ml and only add as much as you need to avoid a wet dough.
Do let me know how you get on if you give it a go!
I see. That’s great, thank you. I will give it a try.
You’re welcome!
I should also have said, Mandy, to use warm water to speed things up too. If you have a thermometer then 38 degrees Celsius.
I wish it was in American measurements. I would love to try this bread, it looks wonderful!
Thanks for your interest in my recipe!
I don’t give American measurements as I think there is too much room for error with ingredients like flour. This means people may not get the best outcome with my recipes, so I’d always recommend using a simple set of metric scales.
Of course there are lots of conversion sites online you can use, as long as you accept there’s room for error with the non-liquid ingredients like flour.
I was really pleased with this recipe. It was simple to make. I didn’t have oatmeal, so I just whizzed up some regular porridge oats.
I loved the addition of an oaty topping, it gave it a very professional finish. Not only was the loaf simple to make, the end result was soft and easy to slice…and most importantly …it was yummy !!
This recipe will be a keeper for me !!!
Thank you for your lovely comments, Catherine! So glad you enjoyed it 😊.
I am trying this recipe starting today. What do you do if you don’t have a smaller oven ABOVE your regular oven for the proofing?
Thanks.
Hi Lyndi, if you don’t have anywhere warm like an airing cupboard then you can use a microwave in a couple of ways. 1. Run (empty!) for 1 minute and then proof in there with the door closed. or 2. My current favourite: place a jug or well insulated large mug of boiling water in the microwave alongside the bread and shut the door. Swap the water for more boiling water as it cools.