Sunflower, Honey and Oat Bread
Sunflower, Honey and Oat Bread is a beautiful yet simple no-knead loaf. Inside you’ll find a moist, soft crumb lightly sweet with hints of honey, a generous amount of crunchy and earthy sunflower seeds plus optional flax seeds. The crust is baked with an attractive topping of more oats and sunflower seeds for a professional finish.

Delicious with sweet or savoury fillings, outstanding toasted to crunchy perfection, spread with butter and drizzled with honey.

Disclosure: this post may contain affiliate links. If you buy via my links, I may earn a small commission at no extra cost to you.
Jump to Recipe

This recipe came about because I’ve been thinking a lot about honey. It started when I finished off my latest loaf of Spiced Fruit Bread. I love the easy, no-knead bread flavoured with cinnamon and mixed spice, its plump dried fruit. Toasted, spread with butter then drizzled with a good quality local honey, as always I was amazed at just how good the combination is.

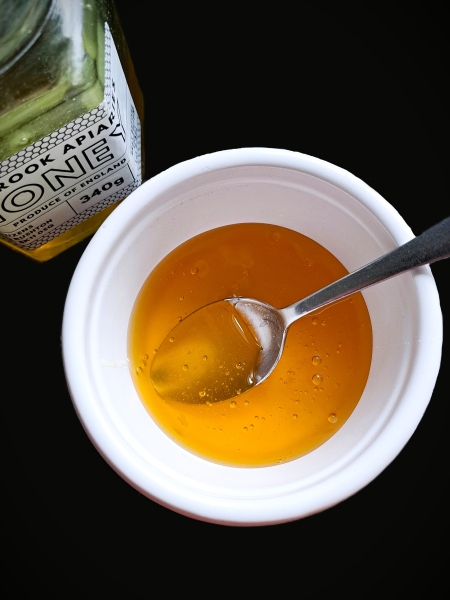
But this time, I also gave the honey a lot more consideration. Because the truth is, if you’ve only ever eaten mass-produced honey, you don’t know what you’re missing. To me, big brand honey often tastes little different to golden syrup; very sweet but with no real flavour of its own. But if you can buy from a good quality small and (ideally) local producer, the difference can be startling.
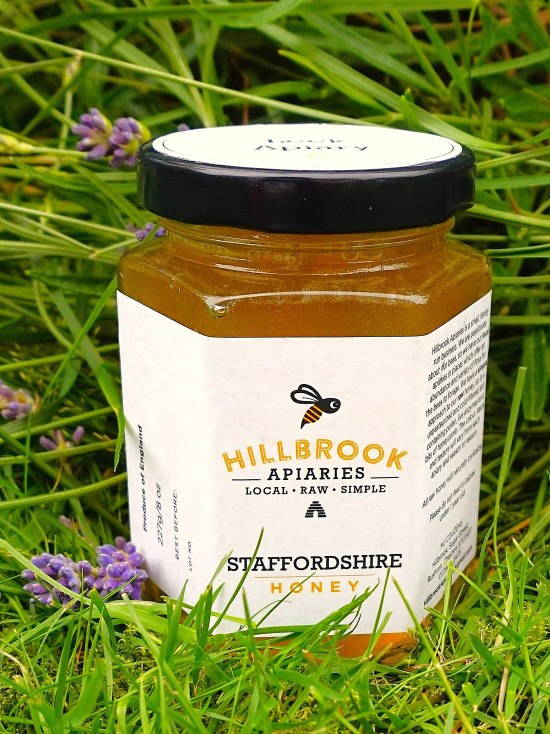
A wonderful producer local to me is Hillbrook Apiaries. They’re a great example of just how delicious honey can be. Beautifully and complexly flavoured, you can almost taste all the different flowers the bees visited! It’s their honey you see in this post (this isn’t a sponsored post by the way; I just love their product) and I highly recommend seeking out an equally good supplier local to you.
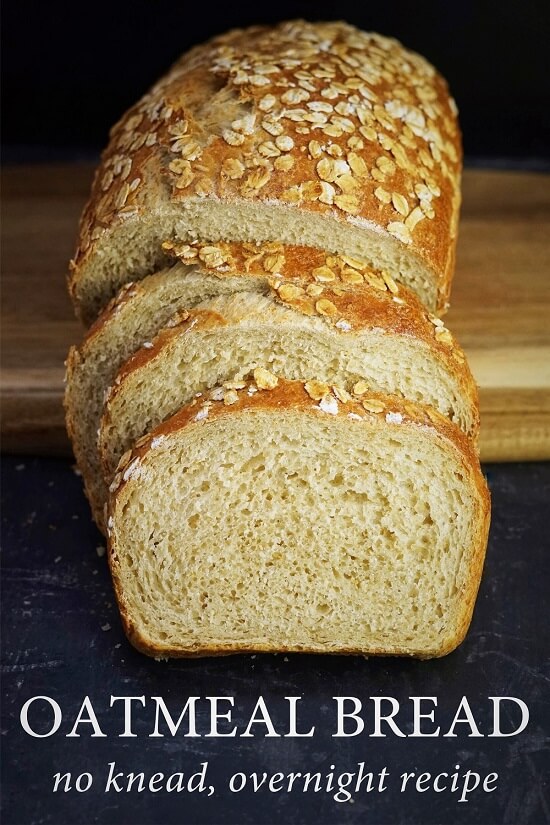
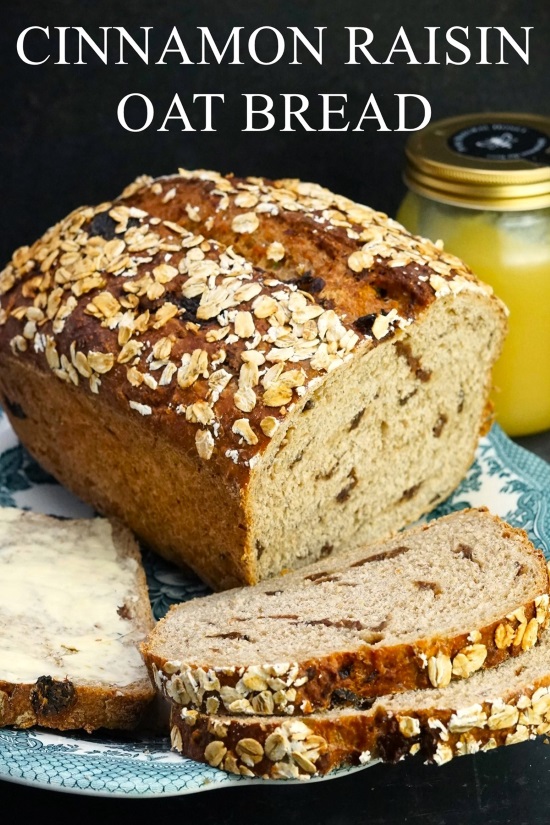
This led me to a thought. Instead of just spreading bread with honey, why not add a generous amount to the dough too? Another homemade bread I enjoy, and which includes just a little honey, is my Cinnamon Raisin Oat Bread. Loving how the inclusion of sweetish oats in that loaf helps to make a soft, tender crumb I decided to make my new loaf an oat bread too. This time though, instead of dried fruit I added lots of crunchy sunflower seeds to complement the almost nutty oats.

The result was this lovely Sunflower, Honey and Oat Bread
SUNFLOWER, HONEY AND OAT BREAD
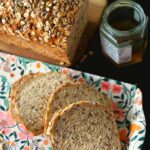
I think the flavour and texture of this loaf certainly lives up to its beautiful appearance. The oats and sunflower seeds on top give it a professional finish as well as a hint of what’s inside. Slice into the bread and you’ll find a moist, soft crumb lightly sweet with hints of honey. While I often add a mix of seeds to bread, here the generous amount sunflower seeds are more than just a background flavour. Crunchy and earthy, they’re integral to the enjoyment of this loaf.

I love eating fresh Sunflower, Honey and Oat Bread with butter and honey. But it’s not an overly sweet loaf, so pairs with savoury flavours too. Try it as a sandwich loaf with simple fillings like cheese, egg, or ham.
But where it really comes into its own is toasted. The gorgeous warm honey aroma you got while it was baking comes flooding back. The crust becomes wonderfully crunchy and the sunflower seeds inside have even more flavour when they’re toasted. Spread with butter, drizzle on more honey and you’ll be in heaven. I promise.

And what’s really great is that this impressive bread is made with a dead simple no-knead, overnight method. Hands-on time is minimal and can be fitted around whatever else you need to do.
EQUIPMENT & INGREDIENTS FOR SUNFLOWER, HONEY AND OAT BREAD
You’ll find a recipe card at the end with ingredient amounts and full instructions. But I strongly recommend you read the whole of this post for extra tips and step-by-step images to guide you. Please use metric measurements and digital scales (affiliate link) for the best results.

EQUIPMENT
The following links are affiliate links. Buy through these (at no extra cost to you) and you’ll be helping support my blog.
- Because I love Sunflower, Honey and Oat Bread toasted, I make it in a loaf tin. This gives me relatively uniform slices that fit nicely in my toaster. You’ll need a loaf tin with a capacity of 900 ml / 2 lb. Even if non-stick, I still recommend greasing it with a little butter followed by a sprinkle of flour.
- Highly recommended for all kinds of baking is a silicone mat to cover your work surface. This reduces sticking (especially useful when a dough contains honey) so you can reduce the amount of extra flour needed. It also makes clean-up easier.
- If you plan to make bread often, a dough scraper is useful. Note that you often get one free with the silicone mat I’ve linked to but do check the current listing.
You’ll also need the usual baking equipment e.g. jug, mixing bowls, spoons.
INGREDIENTS
I’ve split the ingredients into those for the dough, the soaker, and the topping.
DOUGH INGREDIENTS
- Strong white bread flour. Because oats are naturally gluten-free, it’s usual to include a good proportion of wheat flour in oat breads. A bread made only with oat flour would be very dense. You could swap some of the white bread flour with wholemeal if you like.
- Oatmeal/oat flour (and making your own). Here in Britain, oatmeal is the same thing as oat flour (what the US calls oatmeal we call porridge). You’re more likely to find oatmeal in a health food shop than a supermarket. However, it’s dead easy to make your own: simply whizz up rolled or porridge oats in a blender or food processor.
- Salt. Important for the structure of bread as well as flavour.
- Instant dry yeast. i.e. the type you add straight to the other dry ingredients without having to activate first.

- Milk. Gives a richer flavour to the bread but can be replaced with water.
- Water. Balances the richness of the milk but can be replaced with more milk. Neither liquid needs to be heated first.
- Butter. Just a little to grease the loaf tin.
SOAKER INGREDIENTS
As well as the oatmeal in the dough, there’s rolled oats. To soften them and make sure they don’t suck all the moisture out of the dough, they’re soaked in boiling water before being incorporated. It’s here I also introduce the sunflower seeds and honey. Use a flavourful honey for the best results.

You’ll notice I’ve included some flax seed too. This is for extra nutrition and because I like the little flecks of dark brown they bring. But you could leave them out. All you do is put the oats and seeds in a heatproof bowl, dissolve the honey in the boiling water, stir together then leave until cold.
TOPPING INGREDIENTS
I think the topping makes the loaf so much more visually appealing. And it only takes a couple of minutes to add. You’ll just need a few extra rolled oats and sunflower seeds plus a beaten egg white to get them to stick.

Don’t eat eggs? Try replacing it with the flour and water paste I use to glaze my Dark Rye Bread (use wheat flour or oatmeal instead of the rye flour).
HOW TO MAKE SUNFLOWER, HONEY AND OAT BREAD
MAKING THE NO-KNEAD, OVERNIGHT DOUGH
Many years ago, I discovered that a wetter than usual dough combined with a long fermentation (sometimes call first proof or prove) can replace the kneading of conventional bread making. Together, these promote the development of gluten which is normally achieved by kneading. And it’s gluten that gives bread its rise and structure.
When I say long fermentation, we’re talking 12 – 14 hours at normal room temperature. For most of us, this means it’s convenient to mix up the dough in the evening then shape and bake the next day. But the method is very forgiving, and you can adjust it to your own routine. For example, if you’re out all day, you can slow down fermentation in the fridge. It will sit there happily until you come home the following evening.
To make the dough for Sunflower, Honey and Oat Bread, put the white bread flour, oatmeal, salt, and yeast into a large mixing bowl and stir together. Now stir in the cold soaker (i.e. the rolled oats and seeds you soaked in the honey and water) including any liquid that didn’t get absorbed. If you find the seeds and oats clumping, run them through your fingers to separate and coat in flour.

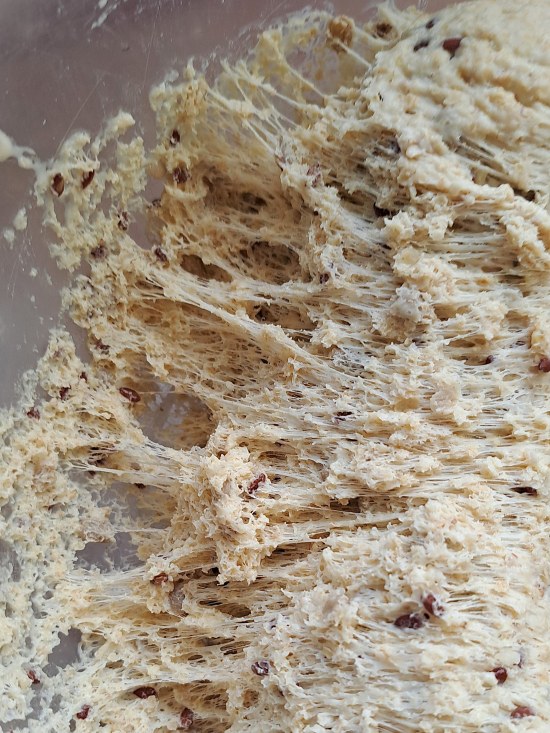
Next pour in all the milk, stirring as you do to start bringing the ingredients together. Then add as much tap water as needed to form a wettish but still firm rather than sloppy dough. Different flours will absorb varying amounts of liquid, so use the final image above as a guide to what the dough should look like. Add the water gradually so you don’t make it too wet.
FERMENT OVERNIGHT
Cover the dough (I place the whole thing in a large reusable polythene bag) and leave to ferment overnight. As mentioned, you can extend the fermentation in the fridge. This is also useful if the room is warm. You can also mix and match: leave at room temperature for a few hours then put in the fridge overnight.
THE NEXT DAY
In the morning, the dough will have spread out as well as risen. This is perfectly normal for wetter doughs. If it doesn’t seem very lively (but note that much of the activity will be taking place underneath), leave a little longer. And if it’s been in the fridge, allow to come to room temperature before continuing.
Lightly flour your work surface, ideally covered with a silicone mat, and scrape the dough onto it. Hopefully, you should see underneath the network of gluten strands.

Fold the dough over itself several times until smooth. As you go, shape it to the length of your loaf tin. Add only as much extra flour as necessary to prevent sticking. Place the shaped dough into your buttered and floured tin.
SECOND RISE OR PROVE
Before baking, the dough now needs a second rise or prove. Ideally, this should be done somewhere warm. I place it in my cold microwave with a thick mug or jug filled with boiling water. This creates a nice cosy space. Alternatives are the microwave warmed for a minute or so then switched off, or a small top oven briefly warmed then switched off.
Depending on the temperature, the second rise could take 40 – 50 minutes for the dough to almost double in size. But the best way to check whether the dough is ready is to gently insert a finger. Does the dough quickly or slowly spring back? If it springs back slowly and an impression is left by your finger, then the dough is ready. If it springs back immediately and doesn’t leave an impression, prove for longer, then check again.
During the second rise you should also preheat your oven to the temperature shown in the recipe card and with a shelf in the middle position. I also take an extra step to get better ‘oven spring’. Put a deepish metal roasting tin (NOT glass: it could shatter) on the lowest shelf. Later, when you put in the Sunflower, Honey and Bread, you’ll pour cold water into the hot tin. This creates steam which delays the forming of a crust, so the bread can rise for longer.
ADD THE TOPPING, BAKE & COOL
Just before baking, brush the egg white over the top of the dough. Try not to let it run down the sides or the loaf could stick to the tin. Now sprinkle over rolled oats and sunflower seeds, pressing down very gently. Finish with another brush of egg white, trying not to dislodge the topping.

Place the loaf on the middle shelf of the oven. Now pour cold water into the preheated tin on the bottom shelf and immediately close the door. Bake for 35 minutes without opening the door. After 35 minutes carefully open the door (keep your face and hands out of the way as lots of very hot steam may billow out) and take out the loaf and the tray of water.

Tap the loaf out of its tin then put it back in the oven, sitting directly on the middle shelf. Bake for another 5 – 10 minutes or until the bottom of the loaf sounds hollow when knocked.

Place the bread on a cooling rack and leave until completely cold before slicing. But I guarantee you won’t be able to resist giving it a sniff now and then to breathe in the wonderful honey, oaty and nutty aromas!
The loaf is best eaten within 3 days, but after the first couple of days I always slice what’s left and pop in the freezer.
BEAUTIFUL, EASY & DELICIOUS
I was so pleased with how my Sunflower, Honey and Oat Bread turned out. One of the prettiest loaves I’ve made, I love the golden crust with its tempting topping of oats and sunflower seeds. Inside, the crumb is soft and tender with sweet hints of that wonderful honey. A pleasing textural and flavour contrast are the crunchy, sunflower seeds with their distinctive earthy flavour.

But I have to say the bread is even nicer when thickly sliced and toasted. Being a moist loaf, it takes a little longer to reach a good deep golden brown. But it’s so worth it for the enhanced flavour and wonderful crunchiness. Even now, after eating it lots of times buttered and drizzled with honey, I still find myself murmuring ‘oh god’ at every bite!

If you’ve made this recipe, I’d love to know what you thought. Please leave a comment and rating.

Sunflower, Honey and Oat Bread
A beautiful yet simple no-knead loaf with a moist, soft crumb lightly sweet with hints of honey, a generous amount of crunchy, earthy sunflower seeds plus optional flax seeds.
Good with sweet or savoury fillings, it's gorgeous toasted, spread with butter and drizzled with honey.
Please read the accompanying blog post before starting and use metric measurements.
Ingredients
For the soaker
- 100 g sunflower seeds
- 25 g flax seeds/linseed (optional)
- 50 g rolled oats
- 75 g well-flavoured honey (approx. 3 tbsp)
- 100 ml boiling water
For the dough
- 400 g strong white bread flour (plus extra for dusting)
- 200 g fine oatmeal (or 200g rolled oats whizzed in a blender)
- 2 tsp salt
- 2 tsp instant dried yeast (i.e. the type that does not need activating before adding to the rest of the ingredients)
- 180 ml milk
- 120 - 160 ml tap water (see instructions for judging how much to use)
- a little butter (for greasing)
For the topping
- 1 small egg white (beaten: see Recipe Notes below for alternative)
- a few rolled oats
- a few sunflower seeds
Instructions
The day before baking
-
Make the soaker by putting the sunflower seeds, flax seeds and rolled oats into a heatproof bowl.
Dissolve the honey in the boiling water then pour over the seeds and oats.
Stir well then set aside until cold.
-
Put the flour, oatmeal, salt and yeast in a large bowl and stir together.
Stir in the soaked seeds and oats including any unabsorbed liquid.
Tip: if the seeds and oats clump together, run them through your fingers to separate and coat in flour.
-
Make a well in the centre of the flour mixture then pour in all the milk, stirring as you do to start bringing the ingredients together.
Add as much of the water as needed to form a wettish but still firm rather than sloppy dough (see image in blog post for how it should look). Stir well so there are no dry bits of flour, adding an extra splash of water if necessary.
-
Cover the bowl or place in a large reusable bag and leave at room temperature overnight or 12 - 14 hours.
Tip: If the room is warm, or if you'd like a longer rise for convenience or to allow more flavour to develop, you can put the dough in the fridge for up to 24 hours. Bring the dough back up to room temperature before proceeding with the recipe.
On the day of baking
-
Grease a 900 g/2 lb loaf tin with butter and dust with flour.
-
Lightly flour a work surface, ideally covered with a silicone mat, and scrape the dough onto it.
Fold the dough over itself several times until it's smooth, at the same time shaping it to fit the length and breadth of the loaf tin: try not to add much more flour but only just enough to prevent sticking to the work surface.
Put the dough in the prepared tin and re-cover or place back in the bag. Set aside somewhere warm until doubled in size (approx. 40 - 50 minutes). Complete the next step while this is happening.
-
While the dough is proving: preheat the oven to 180°C / 160° Fan / Gas 4 / 350°F with a shelf in the middle and a deep METAL roasting tin on the bottom shelf (this will be filled with cold water later to create steam and help the bread rise: DO NOT USE GLASS or it could shatter).
-
Check that the dough is proofed
If, when a finger is gently poked into the dough, it slowly springs back but leaves a slight indentation then it is ready to bake.
If the dough springs back quickly then it's not yet fully proofed: leave another 5 -10 minutes and check again.
-
When ready to bake, add the topping
Brush a layer of the beaten egg white over the top of the dough: try not to let it run down the sides or the loaf could stick to the tin.
Sprinkle over the rolled oats and sunflower seeds then very gently press down to help them stick. Carefully brush over another layer of egg white without dislodging the topping.
-
Bake the loaf
Place in the oven on the middle shelf then pour cold water from a jug into the hot roasting tin in the lower part of the oven. Immediately close the door.
Bake for 35 minutes without opening the door.
After 35 minutes carefully open the oven door (caution: lots of hot steam may billow out so keep your face, hands etc. out of the way) and remove the tin of water.
Take the loaf out of its tin and place back in the oven directly on the middle shelf. Cook for another 5 - 10 minutes or until the bottom of the loaf sounds hollow when tapped.
-
Place on a wire rack until completely cold before slicing.
Best eaten within 3 days or frozen. Can be toasted from frozen.
Tip: slice before freezing so you can take out just as much as you need without wastage.
Recipe Notes
Egg white substitute. Instead of the egg white, you can make a flour and water paste to get the oat and sunflower seed topping to stick. Follow instructions for making a glaze in this post for Dark Rye Bread, substituting wheat flour or fine oatmeal for the rye flour in the paste.
MORE BREAD RECIPES