Dark Rye Bread (no-knead, overnight recipe)
Dark Rye Bread is something rather special. Full-flavoured with a light tangy sourness, its texture is firm without being heavy. Cut thinly, it’s perfect for Scandinavian-style open sandwiches.
For this no-knead, overnight recipe, you’ll start the bread one or two days before you plan to eat it. But the hands-on time is remarkably small. Allow the first long fermentation to start developing the flavours, then do them justice by giving the baked loaf an opportunity to mature for a couple of days. You’ll be rewarded by great tasting, healthy rye bread, speckled with seeds.

Disclosure: this post may contain affiliate links. If you buy via my links, I may earn a small commission at no extra cost to you.
Jump to Recipe
Highly suitable for Britain’s damp, coolish climate, rye was once one of our staple grains. According to Elizabeth David (English Bread & Yeast Cookery, 1979) it was often grown with wheat to make the crop known as maslin. But with the advent of hardier wheat varieties, the use of rye for making bread dramatically dropped.
However, it now seems that rye bread is regaining a wider popularity in Britain. And I wonder if that’s due, at least in part, to the growing interest in the food of Scandinavia where rye bread never fell out of favour?

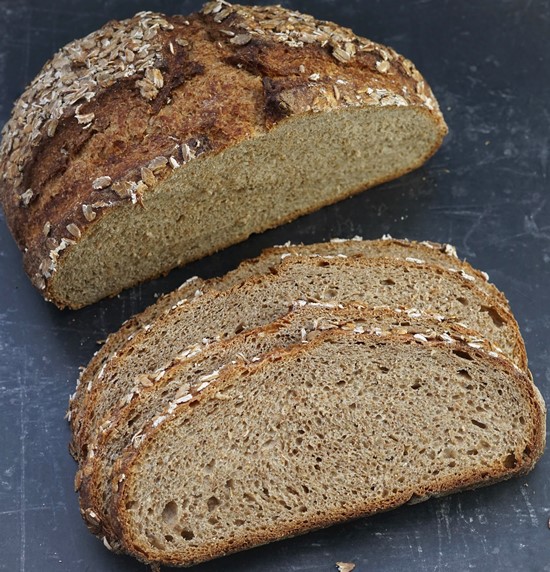
My own recipe for Dark Rye Bread is inspired by the rugbrød (‘rye bread’) of Denmark. Full flavoured and slightly tangy, it’s firm-textured without being heavy. Naturally dark thanks to a good proportion of stoneground wholemeal rye flour and a little molasses to lightly sweeten, inside the bread is attractively speckled by seeds and grains.

Left to mature for 1 – 3 days, the loaf is delicious sliced thinly and used as a base for Danish-style open sandwiches or smørrebrød. After day 4 it’s very good lightly toasted, served with butter and honey, or spread with cream cheese. Dark Rye Bread also freezes well.

RYE FLOUR & WHEAT FLOUR
It’s often said that rye, unlike wheat, has poor gluten content which is why it makes for heavy bread. However, Elizabeth David says it does have good gluten content, just not the sort that’s good for baking bread. But whichever is correct, it amounts to the same thing. Almost all rye breads (pumpernickel being one exception) contain some wheat flour to lighten them. So, what sort of wheat flour to include? Should it be white or wholemeal, and how much?
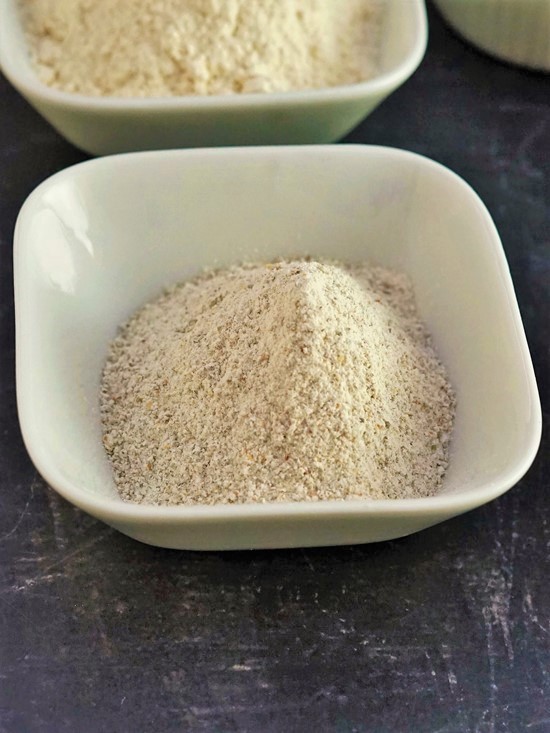
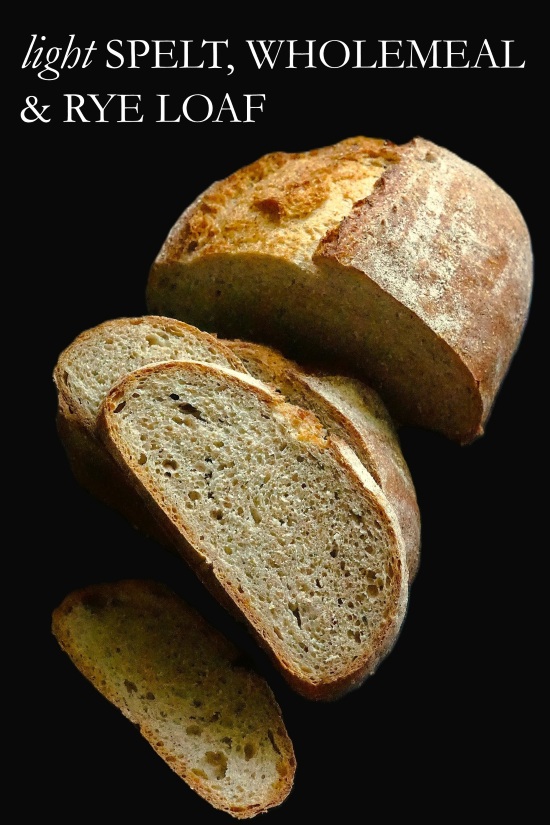
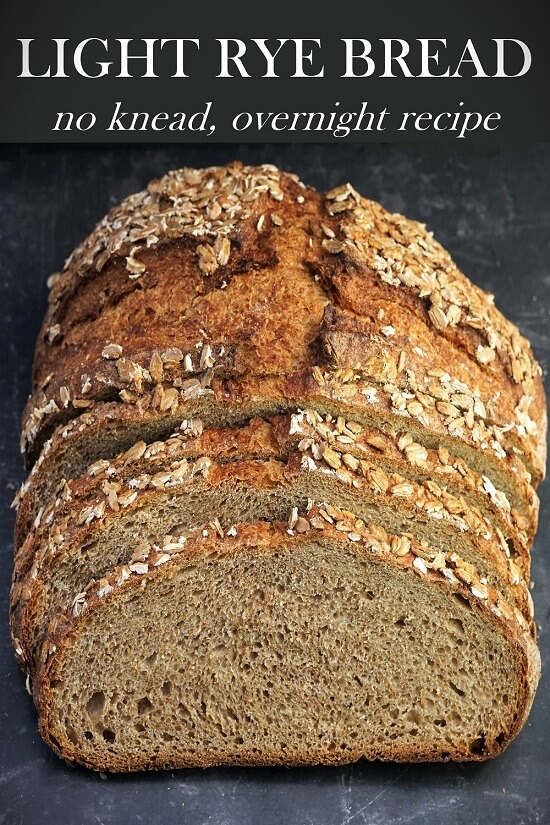
Firstly, the wheat element needs to be a strong bread flour. This gives it good gluten-forming potential. As to how much, in developing my Dark Rye Bread and a Light Rye Bread I experimented with varying proportions of wholemeal rye, plus strong wholemeal and strong white wheat flours.
For a Light Rye Bread that’s a good general loaf I found that equal amounts of all three worked well. Almost doubling the rye to 60 percent, with 20 per cent each of the other two, was closer to the dark rye I was looking for. But it wasn’t quite there.
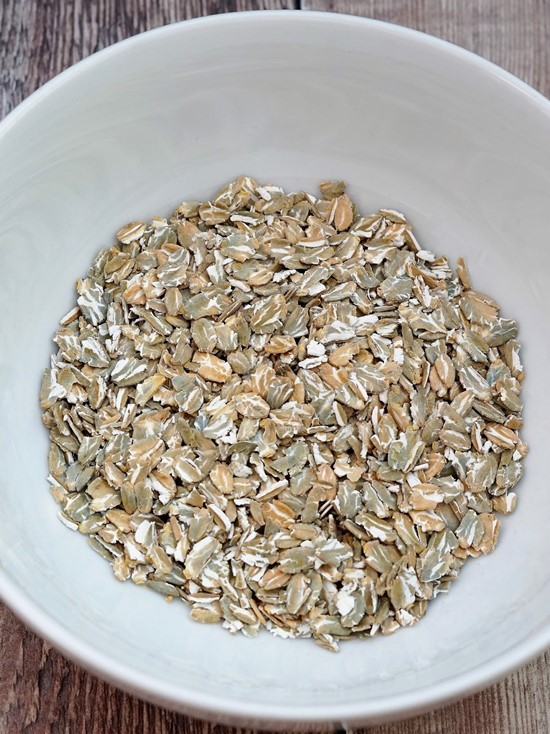
I eventually found that the perfect amount of rye was 75 percent. This included some rye flakes for texture. The remaining 25 percent was white bread flour. I completely left out any wholemeal wheat flour. You could swap wholemeal for the white if you prefer. But I found this combination made a substantial loaf that didn’t feel heavy. If you can’t get rye flakes, usually found in health/wholefood shops, then replace with more rye flour.

OTHER INGREDIENTS FOR DARK RYE BREAD
Before I tell you about my easy, overnight, no-knead method, here’s details of the other ingredients required. You’ll also need salt and water.
MOLASSES
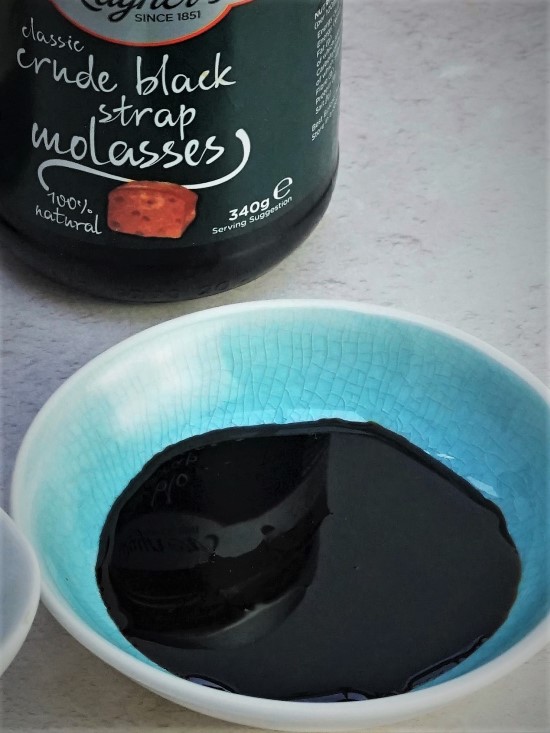
One thing that puzzled me while researching Dark Rye Bread was that many recipes seemed to contain relatively little rye flour, yet their loaves looked appetizingly dark. I was shocked to discover that this was due to the inclusion of colourings such as cocoa powder, coffee, and even gravy browning! Apart from the rye flour, the only thing that darkens my rye bread is some molasses. And that’s added to give a hint of balancing sweetness, not as a colouring. If you don’t have molasses than substitute dark brown sugar.
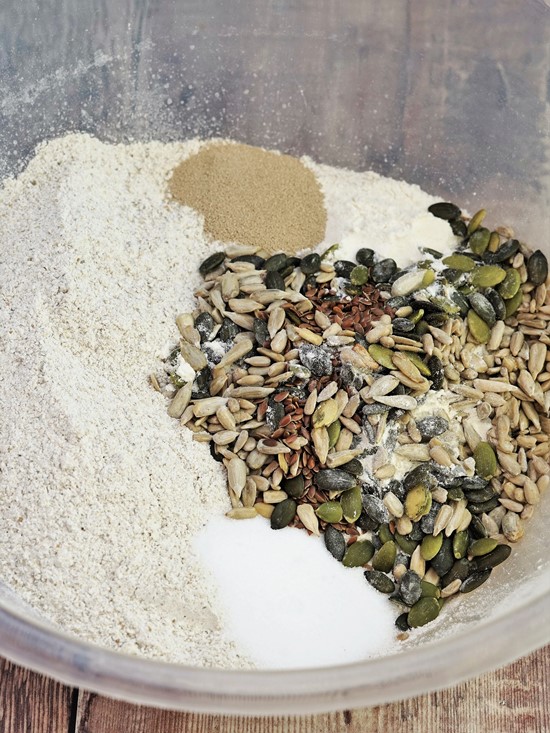
SEEDS
For flavour, nutrition, and appearance I include three different types of seed. Pumpkin, sunflower, plus flax/linseed. I add a total of 75 grams with a little less flax than the others.
Some rye breads contain spices such as caraway, dill, cumin, or fennel seed. I’ve tried this but found them overpowering. What I’m after is a tasty loaf but one that can be a neutral base for a wide range of savoury and sweet toppings. If you do want to include spices, then I suggest a maximum of 2 teaspoons.
INSTANT DRIED YEAST
Many rye breads are made with a sourdough starter, accentuating their lightly sour tang. But I wanted my Dark Rye Bread recipe to be accessible to more bakers so use instant dried yeast. For my method, be sure to use one that doesn’t need to be activated before being added to the flour.
NO-KNEAD, OVERNIGHT DARK RYE BREAD
Doughs made with rye flour are notoriously sticky. Which makes them perfect candidates for my no-knead, overnight method. In conventional bread making, we promote development of gluten (which gives bread its rise and structure) by kneading. However, we can omit this if we create a wetter than usual dough and give it a long first rise or fermentation.

MIXING THE DOUGH
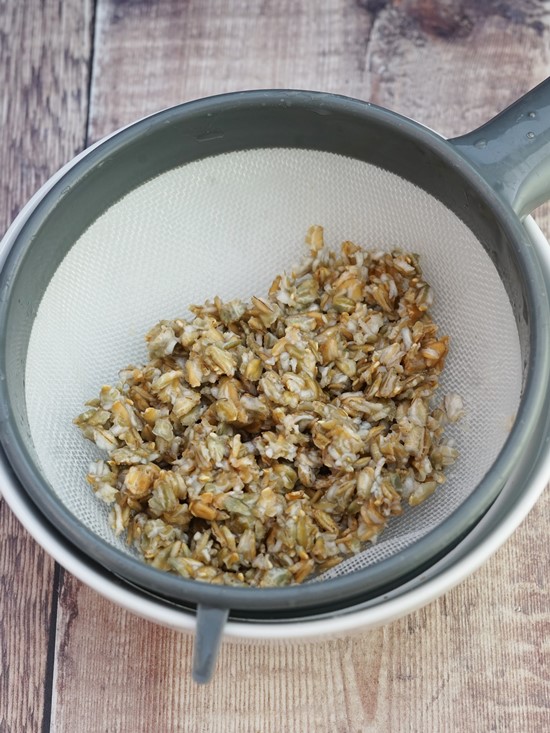
The night before you want to bake, start by soaking the rye flakes in boiling water from a kettle. This will stop them sucking all the moisture out of the dough. While that’s happening, I dissolve the molasses in a little more boiling water.
To make the dough, you stir together the rye flour, white bread flour, the seeds, salt, and instant dried yeast. Then the drained, soaked rye flakes are mixed in. Finally, you add cold water to the dissolved molasses and stir that into the mix too. Because different flours absorb different amounts of liquid, it’s not possible to be exact about the amount of water you’ll need. I recommend starting with a total of 300 ml and see how you go. For the Dark Rye Bread you see in this post I added just under 360 ml.

What you’re aiming for is a wettish but firm dough with no visible bits of dry flour. I use a sturdy silicone spoon or spatula to bring everything together. You can now cover the dough and leave it overnight or 12 – 14 hours. Note that if the room is warm, or if you’d like a longer rise for convenience or to allow more flavour to develop, you can put the dough in the fridge for up to 24 hours. Before continuing with the recipe, be sure to bring it back to room temperature.
THE NEXT DAY
In the morning, the dough will probably have spread more than it’s risen. But don’t worry. That’s perfectly normal with wetter, overnight doughs. As you can see from the images below, although the surface may look just a little lumpy, most of the activity is taking place underneath.

I always recommend that you acquire a simple dough scraper for homemade breads. And it’s even more useful with sticky doughs like rye. Lightly flour your work surface, ideally covered with a silicone mat (affiliate link) to prevent sticking, and scrape the dough onto it. Use the scraper to fold the dough over itself a few times until smooth. You’ll probably need to add a little more flour to stop it sticking but try to use the absolute minimum.

As you fold, shape the dough to the length of a 900 gram/2lb loaf tin (affiliate link). Again because of the stickiness of rye doughs, as well as greasing the tin with butter I sprinkle it with flour too. Now put the dough into the prepared tin, pressing it firmly down and into the corners.
SECOND RISE
The dough needs a second rise or proof, ideally somewhere warm, covered with cling film, a wet tea towel, or placed inside a polythene bag. These days, I proof in my microwave (not switched on!) with a mug or jug of boiling water inside. After 30 – 45 minutes, depending on the temperature, it should have almost reached the top of the tin.

The best way to test whether any dough is ready to bake is to gently poke a finger into it. If the dough slowly springs back but leaves a slight indentation, then it’s ready. If the dough springs back quickly then it’s not ready, so leave a little longer and check again.
GLAZE
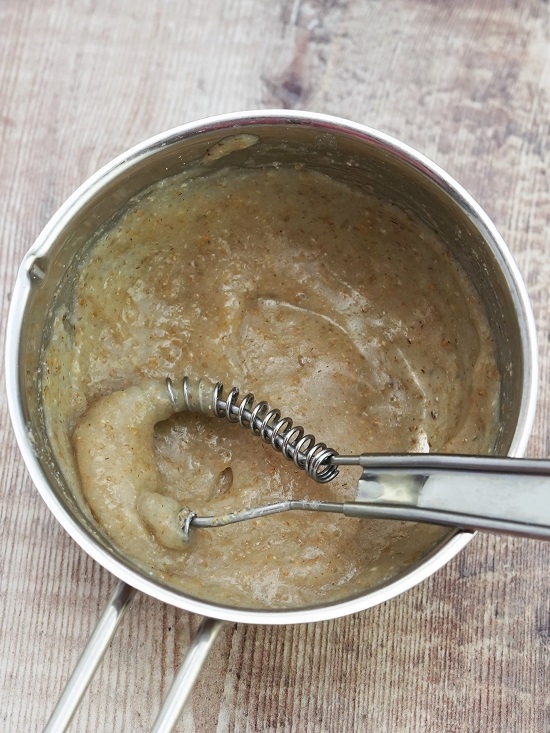
It’s traditional for some rye breads to have a lightly shiny, polished glaze. This is achieved by brushing on a paste made with flour and water. While the dough is on its second rise, I whisk together a little cold water and rye flour over medium heat. I keep whisking as it comes to a boil and thickens. The paste is then set aside to cool.
Just before putting the Dark Rye Bread in the oven, I whisk a little cold water into the paste to give it a single cream-like consistency. Then I brush a layer over the top of the dough and put the tin in the oven.

BAKE
While you shouldn’t expect huge oven spring with this loaf, to encourage a little rise while baking I do one extra step. When I preheat my oven, I also put a deepish metal roasting tin on the lowest shelf. Then, when I put in the bread, I pour cold water into the hot tray and immediately close the door. This creates steam which delays the forming of a crust. This means the bread can rise for longer and should be lighter. DO NOT USE A GLASS DISH for this as it could shatter when the cold water hits the hot glass.
I cook the wettish, heavier than usual rye dough at a lower temperature than many other breads, and for longer. This is to ensure it’s thoroughly baked and has the correct texture. I start by giving it 30 minutes at 180°C / 160°C Fan / Gas 4 / 350° F. When this time’s up, I carefully open the oven door (lots of hot steam is likely to billow out) and remove the tray of water. Then I take the loaf out of its tin, brush over another layer of the paste, then place back in the oven directly on the middle shelf.

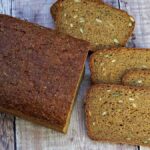
You should continue to bake the bread until the top is dark brown and the bottom of the loaf sounds hollow when tapped. This will take another 45 minutes or so. So, that’s a total time of around 1 hour and 15 minutes. Don’t worry if your Dark Rye Bread has a flattish rather than rounded top. This is perfectly normal and gives attractive, traditional oblong or almost-square slices.
STORING & SERVING DARK RYE BREAD
The bread should be left on a wire rack until completely cold. But I highly recommend you give it considerably longer than that before tucking in. That’s because Dark Rye Bread improves greatly if left to mature. I don’t usually cut into wholemeal breads until the next day anyway, but if you can leave it a day or so longer, full-flavoured rye bread is even better.
I started the rye bread you see in this post on a Wednesday evening, baked it on Thursday, and cut into it on the Saturday. It was perfect. To ensure that it didn’t dry out, I’d well-wrapped the uncut loaf in a big sheet of foil. Then I’d tied it in a polythene bag. Besides improving the flavour, this also makes it easier to slice thinly. And that’s exactly how you should eat this robustly flavoured bread.

My favourite way is inspired by Danish-style open sandwiches or smørrebrød. Smørrebrød means ‘buttered bread’, but they are so much more than that. All sorts of toppings are piled on, so they have to be eaten with knife and fork. I love them so much I’ve even written a whole blog post about them including six of my simple favourites to get you started.

If I think I’m not going to use all the Dark Rye Bread by day 4, then I slice the whole thing and freeze it. That way I can just take out as many slices as I need without waste or it going stale. If you do find you have some stale rye bread, then it’s good lightly toasted. I love it with butter and honey, or cream cheese and cucumber.

DARK RYE BREAD: SOMETHING SPECIAL
A loaf of beautiful Dark Rye Bread is my current favourite. I love it because it has good flavour: slightly tangy, but not overly strong. The texture is substantial, dense, and firm, but not heavy or doughy. Take a bite from a thin slice speckled with seeds, without any topping or even butter, and you know Dark Rye Bread is something rather special.

While you need to start the bread a day or, better still, several days before you plan to eat it, the hands-on time is remarkably small. The main skill required is patience. Allow the long fermentation to start developing the flavours, then do them justice by giving the finished loaf an opportunity to mature for a couple of days. You’ll be rewarded by great tasting, healthy bread, that you can enjoy quite plainly or with as many different toppings as your imagination can conjure.
I HOPE YOU’LL TRY MY DARK RYE LOAF AND LET ME KNOW WHAT YOU THOUGHT IN THE COMMENTS.

Dark Rye Bread (no-knead, overnight recipe)
Full-flavoured with a light tangy sourness, Dark Rye Bread is firm without being heavy. Cut thinly, it's perfect for Scandinavian-style open sandwiches.
For this no-knead, overnight recipe, you'll start the bread one or more days before you plan to eat it. But the hands-on time is remarkably small. Allow the first long fermentation to start developing the flavours, then do them justice by giving the finished loaf an opportunity to mature for a couple of days. You'll be rewarded by great tasting, healthy rye bread.
Please read the accompanying blog post before starting the recipe.
Ingredients
- 50 g rye flakes (can be replaced with more rye flour)
- boiled water from a kettle (see instructions for amount)
- 2 tbsp molasses
- cold water (see instructions for amount)
- 400 g wholemeal rye flour (plus extra for dusting)
- 150 g strong white bread flour
- 75 g mixed pumpkin, sunflower and flax/linseeds
- 2 tsp salt
- 1.5 tsp instant dried yeast (i.e. the kind that does not require activating before use)
- knob of butter (for greasing a bread tin)
For the glaze
- 25 ml cold water plus extra (see instructions)
- 5 g wholemeal rye flour
Instructions
The evening before you bake the bread
-
If using the rye flakes, put them in a heatproof bowl and pour over enough boiling water to cover. Stir, then set aside to soak and cool.
-
Put 100 ml of boiling water in a jug and stir in the molasses until dissolved.
Add enough cold water to make up to 300 ml and set aside.
-
In a large mixing bowl, stir together the rye flour, white flour, the seeds, salt, and instant yeast.
Thoroughly drain the soaked rye flakes and stir into the mixture.
-
Pour the contents of the jug into the mixing bowl and use a sturdy silicone spoon or spatula to start bringing the ingredients together.
Add extra cold water as needed, adding just a little at a time, to form a wettish but firm dough (see image in blog post for how it should look) with no visible bits of dry flour.
-
Cover the dough or place the bowl in a large reusable polythene bag and leave overnight or 12 - 14 hours.
Tip: If the room is warm, or if you'd like a longer rise for convenience or to allow more flavour to develop, you can put the dough in the fridge for up to 24 hours. Bring the dough back up to room temperature before proceeding with the recipe.
On the day of baking
-
Grease a 900g / 2lb loaf tin with butter, sprinkle with rye flour and shake out any excess.
-
The dough should have risen, spread out, and look a little bubbly. If not, leave longer.
Lightly flour a work surface, ideally covered with a silicone mat to minimise sticking, and scrape the dough onto it.
Fold the dough over itself several times until smooth, at the same time shaping it to fit the length of the loaf tin: try not to add much more flour but only just enough to prevent sticking.
Put the dough in the prepared tin, pressing it down and into the corners. Place in a large polythene bag or cover with cling film or a wet tea towel. Set aside somewhere warm for 30 - 45 minutes or until it almost reaches the top of the tin.
-
While the dough is proving
- Preheat the oven to 180°C / 160°C Fan / Gas 4 / 350° F with a shelf in the middle and a deep roasting tin on the bottom shelf (this will be filled with cold water later to create steam and help the bread rise: DO NOT USE GLASS or it could shatter).
- Make the glaze: put the 25 ml of cold water and 5 g of rye flour in a small saucepan over medium heat and whisk as it comes to boiling point and thickens to a smooth paste. Leave to cool.
-
Check that the dough is proofed
If, when a finger is gently poked into the dough, it slowly springs back but leaves a slight indentation then it is ready to bake.
If the dough springs back quickly then it's not yet fully proofed: leave another 5 -10 minutes and check again.
-
When the dough is ready, thin the glaze to the consistency of single cream by whisking in a little more cold water. Brush the top of the loaf with a generous amount.
-
Place the loaf tin in the oven then pour cold water into the hot roasting tin in the lower part of the oven. Immediately close the door.
Bake for 30 minutes.
-
After 30 minutes carefully open the oven door (caution: lots of hot steam may billow out so keep your face, hands etc. out of the way) and remove the tin of water.
Take the loaf out of its tin, brush over another layer of the glaze, then place back in the oven directly on the middle shelf.
Cook until the top is dark brown, and the bottom of the loaf sounds hollow when tapped (approximately a further 45 minutes i.e. 1hr 15 min in total).
-
Leave to cool on a wire rack.
When the bread is completely cold, wrap it well in foil and place in a tied polythene bag or airtight container. Leave for at least 1 day and up to 3 days before slicing thinly.
Best eaten within 4 days or toasted. Can also be frozen.


So happy to have found this recipe, thank you.
You’re welcome, and thanks so much for your 5-star recipe rating1
OMG! I’m in crust heaven right now. Couldn’t wait for a day or two as the crust is best when it’s not long out of the oven. By far the best in 21 years of baking wholemeal sourdough bread (I smuggled some in today) in a country where bread comes in plastic bags, sliced, soft and mainly white). Now it’s tightly wrapped and I will wait for a couple of days before I concentrate on the flavour.
Thanks heaps for this recipe
That’s fantastic! Thanks so much for trying my recipe and for the lovely feedback – you’re most welcome!
Kia ora from New Zealand,
I wonder whether I can bake the loaf in my cast iron dutch oven instead of the oblong tin. Just put the dough into the fridge. Can’t wait to eat that first slice with butter!
Cheers
Sigi
I think that so long as the dough is quite firm, it should work in a Dutch oven. Do let me know how it turns out!
I made it in the tin now, didn’t check for an answer. I’m glad now, as baking without the tin after 30 minutes must have created this amazing crust
Sorry, maybe I did something wrong (tho I measure every ingredient with a scale and follow directions to a T), but this was a nightmare. The dough was more like cake batter. Added almost a cup of extra flour and it was still batter. Left it overnight hoping it would come together- still awful. Baked it, hoping it would come together. It was in the oven for almost two hours and the center was still raw. Waste of time, money, and ingredients.
I’m afraid you must have added much more water, or much less flour, than the recipe calls for if your dough was like batter. The instructions are to add an initial 300ml then only add extra ‘as needed, adding just a little at a time, to form a wettish but firm dough (see image in blog post for how it should look’.
With 550g of flour in the recipe (600g if you omit the rye flakes), I really don’t think it’s possible to create a batter with those ratios.
I note you added almost an extra ‘cup’ of flour which seems odd if, as you say, you measured the ingredients with a scale?
I regularly make this bread and can honestly say it works every time and therefore it can only be that you made an error with ingredient amounts. Sorry!