Multigrain Seeded Bread (no knead, overnight recipe)
Multigrain Seeded Bread is a tasty, nutritious loaf with wholemeal, rye, granary, and white flours plus oats and seeds. It’s also super-simple with my no-knead, overnight method. Just stir up the dough the night before, cover, and leave it. In the morning shape it, prove, and bake in a lidded pot or Dutch oven. If it fits with your routine better, you can even leave the dough in the fridge for up to 24 hours.
You won’t believe how easy it is to get wholesome and healthy homemade bread.

Disclosure: this post may contain affiliate links. If you buy via my links, I may earn a small commission at no extra cost to you.
Jump to Recipe

Have you always wanted to make your own wholesome bread but think it’s too difficult? Or maybe traditional breadmaking involving rigorous kneading then hanging around for hours while the dough goes through two rises just doesn’t fit into your busy day?
Then I think you’ll love my no-knead, overnight recipe for Multigrain Seeded Bread. The hands-on time is minimal and virtually all the rising is done while you’re tucked up in bed. The loaf is packed full of goodness and flavour, making it perfect to eat alongside soups, salads, or make into sandwiches and toast.
WHAT IS NO-KNEAD, OVERNIGHT BREAD?
If you’re unfamiliar with no-knead bread then you’re probably wondering, if you don’t have to knead dough, why the heck does anyone do it?
Well, flour contains two proteins which, when you combine it with a liquid such as water, link together and form gluten. Gluten gives bread its rise and structure and, when you knead dough, you’re encouraging further gluten development. However, given a longer first rise and a wetter than usual dough, gluten will continue to develop very nicely without you.
When I say longer first rise (sometimes called first proof, prove, or fermentation) I mean roughly 12 – 14 hours. For home bakers, that usually means it’s most convenient to do it overnight. You can also slow down and extend the first rise by putting the dough in the fridge for up to 24 hours. Just let it come back to room temperature before proceeding with the recipe.
I’ve been making these no-knead, overnight breads for many years now. I shared my base recipe for Crusty Homemade Bread back in 2018.

Today’s Multigrain Seeded Bread is a variation of that recipe. The result is a tasty, nutritious loaf that’s become my regular, everyday choice for sandwiches, toast etc. But before I talk about that, I want to tell you about the lidded pot you’ll need to bake the bread in.
BAKING BREAD IN A POT
My method is adapted from Jim Lahey of Sullivan Street Bakery in New York. This means I bake the bread in a heavy, lidded cast iron pot or Dutch oven which gets fiercely hot and steamy.
But why do we want steam? Because a steamy, moist environment delays crust formation and that means the bread can keep rising for longer. My wetter than usual dough produces lots of steam that gets concentrated and trapped inside the pot.
Because we’re going to bake the bread at very high temperatures, you’ll need a lidded pot that can be heated up to 240°C / 220° Fan / Gas 9. Don’t forget that any handles or knobs on your pots must be able to withstand that temperature too.

Although they are relatively expensive to buy, I think that Le Creuset Signature casserole dishes (and Le Creuset stainless steel saucepans for general cooking) are a great investment. They should last for years, and the casseroles can be heated up to the required temperature. Of course, you may be able to find cheaper ones, or a Dutch oven, with similar properties that will work too.
For my round Multigrain Seeded Bread, I use my 24 cm round Le Creuset. This has a capacity of 4.2 litres. But going down to a minimum of 3.5 litres should be fine. If I want to make an oval loaf, then I use my 25 cm or 29 cm oval Le Creuset.
MULTIGRAIN SEEDED BREAD
So, now we know a little of the theory of no-knead bread baking, how do we actually do it? You’ll find the detailed recipe card at the end. But if you want more tips plus step-by-step pictures, then I recommend you read the rest of this post first.
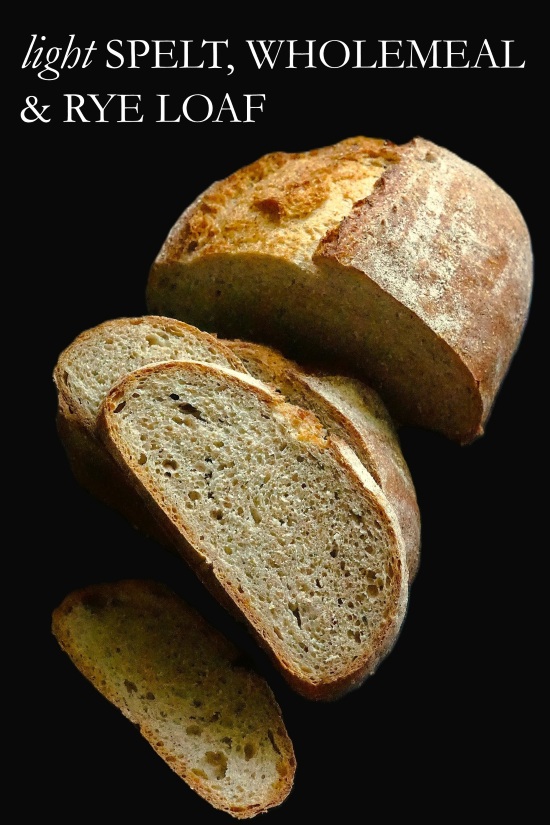
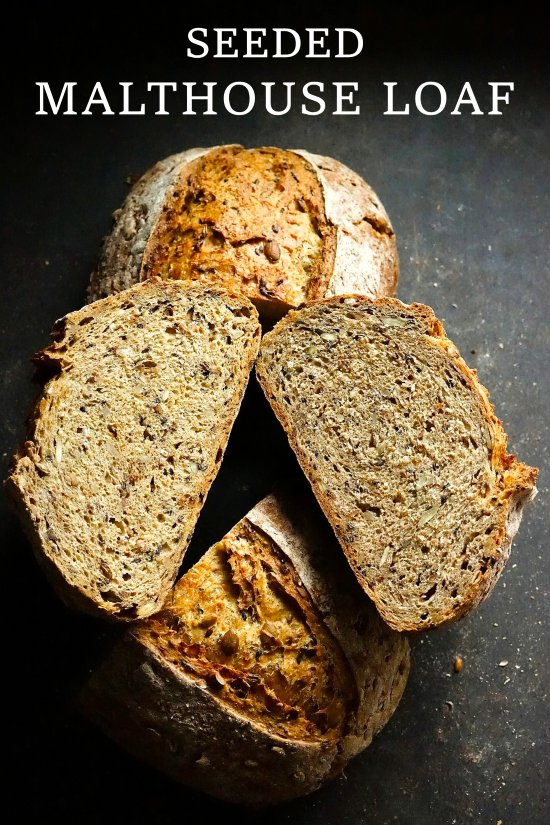
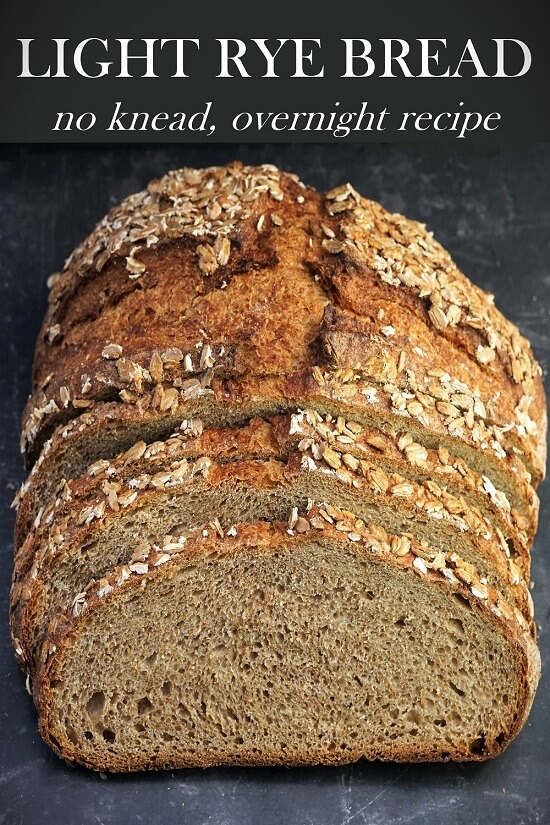
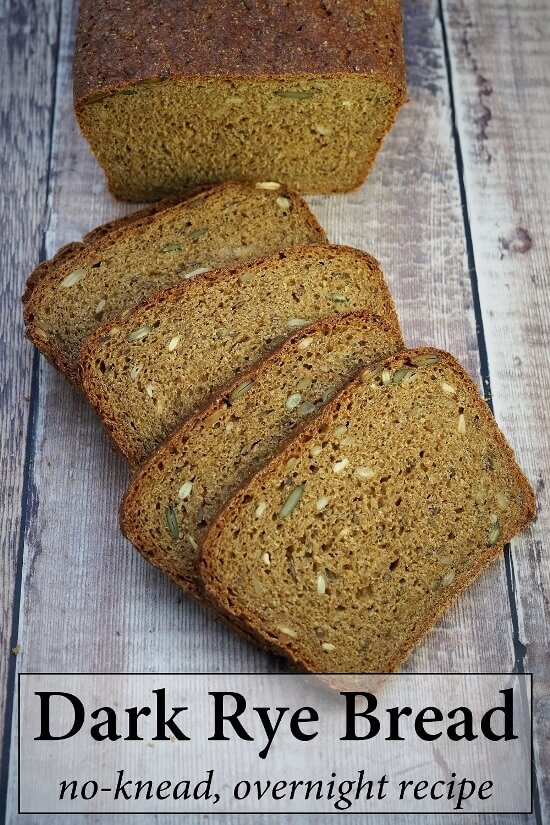
My Multigrain Seeded Bread contains four different types of bread flour plus oats. There’s wholemeal, white, brown granary (sometimes called malted or malthouse), and dark rye flours. The oats are the larger kind I make my porridge with, usually labelled rolled or jumbo.
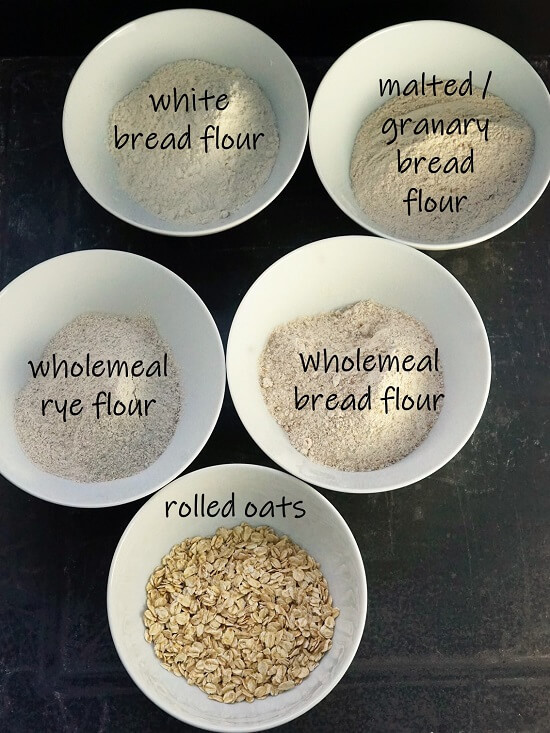
But these are just a suggestion. I often alter the proportions of white vs other flours to make a lighter or more substantial loaf. You can also swap in different flours e.g., wholemeal or white spelt flour.
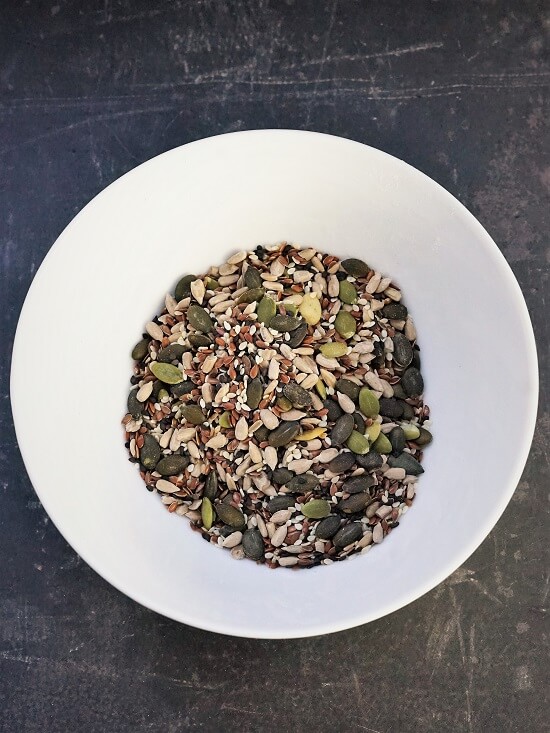
Likewise, you can substitute your favourite seeds for the sunflower, pumpkin, flax, and black and white sesame seeds in my loaf. I often include hemp hearts and whole or ground chia seeds.
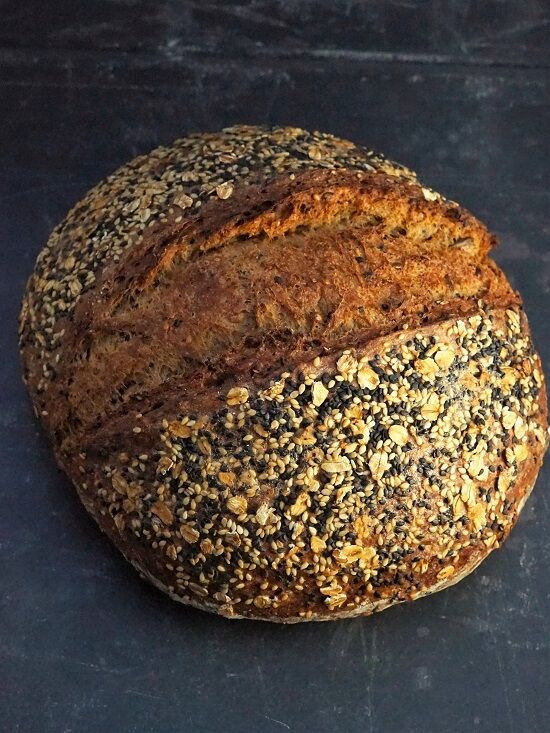
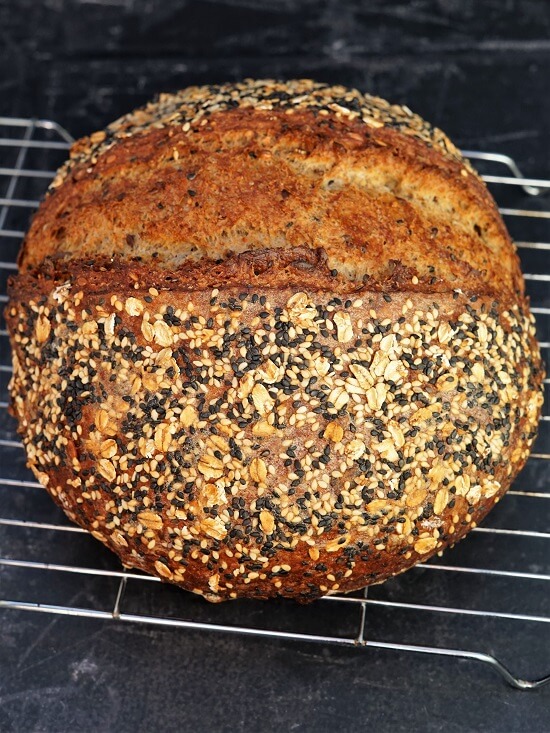
To me, this loaf looks particularly appetizing with a seed and oat topping. I also like that it gives a hint of what’s to be found inside. Here I’ve used a mix of black and white sesame seeds plus rolled oats.

And my secret to stop them falling off once the bread’s baked? I brush on two layers of beaten egg white. One before the seeds and oats are sprinkled on, another after.
THE NIGHT BEFORE BAKING
You’ll need to mix the dough the day before you want to bake the bread. Because the first rise is going to take 12 – 14 hours, I most often do this in the early evening and plan to bake mid-morning the next day. But your dough will come to no harm if you leave it an hour or two longer. As already mentioned, you can also extend the rising by doing it in the fridge for 24 hours.
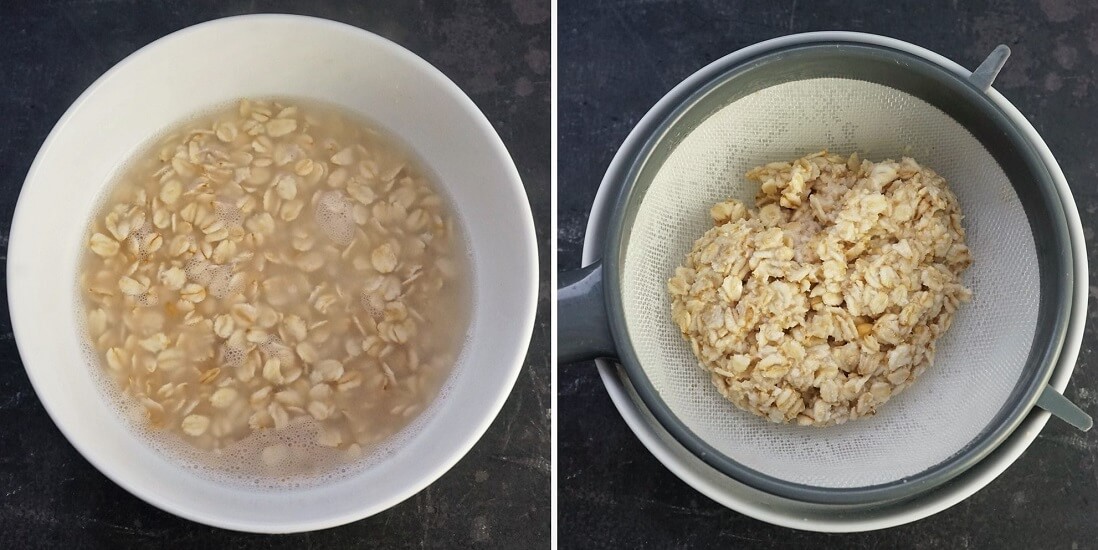
I start by soaking the rolled oats in a little boiling water and leave until cool. Soaking isn’t absolutely necessary, but oats can be very ‘thirsty’ and this lessens the chance of them sucking all the moisture from the dough.
While they’re soaking, I take a large bowl and stir together all the flours, the seeds, 2 teaspoons of salt, and 1.5 teaspoons of instant dried yeast. Note that for my method, you must only use dried yeast that is labelled ‘instant‘, ‘fast‘, ‘easy blend‘ or similar. Check the pack to make sure it doesn’t need to be activated first rather than just adding straight into the flour.
Next, you should drain any excess water from the soaked oats and stir them into the flour and seed mixture. If the oats clump together, use your fingers to lightly rub the mixture and separate them.

Finally, we add water to bring the dough together. Because different flours absorb different amounts of water it’s not possible for me to give you the exact amount. I start by pouring in 300 ml. It doesn’t need to be warm so straight from the tap is fine. I use a sturdy silicone spoon to stir and start bringing the ingredients together. Gradually, I add more water as needed to form a rather wet but not sloppy dough. There should be no dry bits of flour.

Now you can cover the bowl with cling film, a reusable polythene bag, or wet towel and set aside until the next day. Normal, unheated room temperature (we’re talking here in the UK, mind you) is usually fine. But if it’s a hot night or you live in a warmer climate then you can put the bowl in the fridge as per the longer fermentation.
THE NEXT DAY
The next day, the dough should look very different. If you’re not used to wet doughs though, you might be a bit worried. Because as well as rising upwards, the dough will have spread outwards. It will look nothing like the smooth round dome you’re used to. But don’t worry. If you’ve used a clear mixing bowl, then look through the side and you should see that the dough is nicely lively with bubbles.

Even if you haven’t used a clear bowl, when you scrape the dough onto your lightly floured worktop you should see that all-important, intricate network of gluten strands. By the way, a dough scraper that costs just £2 – £3 is invaluable when working with wetter doughs.

Once your dough is on the work surface, give it a few folds and turns to shape it into a ball. By this point it should be looking more like the bread doughs you’re familiar with.

To support the dough on its second rise or proof, we put it into a floured container. I use special cane proving baskets called bannetons. They often come with a liner, but I think they’re unnecessary so long as the basket is well-floured. You can also make your own proofing vessel by lining a bowl with a clean tea towel and flouring the towel well.
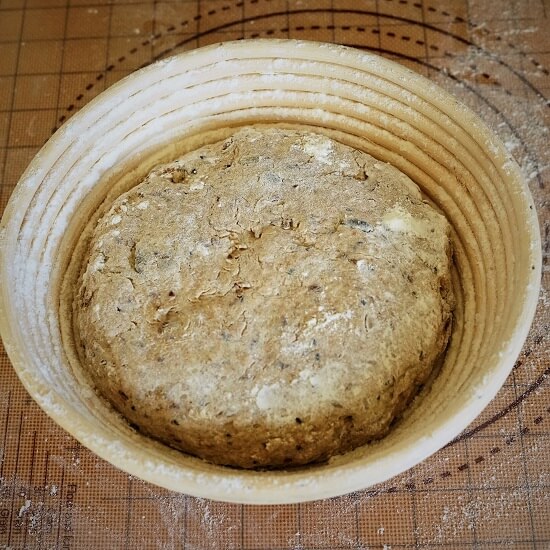
Put the ball of dough into the banneton or bowl so that the domed top is facing downwards. Now cover it and leave for a second rise or proof, ideally in a warmer spot this time. Depending on the temperature this should take 30 – 45 minutes. I’ll tell you further on how to judge when it’s ready.
BAKING MULTIGRAIN SEEDED BREAD
While the dough’s proofing, you should preheat the oven as well as the cooking pot and its lid. I bake the bread in my main oven and, unless it’s a hot day, proof the dough in the small, unheated top oven during preheating. To get the pot as hot as possible, I set my oven to its highest temperature.
HOW TO TELL WHEN THE DOUGH IS READY TO BAKE
To check if the dough is ready to bake, I gently insert a finger to see if the dough quickly or slowly springs back. If it springs back slowly and an impression is left by your finger, then the dough is ready. If the dough springs back immediately and doesn’t leave an impression, prove for longer then check again.
When you know the dough’s ready, remove the pot from the oven and take off the lid. Now carefully flip the dough from its proving basket or bowl into the pot so that the rounded side that was underneath is now on top.
ADDING THE SEED & OAT TOPPING
Working quickly, so the pot stays hot, brush over the beaten egg white. Now slash the top of the dough using a sharp knife, razor blade or baker’s lame. This cut is made so the dough rises in a controlled way rather than splitting at any number of weak points. With practice, you can also create pleasing patterns by slashing in different ways.
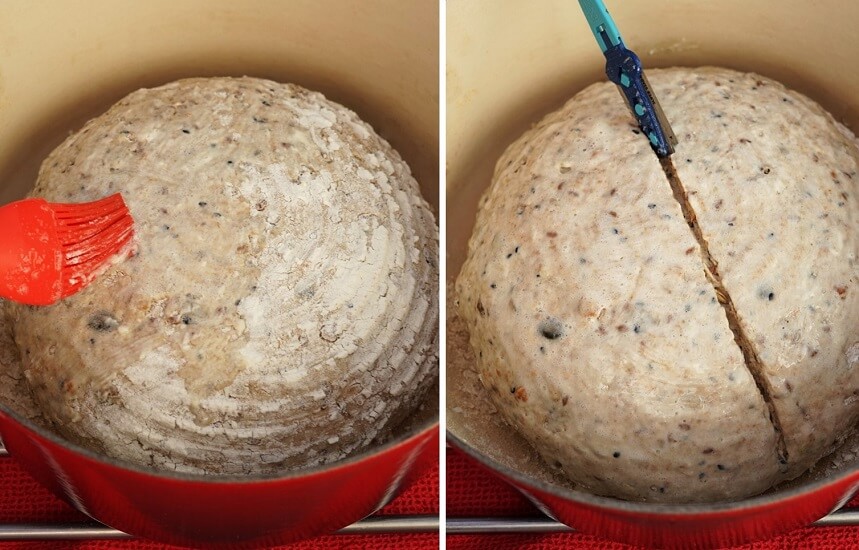
Now sprinkle over the seed and oat topping, trying not to let any fall into the slash. Very, very gently press them down. Finally, brush over another layer of egg white, trying not to disturb the seeds and oats. Annoyingly, I forgot to take a photo of this step. Sorry!
FIRST STAGE OF BAKING: IN THE POT
You now quickly put the lid on the pot and place it in the oven. As soon as it’s in, turn the heat down to 240°C / 220° Fan / Gas 9 and bake for 30 minutes.
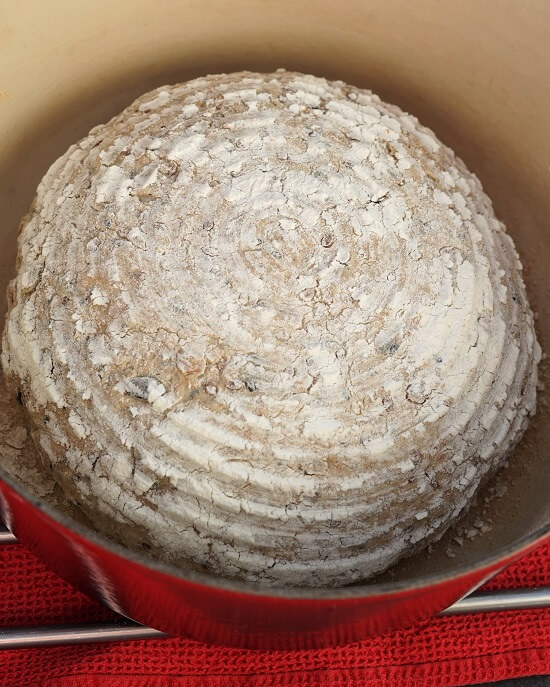
After 30 minutes, take the partially cooked loaf out of its pot. I think this is the most exciting part, particularly if you’ve never made bread before. Carefully taking off the lid, you should see a wonderfully risen loaf that’s starting to brown. It will smell incredibly appetizing.

SECOND STAGE OF BAKING: OUT OF THE POT
By now, much of the moisture will have been driven out of the dough, so less steam is being produced, and a crust is forming. The cooking pot has done its work. So, to ensure the loaf finishes cooking all the way through without over-browning, we take the loaf out of the pot and place it back in the oven, directly on the shelf. We also turn the oven temperature down to 220°C / 200° Fan / Gas 7.
The bread will be cooked if it sounds hollow when you tap its underside. For my Multigrain Seeded Bread this should be after roughly 15 minutes at the lower temperature. Sometimes, if I think it’s done but aren’t entirely sure, I switch the oven off and leave the bread in for another 3 – 5 minutes.
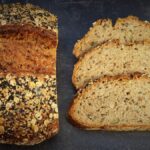
When you’ve transferred the loaf to a wire rack, stand by. After a minute or so, you should hear a satisfying crackling sound. That’s the crust cooling down. Leave until completely cold before slicing and enjoying.
I think this bread’s best eaten within 2 – 3 days. But it freezes wonderfully well. I slice it all first so I can just defrost as many slices as needed without waste.
EASY NO-KNEAD HOMEMADE MULTIGRAIN SEEDED BREAD
I hope this post has convinced you that it isn’t difficult to get wholesome and healthy homemade bread. With a bit of planning the night before, I think this method could be fitted into most people’s routines. If at any point you need to stop things for a while, just pop the dough in the fridge and come back to it when convenient.

Although the instructions look lengthy, once you’ve made your first no-knead, overnight bread, I’m sure you’ll barely need them. You’ll also be confident enough to adapt the recipe to your own choice of grains and seeds.
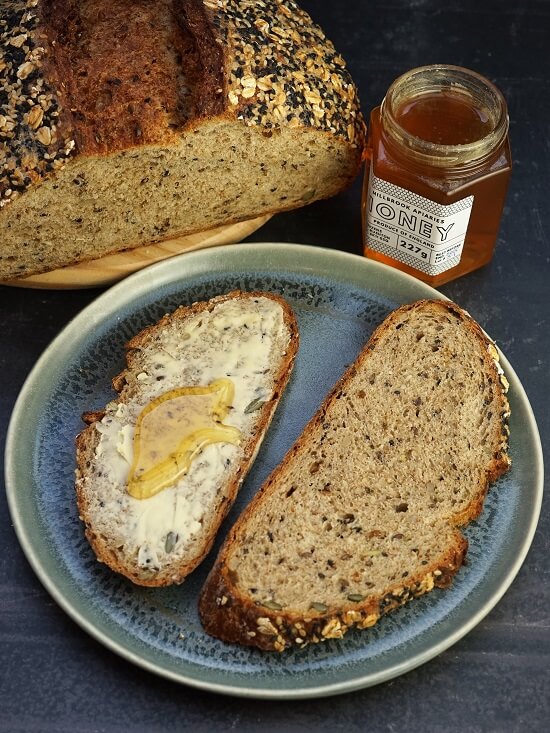
Whether you want a healthier bread for your sandwiches, to eat alongside soups and salads, or for your morning toast, I think Multigrain Seeded Bread will fit the bill.

If you’ve made this recipe, I’d love to know what you thought. Please do leave a comment and rating.

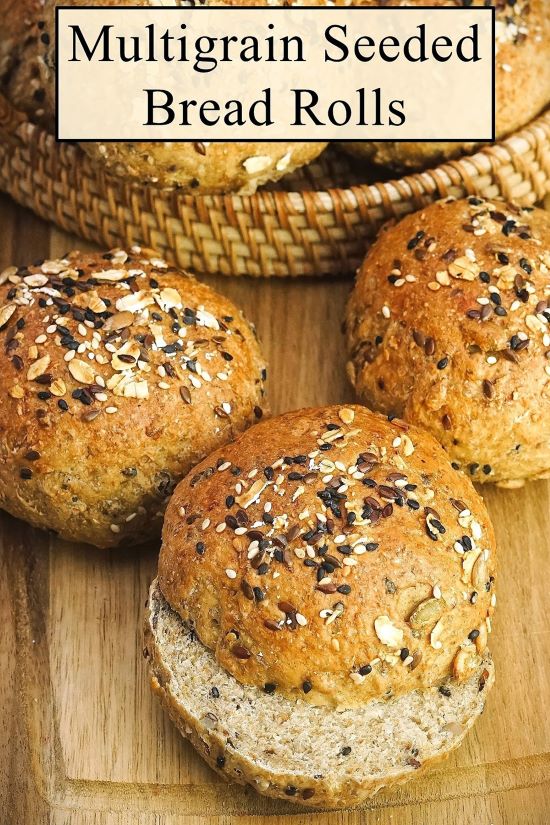
Update: for the same wholesome taste in a bread roll, try Multigrain Seeded Bread Rolls.
Multigrain Seeded Bread (no knead, overnight recipe)
A tasty, wholesome loaf with four different bread flours plus oats and seeds that requires little hands-on time and no kneading. Simply stir up the dough the night before and the next day just shape, prove, and bake.
Customize your loaf by swapping in your favourite bread flours and seeds.
Ingredients
- 50 g rolled or porridge oats
- 150 ml boiling water from a kettle
- 150 g wholemeal bread flour plus extra for dusting
- 150 g malted/granary flour
- 150 g white bread flour
- 100 g wholemeal rye flour
- 100 g mixed sunflower, pumpkin, flax, black and white sesame seeds
- 2 tsp salt
- 1.5 tsp instant dried yeast see Recipe Notes
- 325 - 375 g/ml cold water see Instructions
For the topping
- 1 tbsp rolled oats
- 1 tbsp mixed black and white sesame seeds
- 1 egg white beaten with a splash of water
Instructions
The night before you want to bake the bread:
-
Put the oats in a heatproof bowl and pour over the boiling water. Set aside to soak and cool while you gather the rest of the ingredients.
-
In a large mixing bowl, stir together all the flours, the seeds, salt and instant yeast.
-
Drain and discard any excess water from the soaked oats then stir them into the mixing bowl ingredients: if the oats clump together then use your fingers to separate them.
-
Pour approximately 300 g/ml of the cold water into the mixing bowl and use a sturdy silicone spoon or spatula to start bringing the ingredients together.
Add more water as needed to form a wet but not sloppy dough (see image in blog post for how it should look), stirring well so there are no dry bits of flour.
-
Cover the dough and leave overnight or 12 - 14 hours.
Tip: If the room is warm, or if you'd like a longer rise for convenience or to allow more flavour to develop, you can put the dough in the fridge for up to 24 hours. Bring the dough back up to room temperature before proceeding with the recipe.
On the day of baking:
-
The dough should have risen, spread out, and be very bubbly with a well developed network of gluten strands underneath (see blog image). If not, leave a little longer.
-
Lightly flour a work surface and scrape the dough onto it.
Fold the dough over itself several times until it comes together into a smooth, round ball. Add more flour if needed, but only just enough to prevent sticking to the work surface.
-
Dust a round proving basket with flour: if you don't have one then line a bowl with a clean tea towel and dust well with flour.
Transfer the ball of dough to the basket or tea towel lined bowl, placing it so the rounded top is now underneath.
Cover and leave to prove in a warm place for approximately 30 - 45 minutes.
While it's proving:
- preheat your oven to its highest setting and put on the middle shelf a cast iron pot or Dutch oven with its lid on.
- stir together the oats and seeds for the topping.
-
Check if the dough is ready to bake: gently insert a finger into the dough and see if the dough quickly or slowly springs back.
- If the dough springs back slowly, leaving an impression, then it's ready.
- If it springs back immediately and doesn't leave an impression then leave to prove for longer and check again.
-
When ready to bake, remove the pot from the oven and take off the lid.
Carefully flip the dough from its proving basket or bowl into the pot so that the rounded side that was underneath is now on top.
Add the topping (work quickly so the pot stays hot)
- Brush a layer of beaten egg white over the top of the dough.
- Use a sharp knife, razor blade or baker's lame to cut a slash across the top of the dough.
- Sprinkle over the seed and oat mix then very gently press down to help them stick: try not to let any fall into the slash.
- Brush over another layer of egg white.
-
Put the lid on the pot and place in the oven.
Immediately turn the heat down to 240°C / 220° Fan / Gas 9.
Bake for 30 minutes without removing the lid.
-
After 30 minutes, reduce the heat to 220° C / 200° Fan / Gas 7.
Remove the pot from the oven, tip the bread out of it, then return the loaf to sit directly on the oven shelf.
Bake for a further 15 minutes or until the bread is cooked through: it should sound hollow when tapped underneath.
-
Place on a wire rack until completely cold before slicing.
Best eaten within 2-3 days or can be frozen.
Tip: slice before freezing so you can take out just as much as you need without wastage.
Recipe Notes
Instant Dried Yeast: For this recipe, it's important that you only use dried yeast that is labelled 'instant', 'fast', 'easy blend' or similar. Check the pack to ensure it does not require activating first but can simply be added to the flour along with the other ingredients.
Equipment:
- You'll need a heavy, lidded pot or Dutch oven in which to bake the bread. It should have a capacity of at least 3.5 litres.
- The no knead dough is wetter than normal so a dough scraper is recommended for removing it from the bowl and for folding/shaping it.
- If you don't have a banneton/proving basket, use a large bowl lined with a clean tea towel, well floured.
MORE BREAD RECIPES


I started making my own bread during lockdown and have carried on but always white bread … since I was told that I was heading towards diabetes and was advised to follow Diabetes UK menus which recommends only Rye bread
Then I discovered thing it is lovely I really enjoy it
But I was so sad not to be baking it myself …
Until I found your recipe I followed it exactly and was pleasantly surprised how good it looked when I got up this morning ..I followed day 2 instructions Put it in the oven and had no great expectations Imagining the bread turning out like a Ryvita ! ! !
But No it was a big beautiful loaf cooked perfectly smelling wonderful and very very delicious to eat
I am So Happy
Thank You So much xxx
I’ve taken a lovely photo but It isn’t letting me post it !!
I enjoyed reading your comment so much, Catherine! It was lovely to hear how much you enjoyed my bread recipe and how it’s helping with your health goals. Thank you for getting in touch and best wishes to you x
(Sorry it isn’t possible to post photos with comments, but if you’re on Facebook or Instagram you could always tag me in a post!).
After the 1st rise my dough was very short – tearing rather than stretching during the folds. Any ideas why or is this due to the seeds which break the gluten strands vs white dough? There was a fairly good gluten strand network formed.
Hi Annie, I don’t think it’s the presence of seeds as I include them in many of my loaves but have never had a problem with the dough tearing.
My first thought was that the gluten was underdeveloped, but you say you had a fairly good network of gluten strands so maybe not.
Perhaps then the dough was overworked or even over-proofed so the gluten was starting to break down. Other possibilities are that the dough was cold or perhaps needed a little more water.
Did you go on to bake the bread and if so how was it?
Sorry I can’t be more precise, but there are so many factors. If it happens again, after it’s fermented you could try briefly folding into a ball, covering and leaving to rest for 30 minutes or so.
Hope this helps and thanks for trying my recipe.
Your explanation of the gluten development and instructions are so very well detailed perhaps the most comprehensive I have ever read in a bread recipe. I love Moorlandseaster recipes and have made several of them. I see many similarities in this recipe to a sourdough bake. I love to bake sourdough bread, so this recipe will be great to work with for my purposes..
I really enjoy your site.
Best Regards from Newfoundland
Thank you so much for your kind comments, Gary! You certainly can make this recipe using a sourdough starter instead of yeast. As you’ll see from this early blog post of mine, the method is basically the same: https://moorlandseater.com/no-knead-sourdough/
Hi
I made the multi seeded loaf yesterday. Wonderful flavour – but my loaf was quite flat I think my slash across the loaf wasn’t deep enough so it couldn’t rise. It was also quite damp – i put it back in the oven for 10 mins. The dampness was better and we enjoyed it for breakfast today. Could you advise if you think my theory of not a deep enough slash is correct.
Hi Pam, glad you enjoyed the flavour of the loaf!
I doubt the depth of the slash you made would affect the final height of the loaf. We slash loaves so that when they do (hopefully!) quickly rise in the oven, they split where we want them to and not just where the dough is weakest.
There’s a number of possibilities as to why your loaf was flat and damp including:
Was your yeast well within its Best Before date? If the yeast was ok, then after the overnight rise the dough should have been very bubbly and with a visible network of gluten strands when you scraped it from the bowl.
After the second rise, did you test whether the dough sprang back slowly but left an indent when poked with a finger? If it didn’t spring back at all then it may have been overproofed, meaning you wouldn’t get much rise in the oven.
Is it possible your oven runs a little cool? You may get better results and have less chance of a damp loaf if you increase the time with the lid on. I recently got a new oven and now do an initial 35 minute bake instead of 30. Alternatively, you could try increasing the oven temperature for the time the loaf is in the pot.
Finally, are you making sure the baked bread is completely cold before slicing?
I hope this has helped. It does sometimes take a few tweaks to a bread recipe to get it right for a particular set of circumstances! Do let me know how you get on if you try it again, and thanks so much for trying my recipe.
I have been searching for a Light and Fluffy Multigrain Bread and every time I make one it is a bit heavy and dense. Your bread here looks exactly right, but tell me is it a very light and fluffy loaf or more heavy and dense? Thank you.
Hi, thanks for your interest in my recipe. I wouldn’t say this loaf is light and fluffy, no. It shouldn’t be heavy and dense if made properly, but it’s certainly substantial so probably not what you’re looking for.
I followed the recipe but the middle of the bread isn’t very well cooked – what did I do wrong?
Hi Juliet, sounds like it needed to be baked for longer. Ovens do vary, as will different batches of dough, so it isn’t possible to be exact about timings.
Another possibility is that your oven runs a little hot so the loaf looks done when it isn’t. If the loaf doesn’t sound hollow when tapped underneath then it isn’t ready.
Hope this helps!
Love this recipe, second loaf on the go now. Didn’t have granary flour so used exta rye and bumped up the wholemeal and white flour. I did add 50g of honey to the water and used a full 7g sachet of yeast. Turned out delicious.
Thank you for your lovely feedback. The addition of honey sounds good!