Homemade Ciabatta Rolls
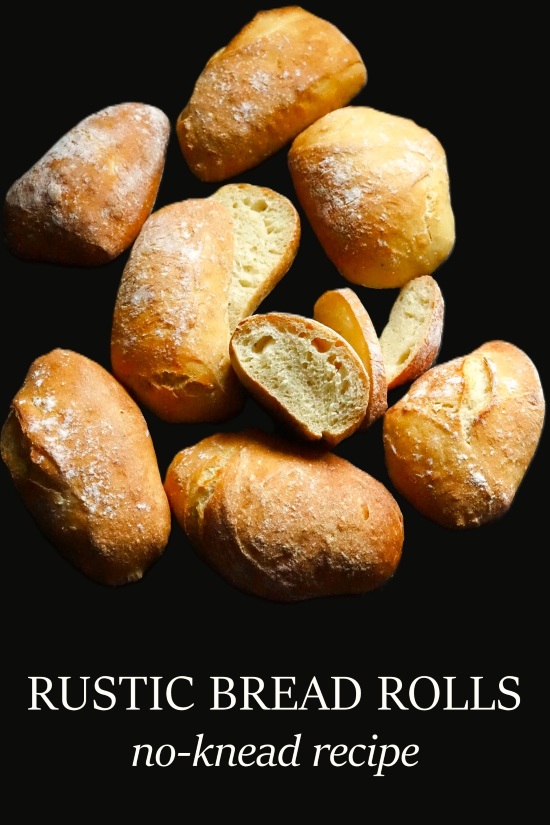
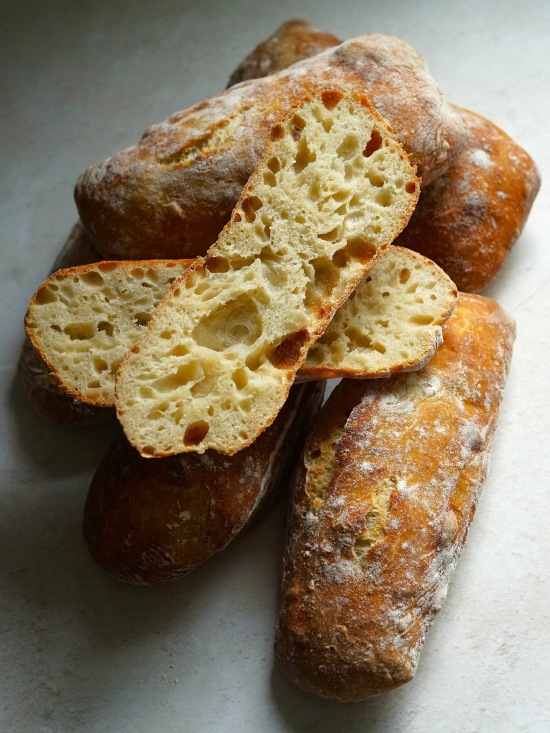
Homemade Ciabatta Rolls, crispy on the outside, soft and chewy inside, are perfect split and filled for Italian-style sandwiches. Or tear off chunks and dip into good olive oil, serve with soups and salads, or any time you want a delicious crusty bread. Containing just flour, yeast, salt and water, fermenting the no-knead dough overnight means home bakers can easily create wonderful, satisfying ciabatta bread with exceptional flavour and texture.
This post contains affiliate links. As an Amazon Associate, I earn commission on qualifying purchases.
Jump to Recipe
The long, flattish Italian bread known as ciabatta (which translates as ‘slipper’) is widely known and loved outside its homeland. But, far from being an old classic, it’s a relatively recent creation. While there must surely have been similar breads before, ciabatta bread was only officially invented in 1982.
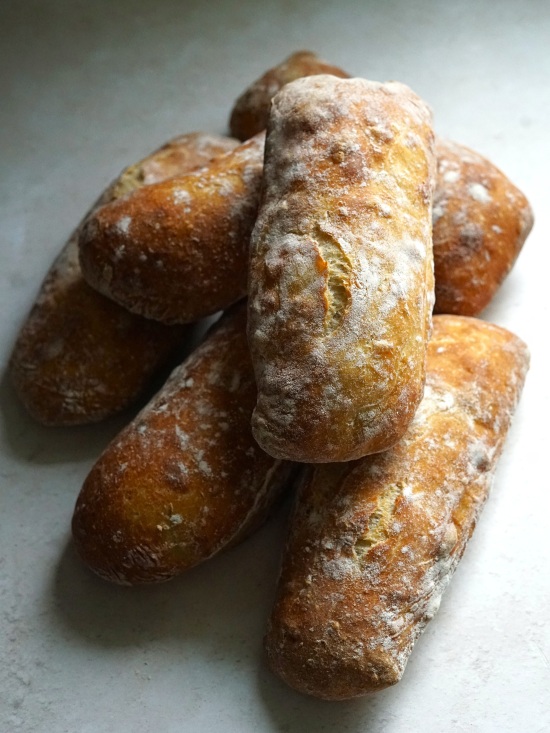
The story goes that Italian miller Arnaldo Cavallari was alarmed at the growing popularity of French baguettes, especially for filled sandwiches or panini*. So, along with two bakers, he created the bread we know today with a thin and crispy crust and a chewy open crumb inside.
*In Italy, panini just means sandwiches (singular: panino), whereas in the UK and USA it usually refers to pressed, toasted sandwiches.
HOMEMADE CIABATTA ROLLS
While ciabatta is available in every supermarket, it’s nowhere near as good as home baked. For my Homemade Ciabatta Rolls you only need the ingredients found in Cavallari’s original. Additions such as olive oil are unnecessary.
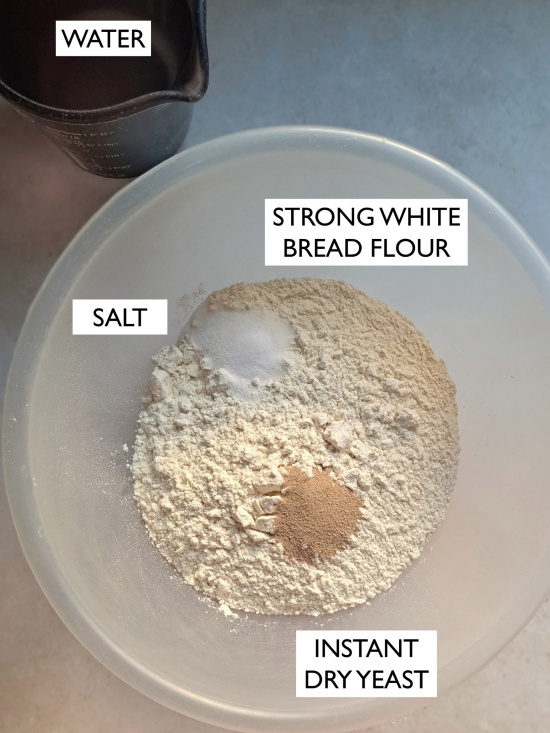
- Strong white bread flour. Has the gluten-forming properties required for the best chewy ciabatta.
- Salt. As well as enhancing flavour, salt helps give structure to the dough.
- Yeast. My recipe uses instant dry yeast, i.e. the type you add directly to the flour without activating first.
- Water. Straight from the tap, no need to have it warm.
My ciabattas have an attractive thin, crispy crust and inside the classic open, chewy crumb that’s great at soaking up flavours. The easy no-knead dough is fermented overnight, giving rich flavour.
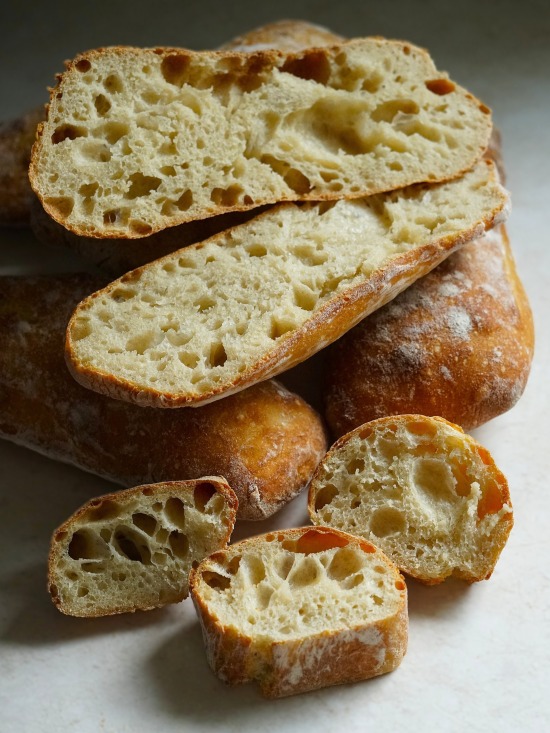
Although I call my ciabattas rolls, I prefer to make them as a baguette shape, similar to what supermarkets sell as half ciabatta. This makes them perfect for a generously sized sandwich for one person, toasted or not.
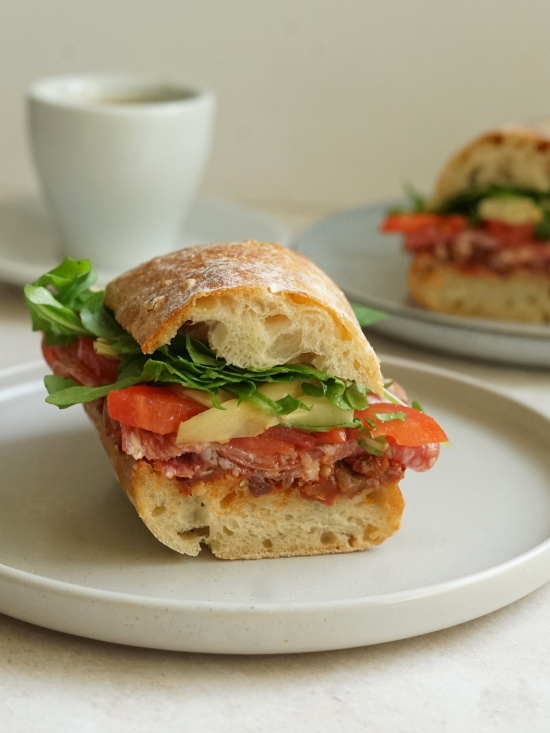
If preferred, you can make smaller rolls or larger loaves from the same dough, adjusting the baking time as necessary. Just like a French-style baguette, you can also slice them into rounds or just tear apart if eating with soup for example.
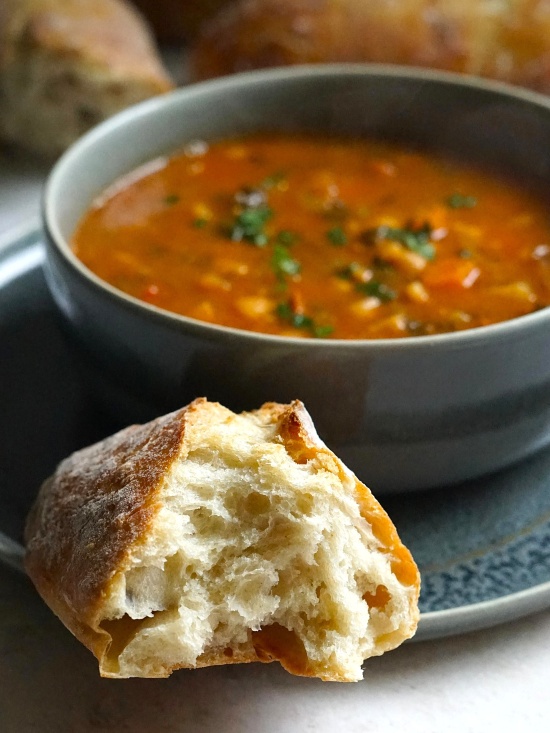
You’ll find a recipe card at the end with ingredient amounts and full instructions to make 6 half ciabattas. But please read the whole of this post before starting as it contains extra tips and step-by-step images to guide you.
HOW TO MAKE CIABATTA DOUGH
The thing that gives ciabatta its distinctive holey interior is a high hydration dough. This simply means it contains a high proportion of water. And the wetter the dough, the flatter the resulting bread, hence ciabatta’s so-called slipper shape. For those interested, you calculate hydration by dividing the grams/ml of water by the grams of flour, then multiplying by 100.
Some ciabatta might have 80 percent or more hydration. But I prefer 75 per cent hydration as this gives the classic open crumb but is easier to handle. It’s still quite a wet and sticky dough as it must be to get the desired end result. But there are two simple pieces of equipment that will help you.
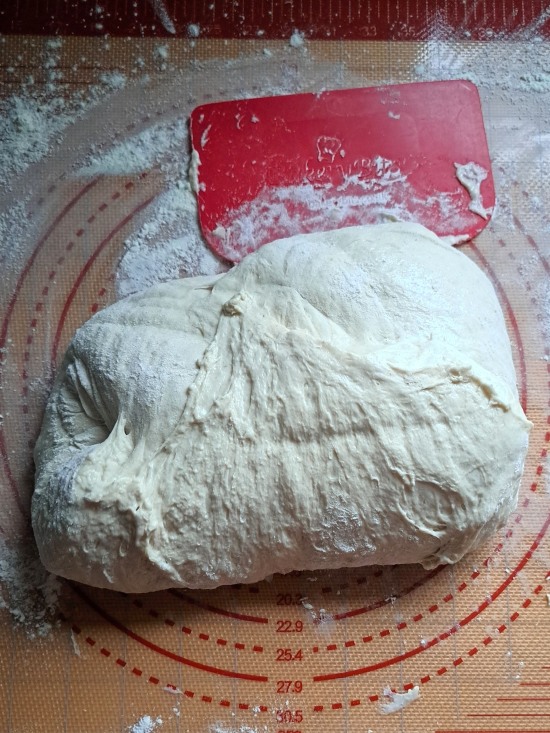
- Silicone mat. Useful for so many baking jobs, cover your work surface with one of these and you’ll reduce sticking and the need for extra flour. I find the mats also make clean-up easier.
- Dough scraper. Used for removing wet doughs from bowls, for folding, cutting and shaping. Note that you often get one free with the silicone mat I’ve linked to but do check the current listing.
You’ll find these and other recommended equipment, ingredients and more in my Amazon store. Buying there helps support this blog at no extra cost to you.
As we’ll see, there’s no kneading involved in my Homemade Ciabatta Rolls. Just a few simple folds and you’ll have fantastic artisan-looking bread that tastes better than any you can buy.
THE NIGHT BEFORE BAKING
The wetter than usual dough has another part to play, not just in creating the classic ciabatta shape. In combination with a long, overnight fermentation, it develops gluten which you’d otherwise achieve by kneading. And it’s gluten which gives structure to bread.
Gathering the ingredients and mixing up the dough for ciabatta will probably take you no more than 10 minutes.
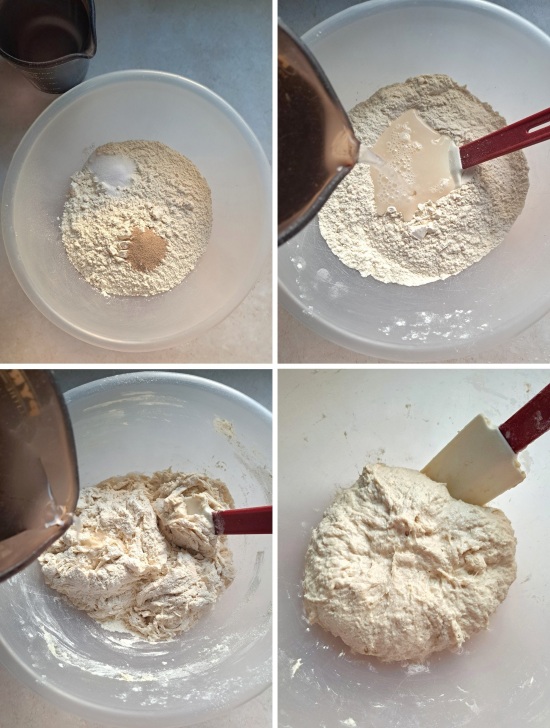
- Put the flour, salt, and instant dry yeast in a large bowl and stir.
- Add 350 g/ml of water and stir in with a sturdy silicone spatula or similar.
- Gradually add more water, stirring as you do, to form a dough that’s wet but not sloppy.
- Stir well until there’s no dry flour visible.
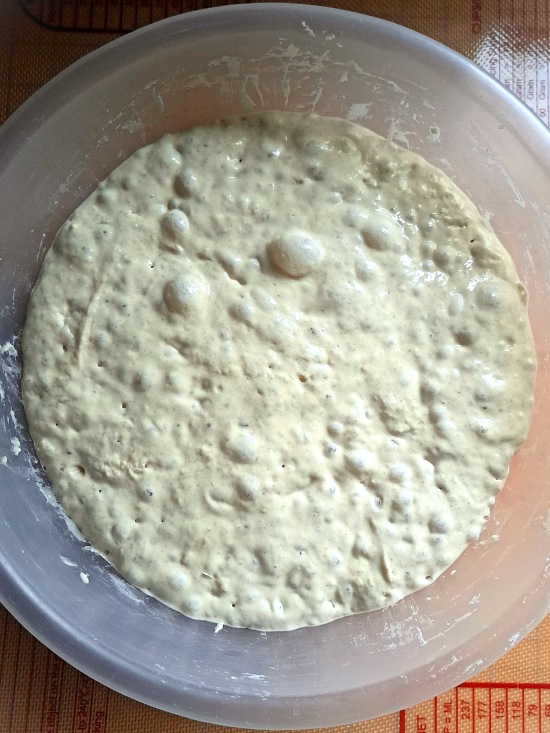
As different flours absorb varying amounts of liquid, it’s not possible to be exact about how much water you’ll need. I use just under 500 g/ml, but you should be guided by the final image above.
Now cover the dough (I place the whole thing in a large reusable polythene bag) and leave to ferment overnight at unheated room temperature. If the room is warm, or you want to extend fermentation for convenience or to develop even more flavour, you could place in the fridge.
THE NEXT DAY: FOLD, SHAPE, BAKE
In the morning, the dough should be very bubbly and have spread out as well as risen. This is perfectly normal for wetter doughs. If it’s been in the fridge, allow to come to room temperature before continuing.
Generously flour your work surface, ideally covering it with a silicone mat first, and scrape the dough onto it. You might think it looks too soft to do anything with. But just a few quick folds and you’ll transform it into a lovely plump dough.
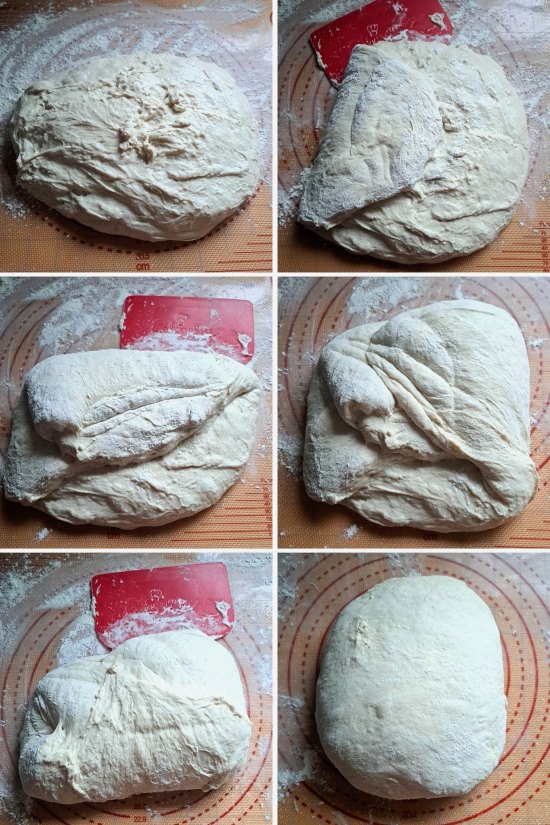
With slightly wet hands, stretch and fold the dough by lifting up one edge then folding it into the middle. Repeat with the other 3 sides; if it helps, think of the sides as north, east, south, and west. Do this twice more. Tip: if you’d like a flatter ciabatta just do 1 or 2 sets of folds rather than all 3.
DIVIDING & SHAPING THE DOUGH
The next step is to cut the dough in two. Then use floured hands or your dough scraper to push and roll each piece into a neater long roll. Sprinkle with more flour if necessary to stop it sticking to the work surface.
I like to make my Homemade Ciabatta Rolls into half ciabatta so cut each piece into 3, giving me 6 rolls in total. As mentioned though, you could cut into 8 smaller rolls or leave as 2 larger loaves if that suits you.
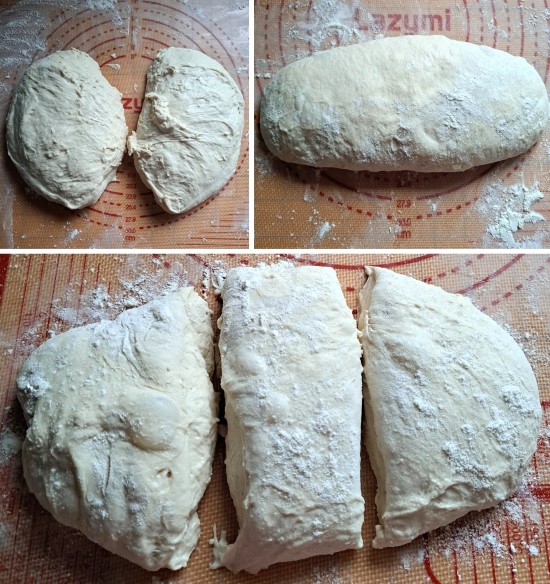
For half ciabatta like mine, stretch and pat into a roll approximately 17 – 18 cm in length. Sprinkle with more flour if you need to. You can make them as neat as you like, although I don’t fuss too much as I prefer a rustic look. When you’re happy with them, transfer the rolls to a sheet of floured baking paper. Leave a little space between them to expand.
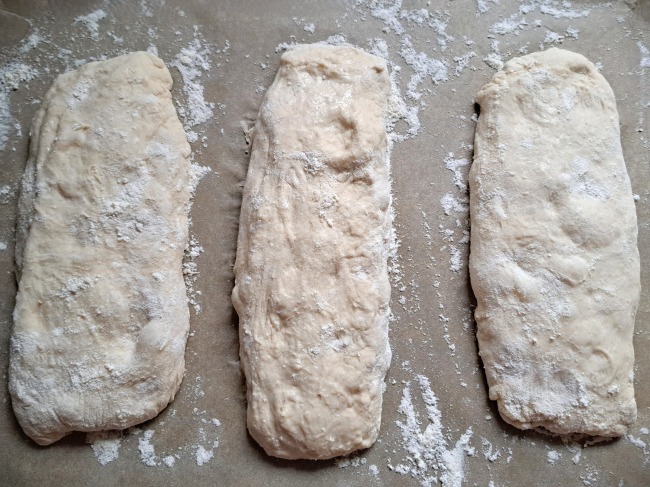
If, like me, you don’t have a baking tray big enough to fit all the rolls then use two and bake in batches.
PROVING & BAKING HOMEMADE CIABATTA ROLLS
The ciabattas now need a second rise or prove. Exactly how long this takes will depend on room temperature, but it’s likely to be 25 – 45 minutes. The best way to test if they’re ready to bake is to gently push a floured finger into the dough. If it leaves an indent rather than immediately springing back, it’s ready. If not, leave longer.
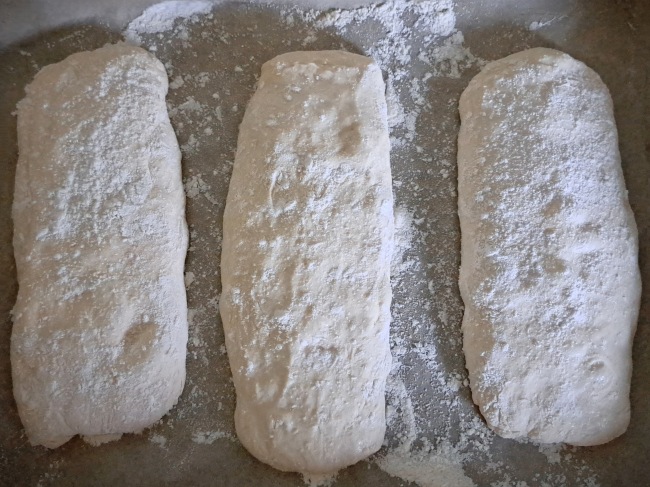
During the prove, preheat your oven to the temperature in the recipe card with a shelf in the middle position. Put the tray for baking the ciabatta onto the shelf to preheat too. To help give the dough a good rise, I also put a deepish METAL (not glass) roasting tin on the lowest shelf. Then, when the Homemade Ciabatta Rolls go on the middle shelf, I pour cold water into the hot tin. This creates steam which delays the forming of a crust, allowing a longer rise.
The rolls are first baked for 20 minutes on the preheated baking tray, still on their paper. After 20 minutes, take the rolls off the tray and put them back in, this time sitting directly on the middle shelf. Bake for another 5 minutes or until they’re deep golden brown and sound hollow when you tap their base.
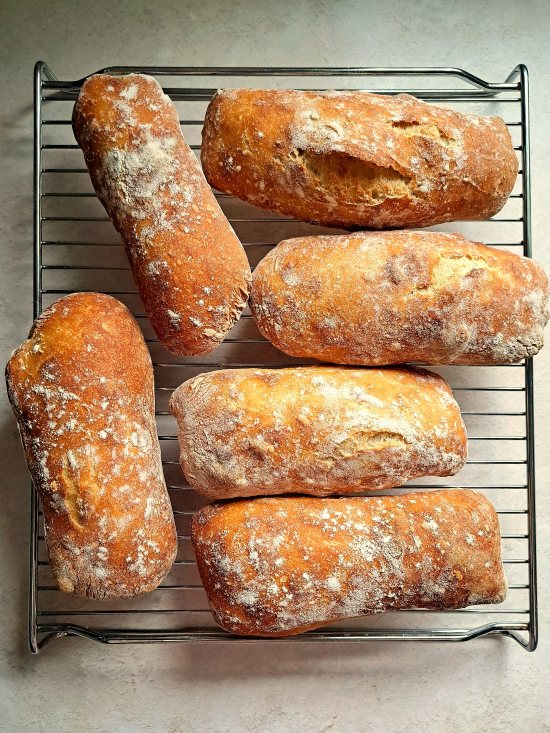
If after the initial baking the tops are already browned enough for your taste, turn the rolls upside down for the final 5 minutes. Put the cooked rolls on a cooling rack. If you’ve a second batch, bake those in the same way, remembering to add cold water to the tin on the bottom shelf.
STORING & SERVING HOMEMADE CIABATTA ROLLS
On the day of baking, the crust of Homemade Ciabatta Rolls is at its crispiest and the wonderful open crumb at its lightest. A little warm from the oven is ideal, but if you’re not eating them the same day, ciabattas freeze very well. Just pop in a plastic bag and tuck them away. In the recipe card I’ve given instructions for refreshing and reheating in an oven or air fryer.
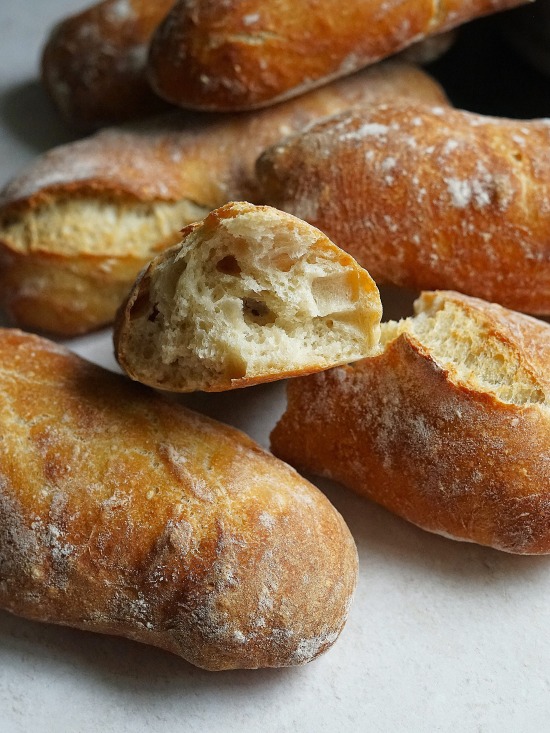
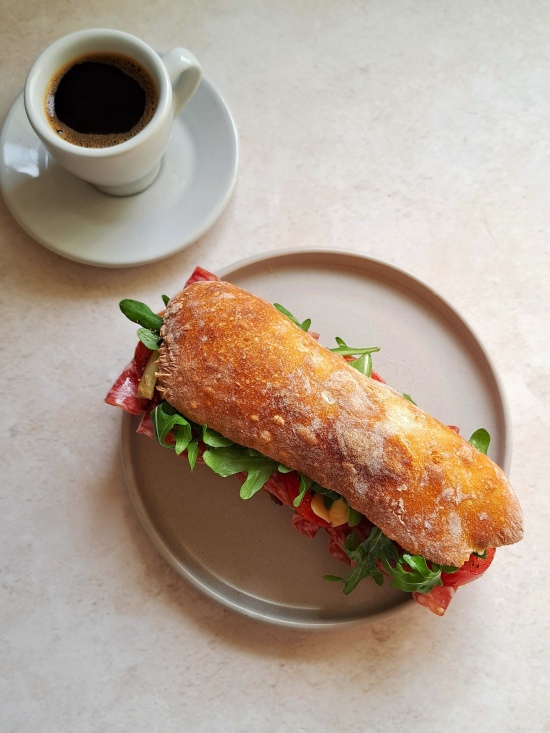
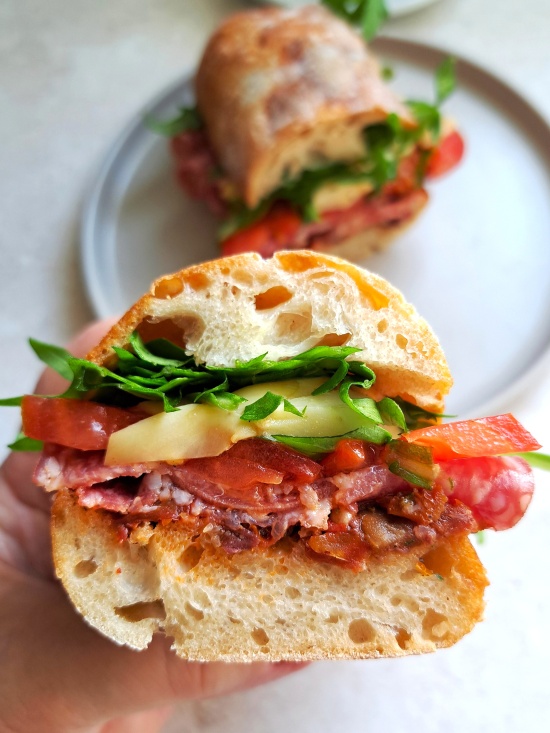
I think you can’t beat a homemade half ciabatta roll for an Italian-inspired sandwich. Below, I spread the base with a roughly chopped mix of sun-dried tomato, garlic, and black olives seasoned with dried oregano and mild chilli flakes. Over that I layered salami, sliced fresh tomato, basil leaves, sliced artichoke heart, and rocket, finishing with black pepper and a drizzle of oil from the sun-dried tomato jar. Buonissimo!
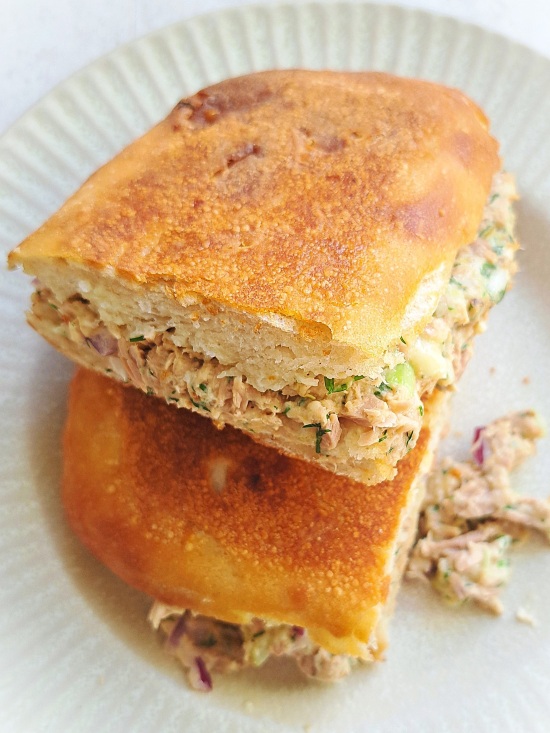
My homemade half ciabattas are also great if you want a toasted panino. In a sandwich press the crust goes even thinner and crispier, like my tuna panino below. But I think these ciabattas, full of flavour and wonderful texture, can be used whenever you want a good quality crusty white roll. Serve with soups, salads, or just spread with butter plus a little honey or jam for breakfast and you’ll see!
If you’ve made this recipe, I’d love to know what you thought. Please do leave a comment and rating.


Homemade Ciabatta Rolls
These easy ciabatta rolls or baguettes have exceptional flavour and texture from a dough of just flour, salt, yeast and water fermented overnight. No kneading required.
Please read the accompanying blog post before starting. For the best results use metric measurements and digital scales.
Ingredients
- 650 g strong white bread flour (plus extra for dusting)
- 12 g (2 tsp) salt
- 7 g (1.5 tsp) instant dry yeast (i.e. the type that doesn't need activating before adding to the rest of the ingredients)
- 450 - 500 g/ml cold water
Instructions
The day before baking
-
Put the flour, salt and yeast into a large bowl and stir together.
Pour in approximately 350 ml of the water, stirring to start bringing a dough together.
Gradually add more water while stirring to form a wettish but not sloppy dough. Stir well using a silicone spatula or similar until there is no dry flour visible.
Tip. You may not need all the water: see photos in the blog post for how the dough should look.
-
Place in a large reusable polythene bag, or cover the bowl, and leave at room temperature overnight, 12 - 14 hours, or until the dough is risen and very bubbly.
Tip: If the room is warm, or if you'd like a longer rise for convenience or to allow more flavour to develop, you can put the dough in the fridge for up to 24 hours. Bring the dough back up to room temperature before proceeding with the recipe.
On the day of baking
-
If you have one, put a silicone baking mat on your work surface to reduce sticking.
Sprinkle the mat or your work surface generously with flour then scrape the fermented dough onto it.
-
Stretch and fold the dough
With slightly wet hands, stretch and fold the dough by lifting up one edge then folding it into the middle. Repeat with the other 3 sides (if it helps, think of the sides as north, east, south, west).
Do two more sets of stretches and folds to get a plump piece of dough.
Tip: if you prefer a flatter ciabatta do 1 or 2 sets of folds instead of 3.
Cover the dough with the empty bowl while you complete the next step.
-
Cut out baking paper
Cut out 1 or 2 pieces of baking paper larger than the baking tray/s you'll be cooking the rolls on. They will need to fit with space to expand.
Sprinkle the paper with flour.
Tip: placing the paper on a board or tray makes the uncooked rolls easier to transfer to the oven later.
-
Cut the dough into 6 ciabattas
Divide the dough in two.
Use a dough scraper to push and roll the first piece into a neater long roll: sprinkle with more flour if it sticks. Cut into 3 equal pieces.
Repeat with the second piece of dough so you now have 6 pieces in total.
Note: if preferred, you can make 2 larger or 8 smaller ciabattas.
-
Shape the dough
Stretch and pat each piece into a roll approximately 17 - 18 cm in length, sprinkling with flour if they're sticky.
Transfer to the prepared baking paper, leaving space between them, and sprinkle with flour.
-
Cover or place the tray(s) in 1 or more large reusable bags and set aside until the dough springs back slowly and leaves an indent when you press with a finger: 25- 45 minutes depending on room temperature.
Complete the next step during this time.
-
While the rolls are proving
Preheat the oven to 220°C /200°Fan /Gas 7 /425°F with a shelf in the middle. Put the tray for baking the rolls onto the shelf to preheat too.
Put a deepish METAL roasting tin on the bottom shelf to preheat: later you'll pour in cold water to create steam and help the dough rise. DO NOT USE GLASS or it could shatter.
-
Bake the rolls
Remove the hot baking tray from the oven and slide or lift the rolls off the board, but still on their paper, onto the baking tray.
Tip: If you're baking the rolls in batches, put the second batch in the fridge while you bake the first.
Place the tray of rolls on the middle shelf of the oven.
Pour cold water into the hot metal roasting tin in the lower part of the oven. Immediately close the door.
Bake for 20 minutes without opening the door.
After 20 minutes carefully open the oven door (caution: lots of hot steam may billow out so stand back) and take out the tray of rolls. Return the rolls to the oven, sitting directly on the middle shelf this time.
Note: if you have just one tray of rolls to bake you can also discard the tin of water at this point. But if you'll be baking another tray of rolls then pour out any remaining water but return the empty tin to the bottom shelf so it stays hot.
Bake the rolls for another 5 minutes or until they're deep golden brown and sound hollow when you tap their base.
Tip: if the tops are already browned enough for your taste, turn the rolls upside down for this final 5 minutes.
Put the cooked rolls on a cooling rack.
If you have a second batch, cook in the same way, adding cold water to the tin on the bottom shelf.
-
Best eaten on the day of baking (slightly warm or cold) or can be frozen.
Can be reheated/refreshed as below.
Reheat/refresh
Preheat an oven to 200°C /180° Fan /Gas 6 /400° F or an air fryer on 'Bake' to 170°C /375° F. Bake until hot, the outside crisp and the interior soft again: approximately 5 - 10 minutes depending on appliance and how many you're reheating.
RELATED RECIPES