Potato Focaccia (no-knead recipe)
Potato Focaccia is a beautifully moist and tasty version of the classic Italian flatbread.
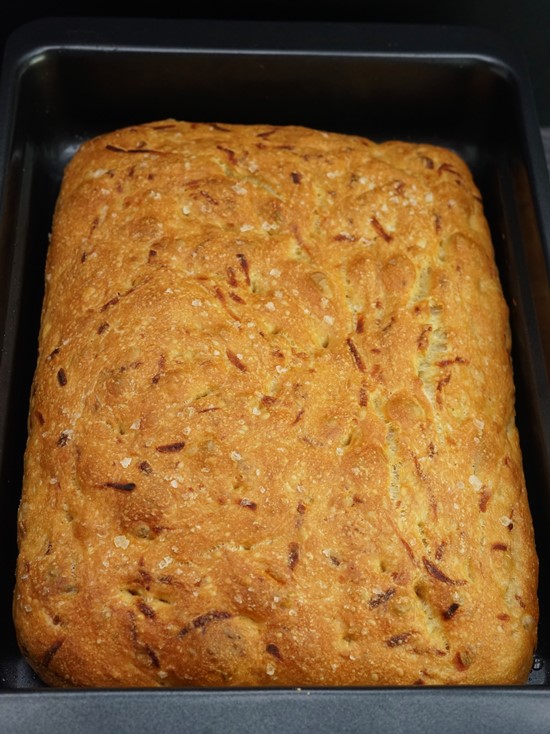
Although you might not guess it was there, grated potato adds complexity of flavour and wonderful texture. The crust is appetizingly dark golden brown. Inside you’ll find a springy, open, and holey crumb.

Made with my easy overnight method, no kneading is required: just stir the dough ingredients together. Before baking the next day, stretch and fold the dough a few times.
Substantial without being heavy, Potato Focaccia has great chewy texture. The long, overnight fermentation plus olive oil gives a fantastic flavour.

Disclosure: this post may contain affiliate links. If you buy via my links, I may earn a small commission at no extra cost to you.
Jump to Recipe
If you’ve never added potato to bread dough before, you’re in for a surprise. Over the years, I’ve made quite a few potato breads. With all of them, I’ve found that grated raw or cooked mashed potato adds great depth of flavour. It also makes the bread moister and helps to keep it fresher for longer. What’s not to like?
Up to now, my favourite has been Sourdough Potato Bread. The recipe I’m sharing today is another great example of the benefits of adding potato to bread dough.
FOCACCIA
The Italian flatbread focaccia is hugely popular in Britain. It’s generally agreed that its name derives from the Latin panis focacius or ‘hearth bread’, reflecting how it was originally cooked.
Years ago, I tried various versions of focaccia. Some good, others not good at all: dry and biscuity or too oily, often with poor flavour. But my favourite was a moist and flavourful olive oil and potato flatbread I came across in a newspaper supplement. It was by baking guru Dan Lepard whose brilliant book The Handmade Loaf got me started making sourdough.
Since then, I’ve developed my own no-knead overnight method for yeasted and sourdough loaves. And it’s that easy technique I’ve used, along with an adapted version of the Lepard flatbread, to create Potato Focaccia.

POTATO FOCACCIA
I admit that the detailed instructions in the recipe card at the end look lengthy. But getting a great tasting, chewy, and satisfying Potato Focaccia is comparatively easy. All you really need is time.
As the dough needs a long fermentation, it’s best to stir it up the night before you want to bake. The next morning you’ll need to be around to do a series of quick stretches and folds of the dough. But these take seconds. So you can be getting on with something else in between.
The only essential bit of kit you need is a large non-stick roasting tray. It should be a minimum of 30 x 25 cm. A cheap and cheerful dough scraper will make life easier too.

THE NIGHT BEFORE
Take a large bowl and stir together 500 grams of bread flour, a teaspoon each of instant dried yeast and salt. Then grate in a large, peeled potato. You don’t have to be exact about the size but aim for 225 – 250 grams before peeling.
Finally, stir in water to make a wet dough. As different flours absorb varying amounts of liquid, I’m afraid I can’t be precise here. Start with 320 ml and add more if needed to bring everything together into a wet dough.

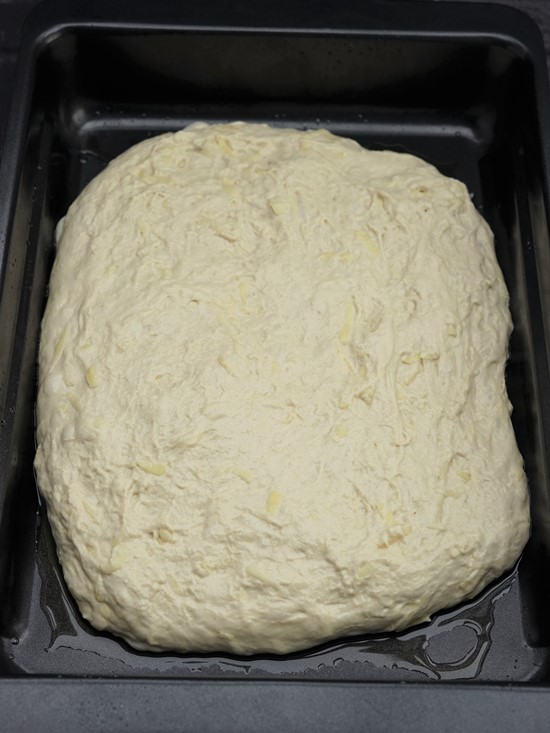
If you’re not used to working with wet doughs, it may look wrong. You may think it’s more like a very thick cake batter than a bread dough. But don’t worry. It will be fine.
Cover the bowl and leave overnight at normal room temperature or approximately 12 – 14 hours. If the room is particularly warm, or you live in a hot climate, then the overnight fermentation can be done in the fridge. You can also do that if it’s just more convenient for you to have a longer rise: a good tip that works with any bread dough.
THE NEXT DAY
In the morning, the dough should have risen to more than twice its size and be very bubbly. This is proof that you don’t have to knead to develop gluten in a wetter than normal dough. However, if it’s not risen and bubbly, leave longer until it is. On the other hand, if it’s ready and you’re not, then you can pop the dough in the fridge for an hour or so.

Looking at the wet, sticky dough, you’re probably now even more pleased that this is a no-knead recipe. But that doesn’t mean that the bread will be heavy. To help it along, and to develop an open and holey interior, we give the dough a few stretches and folds, resting it in between, before baking.
STRETCHING & FOLDING
Before handling such a sticky dough, it (and our hands) need a layer of olive oil. This is why I don’t add oil to the dough: the amount we’ll use to shape and cook the focaccia is sufficient.
First, drizzle a tablespoon of olive oil over the surface of the dough. Rub it all over, greasing your hands with oil as you do. Then reach down the sides of the bowl, gathering up the dough, and stretch it upwards as far as you can without tearing it. Then place it back down, folding the dough over itself. Rotate the bowl a little and repeat the stretching and folding. Do this another six times (i.e. eight in total), rotating the bowl each time. Now cover the bowl and leave it to rest for 10 minutes.

The next stretches and folds are slightly different as we’ll be starting to shape the Potato Focaccia as we go. To do this, first spread some olive oil over a large dinner plate. Then scrape the dough from the bowl onto it.
Fold the dough into thirds by lifting one side, lightly stretching it as you go, and fold it into the middle. Then lift and stretch the other side and fold it over the first. Aim to shape the dough into a rough rectangle as you do this. Now repeat the process, this time folding in the opposite direction. Written down it may look complicated. But it will make sense when you come to do it.

Cover with the upturned bowl or oiled cling film and leave for 15 minutes. Then do the two sets of folds again, one way, then the other. Leave for another 15 minutes.
SECOND PROOF AND GETTING READY TO BAKE
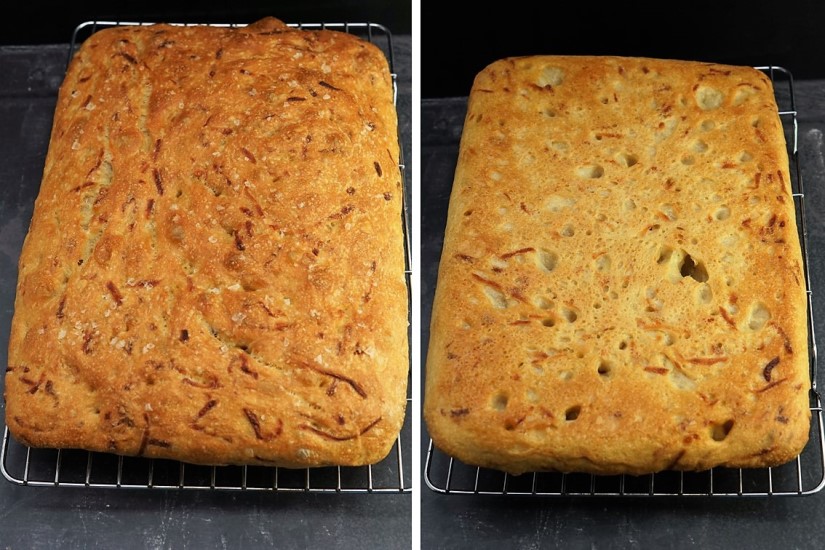
For its final rise, the dough is transferred to a large roasting tray. Make sure it’s a good quality non-stick tray though. It’s heart breaking to see a beautiful looking, golden brown perfectly risen focaccia only to find it’s stuck to the tray. Trust me. I’ve been there.
Grease the bottom and sides of the tray with olive oil before scraping the dough onto it. Then repeat the folding in both directions, again trying to get it into a rectangle shape as you fold. You should now have a seam on top: turn the dough over so it’s underneath. Cover the tin with cling film (oil the cling film if it’s going to touch the dough) and leave to proof.

I can’t be exact about how long the second proof will take as conditions in every kitchen, and on different days, will vary. Unless it’s particularly warm though, expect a minimum of thirty minutes. However, on a cold day it could take an hour. The best way to check if your dough is ready to bake is to prod it with an oiled finger. If the dough doesn’t spring fully back but leaves an impression, then it’s ready to bake. If not, leave another ten minutes and check again. Repeat the checking every five to 10 minutes until it’s ready.
Ten minutes into this second proof, you need to decide whether you want a very thick Potato Focaccia or a merely chunky one. My preference is one that’s not too thick so, at the ten-minute mark, I dabble my fingers in some olive oil and gently stretch the dough so it almost fills the tin. Then I cover it again and leave it until ready to bake. If you’re happy with a thicker bread, then don’t bother with this stretch.
BAKING POTATO FOCACCIA
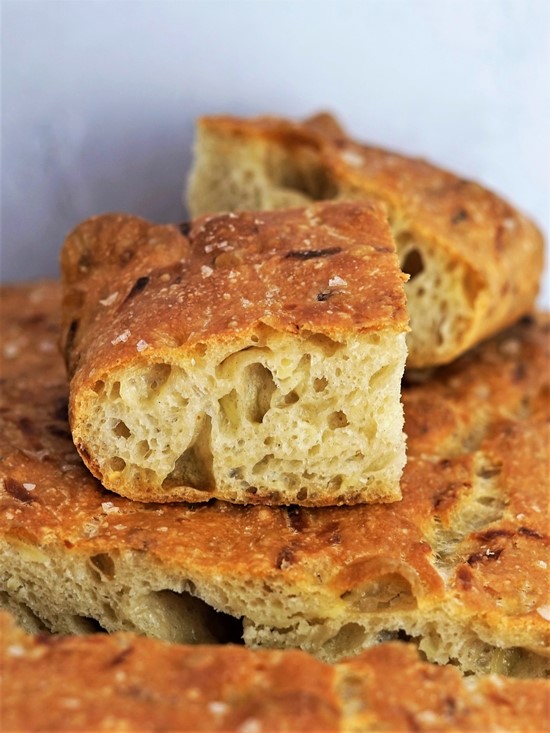
Just before putting in the oven preheated to 220C / 200C Fan / Gas 7, brush or drizzle the dough with more olive oil. Then make those characteristic little dimples all over the surface by pressing down with your fingertips. Finally, I like to add a sprinkle of flaky sea salt, but that’s entirely optional.

Give the focaccia twenty minutes in the oven, then lower the temperature to 200C / 180C / Gas 6. Bake for another eight to twelve minutes or until the bread is dark golden brown and cooked through. It should sound almost hollow if tapped underneath. Put the focaccia on a wire rack to cool just a little, then it’s ready to eat.
TASTY, EASY NO-KNEAD POTATO FOCACCIA
I love the taste and texture of this Potato Focaccia. Oh, and the smell too! Cut into it while still warm and you get a wonderful aroma of fresh bread with something a little extra. A hint of roast potato or maybe even chips 😀.

I can never resist eating a piece straight away. And no matter how many times I make a simple bread like this, I’m always amazed at just how good it tastes.
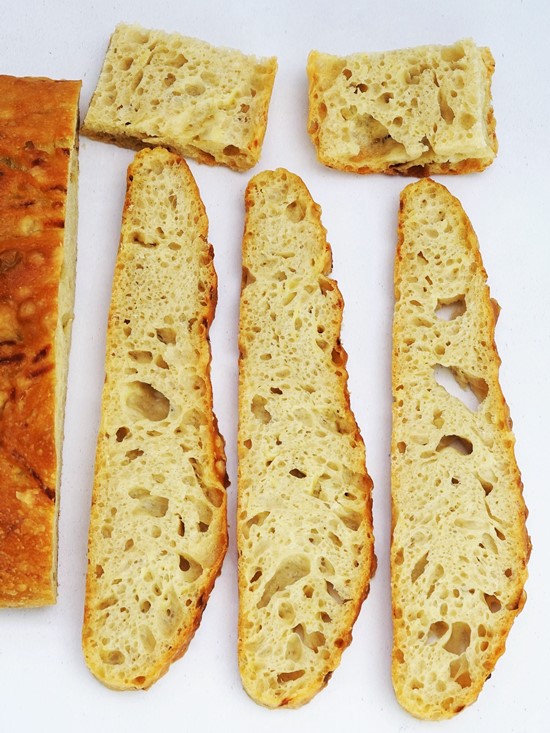
But I suppose I notice the texture first. Lightly crusty on the outside and with a crumb that’s moist and open. This isn’t what you’d call an ‘airy’ bread though. It’s actually quite substantial, although certainly not heavy. It always pleases me to hold a chunky piece between thumb and index finger and give it a light squeeze and see just how springy and bouncy this delicious bread is.
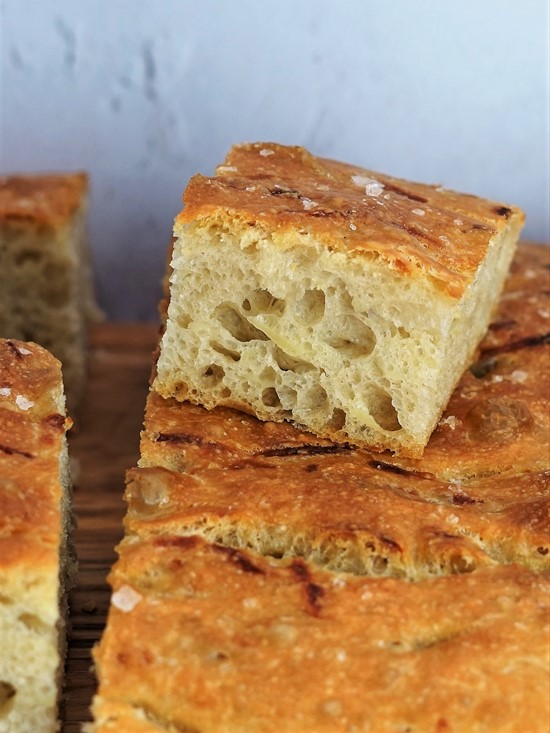
Cut the bread into long slices and you’ll get another view of that great holey structure. Incredible to know that this is all thanks to a wetter than usual dough plus those few minutes of stretching and folding.
Besides eating focaccia alongside salads, antipasti, soups, stews etc. I love sandwiches made with this hearty, tasty bread.
And the potato definitely helps to keep the focaccia fresher for longer. I found myself eating it, rewarmed, three days later and it was still good. Especially stuffed with salami, cheese, tomato, and a little Italian herb seasoning.
Potato Focaccia also freezes well, either whole or in convenient portions.
I hope you’ll try this easy, no-knead recipe and let me know how it went by leaving a comment and rating.
Potato Focaccia
Grated potato helps to create a moist and tasty version of the classic Italian flatbread. In this easy, no-knead recipe a long overnight fermentation also develops flavour.
Ingredients
- 500 g strong bread flour
- 1 tsp instant dried yeast
- 1 tsp salt
- 225-250 g potato, peeled weight before peeling
- 320 - 350 ml water
- olive oil
- sea salt flakes for sprinkling optional
Instructions
THE EVENING BEFORE YOU WANT TO BAKE THE BREAD
-
Put the flour, dried yeast and salt in a large bowl and stir.
Grate the potato into the bowl.
Stir in 320 ml of the water. Mix well, ensuring there are no dry bits of flour, adding a little more water if necessary to create a wet dough.
Cover and leave at room temperature overnight or 12-14 hours.
Tip: if the room is warm then put the dough in the fridge.
THE NEXT DAY
-
The dough should have risen considerably and be very bubbly. If not, leave it longer.
Drizzle a tablespoon of olive oil over the surface of the dough. Rub it all over, greasing your hands with oil as you do so.
Reach down the sides of the bowl, lift up the dough to stretch without tearing it before placing back down, folding the dough over itself. Rotate the bowl a little and repeat the stretching. Rotate and stretch another 6 times, i.e. 8 in total.
Cover and leave to rest for 10 minutes.
-
Grease a large dinner plate with more olive oil.
Scrape the dough onto it.
Fold the dough into thirds by lifting up and stretching one side and folding it into the middle, then lifting up the other and folding to cover the first. Repeat, but this time folding in the opposite direction. Aim to shape the dough into a rough rectangle.
Cover with the upturned bowl or oiled cling film and leave for 15 minutes.
Fold again in both directions, cover and leave for another 15 minutes.
-
Oil the base and sides of a non-stick roasting tray that's a minimum of 25 x 30 cm.
Scrape the dough onto the tray.
Repeat the folding in thirds in both directions, again aiming to get a rectangle shape. Turn over so the seam is underneath.
Cover the tray with cling film (oil it if it touches the dough) and set aside for a second prove.
-
Preheat your oven to 220C / 200C Fan / Gas 7.
-
After approximately 30 minutes*, poke an oiled finger into the dough: if it doesn't spring fully back but leaves an impression then it's ready to bake. If not, leave another 10 minutes and check again. Repeat the checking as necessary.
*Optional: after the first 10 minutes, with oiled fingers gently stretch out the dough so it almost fills the tin. This will give a less deep focaccia, although it will still be quite chunky.
-
When the dough is ready to bake, drizzle or brush olive oil over the top then dimple it by pressing down with your fingertips all over the surface.
Sprinkle with flaky sea salt if liked then put into the oven and bake for 20 minutes.
-
Turn the oven down to 200C / 180 Fan / Gas 6 and bake for a further 8-12 minutes until cooked through and dark golden brown. The bread should sound almost hollow if tapped underneath.
Transfer to a wire rack to cool a little.
-
Best served lightly warm.
Store in an airtight container when cold. Should keep for 3-4 days or can be frozen.
Reheat in a low oven or in a microwave.
Recipe Notes
Recipe adapted from Dan Lepard's in The Guardian Guide to Baking (2007)
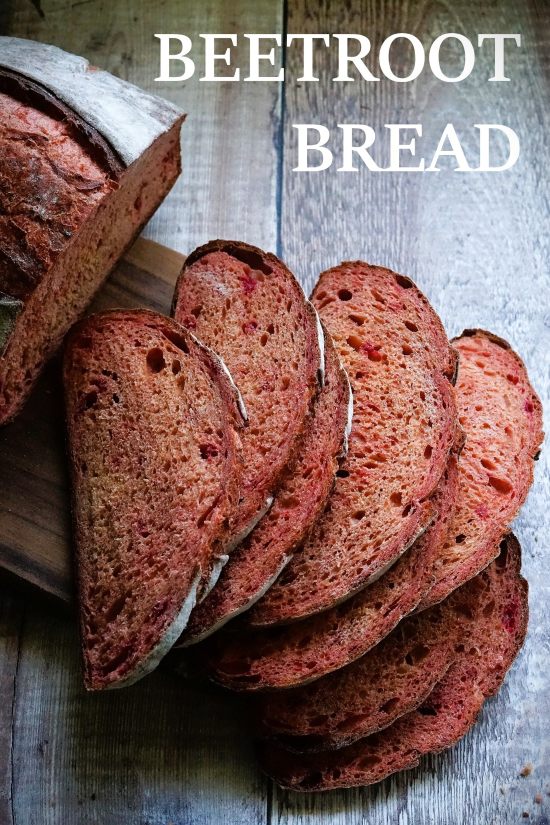
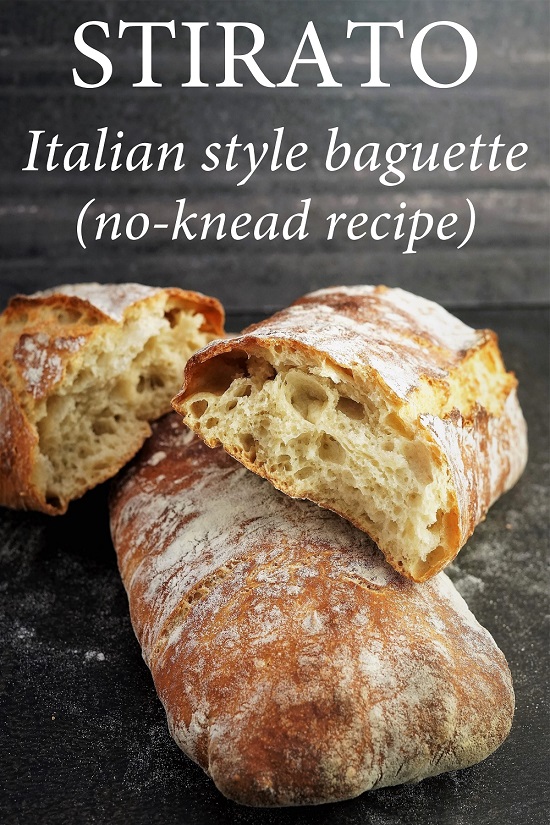
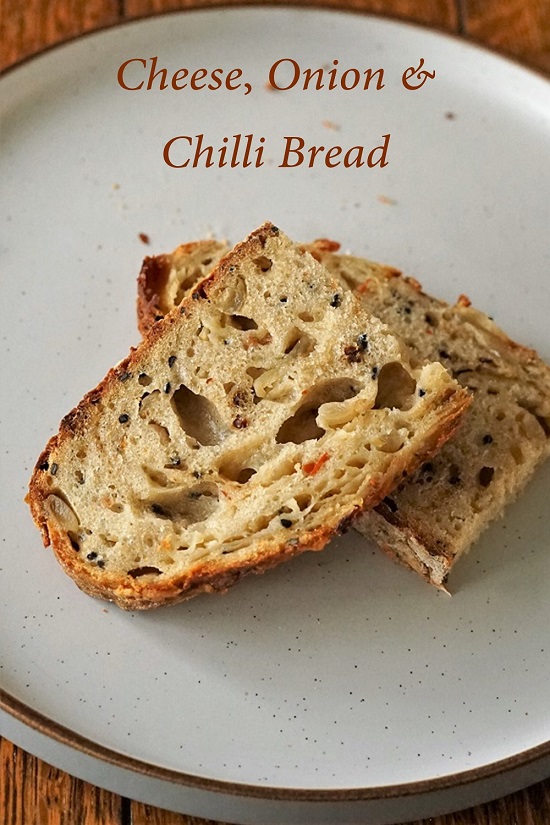
MORE BREAD RECIPES


Does the potato need to be cooked before grating?
No it doesn’t 🙂
Just made this and it is so delicious. It is like the best bread you’ve eaten with a hint of roast potato. Thank you x
Thank you for your lovely commments, Julia! I absolutely love this bread too.