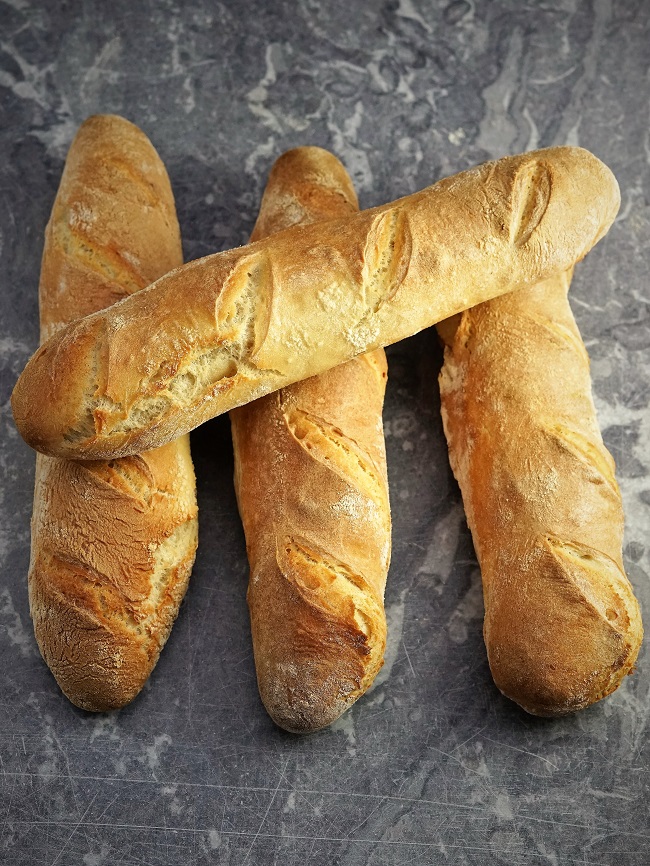
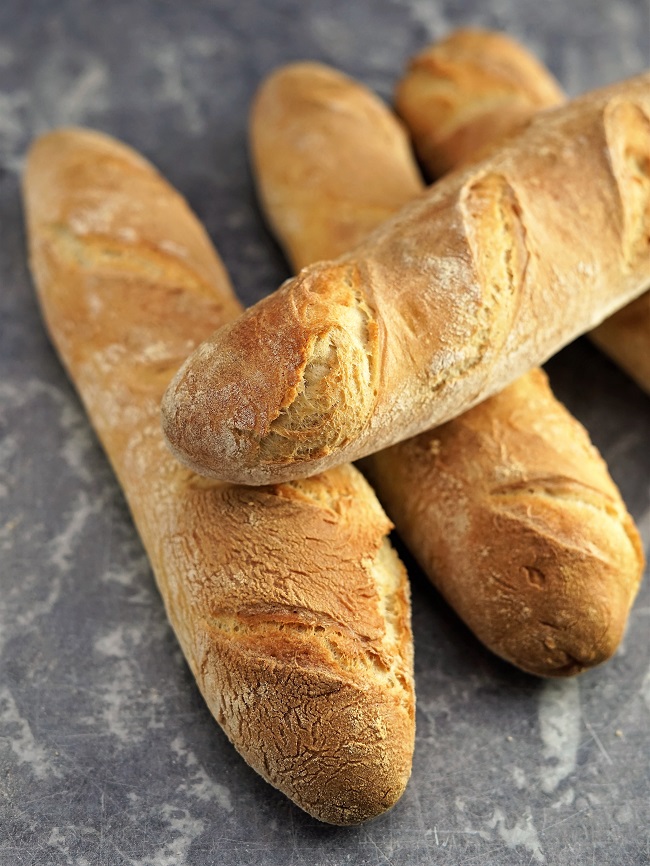
Homemade Baguettes
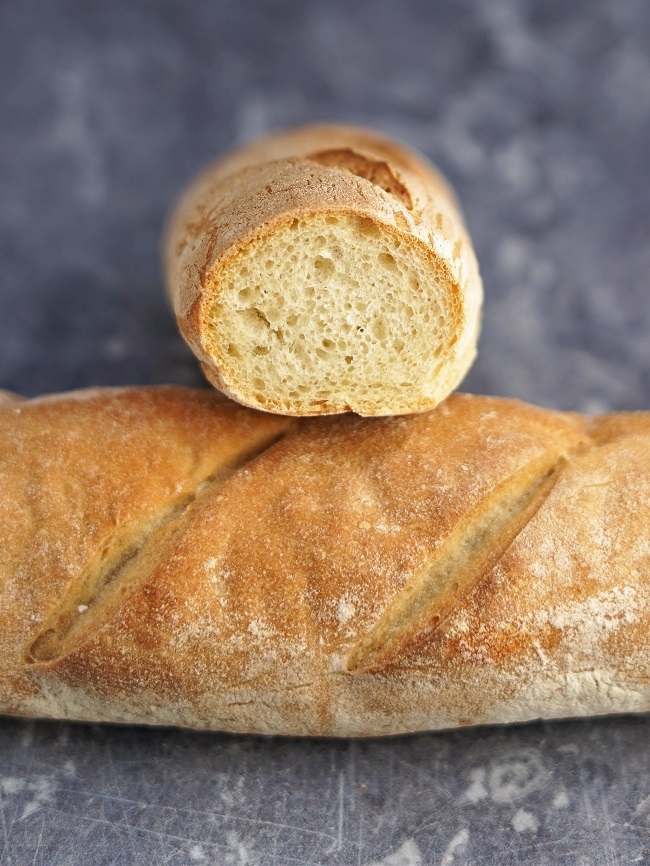
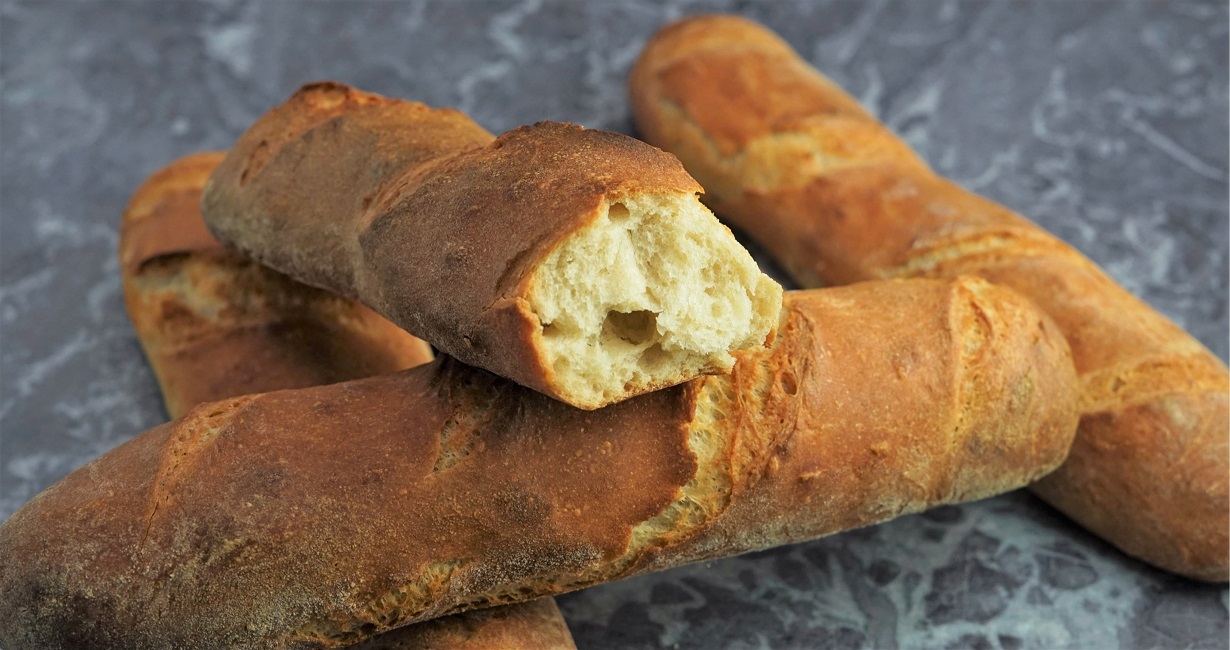
Homemade Baguettes, with a tasty, light crumb and thin, crunchy crust, really aren’t difficult to achieve. The whole process takes around three and a half hours, but most of that is hands-off time.
Jump to Recipe
Although I’ve been baking bread for over thirty years, I don’t think I’d ever made baguettes until recently. I suppose it’s possible I did have a go, somewhere in the dim and distant past. But the fact that I can’t remember suggests they weren’t exactly a roaring success.

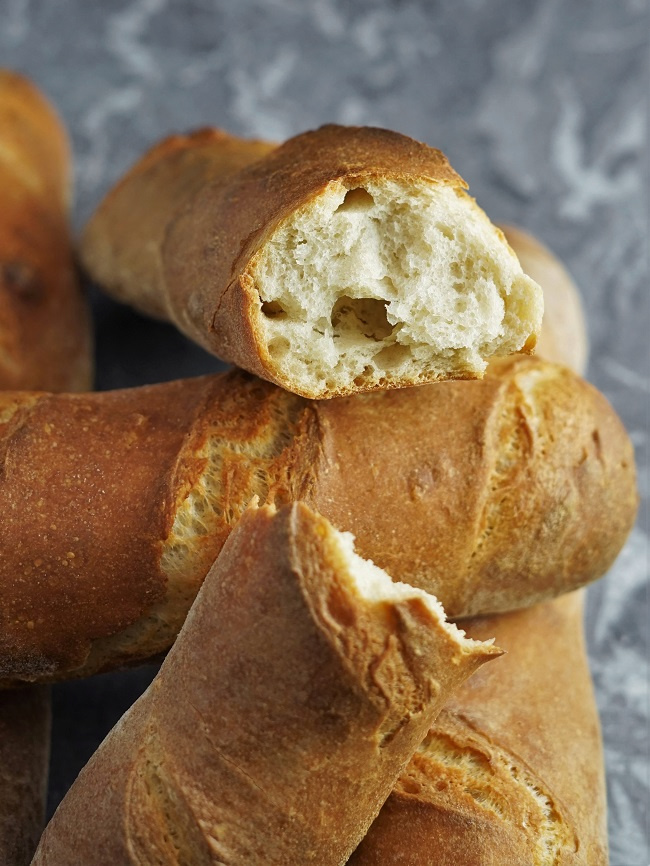
Over the last few weeks though, I’ve been making these crispy, crunchy breads with a delicate crumb pretty regularly.
MY FIRST BAGUETTES
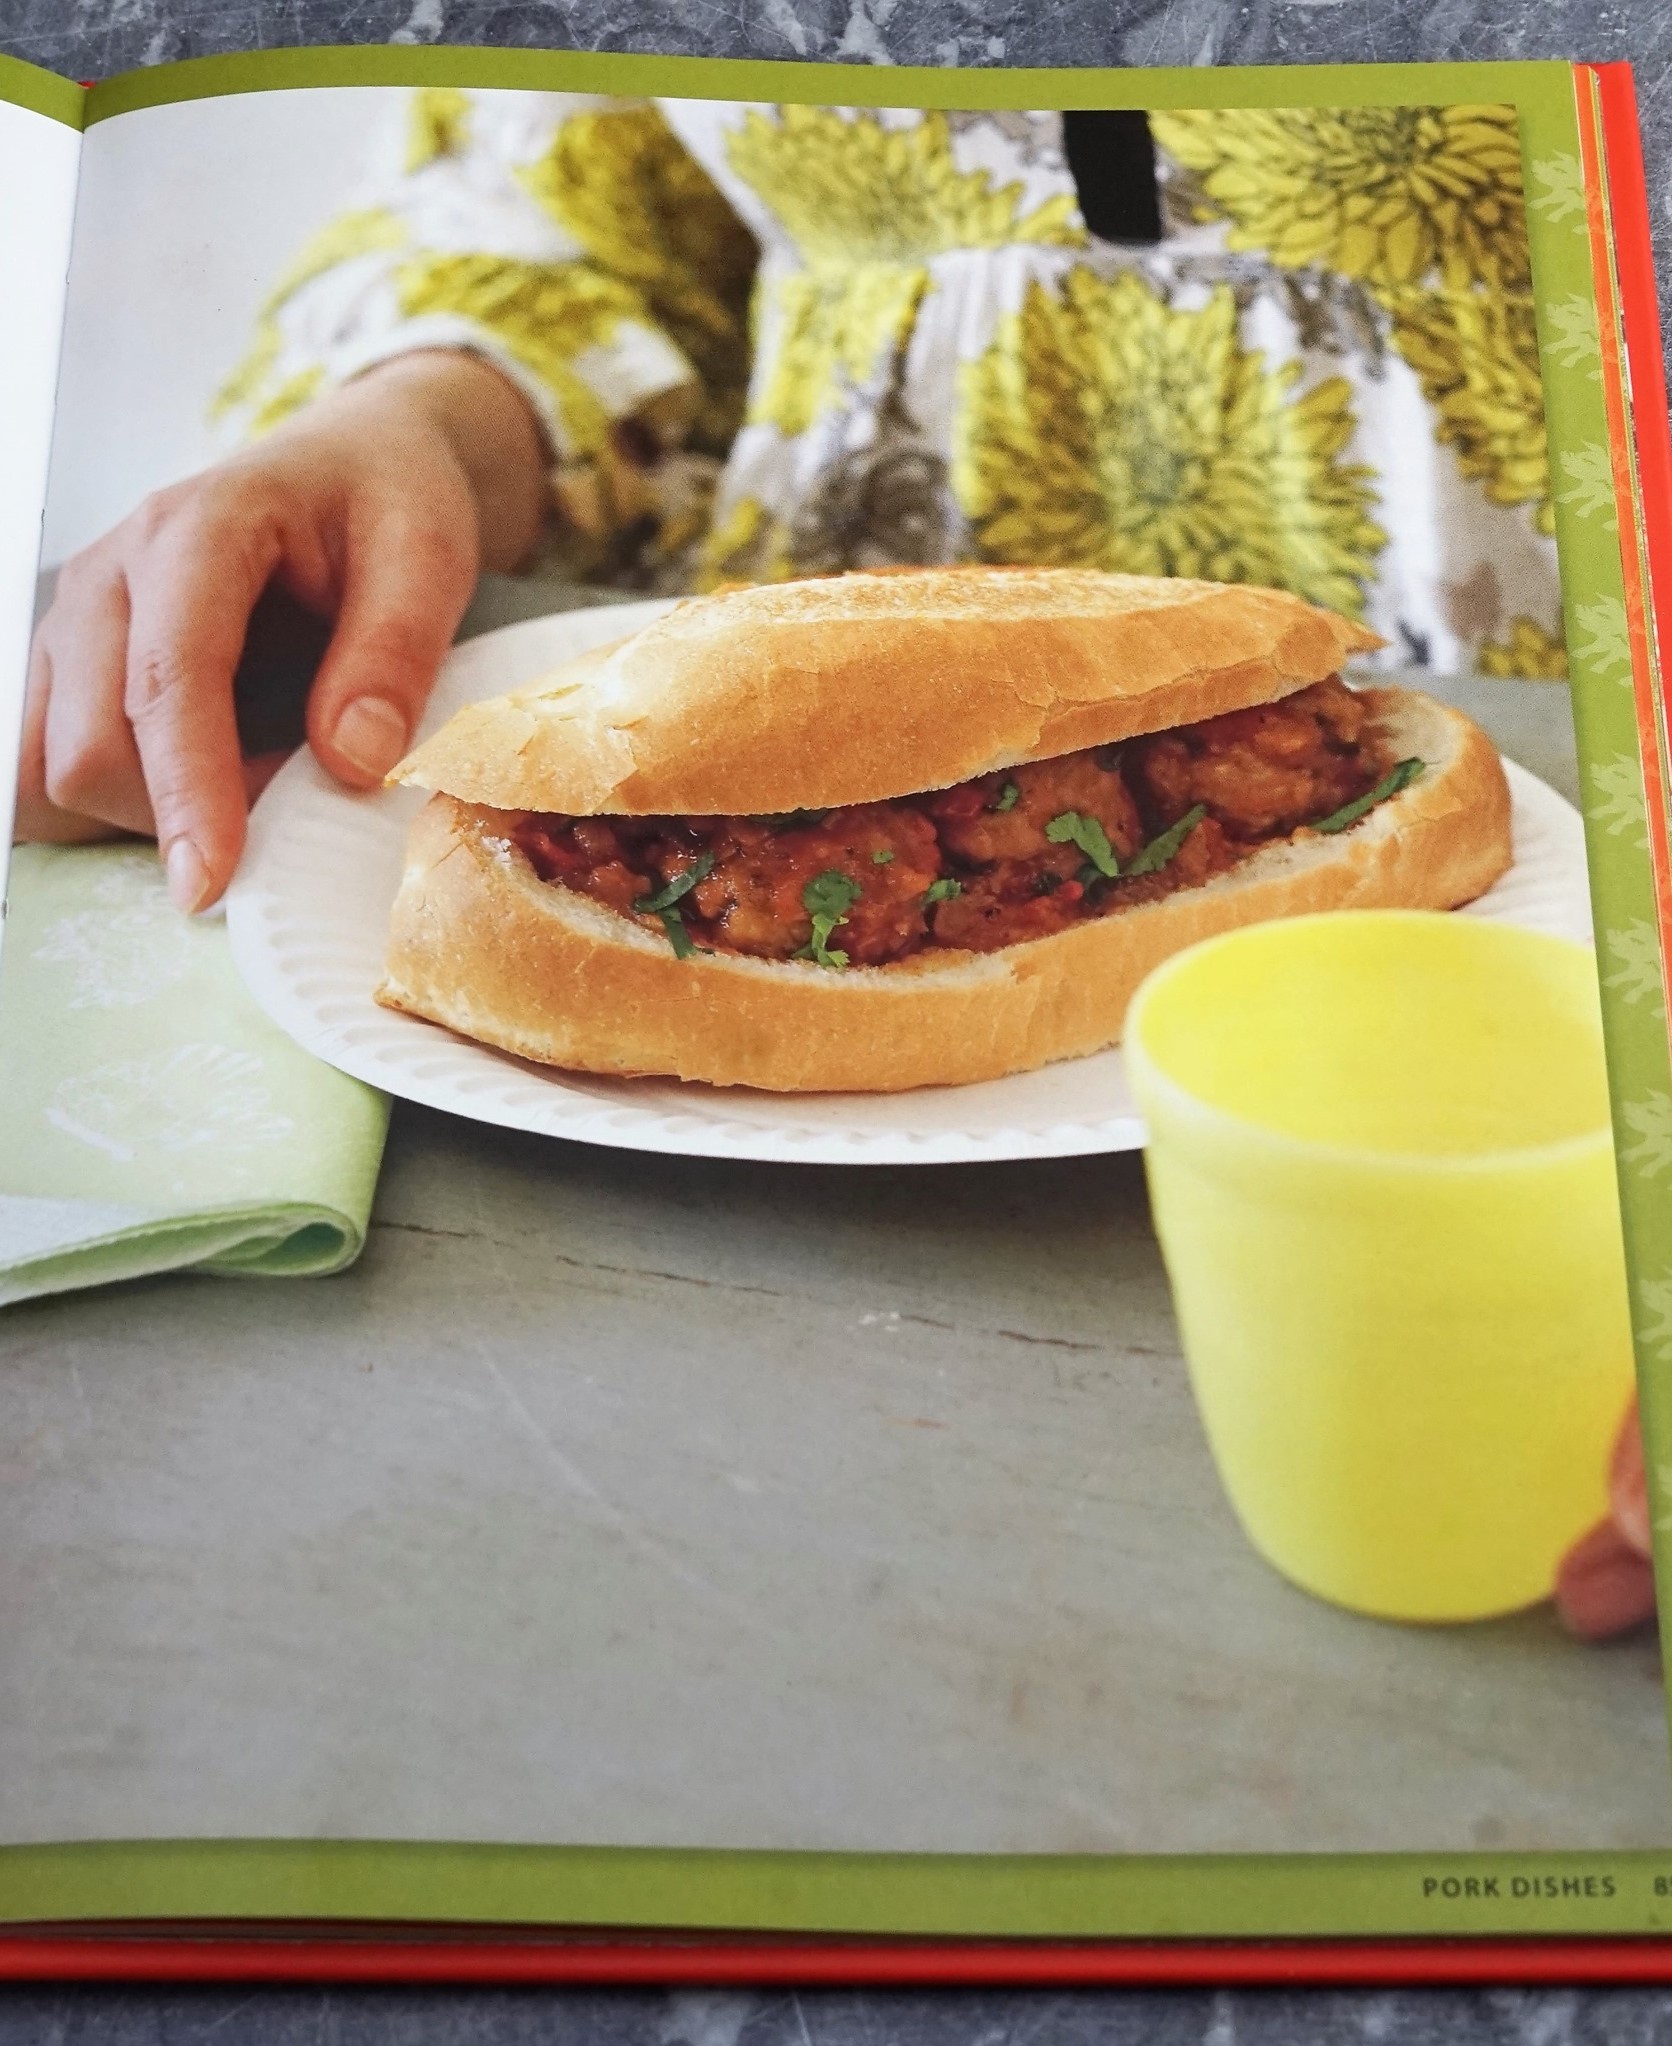
Mind you, the first batch was actually a spur of the moment thing. I’d been thinking about what to cook for that night’s dinner using pork mince. Narrowing it down Chinese, Thai or Vietnamese, I picked up my copy of Little Vietnam by Nhut Huynh. Pork meatballs in a tomato and coriander sauce, served in a baguette, immediately caught my eye.
The book explains that the tomato sauce is an example of the European influence on Vietnam. Of course, the presence of baguettes also reflects the country’s French colonial past, as seen in banh mi sandwiches (which often even include a little pate), now popular in the West. Anyway, I was absolutely certain I just had to make that dish that day. And that meant baking baguettes.

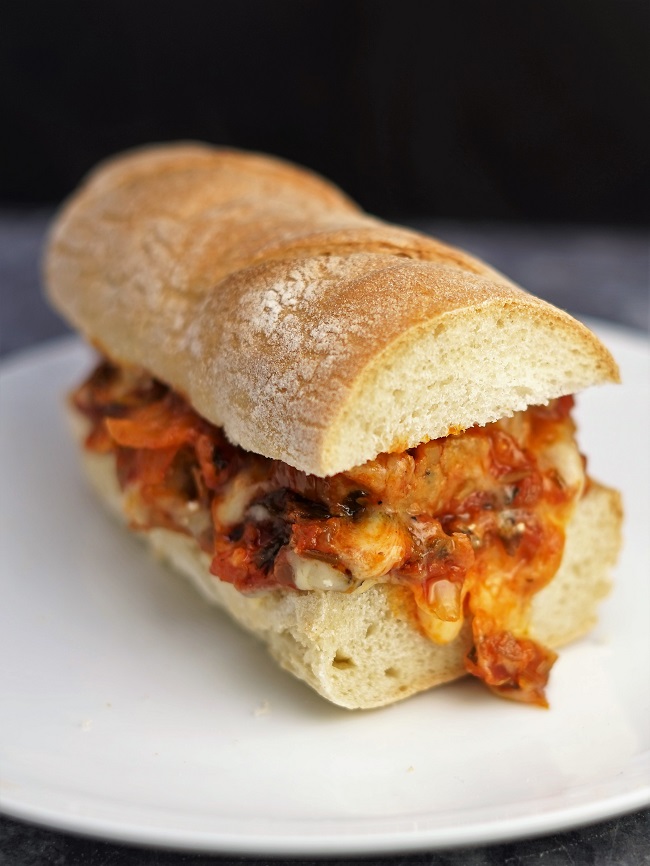
To be honest, I wasn’t expecting much from my first effort. But, I reasoned, if the baguettes didn’t turn out perfectly then they’d probably be fine dunked into those great-sounding meatballs and sauce rather than making into a sandwich. How wrong I was! The baguettes, and the meatball sandwich, turned out wonderfully well. Just look at that dinner:
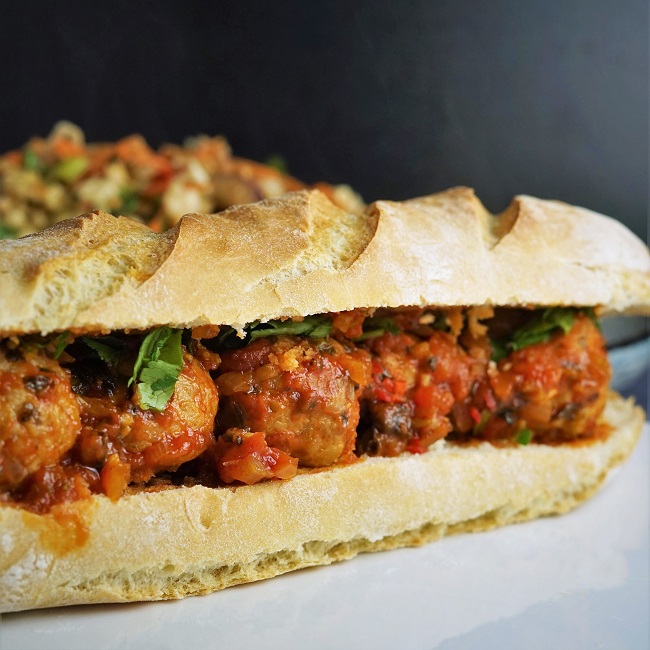
Soft meatballs in a herby tomato sauce flavoured with soy and fish sauce, all on a crunchy baguette. Very messy to eat, but so good!
HOMEMADE BAGUETTES
If you’ve made any of my other bread recipes then you’ll know that I usually use an overnight, no knead method. Made with a very wet dough, the bread is almost always baked in a covered pot which gets searingly hot. This creates steam which helps the bread rise. However, for the Homemade Baguettes I needed that very day, obviously I had to find a different method.
Although I loved that first batch, I’ve been tweaking the recipe over the last few weeks to get it even better.
By the way, please don’t think that the lengthy, detailed instructions at the end of the post mean baguettes are difficult to make. Once you’ve made them a time or two, you’ll find it really easy, so please don’t be put off. The next sections give the rationale behind my method. But if you want to get started, go direct to the recipe here: Jump to Recipe
THE FLOUR
When researching baguette recipes, the first thing I learned was that French baguettes are not traditionally made with the strong bread flour I use for my standard loaves. For a ‘proper’ baguette, a French T55 flour is often recommended. This has a lower protein content which is said to help create a lighter crumb and crisper crust.
As a substitute for T55, recipes often suggest using ordinary plain white flour. I did this for my first batch of baguettes, admittedly somewhat sceptically. But I was pleased with how they turned out.
Other recipes suggest a mix of plain and bread flour. Some use proportionately more plain, others more bread flour. After experimentation, I’ve settled on equal amounts of plain unbleached white flour and strong white bread flour.
However, bear in mind there are many, many factors determining how a particular batch will turn out. Consequently, I think it’s probably worth trying different amounts of each flour and find which you personally like best. Of course, if you can get it, you could use French T55 flour and see what you think.
AUTOLYSING
Because my breads tend to have long proving times, I usually dispense with a step that’s recently gained favour with home bakers, especially sourdough bakers. Autolysing. This means mixing together some or all of the flour and water, then leaving for anything from 15 minutes to several hours. Only then is the salt and yeast (or starter) added and the dough kneaded.
Autolysing is said to create a dough that requires less kneading, is easier to work with and has a better rise. It’s claimed the finished bread has superior flavour and texture. As my doughs are typically left 12-14 hours, I think that’s plenty of time for the gluten (and flavour) to develop. And I don’t knead them anyway.
But I wasn’t using my usual method for Homemade Baguettes. The dough wouldn’t be left overnight and would require kneading. So, I decided to use a simplified form of autolysing.

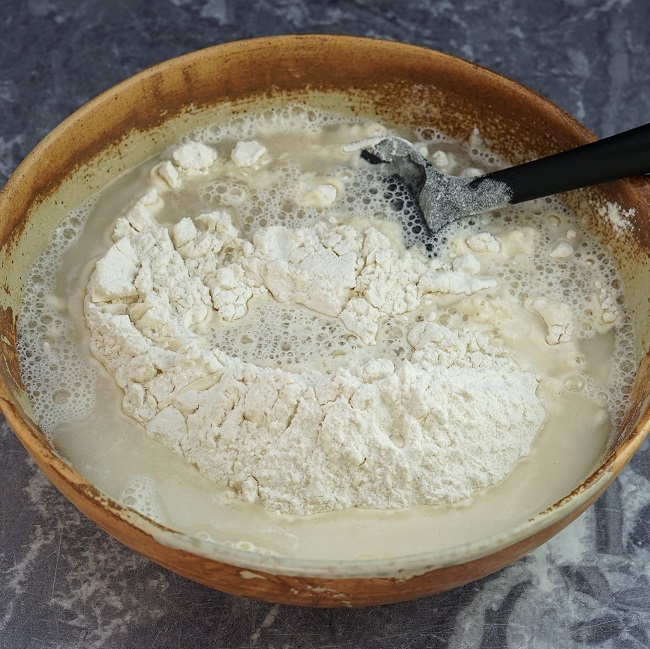
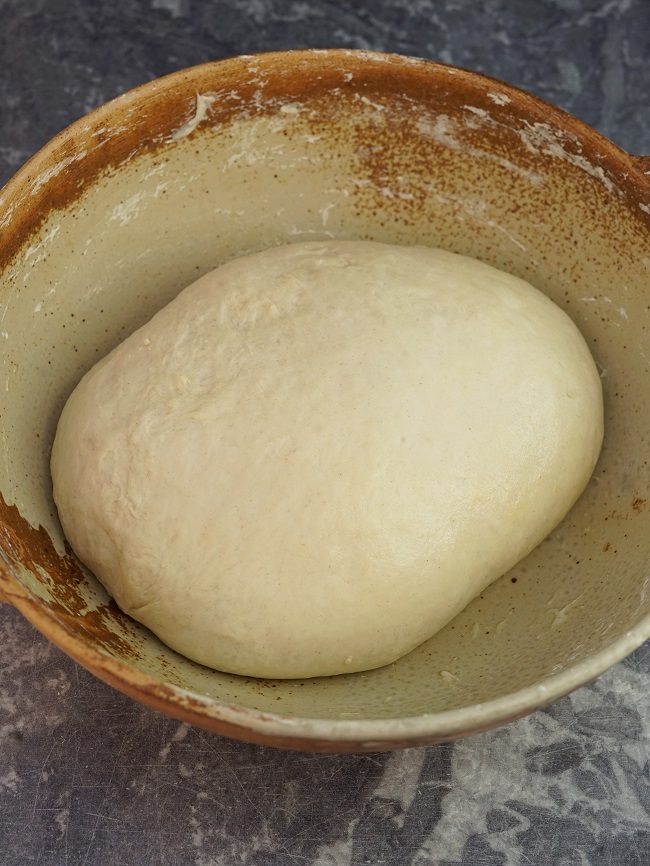
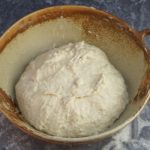
I’d read that where a wetter dough is used, as with baguettes, the yeast could be included in the autolyse. This is because it can be difficult to incorporate later. However, as the salt is said to inhibit gluten development (and gluten is the protein that helps bread to rise), it shouldn’t be added until after the autolyse. So, in my version, I mix up the flour, instant yeast and water then leave it for 30 minutes.
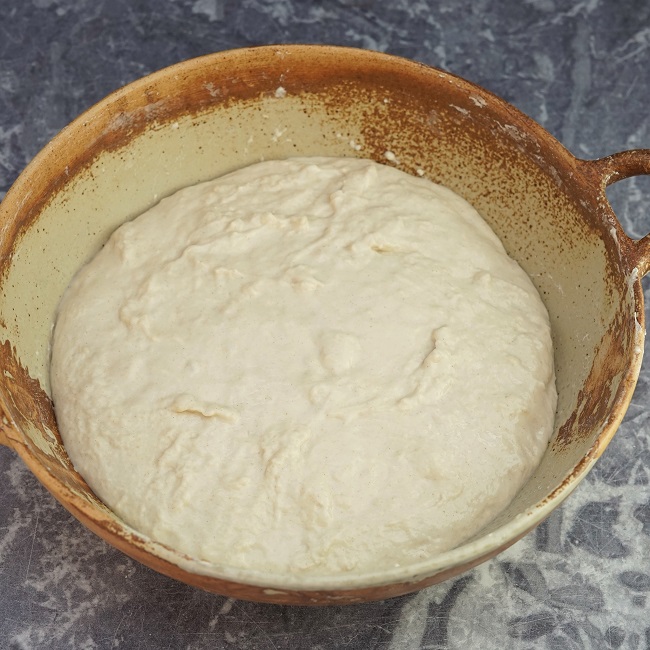
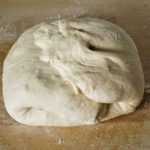
After the 30 minutes are up, the dough looks very slack and wet, as in the image above. It will probably have spread out a bit and you might be rather disappointed. However, once the salt is incorporated and you start to knead the dough, you’ll find it very quickly becomes silky smooth and attractively bouncy.
KNEADING
If you’re not used to kneading, don’t worry. There’s no secret or special skill to it. Just keep folding the dough over and over itself, lightly stretching it as you go. If you really don’t know where to start, look at this quick video on how to knead.
Between 8-10 minutes will be enough to create a smooth, plump dough. Now it’s time to give the dough its first proper rise or proving/proofing. Pop it back in the bowl, cover, and leave it. After about 45 minutes the dough should have doubled in size.
STRETCHING & FOLDING
Stretching and folding dough is a technique which aims to create a better rise and give your bread a more open crumb. It does this by both strengthening the gluten and incorporating air. Stretching and folding literally only takes a few minutes. I’ve explained how to do it in the recipe card at the end of the post.
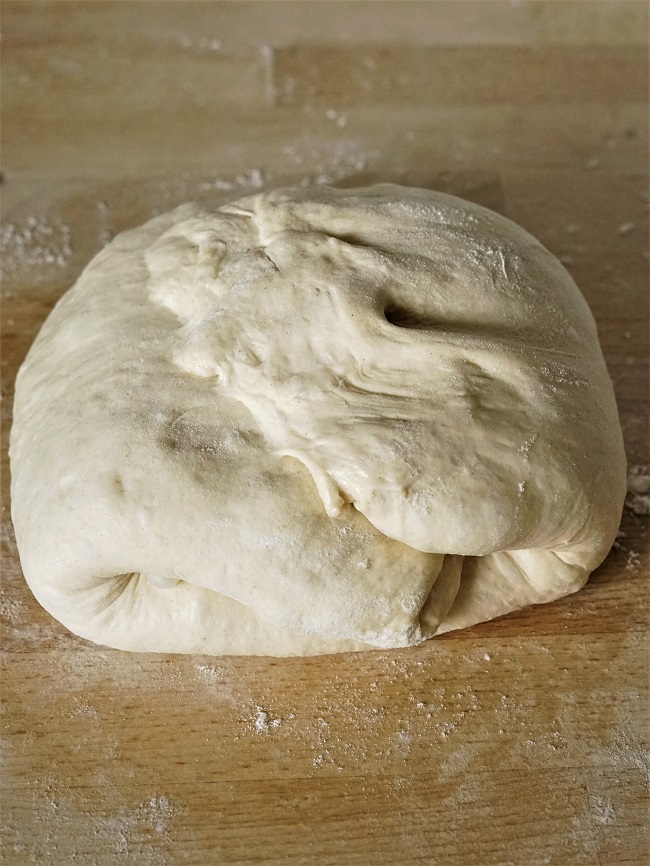
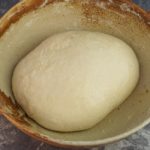
What you’ll end up with is a parcel of dough, as shown above. We then re-shape it into a ball by very briefly kneading, then return it to the bowl for further proving.
For my baguettes, I do another set of stretching and folding 30 minutes later.
SHAPING THE BAGUETTES
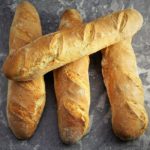
I make four medium sized baguettes as I think these make a nice, generous portion for one person. But there’s no reason you couldn’t make six smaller ones or three large instead. However many you make, I strongly suggest you use scales to ensure the baguettes end up the same size. Maybe it’s just me, but it’s surprising how wrong you can be when you divide the dough by guesswork rather than by weighing!
Before you start shaping the baguettes, have ready a tea-towel spread out and lightly floured. The fancy French name for this is couche which just means bed or resting place.
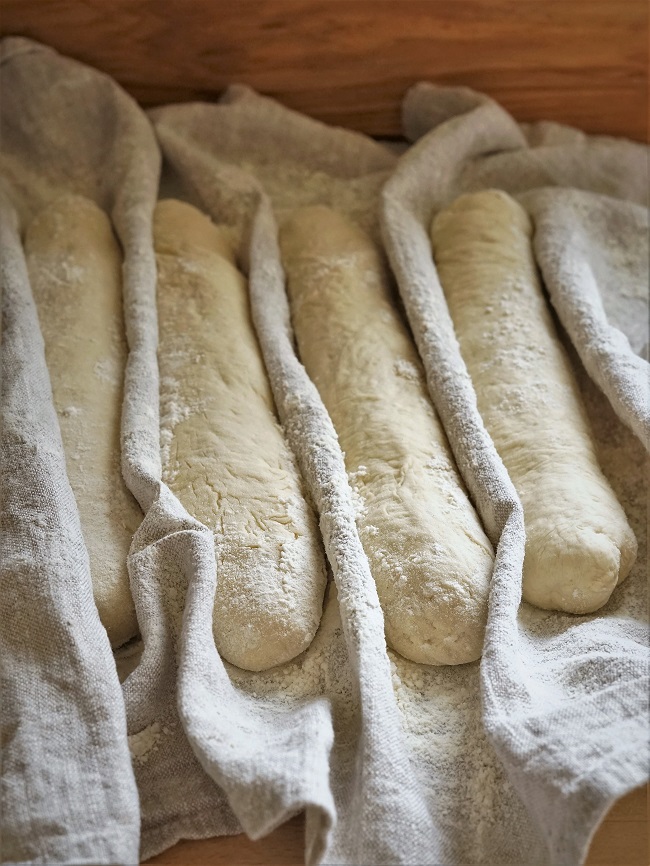
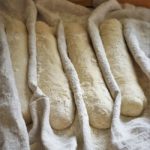
As you shape each baguette, rolling on the work surface until 24-26 cm long, transfer it to the tea-towel. Bringing up little folds or ridges between each baguette helps them to keep their shape.
The baguettes now have their final proving before baking. The time this takes will vary but expect 15-30 minutes. I think the best way to tell if breads are ready to bake is to gently poke a finger into the dough. If the dough springs back slowly, but leaves a slight indentation, then I consider it done. If the dough springs back immediately, it’s not fully proved so leave a little longer. On the other hand, if it doesn’t spring back at all then it’s probably over-proofed.
BAKING THE BAGUETTES
One of the reasons I usually bake bread in a covered pot is to create steam. Without steam, the intense heat starts to quickly create a crust which prevents further rising. As I don’t have long pots to cook baguettes in, I have to create steam another way.
I do this, after slashing the dough, by spritzing with water from a spray bottle (you’ll find very cheap in garden centres) then quickly putting in the oven.
I also have a big, preheated roasting tray on a lower shelf. Just before closing the oven door I throw in a load of ice cubes.
After the first 3 minutes, then again at the 6-minute mark, I open the door and spritz the baguettes again along with the walls of the oven.
I leave the bread to do its thing until 20 minutes have elapsed. Then I discard the baking tray and put the baguettes directly on the oven shelf so that their bottoms get nicely browned too.
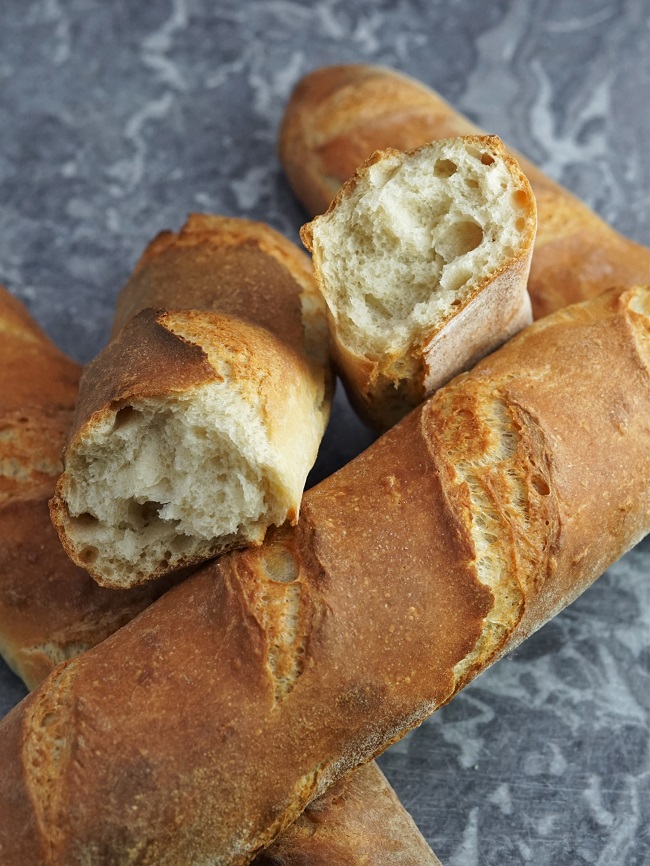
It should take a further 10 minutes to get a dark and crunchy crust which is now my preferred finish. Cool on wire rack for a bit, if you can resist immediately tearing in!
SERVING & STORING
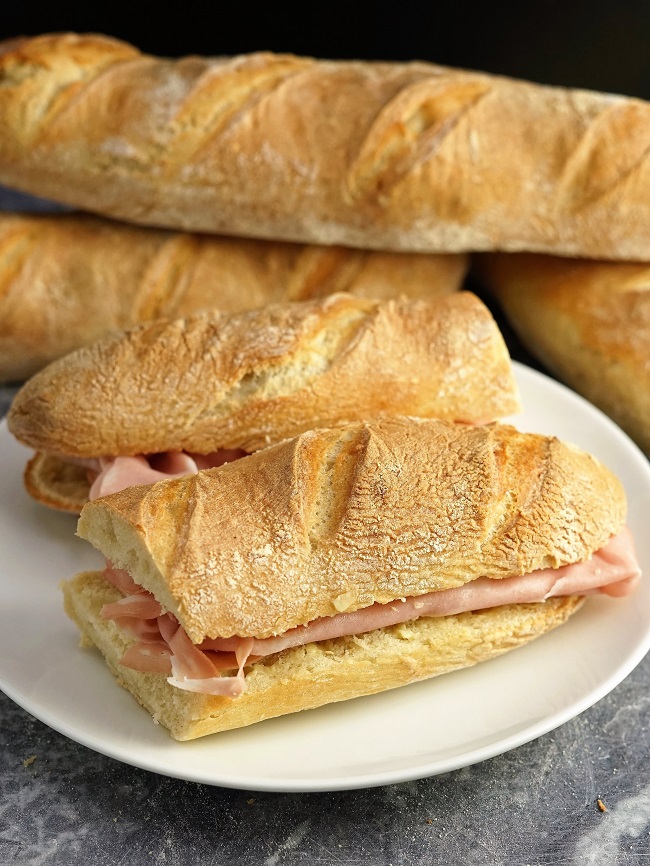
You really don’t need me to tell you how to eat baguettes, do you? Perfect alongside cheese and charcuterie, with soups, or just split and made into a good old sandwich, they’ve so many uses.
Baguettes are best eaten on the day they’re made. The flavour will still be good the next day, although they’ll be chewy rather than crunchy.
From the batch that started it all, I had baguettes and meatballs left over. With the addition of some melted cheese, I had a cracking lunchtime sandwich the next day.
However, spritzing a day-old baguette with water and warming in a low oven for a few minutes will bring back much of its lightness and crispness.
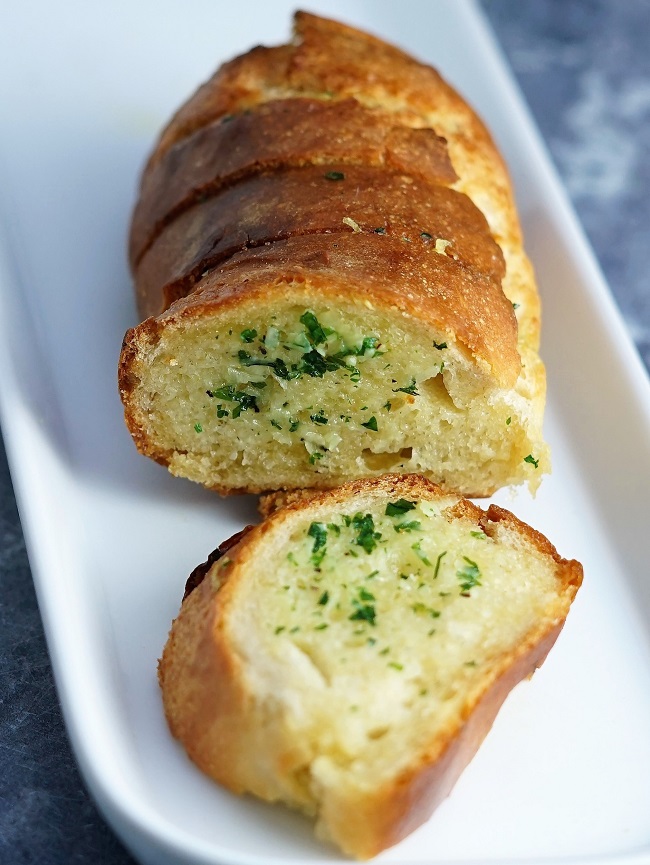
A classic way to perk up a baguette is to make wonderful garlic bread. Simply slice across at intervals, without going all the way through, then fill with garlic butter. Wrap in foil and bake at 220C / 200C Fan / Gas 7 for 12-15 minutes.
Since I’ve discovered how easy Homemade Baguettes are, I always have some in the freezer. I freeze them on the day of baking and just take out what I need. I defrost them in the microwave then do the ‘spritz and bake’ to crisp and lighten up.
With the quality of mass-produced breads, including baguettes, being so low I think it’s really worth making your own. With superior flavour and texture, and no nasties like palm oil, unless you live next door to a great artisan baker, I don’t think you’ll get any better than Homemade Baguettes.
Have you tried this Homemade Baguettes recipe? Please do leave a comment and rating.
Homemade Baguettes
Although the instructions look lengthy, once you've made these easy baguettes a time or two you won't need them. Can be made with equal amounts of plain and bread flours or all plain flour.
Ingredients
- 250 g plain white flour plus extra for sprinkling
- 250 g white bread flour omit and use all plain white flour if preferred
- 1 tsp instant yeast
- 330-350 g water, slightly above body temperature should feel a little warm to your finger
- 1½ tsp salt
- 1-2 tsp oil for greasing
- ice cubes & a spray bottle of water for creating steam in the oven
Instructions
-
Put the flour and instant yeast into a roomy bowl and stir together.
-
Pour in 330g of the water and, using a plastic/rubber spatula, quickly bring the mixture together into a rough, wet dough. Add a little more of the water if necessary.
Cover with cling film or a wet tea-towel and set aside for 30 minutes.
If the room is cool or draughty, put the bowl in an unlit oven or microwave.
-
After 30 minutes, scrape the dough onto a floured surface, pat it out slightly and sprinkle over the salt.
Knead the salt into the dough and keep kneading for 8-10 minutes until it's very soft and silky. Add more flour to stop the dough sticking, but only add the absolute minimum needed.
-
Put 1 tsp of the oil in the bowl, return the dough to it and turn it around the bowl so it's lightly coated in oil.
Cover again and leave to prove until doubled in size (approx 45 min).
-
Scrape the dough onto a work surface then flatten it into a rough rectangle.
Tip: the oil you added to the bowl should stop the dough sticking, but rub the work surface with a little more oil if necessary. Don't be tempted to add more flour as this may prevent the dough coming together properly during the next stage.
Pick up a long edge, stretching it slightly, and fold it into the centre of the dough.
Pick up the other long edge, again stretching it slightly as you do, and bring it over the first fold.
Repeat with the short edges.
Shape the into a ball again by very briefly kneading then return to the bowl.
-
Cover and prove for another 45 min.
Optional: after 30 min repeat the folding described at step 5 then prove until the full 45 minutes have elapsed.
-
Divide the dough into 4 equal pieces (weighing is recommended).
Briefly knead each one into a smooth ball and leave to rest while you complete step 8.
-
Preheat the oven to 240C / 220C Fan / Gas 9.
Position a shelf just above the middle of the oven and place a heavy baking tray on it.
Put a heavy roasting tin on the bottom shelf.
Take a clean tea-towel and dust one side with flour. Lay it, floured side up, on a work surface.
-
Take one ball of dough and, using your hands, roll it on the work surface into a baguette shape 24-26 cm in length.
Transfer to the floured tea-towel, bringing up the towel around it a little to help hold its shape.
Repeat with the rest of the dough, making a little ridge with the tea-towel between each baguette.
-
Loosely cover the baguettes with cling film or a wet tea-towel and leave to prove until the hole left by a finger gently poked into the dough springs back slowly but still leaves a slight indentation (15-30 min).
If the indentation springs back immediately the dough is not fully proved so leave a little longer. If it doesn't spring back at all then it's possibly over-proofed.
-
Remove the hot baking tray from the oven and carefully transfer the baguettes onto it, leaving space between them.
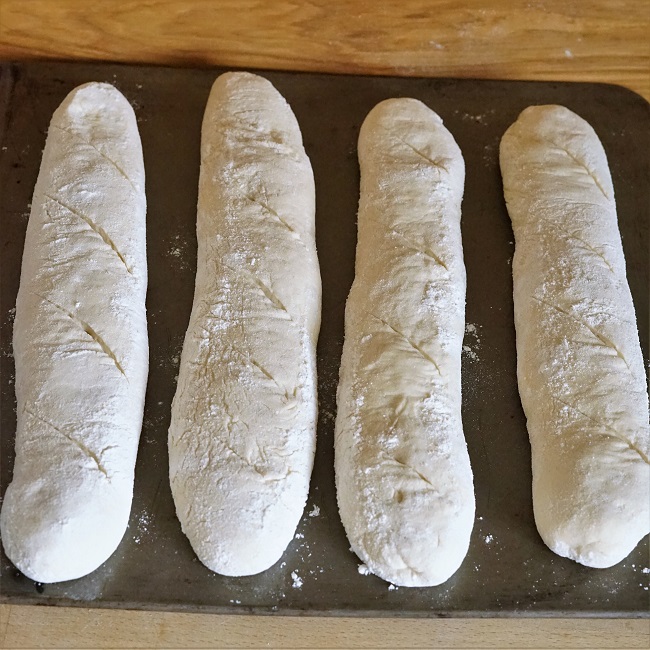
Make several long, deep diagonal slashes across the width of each baguette.
Use the spray bottle to cover the baguettes in a fine mist of water then place the tray in the oven.
Before closing the oven door, quickly throw ice cubes in the roasting tray on the bottom shelf.

-
At 3 minutes: open the oven door and mist the baguettes and oven with water from the spray bottle. Close the door.
At 6 minutes: mist with water again.
-
At 20 minutes: discard the baking tray and place the baguettes back in the oven, this time directly on the oven shelf.
Continue baking until the baguettes are completely cooked and are golden brown: this should take a further 10 minutes (i.e. a total baking time of 30 minutes).
-
When done, leave on a wire rack to cool.
Best eaten on the day they're made, although spritzing with water and warming in a low oven the next day will bring back some of their lightness and crispness.
Can also be frozen on the day of baking.


Hi
I love your recipes and have tried several since finding your site a couple of weeks ago. Would it be ok to make the dough in a mixer with a dough hook? I’m unable to knead by hand.
Hi Janice,
Glad to hear you’re enjoying my recipes!
I’ve always kneaded by hand rather than in a mixer so I’m not an expert on them, but I see no reason at all why you couldn’t use one for this recipe.
If you try it, do please come back and let me know: I’m sure the result would be useful for many others who use a mixer and dough hook.
Excellent recipe. I was really pleased with the results and they passed the teenager test. Made them a couple of times now.
Thank you Catherine! So glad you enjoyed making my baguette recipe.