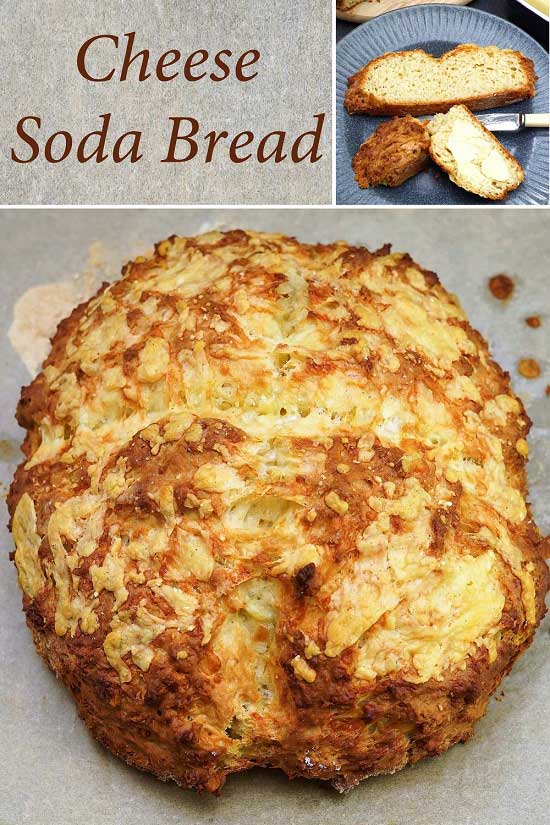
Cheese and Sun-Dried Tomato Bread
Cheese and Sun-Dried Tomato Bread has an intense tomato flavour with background notes of cheese, herbs, and garlic. Perfect for tearing into chunks to dip into olive oil and Balsamic vinegar, equally good alongside soups, salads, or made into sandwiches. After a couple of days, this delicious loaf makes sensational cheese and tomato on toast, or a great base for bruschetta.
Made with a no-knead, overnight method and baked in covered pot or Dutch oven, it’s a great textured, flavoursome loaf that’s so easy.

Disclosure: this post may contain affiliate links. If you buy via my links, I may earn a small commission at no extra cost to you.
Jump to Recipe

NO-KNEAD OVERNIGHT BREAD
Having a simple breadmaking method gives you the base for a whole range of flavoured breads. I love coming up with new ones and am especially pleased with my latest: Cheese and Sun-Dried Tomato Bread. Like virtually all my loaves, I make it using a no-knead, overnight method.

In conventional bread making, we knead dough to develop a protein called gluten. And it’s gluten that helps doughs rise and gives bread its structure. However, several years ago I discovered that a wetter than usual dough, combined with a longer fermentation time, will also develop the gluten.

Baking the bread in a very hot, lidded pot also helps with the rise. That’s because inside the pot it gets steamy and moist. This keeps the dough softer for longer as crust formation is delayed. The result should be an impressively risen loaf.

If you want to know more about the method, and maybe create your own flavoured breads from it, you can read this post about Crusty Homemade Bread. However, this current post and the recipe card at the end will give you all the info you need to make delicious Cheese and Sun-Dried Tomato Bread.
CHEESE AND SUN-DRIED TOMATO BREAD
I’ve made a couple of breads flavoured with cheese and tomato before. But both Savoury Tear & Share Star Bread and Picnic Bread contain lots more ingredients too; things like roasted onions, peppers, and salami. But what I was after this time was a loaf with the accent squarely on tomatoes plus, in the background, tastes of cheese, Italian-style herbs and garlic. Now, after some experimenting, I can share my recipe for Cheese and Sun-Dried Tomato Bread which fits the bill perfectly.

Whether you want to eat it alongside salads and soups, use as a regular sandwich bread, slather in butter, dip into olive oil and Balsamic vinegar, or toast it, I think you’ll enjoy this easy, tasty, and attractive-looking bread.
EQUIPMENT
Because the bread is baked at a very high temperature, you’ll need a lidded pot that can be heated up to 240°C / 220° Fan / Gas 9 / 475° F. Don’t forget that any handles or knobs must be able to withstand that temperature too. Although they’re expensive, I think Le Creuset Signature dishes are a great investment. They last for years and can be heated up to the required temperature. Of course, you may be able to find cheaper ones, or a Dutch oven, with similar properties.
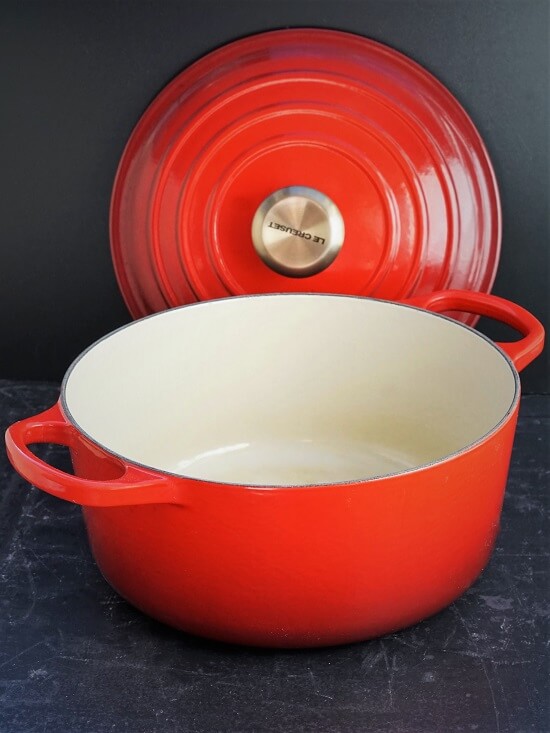
For the round Cheese and Sun-Dried Tomato Bread you see in this post, I used my 24 cm diameter pot. This has a capacity of 4.2 litres. But going down to a minimum of 3.5 litres should be fine. I’ve also made it as a long loaf and for that I used my 29 cm oval Le Creuset.
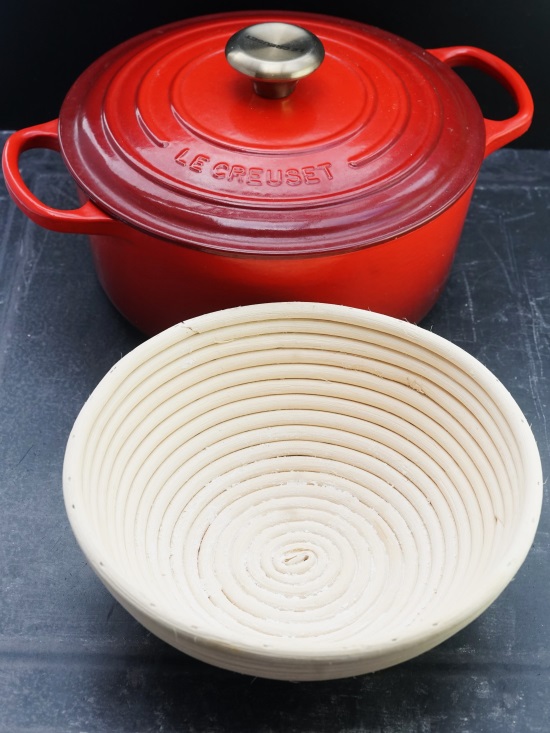
For this recipe you’ll also need a suitably shaped container to support the dough on its second rise or proof. I use a 23 cm cane proving basket called a banneton. You can also make your own proofing vessel by lining a bowl with a clean cloth such as a tea towel.
INGREDIENTS & MAKING THE DOUGH
You’ll find ingredient amounts and full instructions for making one large Cheese and Sun-Dried Tomato Loaf in the recipe card at the end. But I recommend you read this whole post before attempting it. You’ll find extra tips here as well as step-by-step images to help you.
THE NIGHT BEFORE
The night before you want to bake the bread, mix up the simple dough. Start by stirring together white bread flour, instant dried yeast (i.e. the sort that can be added straight to the other ingredients without having to be activated in water first), salt, and dried herbs. For the herbs, I use my Homemade Italian-Style Seasoning, but you could use any ready-prepared mix or just dried oregano if you prefer.

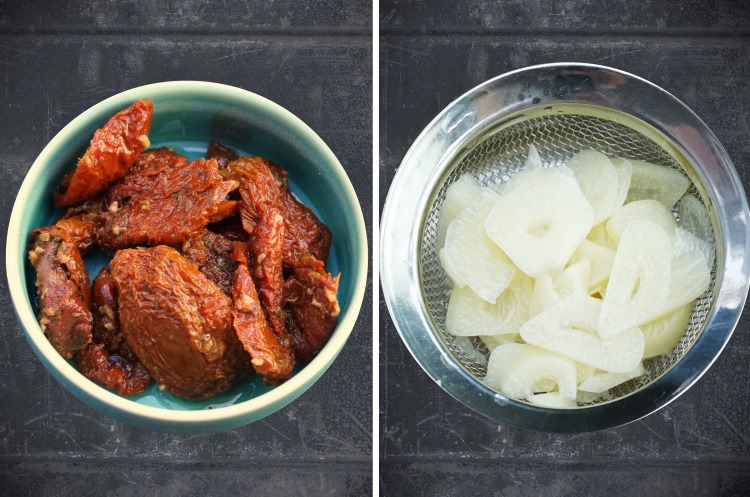
Next, we add the sun-dried tomatoes and garlic. Choose tomatoes packed in oil but drain them and retain the oil as we’ll use a little of it in the dough.
So that the garlic flavour isn’t overpowering, I simmer peeled and sliced garlic cloves for a few minutes before draining and stirring into the mix along with the chopped sun-dried tomatoes. You can leave the garlic in slices, finely chop or cut into thin, julienne matchsticks. If you want a stronger garlic flavour, then omit the simmering.
Now make a well in the middle of the mixture and add a tablespoon of the reserved sun-dried tomato oil. To this, we add enough tap water to make a wettish, shaggy dough. Because different flours absorb different amounts of water, it isn’t possible to be exact. Start by gradually stirring in around 400 ml. Add more if necessary to create a dough that looks like the image below right with no visible dry flour. We add the cheese the following day; I explain why below.

Cover the dough and set aside overnight or 12 – 14 hours. Unheated room temperature is usually fine here in the UK. But if it’s a hot night, or you live somewhere warmer, put the bowl in the fridge. You can also do this if it’s just more convenient to slow fermentation down.
THE NEXT DAY
In the morning, the dough should have spread outwards as well as rising up and be very bubbly. This is perfectly normal for wetter, no-knead doughs.

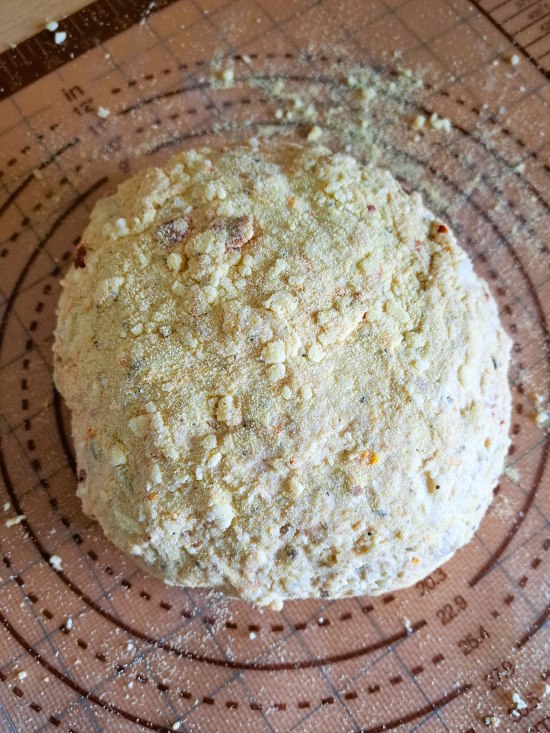
Scrape it onto the work surface, ideally covered with a silicone mat. Because it’s a wet dough, you’ll need to first sprinkle it with something to prevent sticking. You could use more flour, but this can make the dough claggy, so I prefer polenta. I think this also adds a bit of extra flavour and interesting texture. Give the dough a few folds and turns, adding more polenta/flour as you go, and you’ll soon have a smooth dough.

Next, we incorporate the cheese into the dough. I don’t do it the night before as the fat content can negatively affect gluten development. Make sure you use a well-flavoured Cheddar as, although I only wanted a subtle cheese flavour as background to the tomatoes, you do need to be able to taste it.

All you do is pat out the dough to flatten it, scatter over the cheese, then fold over the sides to cover it. Keep folding until it’s well distributed throughout the dough. I find it’s easiest to add the cheese in two batches. As before, add polenta/flour to prevent sticking. You should also sprinkle plenty in your proving basket/banneton or cloth-lined bowl.
When you’ve incorporated all the cheese and it’s a nice round shape, put it inside your proving vessel with the rounded side facing DOWN.
Now cover and leave it, ideally in a warmer spot this time. Unless it’s a hot day, I proof the dough in my unheated top oven while the one below is preheating to the temperature as per the recipe card. Be sure to put the cooking pot and its lid to preheat too.

BAKING CHEESE AND SUN-DRIED TOMATO BREAD
Depending on the temperature, proofing should take 30 – 45 minutes. The dough should have almost doubled, but the best way to check if the dough is ready is to gently insert a finger. Does the dough quickly or slowly spring back? If it springs back slowly and an impression is left by your finger, then the dough is ready. If it springs back immediately and doesn’t leave an impression, prove for longer then check again.

When it’s ready, remove the preheated pot from the oven and take off the lid. Although I don’t normally protect the bottom of the bread as it bakes, melting cheese can make it more likely to stick. So in this case, I sprinkle a layer of polenta or flour over the base of the pot before flipping in the dough so the rounded side is now facing UP.

Working quickly so the pot stays hot, I then scatter over more grated cheese before cutting a deep cross on top of the dough. Now place in the oven and bake for 35 minutes without removing the lid.
After 35 minutes, reduce the heat as per the recipe card and tip the bread out of the pot. If you get any resistance due to melting cheese, leave it cooking in the pot and try again when it’s baked another 5 minutes or so.

Return the loaf to the oven, sitting it directly on the oven shelf. Bake for a further 10 – 15 minutes or until the bread is cooked through. It should sound hollow when you tap it underneath.
Put the finished loaf, which should smell absolutely delicious, onto a wire rack to cool.

SERVING & STORING CHEESE AND SUN-DRIED TOMATO BREAD
With its intense tomato flavour, subtle hints of cheese, herbs, and garlic, I think this easy bread makes a great accompaniment to so many meals. At its simplest, I like to eat it with chunks of cheese plus a few vegetables like tomatoes, or olives and roasted peppers.

You can also eat Cheese and Sun-Dried Tomato Bread as a starter or side. Try it torn into rough chunks with a bowl of good olive oil and Balsamic vinegar to dip into. Or perhaps alongside salads like Italian-influenced Bean & Tuna Salad, and French Aïgroissade with its colourful mixed vegetables in garlic mayonnaise. And don’t forget soups. I think it would go particularly well with Minestrone Soup or Leek, Potato & Watercress Soup.

But I think this easy bread is equally good used for sandwiches. Eaten fresh, it’s substantial without being heavy.
After a couple of days, you can toast it which brings out more of the cheese flavour in the crumb, complementing that of the crust that already has a grilled cheese taste. To really kick up the cheese and tomato flavour, I highly recommend using this bread for cheese and tomato on toast. Gorgeous sprinkled with more Italian-style herbs and some chilli flakes.

To store for longer, I recommended slicing or cutting into chunks and freezing. That way, you’ll have wonderful Cheese and Sun-Dried Tomato Bread whenever you fancy something a little more interesting than plain bread.
IF YOU’VE MADE THIS BREAD, I’D LOVE YOU TO LEAVE A COMMENT & RATING

Cheese and Sun-Dried Tomato Bread
With an intense tomato flavour and background notes of cheese, herbs, and garlic, this bread is perfect for tearing into chunks to dip into olive oil and Balsamic vinegar, but equally good alongside soups, salads, or made into sandwiches. After a couple of days, it makes sensational cheese and tomato on toast, or a great base for bruschetta.
Made with an easy, no-knead, overnight method and baked in covered pot or Dutch oven, it's a great textured, flavoursome loaf.
It's recommended that you read the accompanying blog post before beginning the recipe.
Ingredients
For the dough
- 6 cloves garlic (peeled, thinly sliced)
- 130 g sun-dried tomatoes packed in oil (drained weight)
- 600 g white bread flour
- 2 tsp instant dried yeast (see Recipe Note 1)
- 2 tsp salt
- 3 tsp Italian-style dried herb mix (see Recipe Note 2)
- 1 tbsp oil from jar of sun-dried tomatoes (or olive oil)
- 400 - 460 ml/g water (from the tap: doesn't need to be warm)
- Polenta for dusting (or use more white bread flour)
- 200 g mature Cheddar cheese (coarsely grated, divided 150g/50g)
Instructions
The day before you bake the bread
-
Put the garlic slices in a small saucepan and cover with boiling water from a kettle. Simmer for 3 minutes then drain and leave to cool.
Tip: for a stronger flavour, add the garlic raw at Step 3 instead of cooking it.
Chop the garlic finely or cut into julienne strips.
-
Drain the sun-dried tomatoes in a sieve over a jug: reserve 1 tbsp of the oil for the recipe.
Roughly chop the tomatoes.
-
In a large mixing bowl, stir together the bread flour, instant dried yeast, salt, and dried herbs.
Stir in the prepared garlic and sun-dried tomatoes.
-
Make a well in the middle of the flour mixture and add the reserved tablespoon of oil from the tomatoes.
-
Gradually pour in approximately 400ml of the water, stirring as you do, to start bringing the ingredients together.
Add more water as needed to form a wettish but not sloppy dough (see image in blog post for how it should look), stirring well so there are no dry bits of flour.
-
Cover the dough and leave overnight or 12 - 14 hours.
Tip: If the room is warm, or if you'd like a longer rise for convenience or to allow more flavour to develop, you can put the dough in the fridge for up to 24 hours. Bring the dough back up to room temperature before proceeding with the recipe.
On the day of baking
-
The dough should have risen, spread out and be very bubbly. If not, leave a little longer.
Dust your work surface with polenta or bread flour and scrape the dough onto it.
Fold over itself several times until it comes together into a smooth dough. Add more polenta or flour if needed to prevent sticking to the work surface.
-
Sprinkle a generous layer of polenta or flour inside a proving basket or tea towel-lined bowl.
-
Flatten the dough and scatter over HALF of the 150 g of cheese.
Fold over the sides of the dough to cover the cheese, then keep folding until the cheese is partly distributed then pat out again and repeat with the remaining half of cheese. To stop it sticking, add more polenta or flour as needed.
Shape the dough to fit your proving basket or bowl and put it inside with the rounded side facing DOWN.
-
Cover with cling film or place in a large reusable polythene bag and leave in a warm place for approximately 30 - 45 minutes.
While it's proving:
- preheat your oven to its highest setting and put a lidded cast iron pot or Dutch oven on the middle shelf.
-
Check if the dough is ready to bake: gently insert a finger into the dough and see if the dough quickly or slowly springs back.
- If the dough springs back slowly and leaves an impression, it's ready.
- If it springs back immediately and doesn't leave an impression then prove another 5 - 10 minutes and check again.
-
When ready to bake, remove the pot from the oven and take off the lid.
Sprinkle a layer of polenta or flour over the base of the pot, then carefully flip in the dough so the rounded side is now facing UP.
Scatter over the remaining 50 g of grated cheese, then cut a deep cross on top of the dough.
-
Put the lid back on, place the pot in the oven and immediately turn the heat down to 240°C / 220° Fan / Gas 9 / 475 F
Bake for 35 minutes without removing the lid.
-
After 35 minutes, reduce the heat to 220° C / 200° Fan / Gas 7 / 425°F.
Remove the pot from the oven, tip the bread out of it, then return the loaf to sit directly on the oven shelf.
Tip: if the bread resists coming out of the pot (melted cheese can sometimes make it stick) then leave it in and try again when it's baked another 5 minutes or so.
Bake on the shelf for a further 10 - 15 minutes or until the bread is cooked through: it should sound hollow when tapped underneath.
-
Place on a wire rack until completely cold before slicing or cutting into chunks.
Best eaten within 2-3 days or can be frozen.
Tip: slice or cut before freezing so you can take out just as much as you need without wastage.
Recipe Notes
Note 1. Instant Dried Yeast. For the method in this recipe, you should use dried yeast that does not need activating before adding to the rest of the ingredients. It's usually labelled 'fast-acting', 'instant' or similar.
Note 2. If you want to make your own blend of dried herbs, try my Italian-Style Seasoning recipe. Alternatively, replace with 2 tsp dried oregano.
Equipment.
- You'll need a heavy, lidded pot or Dutch oven in which to bake the bread. It should have a capacity of at least 3.5 litres.
- To support the dough on its second rise or proof, you'll need a banneton/proving basket or a large bowl lined with a tea towel or other cloth.
- The no-knead dough is wetter than normal so a dough scraper is recommended for removing it from the bowl and for folding/shaping it.
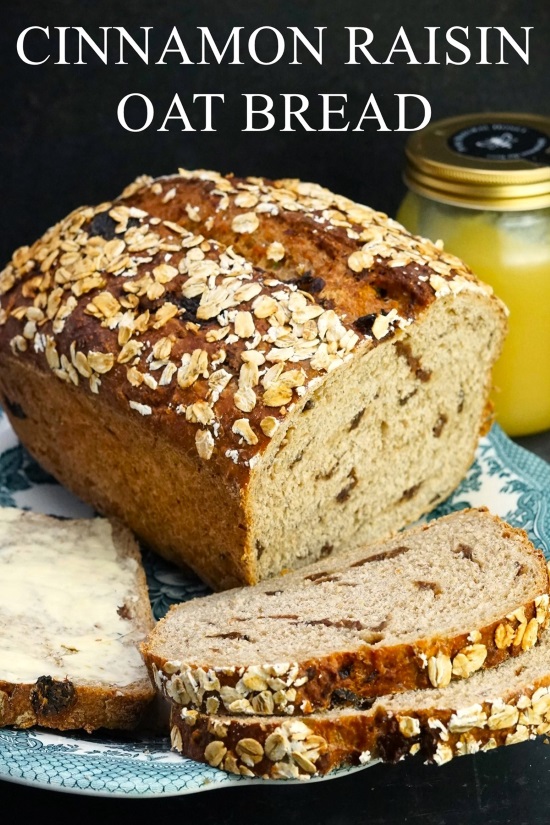
RELATED RECIPES


Left out the garlic and used a mozzarella and cheddar ready grated mix. Lovely bread, only tricky part was folding in the cheese. One loaf is a lot for me and husband to eat in one go, how would you suggest freezing and defrosting it Lynne. Love your recipes especially bread x
Many thanks for your lovely comments, Julia!
There’s only two of us in our house so I almost always freeze part of all my breads. I slice or cut into chunks first and put in re-useable polythene bags so I can take out just the right amount.
If I know in advance I’ll be eating some, I put in a plastic container to defrost a few hours or the night before. Otherwise, I use the defrost function on my microwave. For toast, you can just pop slices in the toaster without defrosting.
Hope this helps!