Homemade Hot Dog Buns
Homemade Hot Dog Buns are better than any you can buy. Made with an easy, overnight dough enriched with butter, eggs, and milk, they have a full flavour I think you’ll love. The texture of these light, brioche buns, while delectably soft and fluffy, is still substantial enough not to fall apart when you eat them.

The dough requires minimal kneading and is so versatile you can shape it into buns for burgers too. Or use it to make delicious bread rolls to eat with soups, salads, or simply stuff with your favourite fillings.
Jump to Recipe
SUPERIOR SAUSAGES DESERVE SUPERIOR BUNS
Until fairly recently, here in the UK hot dogs had something of a bad reputation. Growing up in the 1970s and 80s, the only place I’d see them sold were from insalubrious-looking vans at fairgrounds and down-at-heel markets. Even the name ‘dogs’ apparently came from the fact that back in the nineteenth century people could never be sure exactly what meat they contained. Read the interesting history of the hot dog here.

But, like the burger before it, the hot dog has had a renaissance. You can now get gourmet hot dogs at trendy street food stalls, bars, and restaurants. And for the home cook, there’s a whole world of sausages out there. Not just your standard frankfurter, but bratwurst and any number from small producers at farmers markets, online and even supermarkets.

But what about the bun? Go into the average supermarket and you’ll be hard pressed to find anything other than a sad, tasteless, gummy, additive-packed sub-shaped bread roll with which to insult your superior sausage. Thankfully though, with not too great an effort, it’s not difficult to make a hot dog bun worthy of a decent sausage. Or, its shape altered accordingly, suitable for almost any other filling you like.

HOMEMADE HOT DOG BUNS
I took as the starting point for Homemade Hot Dog Buns my recipe for Brioche Buns for savoury fillings. Brioche is bread made with a dough that’s been enriched with butter and eggs. This gives a rich flavour which makes it a popular carrier for gourmet burgers.
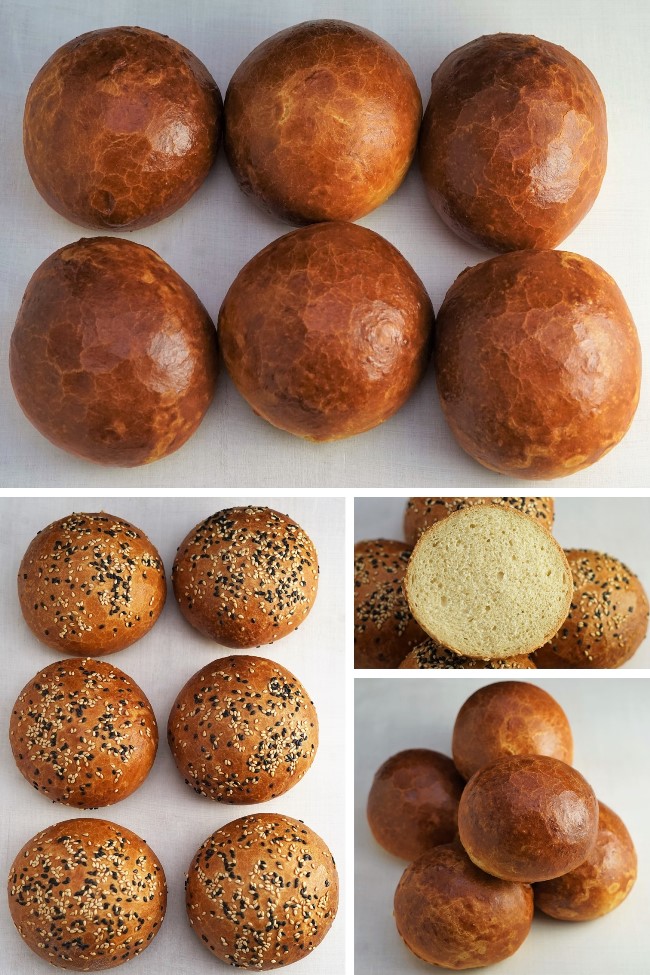
So, I thought, why not a brioche-like bun for hot dogs? The results of my experiments were delicious, full-flavoured buns. Made with ordinary plain (all-purpose) flour rather than bread flour they are wonderfully soft and light too.

I’ve since discovered that these buns are brilliant not just for hot dogs, but pretty much any filling you like. From my first batch, shorter and fatter than standard hot dogs, I filled some of them with egg mayo and cress.
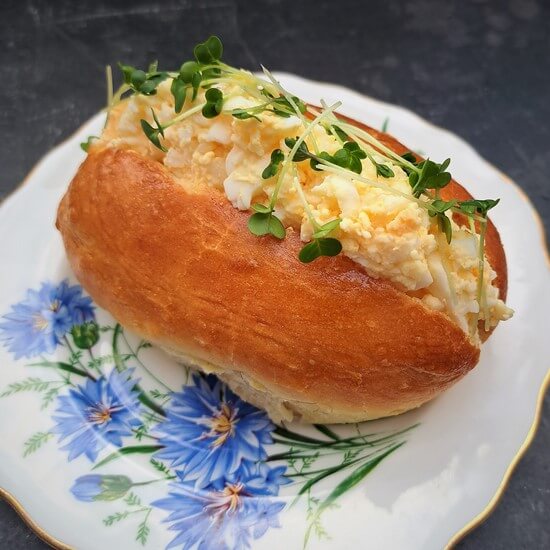
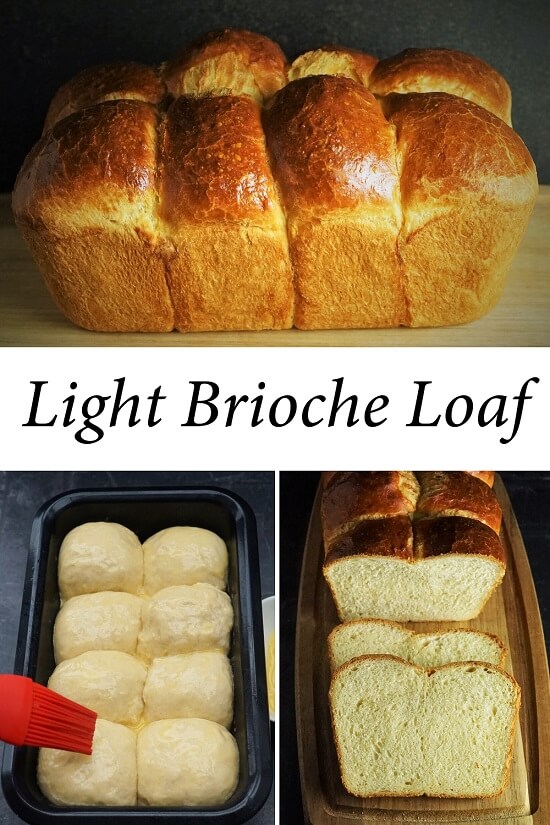
Others got eaten with butter and pate. Another, sub-sized one, I stuffed with chicken Caesar salad. And there’s no reason you can’t shape the dough into rounds to serve with burgers or anything else you fancy. Update: since writing this post I’ve made a Light Brioche Loaf with almost exactly the same dough.

Ready to start? You can Jump to Recipe here. But I recommend you read on for tips plus step-by-step images.
OVERNIGHT, ALMOST NO-KNEAD DOUGH
You’ll need to start making the dough the day before you want to bake the hot dog buns. For virtually all of my homemade bread recipes, I use this overnight method. A slow, overnight rise improves the flavour and, when combined with a wetter than normal dough, can cut down kneading time or even eliminate it.
The protein which helps bread to rise is called gluten. And the aim of kneading, or using the overnight, wetter, no-knead method, is to develop the gluten. However, the higher fat content of doughs enriched with butter, eggs and milk, tends to inhibit this development. Which is why I do include a short, five minute kneading in my Homemade Hot Dog Buns recipe.

Due to that fat content of brioche-type doughs (which, remember, is why they taste so good!), they can be rather sticky. For this reason, many recipes say you need a stand mixer to make it. But, due to lack of space, I don’t have one. Luckily, I’ve found that enriched doughs can easily be made without this piece of equipment.
MIXING THE DOUGH
The night before, start by stirring together 500 grams of plain flour, 2 teaspoons of instant dried yeast, 1.5tsp salt and 1 tsp sugar. Do make sure the yeast you use is instant i.e. it shouldn’t need to be activated before mixing with the other ingredients. Otherwise, this recipe won’t work.

After rubbing in 60 grams of butter, a beaten egg is gradually stirred in, followed by milk. As different flours absorb different amounts of liquid, it’s not possible to be exact about the amount of milk you’ll need to add to make a sticky but not wet dough. It will most likely be between 225 and 275 ml. I use a silicone spoon to bring everything together.

The resulting dough will be quite stiff, giving your arm a bit of a work out in the process. Don’t worry that it looks a bit rough and shaggy. This is fine. Just ensure that you have no bits of dry flour visible.

You can then cover the dough and leave it overnight or 12-14 hours. If the room is particularly warm, or you want a longer initial rise, then put it in the fridge. It will be fine in there for up to 24 hours.
THE NEXT DAY
When you return to your dough the next day, it should look quite different. Rather than a shaggy ball, it should have both spread out and at least doubled in size.
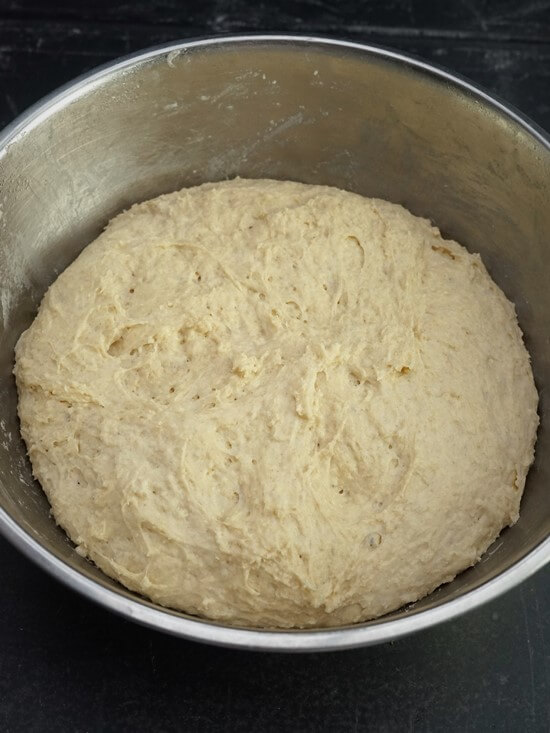
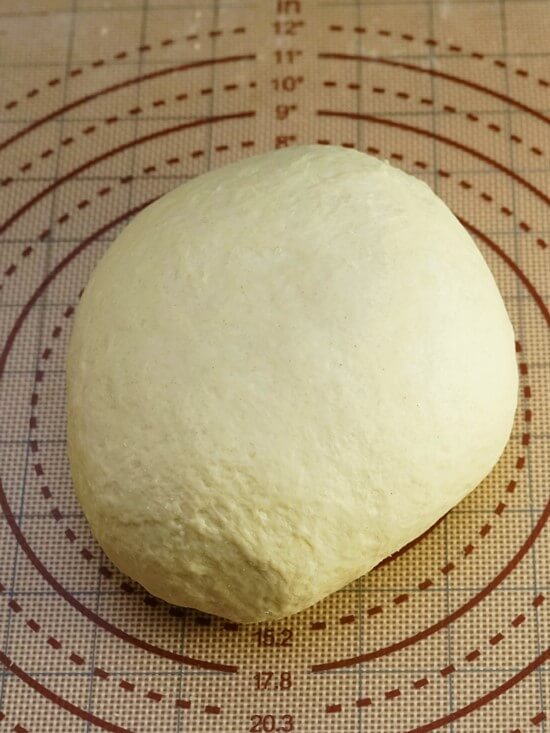
If you’re not used to working with wetter dough, it may still look nothing like any bread doughs you’re familiar with. But after just five minutes kneading it should be nicely smooth. By the way, during this stage and later when you shape the buns, try to use as little extra flour as possible to stop it sticking: adding too much can result in tough buns.
The recipe makes 9 hot dog buns that are the right size for a standard frankfurter. I strongly recommend you use scales to divide the dough into 9 equal pieces. I’m certainly useless at judging it by eye, anyway! Of course you can make fewer, larger buns or more smaller ones if you prefer.
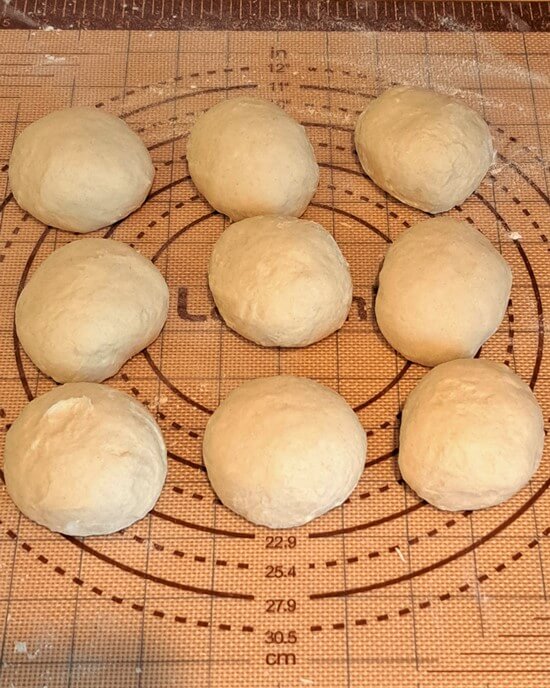
Next, briefly shape each piece into a ball. Now roll each ball roll back and forth across the surface into a smooth sausage shape. Approximately 16 – 18 cm long to eat with a standard frankfurter, longer or shorter if you prefer. Because the dough can shrink back, I find it easiest to roll in two stages. First, roll out each one to about two-thirds the length you want. Then go back to the beginning and roll to the required length: you should find the dough more malleable and less prone to shrinkage on the second go.
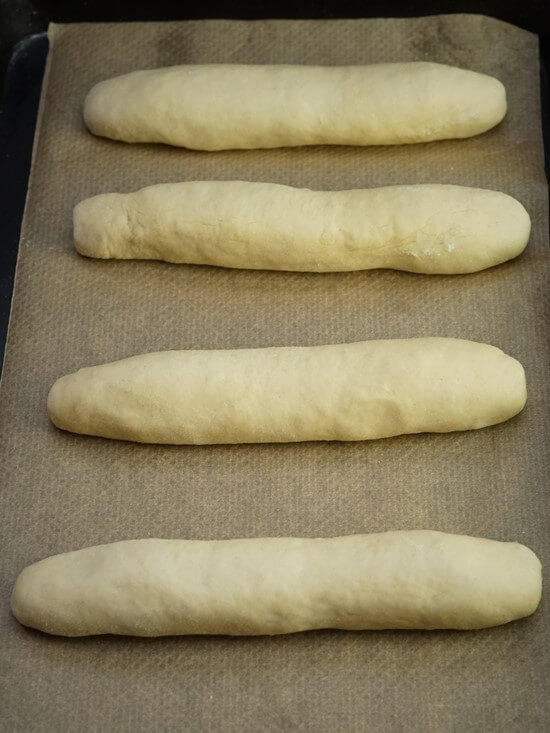
Transfer each bun to a baking tray: I line mine with baking paper to make sure they don’t stick. Space the buns 4 – 5 cm apart so they have room to expand as they rise and bake. If you don’t mind having a batch of pull-apart buns, you can put them closer together and maybe get away with one rather than two trays.
PROOFING
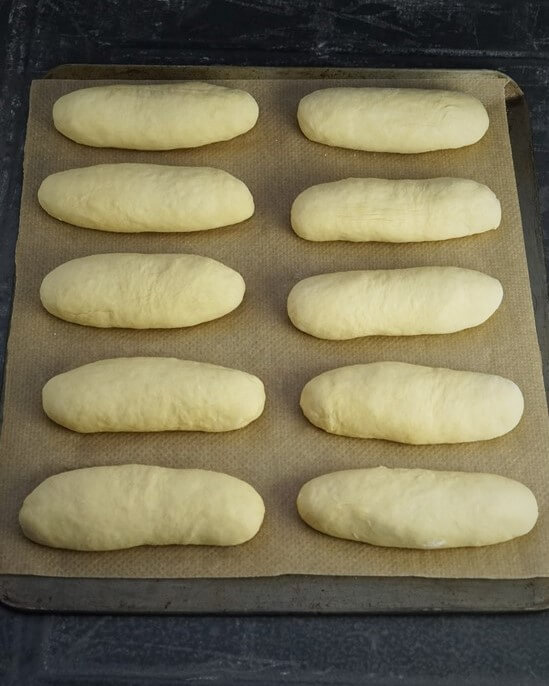
Your Homemade Hot Dog Buns now need a second rise, covered, and ideally in a warm spot. I preheat my main oven (180°C / 160°C Fan / Gas 5) and put them in the unheated small oven above. After around 45 minutes, depending on the temperature, they should have almost doubled in size. If not, leave a little longer.
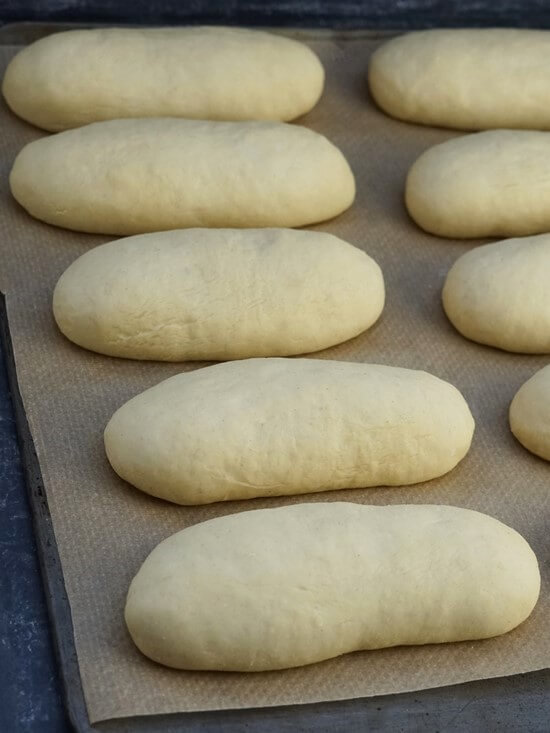
But the best way to test whether a dough is fully proofed, rather than going on time or appearance, is to gently poke a finger into it. If the dough slowly springs back but leaves a slight indentation then it’s ready. If the dough springs back quickly then it’s not ready so leave a little longer and check again.
To get an attractive, shiny top to the buns, I give them a thin glaze of egg wash just before they go in the oven.
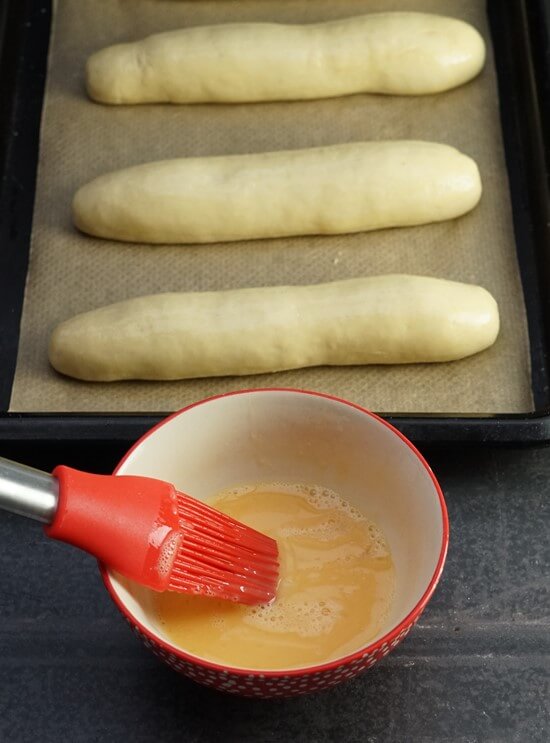
As you only need a very small amount of beaten egg for this, if you don’t have any other use for the rest of it and don’t want to waste it (our lucky dog gets mine), you could just keep a bit back when making the dough.
BAKING & STORING HOMEMADE HOT DOG BUNS
When I preheat my oven, placing a shelf in the middle ready for the buns, I also put a shelf in the lowest position with a deepish roasting tray on it to heat up. Then, when I put the glazed buns in the oven, I pour cold water into the hot roasting tray and immediately close the door. This creates steam which delays the forming of a crust. This means the buns can rise for longer and should be lighter.
Bake the buns, without opening the oven door, for 15 minutes. After 15 minutes carefully open the door (keep your face and hands out of the way as lots of hot steam may billow out) check the buns and, if necessary, turn the tray around for even cooking.
After another 5 minutes the buns should be golden brown and sound hollow when tapped on top. Every batch I’ve made, of whatever size, has taken a total of 20 minutes to bake. However, ovens do vary so yours may take a minute or two more or less.

Once they’re out of the oven, smelling wonderful, transfer to a wire rack to cool.
Although best eaten on the day of making, I’ve found that on the second day if you microwave Homemade Hot Dog Buns for 20 – 40 seconds then they go lovely and soft again. As there’s only 2 people in our household, I freeze most of them and even then they still taste fresh after pinging in the microwave.
EASY, VERSATILE HOMEMADE HOT DOG BUNS
As home bakers will already know, comparing even simple homemade bread to cheap, additive-packed, gummy, store-bought and there’s no contest. And after discovering how easy it is to get great tasting, fluffy-inside homemade hot dog buns, I’ll never again settle for those third-rate ones.

Yes, shaping the buns takes a little time. But even that is so much easier when you know my tip about doing it in two stages. In any case, the rewards and satisfaction gained are so high for relatively little effort.

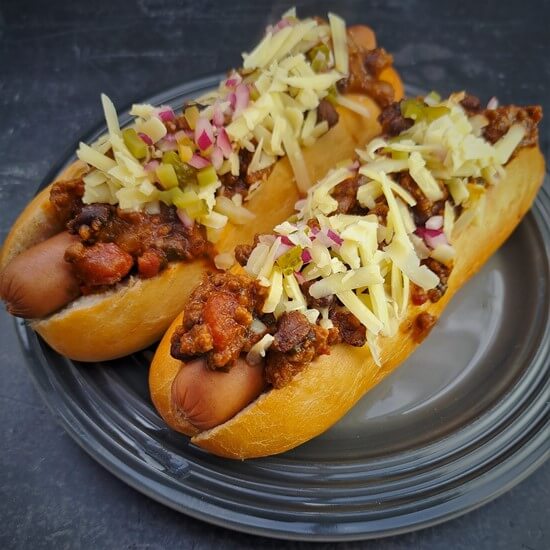
In fact, knowing I can easily produce a batch of buttery, rich, flavoursome buns means I enjoy hot dogs more often now. Maybe with just a squirt of tomato ketchup or perhaps a few more additions like a drizzle of sweet mustard ketchup, diced gherkins and red onion. I’ve even fallen in love with chilli hot dogs – something I would never have attempted with those pappy supermarket buns.
But you don’t have to eat hot dogs to enjoy these wonderfully-flavoured buns. Even if you make them into the classic hot dog bun shape, you can still use them as a sub or baguette and stuff with your favourite fillings. Chicken, meatballs, steak, cheese, salad. Almost anything. Or you can shape the same dough into rounds as burger buns or delicious bread rolls to eat with soups, salads, etc. The possibilities are endless.
If you’ve made these buns, I’d love to know what you thought and how you eat them. Get in touch via the Comments section at the end.

Homemade Hot Dog Buns
Made with an easy, overnight brioche-style dough, these hot dog buns are tasty, soft and fluffy but substantial enough not to fall apart when you eat them.
The dough requires minimal kneading and can be shaped into buns for burgers too. Or use it to make delicious bread rolls to eat with soups, salads, or simply stuff with your favourite fillings.
Ingredients
- 500 g plain white flour
- 2 tsp instant dried yeast see Recipe Note #1
- 1.5 tsp salt
- 1 tsp sugar can be omitted
- 60 g butter cut into small pieces
- 1 egg, beaten
- 225 - 275 ml milk see Recipe Note #2
For the glaze
- 1 egg, beaten see Recipe Note #3
Instructions
The day before you want to bake the buns
-
In a large bowl, stir together the flour, yeast, salt, and sugar. Rub in the butter.
-
Make a well in the middle and tip in the beaten egg. Stir the mixture to start bringing it together, gradually adding enough of the milk to create a ragged ball of dough: the mixture will be quite stiff. Ensure there are no dry bits of flour visible.
-
Cover with cling film or a wet tea towel and leave overnight or 12-14 hours at room temperature.
Tip: the dough can be put in the fridge during hot weather or if you wish to leave it for longer (up to 24 hours).
On the day of baking
-
Line one large or two regular baking trays with greaseproof paper or baking parchment.
-
Lightly flour a silicone mat or clean work surface and scrape the dough out onto it.
Knead the dough for 5 minutes or until smooth. If it sticks, dust the surface again with flour, using only the minimum to avoid a tough dough.
-
Ideally using scales, divide the dough into 9 equal pieces.
Briefly knead each piece into a ball then roll back and forth across the surface into a smooth sausage shape approximately 16 - 18 cm long.
You may find this easiest to do in two stages: first roll out each to approximately 12 cm, then go back to the beginning and roll each to the full length. On the second rolling you will find the dough more malleable and less likely to shrink back.
Transfer to the baking sheet(s), spacing the buns 4 - 5 cm apart or closer if you don't mind having to pull them apart once baked.
-
Put the tray(s) in a large polythene bag or cover with cling film or a wet tea towel. Set aside somewhere warm for 45 minutes or until almost doubled in size.
Meanwhile, preheat the oven to 180°C / 160°C Fan / Gas 5 with a shelf in the middle and a deep roasting tray on the bottom shelf (this will be filled with cold water later to create steam and help the buns rise).
-
Check that the dough is proofed:
If, when a finger is gently poked into the dough, the dough slowly springs back but leaves a slight indentation then it is ready to bake.
If the dough springs back quickly then it's not yet fully proofed: leave it another 5 -10 minutes and check again.
-
When they're ready to bake, add the glaze by brushing a layer of the beaten egg over each bun and place in the oven.
Carefully pour cold water from a jug into the hot roasting tray in the lower part of the oven then immediately close the door.
-
Bake, without opening the oven door and letting the steam out, for 15 minutes.
After 15 minutes carefully open the oven door (caution: lots of hot steam may billow out so keep your face, hands etc. out of the way) and, if necessary, turn the tray around to ensure the buns cook evenly.
Cook until the buns are golden brown and sound hollow when tapped on top: approximately 5 min more i.e. 20 minutes in total.
-
Transfer each bun to a wire rack and leave until cold.
Best eaten on the day they're made or frozen.
Tip: on the day after baking or after freezing, microwaving on high for 20-40 seconds will make the buns soft and fluffy again.
Recipe Notes
#1 Yeast. Dried yeast that needs activating before mixing with the other ingredients will NOT work with this method. Only use instant, fast-acting yeast that doesn't require activating first.
#2 Liquid. Different flours absorb different amounts of liquid so it's not possible to be exact about the amount you'll need to bring the dough together.
#3 Egg for the glaze. You won't need a whole egg for the glaze so, if you don't have a use for the rest and don't want to waste it, you could hold back a tablespoon of the beaten egg from the dough and use that instead. You can also omit the glaze if preferred.
MORE BREAD RECIPES

These turned out perfectly! I have been searching for a bun recipe because the store bought ones tend to be filled with preservatives and other awful ingredients and we are currently living in a country where local bakeries do not make buns like this. I made hamburger buns with this recipe (8, as you mentioned in the comments – and they were approx 105g each). I also sprinkled the tops with sesame seeds. Thanks to your detailed instructions, I found these came together very quickly and easily for me – and the dough was so easy to work with the following day. Thanks for sharing – my family absolutely loved them. I’ve been asked to make hotdog/sausage buns next 🙂
That’s fantastic to hear. Thanks so much for taking the time to give your detailed feedback and 5-star rating!
I have not yet tried this, as I have a few questions about this delicious sounding bread.
When you make hamburger buns, do you still divide the dough into 9 pieces? Also, have you ever baked on more than one shelf when using your fan oven?
Thanks for all the tips regarding rolling out the hot dog buns. I can hardly wait to try this. So many recipes, so little time. ..
Thanks for your interest in my recipe, Laurie!
When I use this dough for hamburger buns, I divide into 8 rather than 9.
Yes, I do bake on more than one shelf of my fan oven. But if your oven is quite small you may struggle to space three shelves far enough apart (i.e. two to bake on, one for the tray of water to create steam). If that’s the case then bake in batches or don’t bother with creating steam: they should still be good!