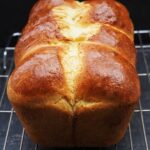
Light Brioche Loaf
Light Brioche Loaf is made with an easy, overnight dough enriched with butter, eggs, and milk. The result is a full flavoured loaf with a soft and fluffy crumb.

Unlike most brioche recipes, you don’t need a stand mixer for this one and the kneading required is minimal. This means the texture won’t be identical to classic brioche, but it’s still a special loaf that’s perfect for sandwiches, French toast, or slathered with butter and jam for breakfast.
Jump to Recipe
The idea for this easy and delicious Light Brioche Loaf came to me after creating my Homemade Hot Dog Buns recipe. I’d found that the buns’ wonderful flavour and texture suited lots of fillings, not just hot dogs. So, I thought, why not create a sliceable loaf with the same dough, just adding a little extra butter?

I liken the dough to brioche because it’s enriched with butter and egg, plus milk. However, my version has less butter and eggs than the classic brioche. It still has a richer flavour than regular bread, but it’s cheaper and more versatile.

This, combined with my overnight method, means you don’t need the stand mixer necessary for most brioche recipes either. The only bit of equipment you do need is a 900 gram (2 lb) loaf tin. A dough scraper will come in handy but isn’t absolutely necessary.
LIGHT BRIOCHE LOAF INGREDIENTS
Here’s the ingredients you’ll need to make this lovely loaf.
- plain (all-purpose) flour: gives a lighter, less chewy dough than bread flour.
- instant dried yeast: make sure it’s the kind that doesn’t need to be activated before adding to the flour.
- salt and sugar: not much, just a little for added flavour.

- butter: you can’t have brioche without butter. But this is a light brioche, so just 80 grams.
- egg: 1 beaten egg for the dough plus a little extra for the glaze.
- milk: use whole milk for the best flavour.

OVERNIGHT, MINIMAL KNEADING METHOD
You’ll need to start making the dough the day before you want to bake. For virtually all my homemade bread recipes, I use an overnight method. A slow, overnight rise improves the flavour and, when combined with a wetter than normal dough, can cut down kneading time or even eliminate it.
All you do is stir together the flour, salt and instant yeast then rub in the butter. Next the beaten egg is gradually stirred in, followed by the milk. As different flours absorb different amounts of liquid, it’s not possible to be exact about the amount of milk you’ll need. But you’ll most likely use between 225 and 275 ml to create a sticky but not too-wet dough.

You then cover the dough and leave it overnight or 12-14 hours. If the room is particularly warm, or you want a longer initial rise, then put it in the fridge. If convenient, you can leave it in there for up to 24 hours.
SHAPING THE LOAF
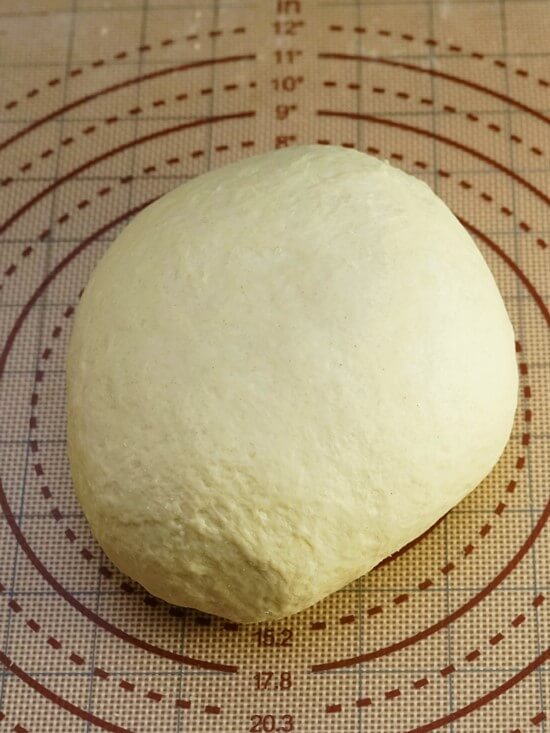
The next day, if you’re not used to wet doughs, you might be surprised that it’s spread outwards as well as upwards. But don’t worry, it supposed to look like this.

Although the overnight, wetter than normal dough will have helped to develop the gluten which gives bread its rise and structure, the higher fat content of doughs enriched with butter, eggs and milk tends to inhibit this development. So, for my Light Brioche Loaf recipe I do include a brief, 5-minute kneading. That’s all it takes to get the dough nice and smooth.
Although I have made braided brioche loaves before, for this one I used balls of dough. This means that you can eat the bread as a pull-apart loaf as well as slicing it. All you do is divide the kneaded dough into 8 (I use scales for accuracy) then fold/knead into balls. These are then placed in your well-buttered loaf tin in 2 rows of 4.

I could probably have made mine a little smoother, but I don’t think it affected the finished loaf.
SECOND RISE
The second rise or proof should be done somewhere warm. I preheat my main oven (to 180°C / 160°C Fan / Gas 5) and put in the unheated small oven above. After around 45 minutes, depending on the temperature, it should have almost doubled in size. If not, leave a little longer.

But the best way to test whether a dough is fully proofed, rather than relying on time or appearance, is to gently poke a finger into it. If the dough slowly springs back but leaves a slight indentation, then it’s ready. If the dough springs back quickly then it’s not ready, so leave a little longer and check again.
To get the classic, shiny top to the loaf, I brush over some beaten egg just before it goes in the oven.

BAKING LIGHT BRIOCHE LOAF
When I preheat my oven, placing a shelf in the middle for the bread, I also put a shelf in the lowest position with a deepish roasting tray on it. Then, when I put the loaf into the oven, I pour cold water into the hot roasting tray and immediately close the door. This creates steam which delays the forming of a crust. This means the bread can rise for longer and should be lighter.

You bake the bread for 30 minutes without opening the oven door. After 30 minutes carefully open the door (keep your face and hands out of the way as lots of hot steam may billow out) and remove the loaf from its tin. Then put the loaf back in the oven, sitting directly on the oven shelf. Give it another 3 – 5 minutes or until the top of the loaf sounds hollow when tapped. Now transfer to a wire rack to cool.
SERVING & STORING LIGHT BRIOCHE LOAF
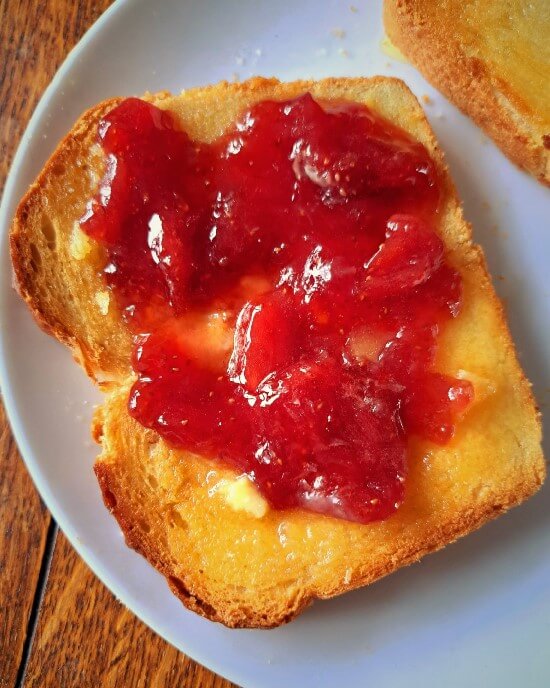
You can eat this soft, delicious bread just as you would any other. In sandwiches, alongside soups, salads, with pâté, etc. Because of the egg, butter and milk, I think Light Brioche Loaf is particularly good toasted. It makes a cracking ham and cheese toastie, or try a slice for breakfast spread with butter and Homemade Strawberry Jam.
But one of my very favourite things to make is French toast (often called ‘eggy bread’ in Britain). Soak slices in beaten egg and milk then fry in butter until golden. You can take it in a savoury direction by including grated cheese with the egg and milk, or enjoy it sweet served with a drizzle of maple syrup and warmed fruit.
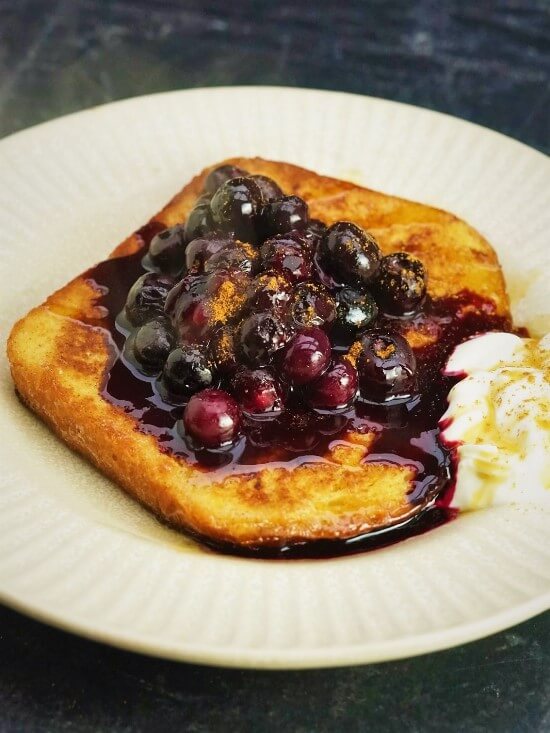
I especially love it with blueberries, cinnamon, and a blob of thick yogurt.
If you’re not toasting or frying the bread, then it’s best eaten within 2 days. But brioche freezes very successfully. I usually slice then freeze so that I can take out exactly the amount I need with no waste.
I certainly don’t claim that my Light Brioche Loaf is the same as classic brioche. However, if you want some of that rich flavour and soft texture without too much effort, I think you’ll love it.
If you’ve made this bread, I’d love to hear what you thought of it by leaving a comment and rating.
Light Brioche Loaf
Light Brioche Loaf is made with an easy, overnight dough enriched with butter, eggs, and milk. The result is a full flavoured loaf with a soft and fluffy crumb.
Unlike most brioche recipes, you don't need a stand mixer for this one and the kneading required is minimal. This means the texture won't be identical to classic brioche, but it's still a special loaf that's perfect for sandwiches, toasties, French toast, or slathered with butter and jam for breakfast.
Ingredients
- 500 g plain white flour plus extra for dusting
- 2 tsp instant dried yeast see Recipe Note #1
- 1.5 tsp salt
- 1 tsp sugar
- 80 g butter cut into small pieces (plus extra for greasing)
- 1 egg beaten
- 225 - 275 ml milk see Recipe Note #2
For the glaze
- 1 egg, beaten see Recipe Note #3
Instructions
The day before you want to bake the bread
-
In a large bowl, stir together the flour, yeast, salt, and sugar. Rub in the butter.
-
Make a well in the middle and tip in the beaten egg. Stir the mixture to start bringing it together, gradually adding enough of the milk to create a ragged ball of dough: the mixture will be quite stiff. Ensure there are no dry bits of flour visible.
-
Cover with cling film or a wet tea towel and leave overnight or 12-14 hours at room temperature.
Tip: the dough can be put in the fridge during hot weather or if you wish to leave it for longer (up to 24 hours).
On the day of baking
-
Grease a 900g / 2lb loaf tin with butter.
-
Lightly flour a clean work surface and scrape the dough onto it.
Knead the dough for 5 minutes or until smooth. If it sticks, dust the surface again with flour, using only the minimum to avoid a tough dough.
-
Using scales, divide the dough into 8 equal pieces then briefly knead each piece into a round ball.
Place the balls in the prepared tin in 2 rows of 4.
-
Put the tin in a large polythene bag or cover with cling film or a wet tea towel. Set aside somewhere warm for 45 minutes or until almost doubled in size.
Meanwhile, preheat the oven to 180°C / 160°C Fan / Gas 5 with a shelf in the middle and a deep roasting tray on the bottom shelf (this will be filled with cold water later to create steam and help the bread rise).
-
Check that the dough is proofed:
If, when a finger is gently poked into the dough, the dough slowly springs back but leaves a slight indentation then it is ready to bake.
If the dough springs back quickly then it's not yet fully proofed: leave it another 5 -10 minutes and check again.
-
When the dough is ready, add the glaze by brushing a layer of the beaten egg over the top of the loaf.
-
Place in the oven then carefully pour cold water from a jug into the hot roasting tray in the lower part of the oven. Immediately close the door.
Bake for 30 minutes.
-
After 30 minutes carefully open the oven door (caution: lots of hot steam may billow out so keep your face, hands etc. out of the way) and take the loaf out of its tin.
Place the loaf back in the oven directly on the shelf and cook for another 3 - 5 minutes or until the top of the loaf sounds hollow when tapped.
-
Transfer to a wire rack to cool.
Best eaten on the day it's made or can be frozen. Tip: slice before freezing so that you can take out what you need with no waste.
Recipe Notes
#1 Yeast. Dried yeast that needs activating before mixing with the other ingredients will NOT work with this method. Only use instant, fast-acting yeast that doesn't require activating first.
#2 Liquid. Different flours absorb different amounts of liquid so it's not possible to be exact about the amount you'll need to bring the dough together. See the image in the blog post as a guide to what the dough should look like.
#3 Egg for the glaze. You won't need a whole egg for the glaze so, if you don't have a use for the rest and don't want to waste it, you could hold back a tablespoon of the beaten egg from the dough and use that instead.
RELATED RECIPES


Hello there, i couldnt find pin button in this post so i can save it to my pinterest board.. would you mind to add that ? Thank you i’d love to rebake this recipe 🙂
Thanks for your interest in this recipe – you should now be able to be able to pin it and all my others!