Stirato: Italian-Style Baguette
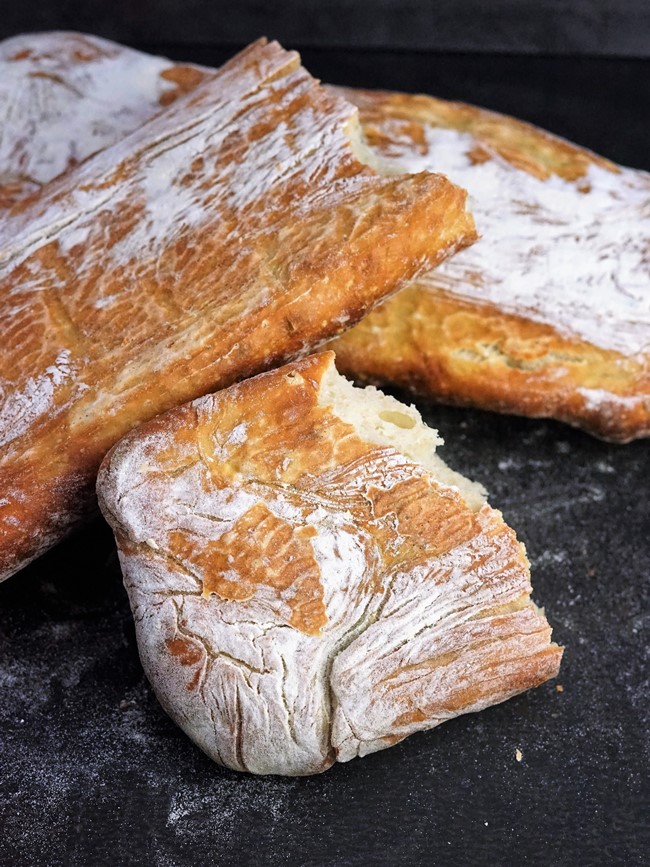
Stirato is a rustic, Italian-style baguette whose name means ‘stretched’. Made with just bread flour, salt, fast-acting yeast and water, it has a crispy crust and open crumb.
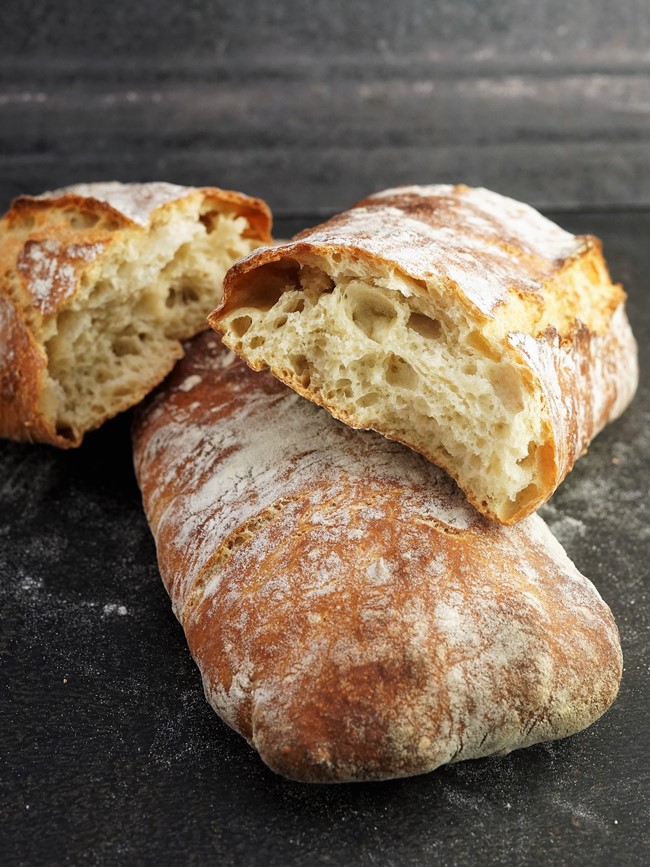
With this easy, no-knead recipe you’ll get great-tasting bread for very little effort. Just mix up the dough the night before you want to bake. In the morning, shape it, rest it for thirty minutes, stretch then bake.
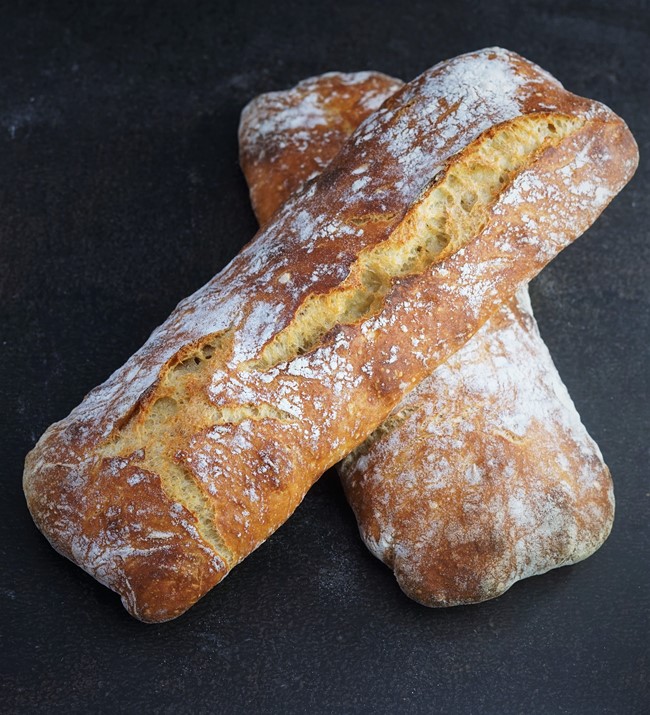
My Stirato is based on that of no-knead bread guru Jim Lahey. However, with my version you won’t need the specialist baking equipment of the original.
Disclosure: this post may contain affiliate links. If you buy via my links, I may earn a small commission at no extra cost to you.
Jump to Recipe
EASY, NO-KNEAD BREAD
If you’re a regular follower, then you’ll know that virtually all the bread I bake is no-knead. This is despite orthodox bread making saying that dough must be kneaded as this develops the gluten. And it’s gluten that gives structure to the loaf.
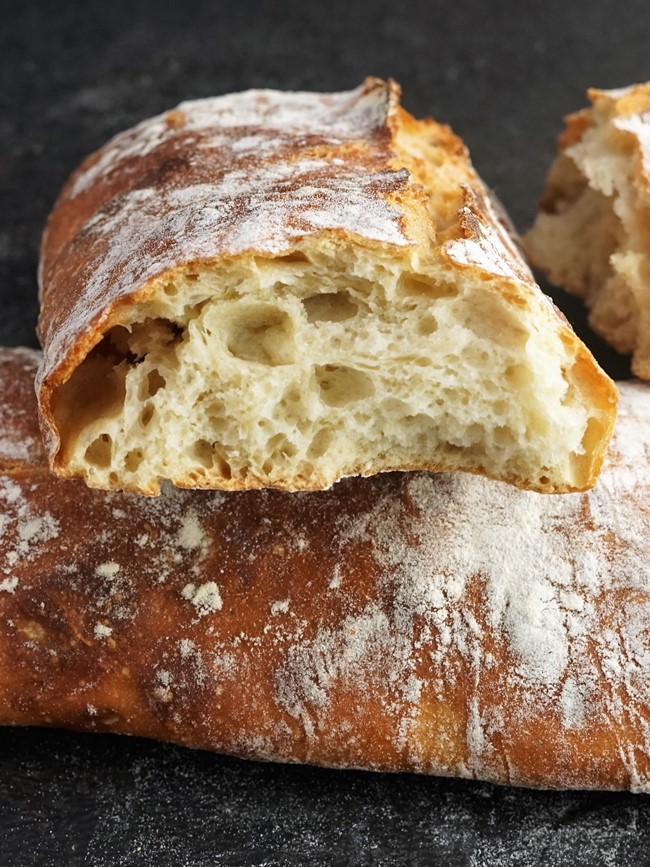
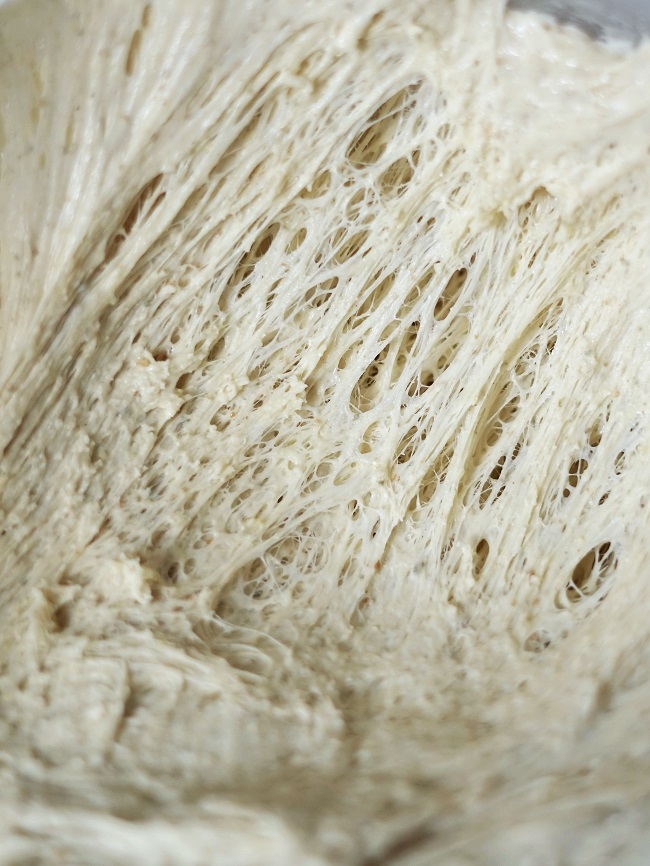
But I learned, many years ago now, that a wetter than normal dough plus long proving times also develop gluten. So much so, in fact, that it’s possible to make wonderful loaves with no kneading at all.
Although not particularly well known in the UK, the person lauded as being responsible for the popularity of no-knead loaves, including baking them in lidded pots, is Jim Lahey of the New York Sullivan Street Bakery. It was this method I adapted to create my own no-knead recipes for Sourdough bread and also my yeasted Crusty Homemade Bread.
But it was only recently that I bought Lahey’s book My Bread (paid link). You can also buy the Kindle edition here (paid link).
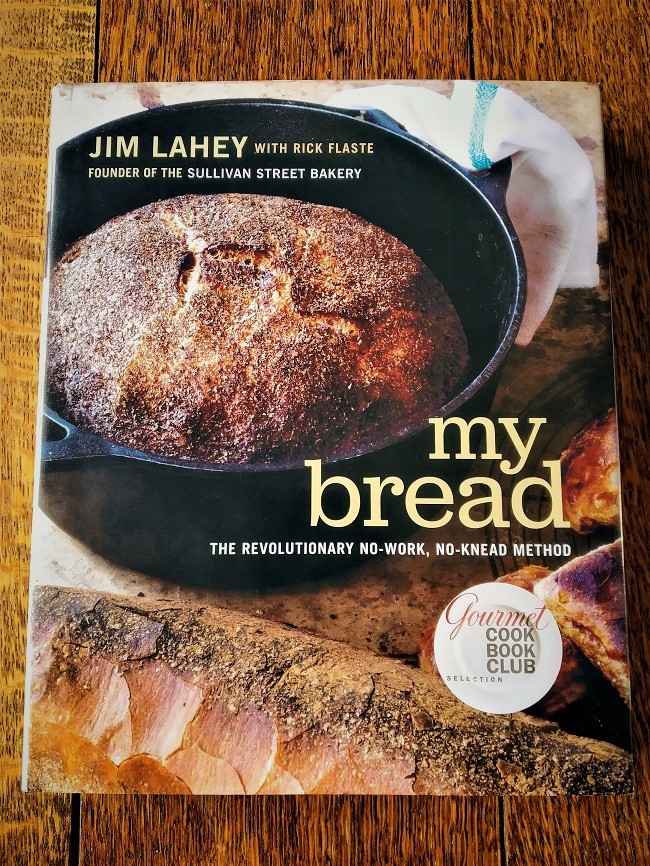
In there, Stirato Italian baguettes were the first recipe to catch my eye.
STIRATO
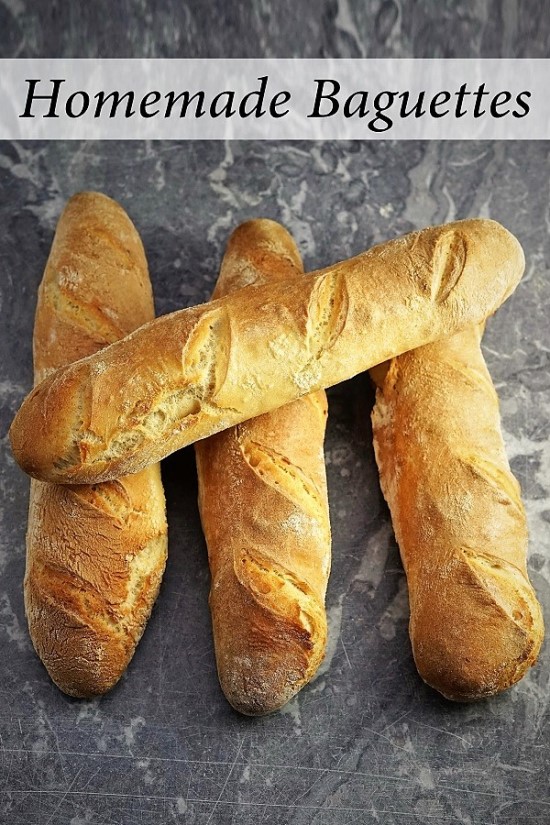
Lahey says that Stirato is the Italian version of the French baguette. Although I have my own Homemade Baguettes recipe, a more rustic, Italian version with no kneading sounded right up my street. Stirato means “stretched”. Further on you’ll see exactly why it has that name.
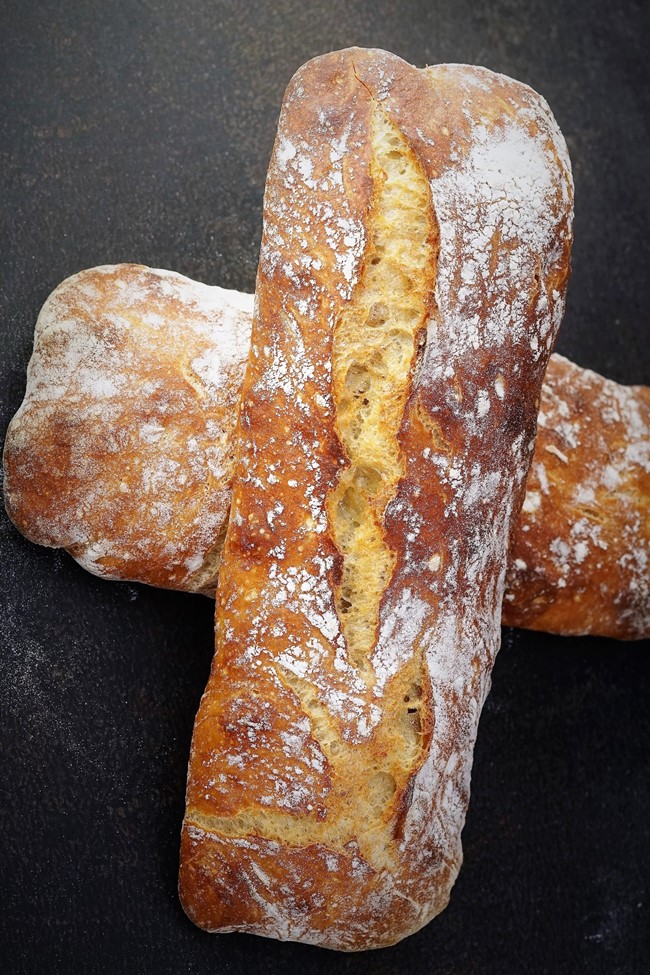
In his recipe aimed at home cooks, Lahey alters the method used in his New York bakery. Rather than baking the Stirato in special elongated pots, he uses a pizza stone and the base of a Römertopf French Bread Baker. But I think that equipment is still too specialized for most home cooks. Including me.
So I came up with my own method and have been extremely pleased with the results.
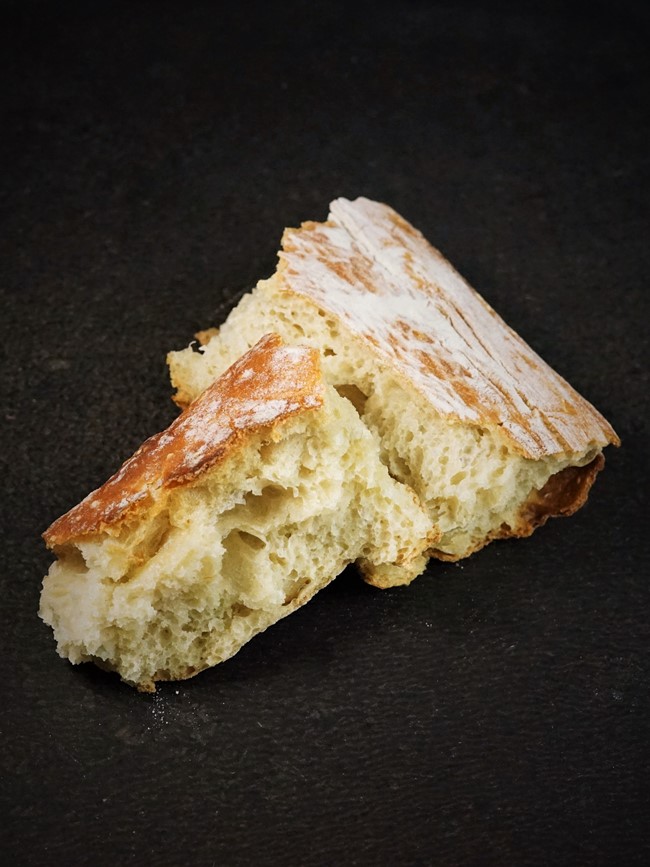
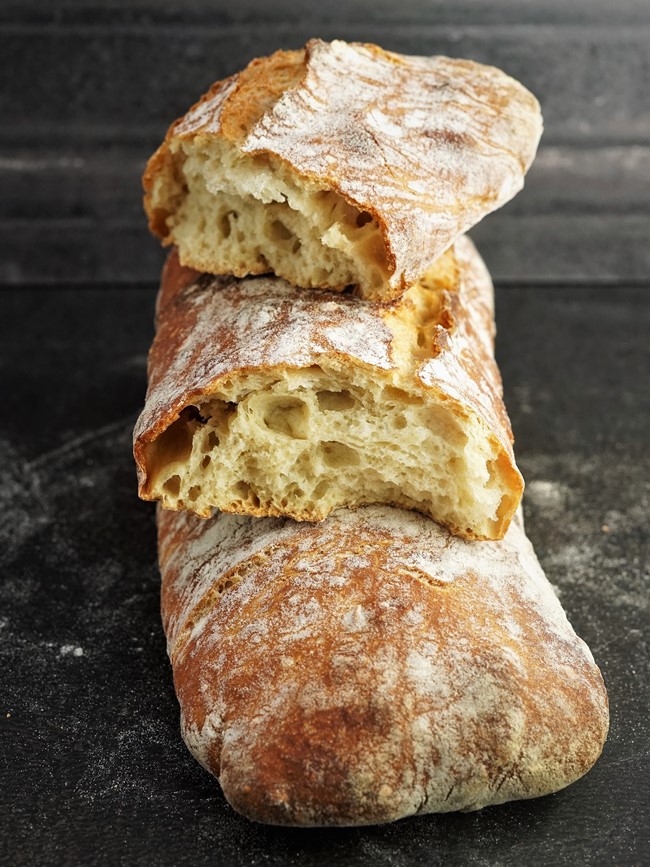
The crust turns out crisp and crunchy. On the inside, there’s an attractive open crumb that’s satisfyingly chewy. Perfect for tearing and eating alongside soups, salads, and all manner of foods. Or splitting and stuffing to make incredible sandwiches.
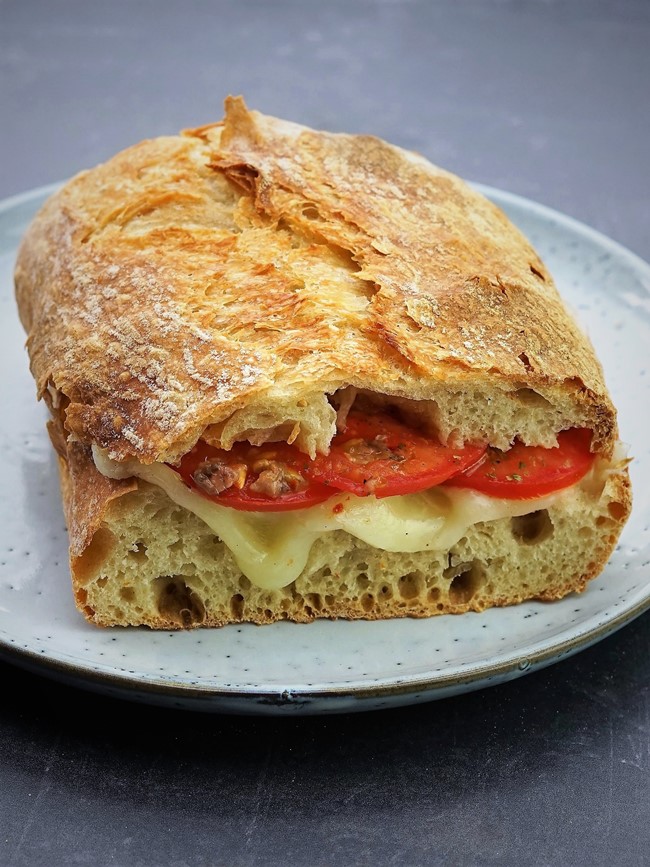
With my first batch of Stirato I made the simple but stunningly delicious sandwich above. Inspired by Sicilian pane cunzato, it had tomato, oregano, anchovy, olive oil, sheep’s milk cheese, chilli flakes and black pepper.
Ready to start making Stirato? Jump to Recipe
Want to see and understand the steps in more detail first?
Read on…
THE NIGHT BEFORE
When dough isn’t going to be kneaded, we need a long initial prove so that the gluten can develop. And when I say ‘long’ I mean a minimum of 12 hours. But some no-knead doughs are left for 24 or even 48 hours in the fridge.
For my Stirato 12-14 hours should be sufficient, depending on the room temperature. For practical purposes, this means I mix up the simple dough the evening before I’m going to bake.
I start by stirring together bread flour, salt, and fast-acting yeast. Then I pour in water, stirring vigorously with a spoon to create a very wet, loose mixture.
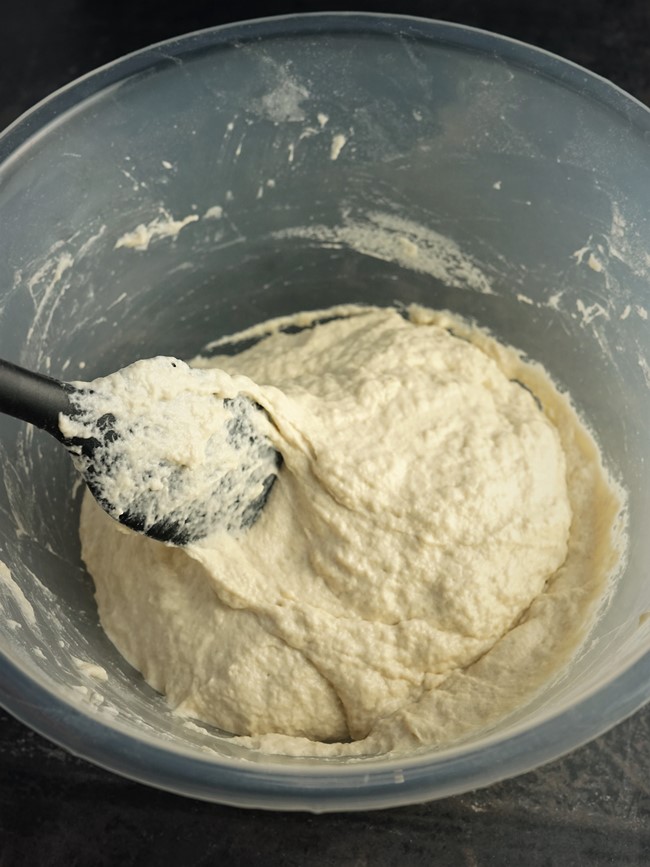
I use slightly more salt and yeast than the Lahey recipe but usually the same flour and water proportions. However, I’ve recently added a note to the recipe card for those who find a slightly less wet dough easier to work with.
Next you cover the bowl and leave overnight. If you want to extend this first rise even more (perhaps you don’t want to bake until the evening of the next day, or the room is particularly warm) then just pop the dough in the fridge.
IN THE MORNING
In the morning, the dough should be well risen and also have spread out (as is normal with wet doughs). It at will also be very bubbly.
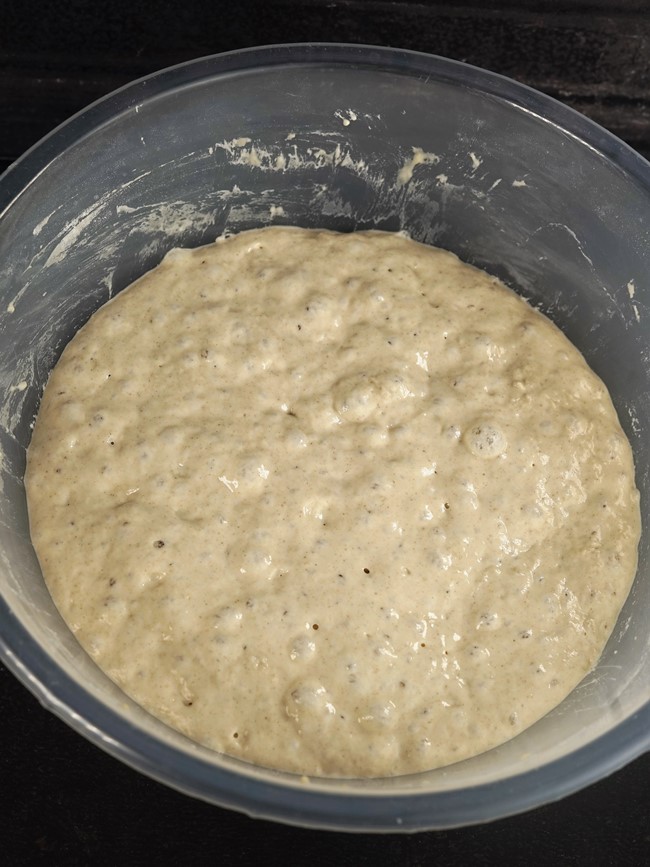
If it isn’t then leave for longer.
SHAPING THE BREAD
Because the dough is so wet, the one piece of equipment I think is vital is a dough scraper. They can be had for just a few pounds and are essential for scraping dough from bowls and work surfaces as well as cutting. Besides a scraper, lots of extra flour for dusting will make shaping the dough easier.
I form the Stirato on a piece of baking paper rather than a work surface. This, and laying the paper on a large board, will help with transferring to a baking tray later.
The first step is to scrape the dough onto the floured paper. Then nudge it into a rectangle and sprinkle more flour over the top.
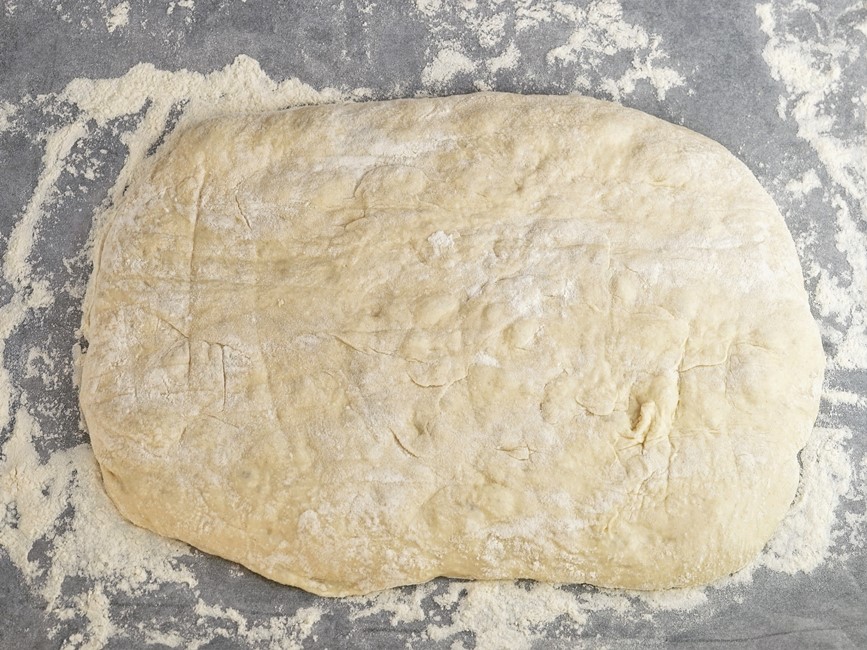
We then need to shape it into a long baguette.
This is best done by using your dough scraper to lift the long side facing you and fold it over towards the middle. Keep pushing it over so that the dough is rolled into a tube.
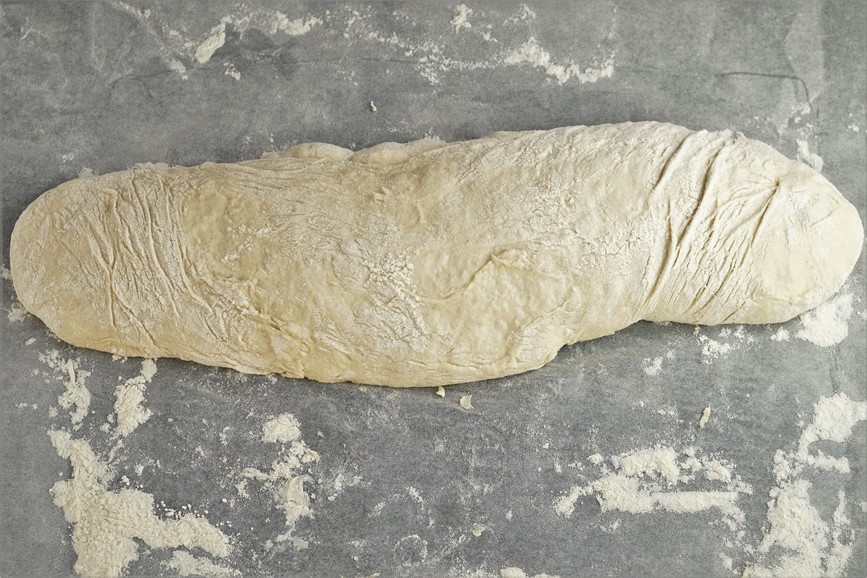
Don’t be afraid to sprinkle more flour at each step. This will really help with handling the dough.
Next, we cut the tube in half to give us two rather fat baguettes. These will be stretched into thinner, longer Stirato later.
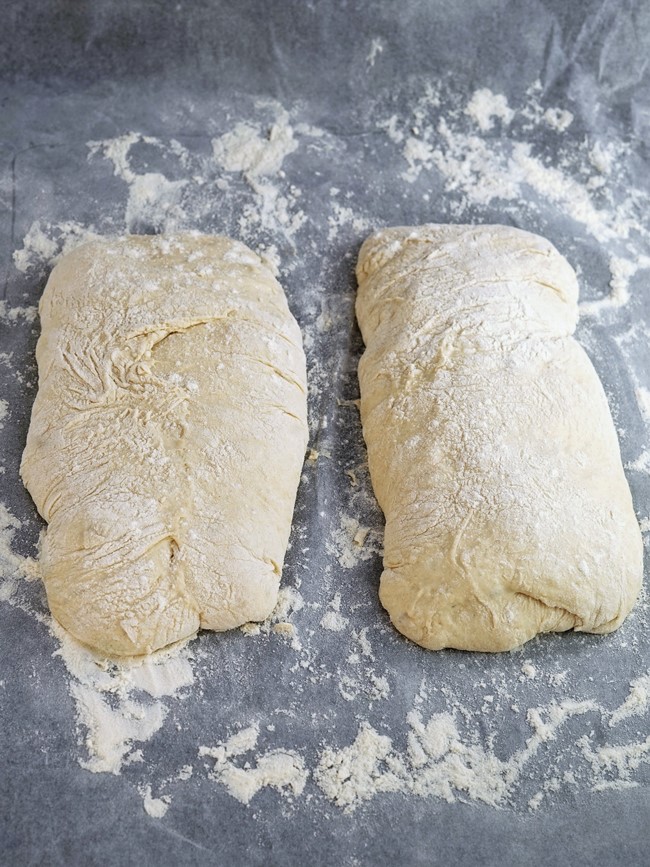
But first the dough needs to have its second rise or prove. This should take around 30 minutes or until the depression left by a finger pressed into the dough slowly rather than quickly springs back. If it springs back immediately then leave to prove for longer.
While that’s happening, you’ll need to preheat your oven and a baking vessel.
STEAMY BREAD BAKING
My bread making method, adapted from Lahey, involves baking in a covered pot. The idea is to create a fiercely hot, steamy atmosphere which prevents a crust forming too soon. This helps the bread rise for longer.
I always bake my standard loaves in heavy oval or round casserole dishes such as Le Creuset.
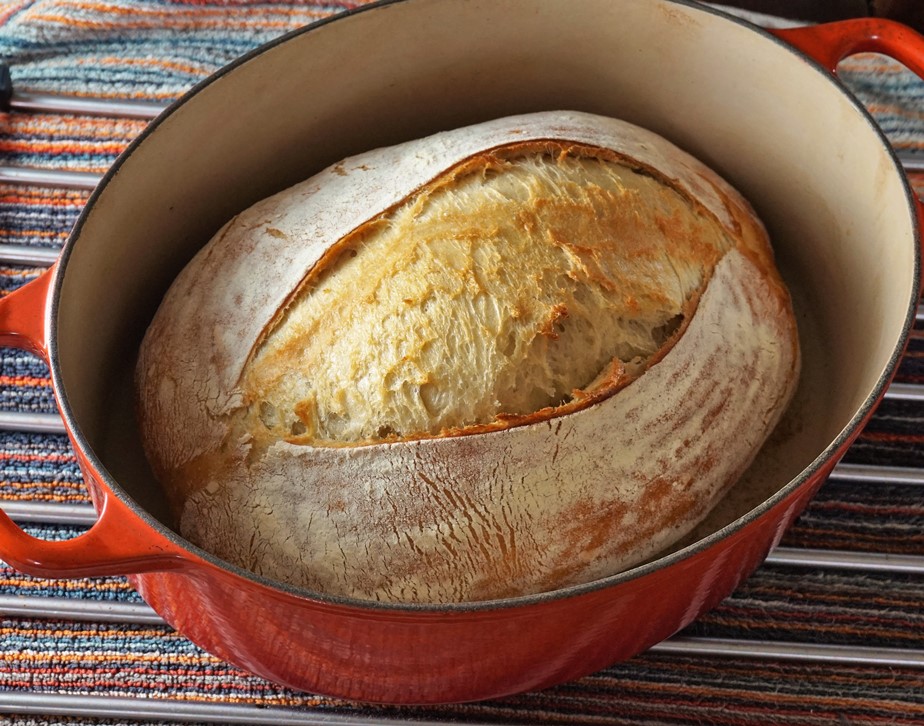
But there’s no way long baguettes are going to fit into any of those. As mentioned above, in his bakery Lahey has special elongated pots in which to bake Stirato. In the book he uses a pizza stone and a special French bread maker.
However, I have neither of those so must improvise. For the base, I use a large baking tray. This goes into the oven to preheat. For a lid, I put, upturned on top, a deep roasting tin. This is also preheated. (Don’t worry if you don’t have a tin to use as a lid. You’ll still get good loaves).
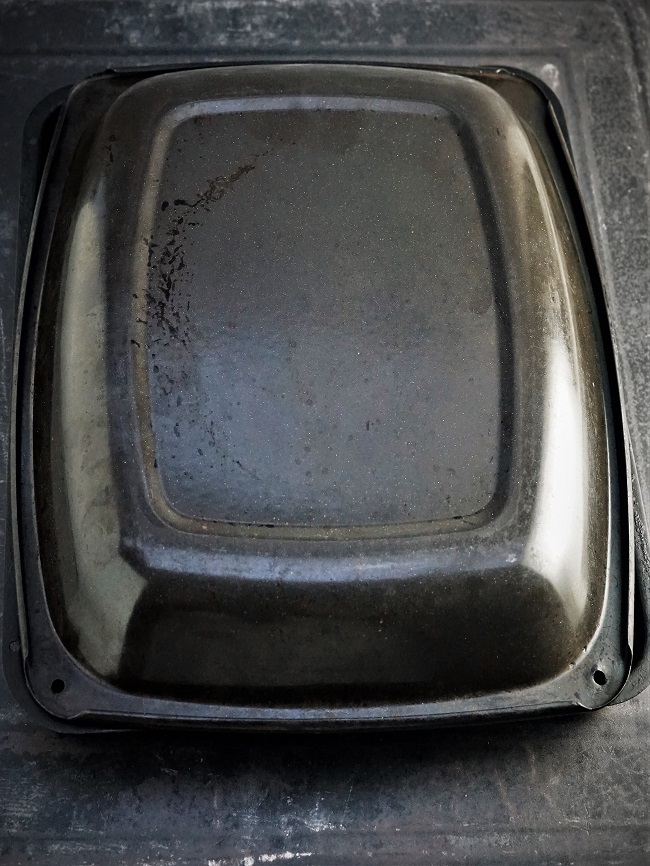
But my homemade contraption isn’t a perfect fit so some steam is bound to escape. To counteract this, I create steam in the oven itself as per my French baguette and Brioche Bun recipes. I preheat another deep roasting tin on the bottom shelf of the oven. Then, immediately as the breads go in, I pour cold water into it and close the door.
This certainly creates a steamy atmosphere, so do be careful when opening the oven door. Keep hands and face clear as steam can come billowing out rather fast.
Note: use a baking tin and not a glass tray to create the steam as glass may break when you pour cold water in.
STRETCH & BAKE
To live up to their name of Stirato or ‘stretched’, there’s one more step to do before baking. Gently pull each piece of dough until around 28 cm long. Or a few centimetres shy of the length of your baking tray.
You might have noticed from the images that I draw an outline of the base of my tray on the baking paper. This is so I don’t too enthusiastically stretch the dough only to find it doesn’t fit the tray!
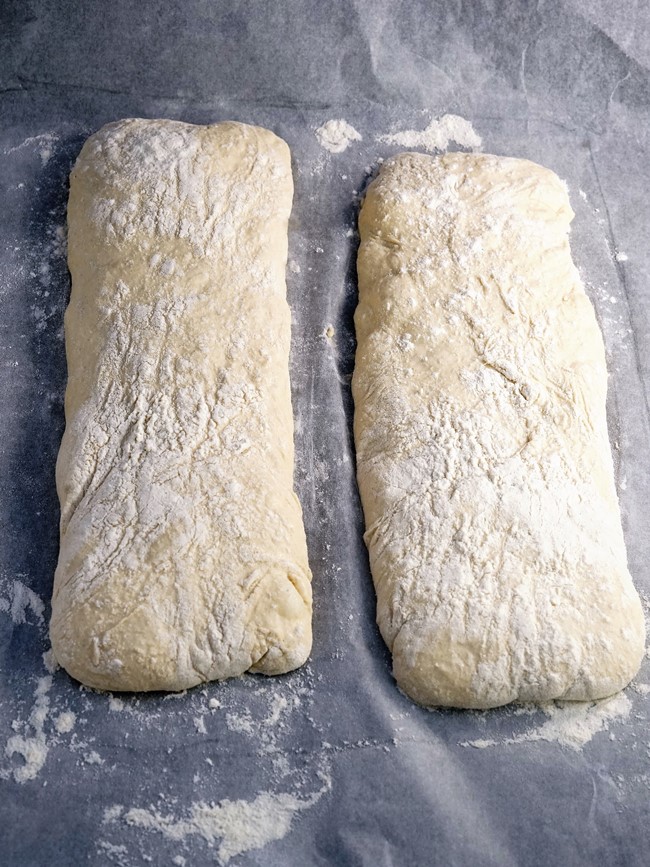
By the way, the dough is still very soft at this point. So, if you find you can’t lift it fully off the paper to stretch it, use your scraper to push and nudge it.
Then you’re ready to transfer the whole thing, paper and all, onto the preheated baking tray. This is where the board you placed underneath the paper comes in very handy. Simple pick it up and angle it so the paper plus breads slide off and onto the tray.
Pop on your improvised lid and place the whole thing in the oven. Pour water into the tin on the bottom shelf, shut the door and walk away for 30 minutes. After 30 minutes, you can take the lid off and also remove the tin containing the water.
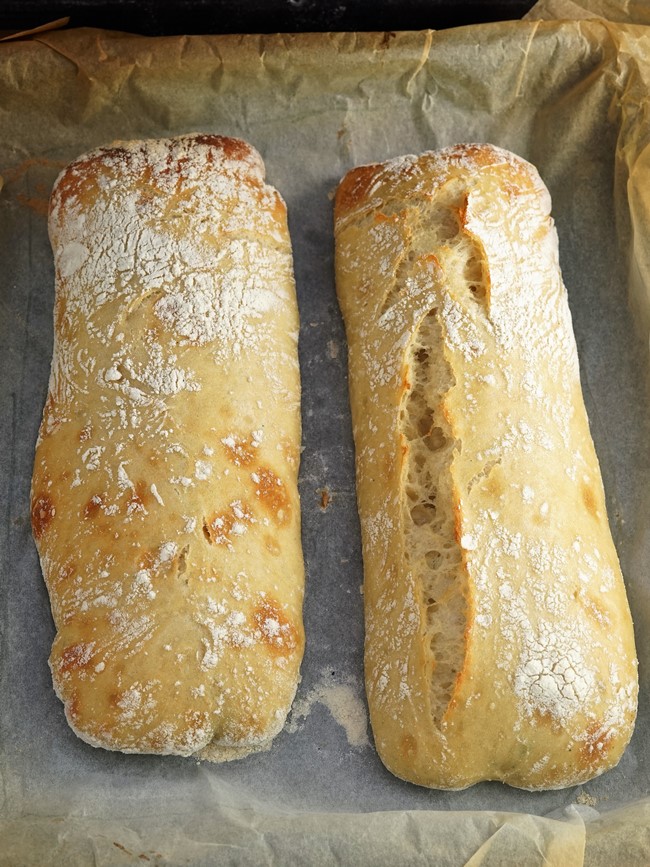
What you should have at this point are two nicely risen loaves with a crust just starting to form, as per the above photo. I then give the uncovered loaves ten minutes back in the oven at a slightly lower temperature.
Finally, I take the Stirato off the paper and bake directly on the oven shelf until they’re a dark golden brown.
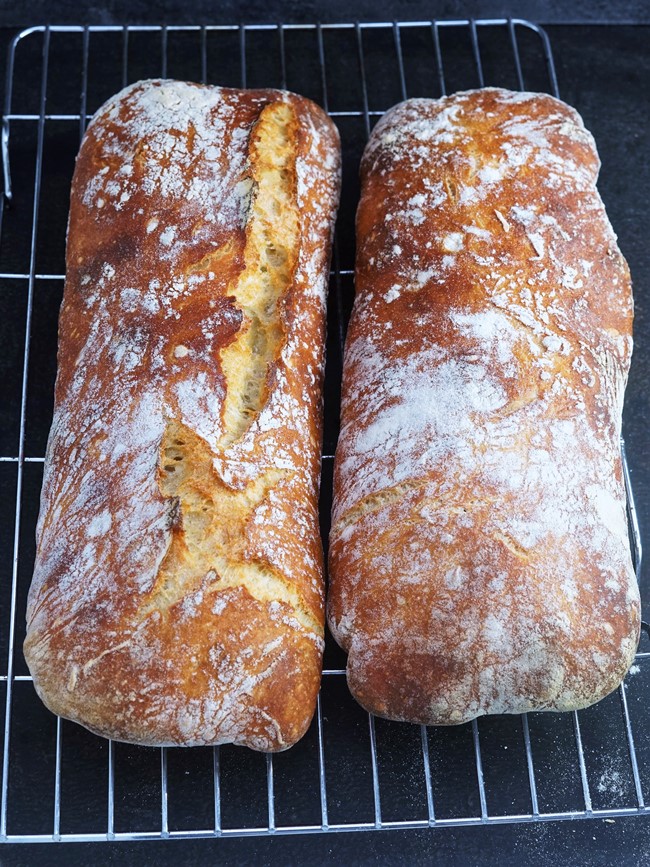
This should take another 3-5 minutes. When done, their bottoms will sound hollow if you give them a tap. Put the baguettes on a rack to cool.
SERVING & STORING STIRATO
When cool enough to handle, feel free to tear into the bread, have a good sniff, then bite through the crispy crust and enjoy the chewy crumb. I think you might be surprised at just how tasty it is, considering the simple ingredients.
As many people are now discovering, a longer fermentation helps to create great flavour. Some also find this sort of bread much more digestible thanks to the relatively small amounts of commercial yeast.
I think Stirato is great eaten on its own with butter or olive oil. They’re also the perfect side to salads and soups: one of my batches was wonderful with an indulgent Cream of Chicken Soup. But it’s probably as a hearty sandwich where this easy, versatile bread comes into its own.

Robust enough to deal with generous fillings and big, bold flavours, I particularly loved the sandwich pictured above. Local spicy merguez sausage griddled with red onion, topped with chilli-garlic mayo and parsley. I could eat that again right now!
Stirato is best eaten on the day of making. But I often eat them the next day or they freeze very well. You can also use them toasted to make bruschetta or crostini.
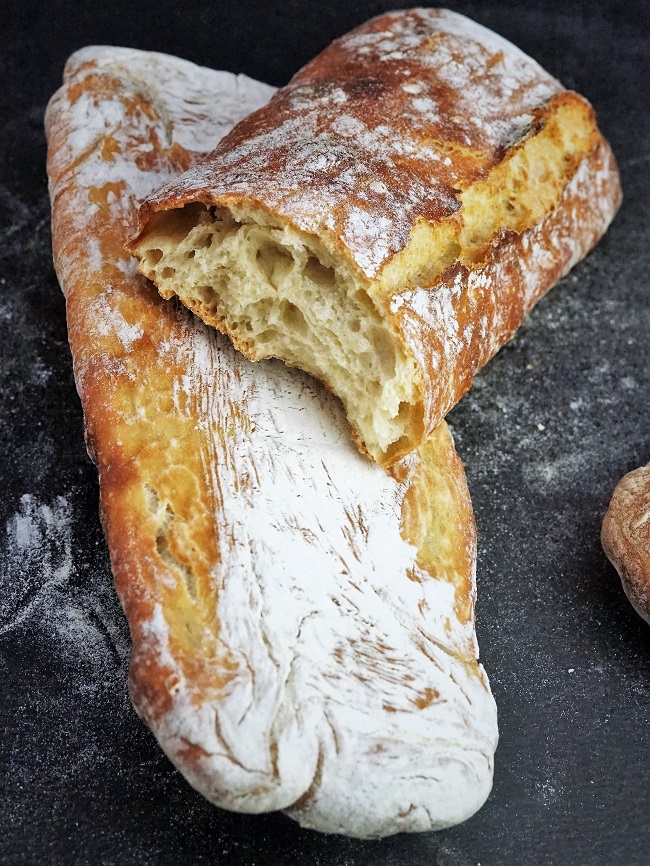
The wet dough may not be the easiest to work with, but you’ll get the hang of it once you’ve made Stirato a couple of times. And the rewards are so worth it!
HAVE YOU MADE STIRATO?
RATE THE RECIPE & LEAVE A COMMENT

Stirato: Italian-Style Baguette
Easy, rustic baguettes with a crispy crust and open crumb. Mix the no-knead dough the night before, shape and bake the next day.
For best results, read the whole blog post first before beginning the recipe.
Ingredients
- 400 g bread flour plus extra for sprinkling
- 1½ tsp salt
- ½ tsp instant, fast-acting dried yeast
- 300-350 g/ml water see Recipe Note 1
Instructions
The evening before baking
-
Stir the flour, salt and yeast together in a large bowl.
Stir in enough water to create a rough, wet dough (see photo in blog image for how it should look).
Cover the bowl and leave at room temperature overnight or 12-14 hours.
Tip: in warm weather, or to slow things down, put the dough in the fridge.
On the day of baking
-
The dough should be well risen, spread out, and very bubbly: if not then leave for longer.
-
Cut a piece of baking paper to line a large baking tray: the paper should be large enough to come up above the sides.
Tip: to ensure your loaves will fit in the tin, it's helpful to take a pencil and mark on the paper an outline of the base.
Put the paper on a board or tray: this will assist in lifting the soft, uncooked loaves.
-
Flour the paper very well, then scrape the dough from the bowl onto it.
Sprinkle more flour over the top.
Use a dough scraper to push the dough into a rectangle approximately 20 x 25 cm with one of the long sides facing you.
Use the dough scraper to lift the long side and fold it over towards the middle. Keep pushing it over so that the dough is rolled into a tube.
-
Dust the paper with more flour if needed, then cut the tube into 2 shorter pieces.
Place the pieces apart on the paper.
Cover, then leave for 30 minutes or until the depression left by a finger pressed into the dough slowly rather than quickly springs back. If it springs back immediately then leave to prove for longer.
-
While the dough is proving
Preheat your oven to 240C / 220 Fan / Gas 9 / 475F.
Position a shelf just above the middle of the oven and place the large baking tray on it. If you have a tin or tray that will fit over the top as a lid then preheat that too.
Put a deep roasting tin on the bottom shelf (this will later be filled with water to create steam: do not use a glass tray as it could break).
-
Gently stretch one of the dough pieces to approximately 28 cm in length (use a dough scraper to nudge it off the paper first if necessary). Make sure you don't stretch it longer than your baking tray!
Repeat with the other piece of dough.
-
Take the preheated tray out of the oven.
Pick up the board and slide the paper and dough off it and onto the tray.
Put the tray on the middle shelf of the oven (if you've preheated a tray or tin to use as a lid, place that over the top first.)
Pour cold water into the heated roasting tin on the bottom shelf of the oven to half fill it.
Close the door and bake for 30 minutes.
-
After 30 minutes, turn the oven down to 220C / 200 Fan / Gas 7 / 425F.
Open the oven door carefully, keeping your face away: lots of steam is likely to rush out!
If you used a tray or tin as a lid, remove it.
Remove the roasting tin containing the water.
Shut the door and bake for a further 10 minutes.
-
After 10 minutes, remove the baking tray with the bread, take the loaves off the tray and the paper then return them to the oven, directly on the shelf.
Continue baking until dark golden brown and sounding hollow when tapped underneath (3-5 min).
-
Leave to cool on a wire rack before serving.
Best eaten on the day of baking or can be frozen.
Recipe Notes
Note 1 Different flours absorb varying amounts of water and, if you're not used to working with very wet doughs, you might want to add 300 rather than 350 ml/g the first time you make Stirato. You can always add more water next time.
Adapted from a recipe by Jim Lahey in My Bread.
RELATED RECIPES


this recipe beats any baguette recipe and is so much easier.I baked mine on a preheated pizza steel covered with a roasting pan lid.for steam I spritzed water directly onto the loaves before baking.thanks so much for your recipe and detailed explanation
You’re most welcome David, and thanks so much for the great feedback!
Hi… I mixed the dough last night, can the dough sit out longer than the 12-14 hours? I’m thinking id rather bake it later in the day if possible.
Hi, yes you can, but so it doesn’t overproof I recommend putting it in the fridge. Take it out again well before you want to bake though, so it has time to come back to room temperature before proceeding with the recipe. Hope you enjoy it!
Could the dough be sectioned off to make 3 medium loaves instead of two large loaves? If so, would the cook time be the same?
Hi Danielle! There’s no reason why you couldn’t divide the dough into three instead of two. If you’re going to put a lid on as per my suggestion, then I’d probably keep the initial 30 minutes the same, then take the lid off and bake until done, which may be quicker than for two. However, if you’re not adding a lid, keep an eye on them as they may need 5-10 minutes less.
If you try it, do let me know how it went.
Hi! Trying this recipe for the first time . I plan to bake in about 24 hours , so I have put the dough in the fridge. How long before I plan to bake should I remove the dough. Is the 30 minute proof time for the second rise enough? Thanks for your help.
Thanks for your interest in my recipe! I think it may need a little longer but it’s hard to be exact. I would plan for an extra 20 – 30 minutes but have your oven preheated and ready to go in case it turns out to be quicker.
When the dough’s ready, the depression left by a finger should slowly rather than quickly spring back as per step 4.
Hope you enjoy it!
FYI:!!!! MAKE SURE YOUR ROASTING “TRAY” that you use for stream IS NOT GLASS! Pouring COLD water into a 475 degree pan CAUSES THE GLASS TO SHATTER !!!!!! I had SHARDS OF GLASS ALL OVER MY OVEN AND KITCHEN FLOOR!!!!!!!!
Glass ovenware does come with a warning not to put cold water in when hot as it may break.
I also say in the blog post and recipe card to use a baking tin to create steam. There was one instance where I say ‘tray’ but I’ve now changed that to ‘tin’ as well.
In case anyone else doesn’t know glass shouldn’t be used in this way, I’ve now added a note in the blog post and recipe card explicitly saying not to use glass for creating steam.
Hopefully no one else will get the shock you must have had!
I don’t understand the use of a tray/tin for a “lid” direction. Is it to completely cover/seal with room around loaves??
I explain in the blog post accompanying the recipe in the section Steamy Bread Baking: ‘The idea is to create a fiercely hot, steamy atmosphere which prevents a crust forming too soon. This helps the bread rise for longer.’
I want to make sure I understand. I do have a big oval Dutch oven. So if I use that am I supposed to put the lid on and the tin of water underneath as well.
Thank you
Mike
Hi Mike, if you’re lucky enough to have a Dutch oven large enough to cook the loaves in then you WON’T need the tin of water. That’s because, with the Dutch oven lid on, it will create its own steam.
Anyway you could provide measurements and temp for US residents?
Hi and thanks for your interest in my recipe!
Following a previous request I do now add Fahrenheit to new recipes, but it would take a long time to go back and add to all the previous ones like this. However, I have added an oven temperature conversion chart page here: https://moorlandseater.com/oven-temperature-conversion/
Regarding US measurements, I’m afraid there is too much room for error so I always recommend digital scales with metric measurements. I feel that converting to cups or ounces when the recipe hasn’t been tested using them could mean people attempting it may get disappointing results.
Hope you understand! 🙂
This is my go to bread for a chicken sarnie on Xmas eve, it’s our tradition now!
It’s a lovely, easy peasy bread. Have made it for family too, also went down a treat. I like that it’s pretty fuss free and delicious
Thank you for your great feedback, Sarah. Chicken on stirato sounds lovely!
Just made a version of this using Matthews Churchill White bread flour from Tesco. I used 70% hydration (500g flour, 350ml water) and it came out well. I just used water in the bottom tray to get some steam as I wasn’t convinced my oven tin was deep enough to be used as a cover. Overcooked slightly but you live and learn. Good recipe/technique, glad I found your page.
Thank you so much Nigel for taking the time to give your great feedback. So glad you got a good result!
Can you use fresh yeast in place of the fast acting yeast.
Hi Graham, I’m afraid I never use fresh yeast so really couldn’t say if it would work with the no knead, overnight method.
Hello there 👋
Both yeast works very well. I have baked no knead bread with both of yeast.
These days I only use dry yeast, but I used earlier also fresh yeast. I’ve been baking for a very long time – I’m 74 years old.
Your writing was interesting and certainly useful for many beginners.
Best regards from Finland 🌹
Thank you so much for getting in touch, Titta! Sounds like you have about 20 more years experience than I, so your kind words about my blog are lovely to read!
Thanks for the great step by step explanation of the shaping, resting and stretching,
Tried to make this twice now and both times it was a mess spread out too much and was very thin. Are you sure the quantities are correct? Is there too much water? Grateful for any advice. Love your other recipes by the way.
Hi Julia, sorry to hear you’re not having success with this recipe.
The quantities are definitely correct (flour and water are the same as those in the Jim Lahey recipe on which it’s based).
Flours do take up different amounts of water though, so you could perhaps try it with 50ml/g less and see what happens?
Edit: I’ve now updated the recipe with a note about using less water if necessary. I’ve just baked a test batch with the lower amount and the results are still good!
Thanks for your reply. Will definitely try again as your recipes are gold. Made the flourless seed crackers for my son over and over. This weekend I made your chestnut and mushroom soup. I am not a fan of soups but my husband is; I wanted to make something cosy because of storm Eunice and three inches of snow in Yorkshire. Just the best soup ever ! Thanks😁
Thank you for the lovely comments, Julia!
Let me know how you get on if you try the stirato with less water.